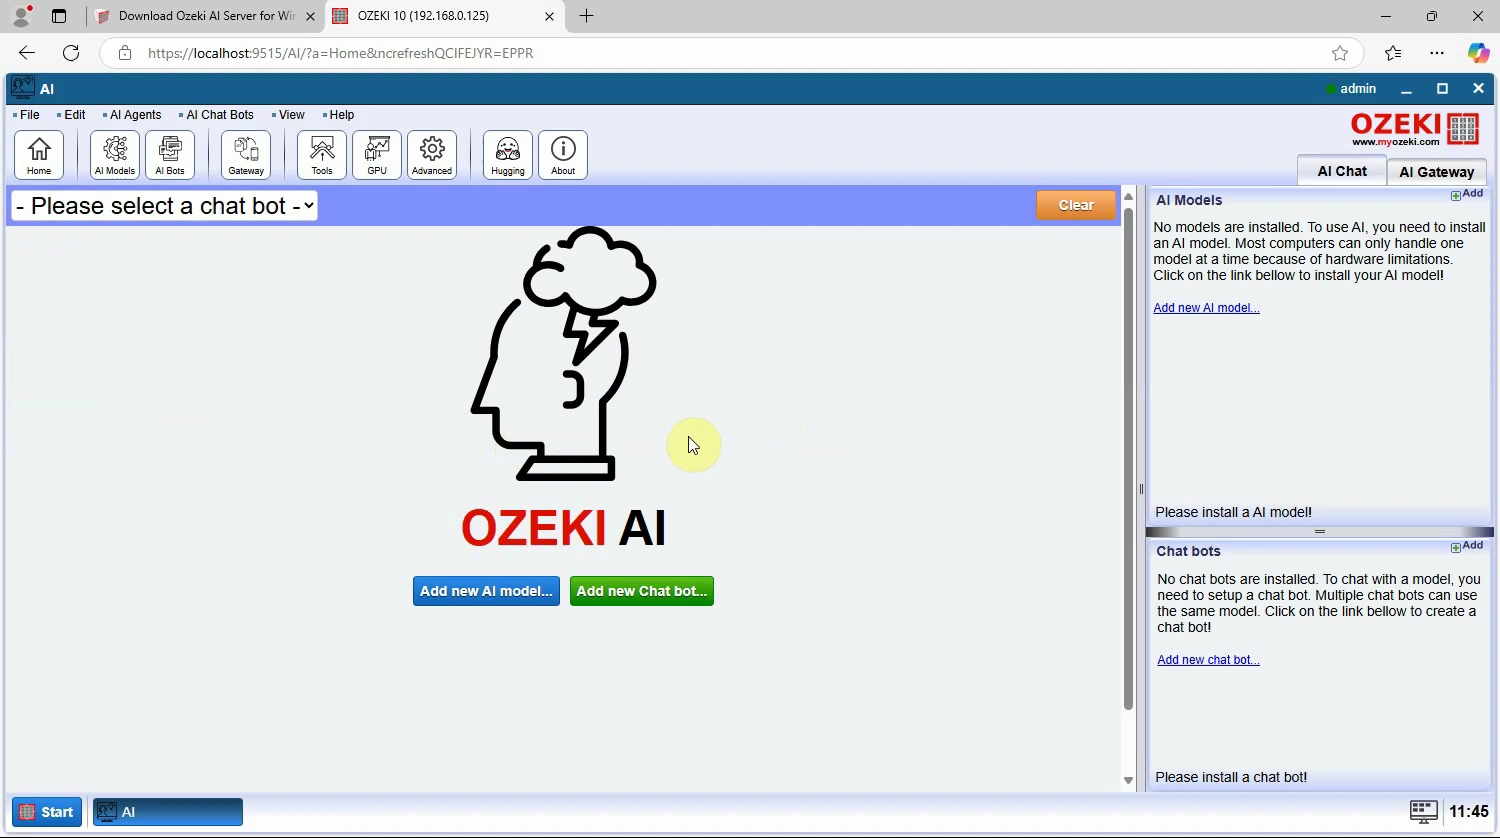
How to Download and Install Ozeki AI Server
This page provides a detailed guide on how to download and install Ozeki AI Server to build a AI systems. Ozeki AI Server is a powerful software solution designed to help you run AI models locally or use remote AI services efficiently, without requiring extensive programming skills. With this tool, you can easily switch models and optimize costs while ensuring your AI solutions stay up-to-date.
What is Ozeki AI Server?
Ozeki AI Server is the software you need if you want to build a Local AI system. To run AI models locally or to use remote AI services efficiently, you need the AI server functionality offered by Ozeki AI server software. This software allows you to build great AI solutions without the need of hiring software developers. With Ozeki AI server you can optimize costs, and stay up to date, because switching models under solutions is very easy with this system.
How to Download and Install Ozeki AI Server (Quick Steps)
- Open the download page
- Download the Latest Ozeki AI Server
- Extract the downloaded ZIP file
- Start the AI Server installer
- Installer welcome page, accept the License Agreement
- Installation process
- Installation finished
- Start Ozeki AI Server
- Open AI Server interface
- Ozeki AI Server is ready to use
How to Download and Install Ozeki AI Server (Video tutorial)
In this video tutorial, you will learn how to download and install Ozeki AI Server step-by-step. The video will guide you through the entire process, from accessing the download page to launching the AI server.
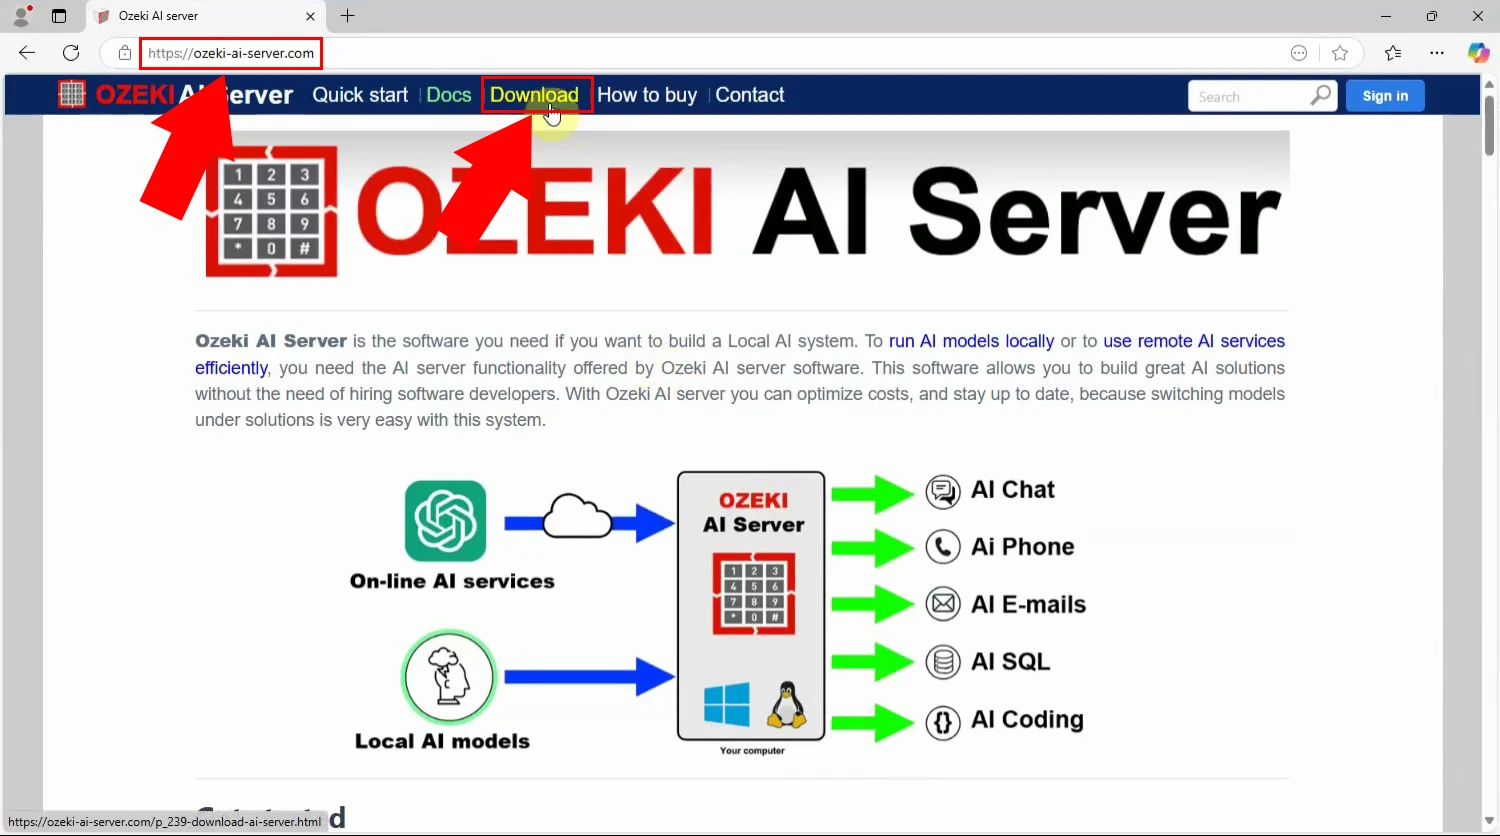
Step 1 - Open download page
Go to the official Ozeki AI Server download page. This can be found on the Ozeki website or by searching directly online (Figure 1).
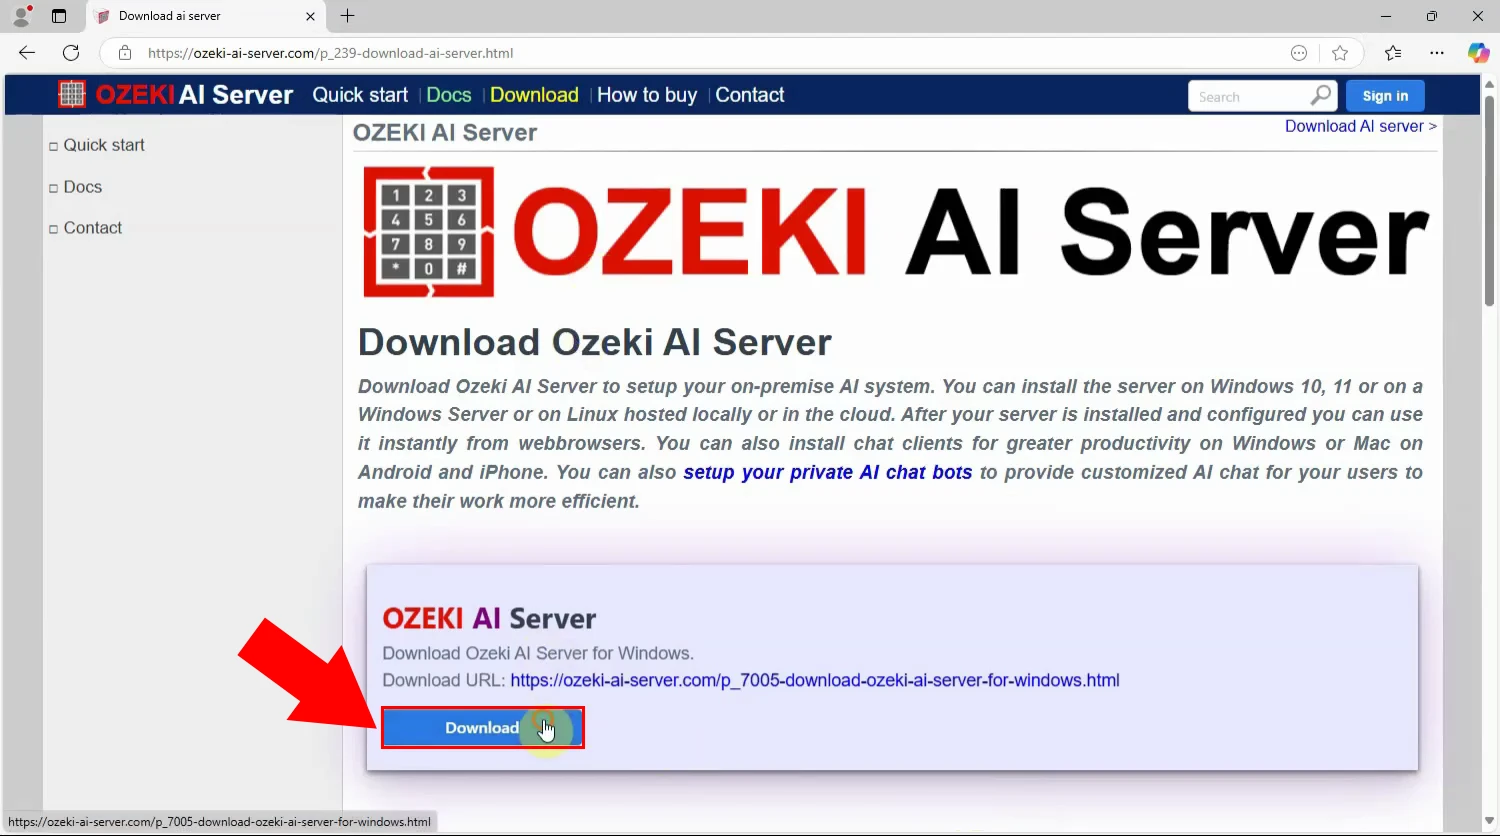
Step 2 - Download AI server
On the download page, click on the "Download" button (Figure 2).
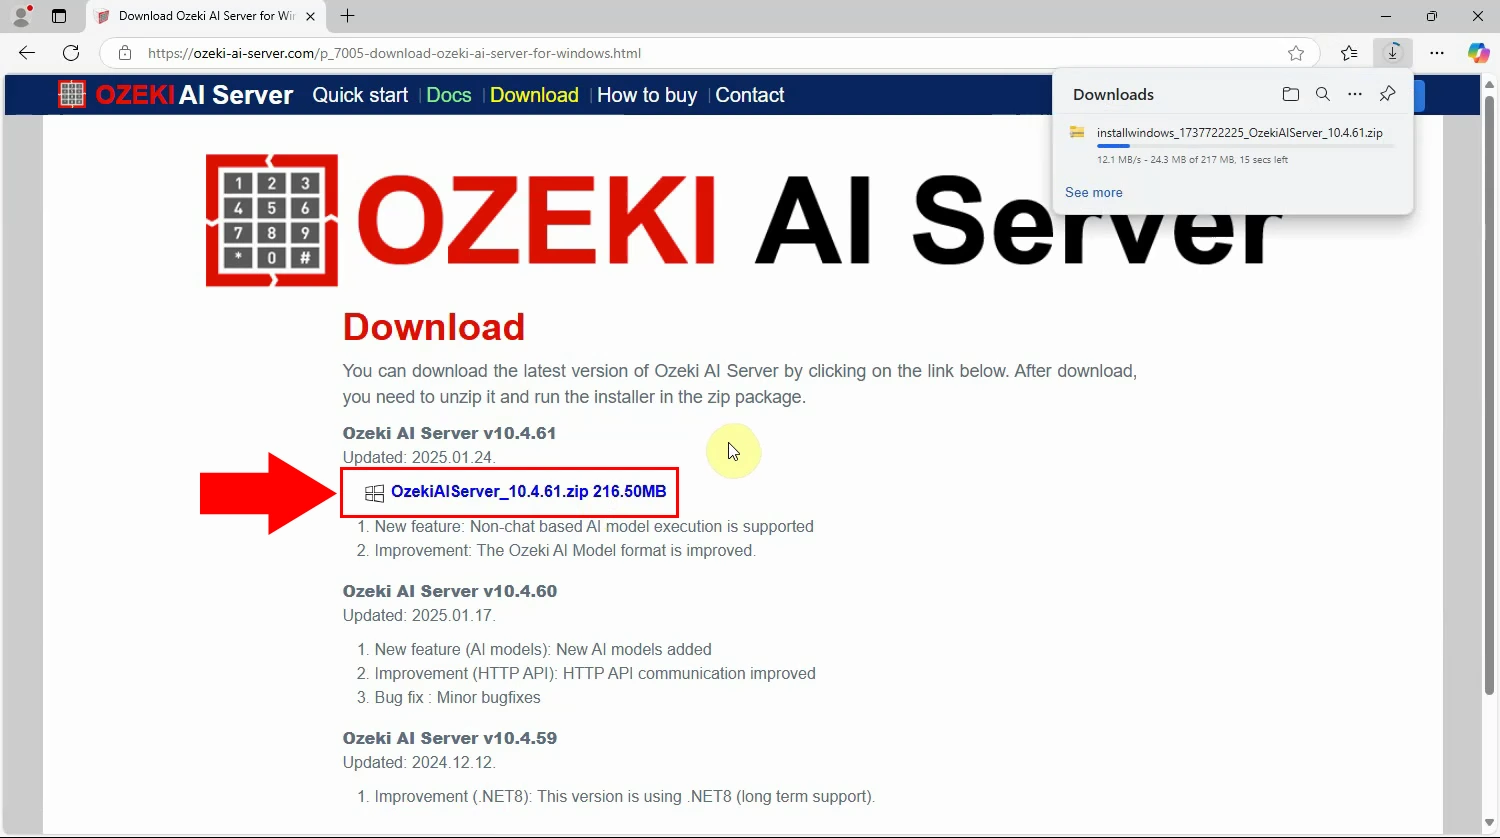
Step 3 - Download latest version
Download the latest version of Ozeki AI Server to ensure you have access to all the newest features and improvements (Figure 3).
Step 4 - Extract downloaded ZIP
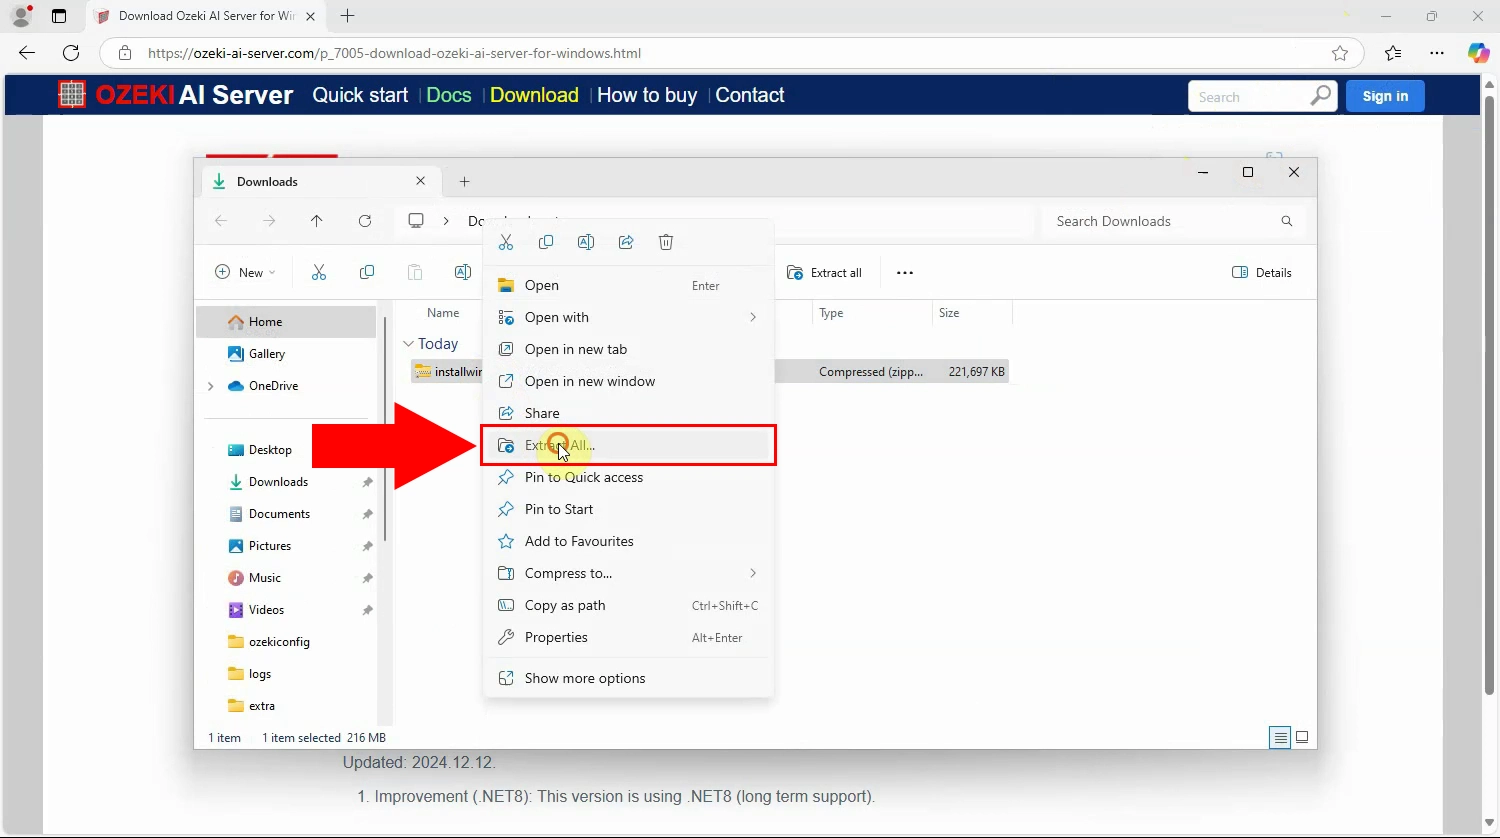
Once the download is complete, locate the ZIP file in your Downloads folder or the specified download location. Right-click the file and select "Extract All…" or use tools like WinRAR or 7-Zip. Save the extracted contents to a folder where you want to install the software (Figure 4).
Step 5 - Start AI server installer
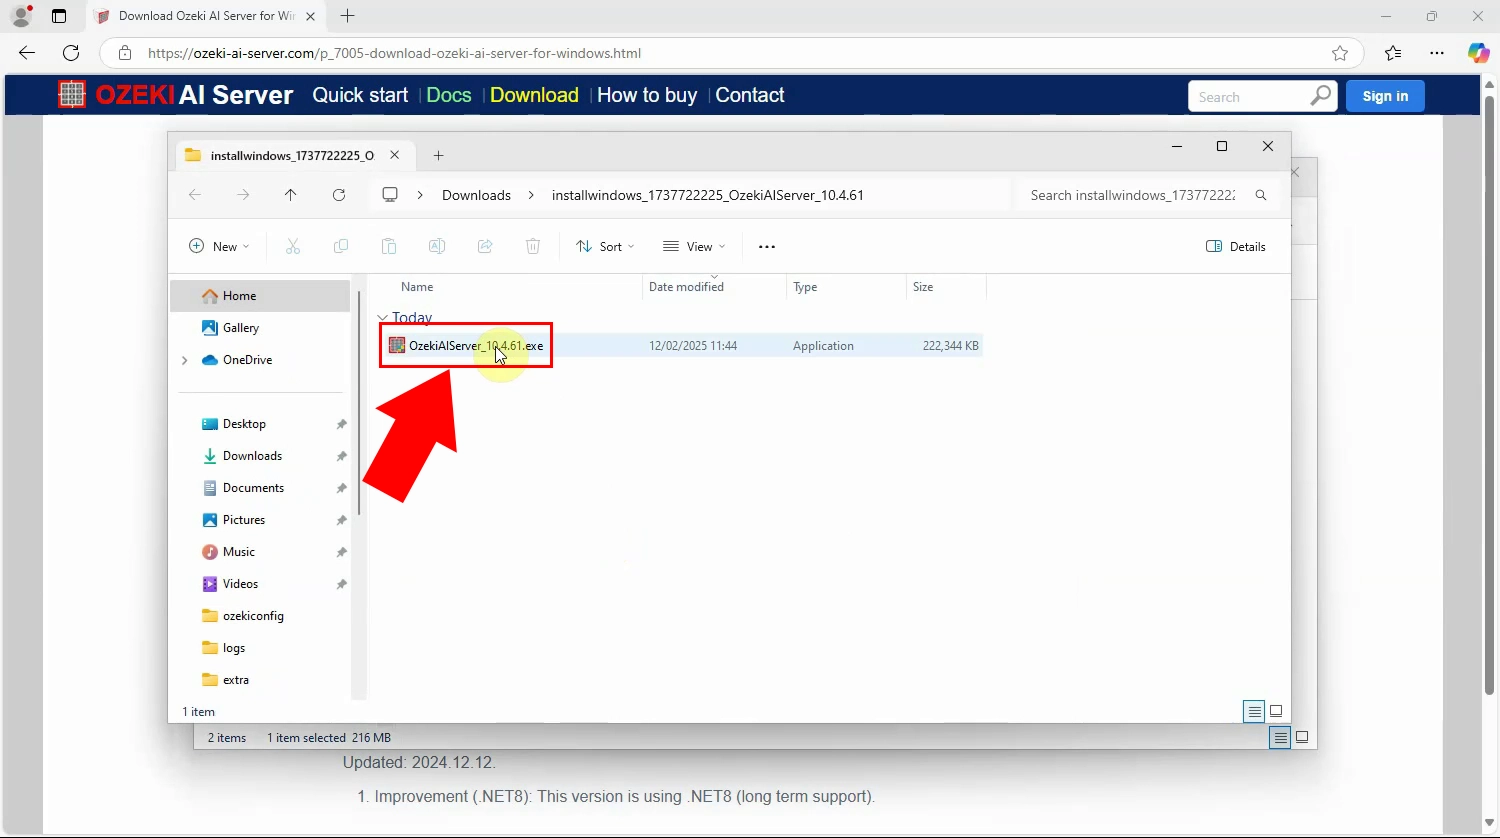
In the extracted folder, find the Ozeki AI Server installer file. Double-click the installer to launch the installation process (Figure 5).
Step 6 - Installer welcome page
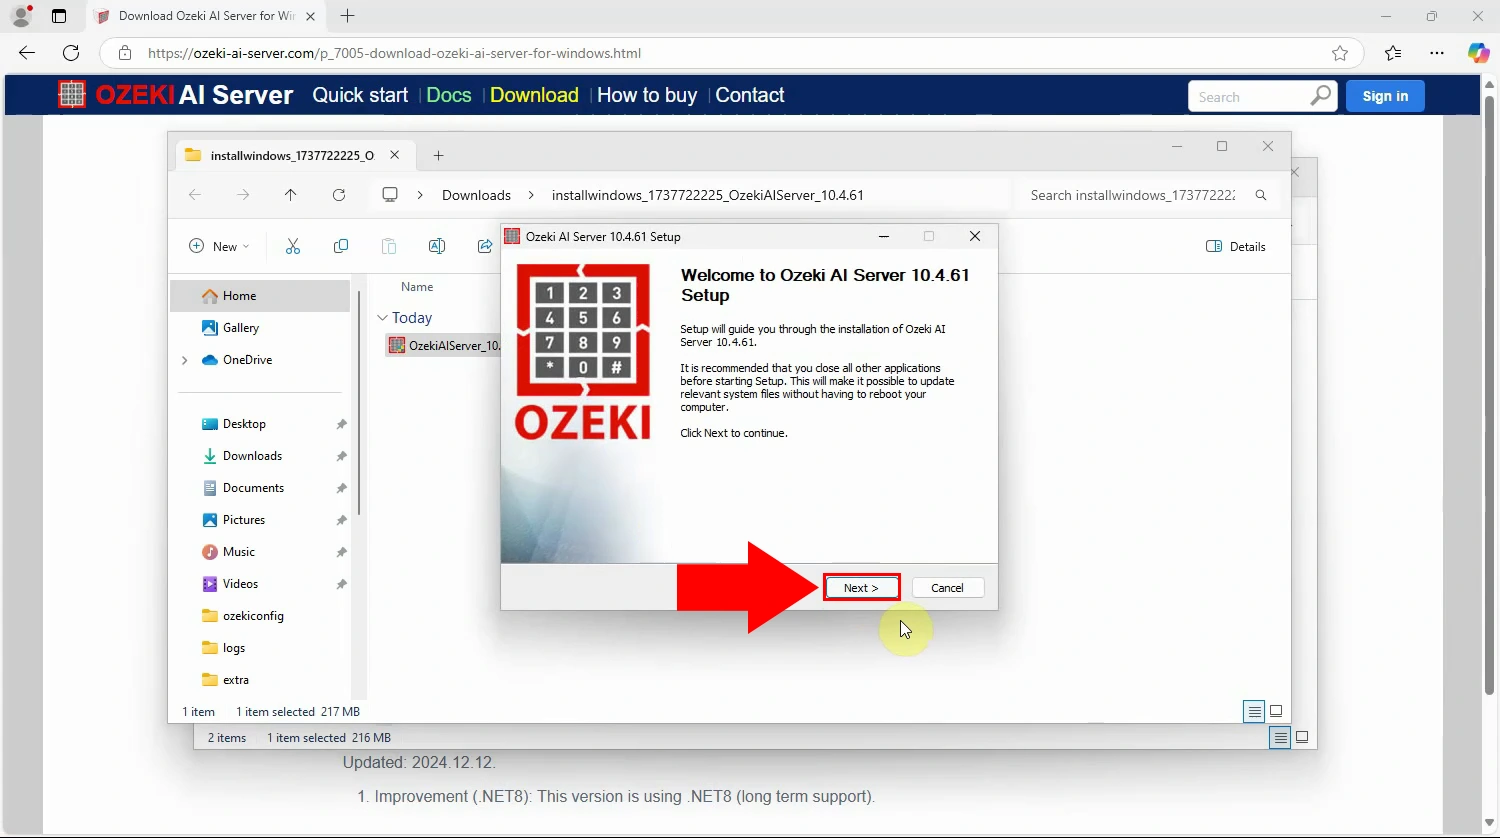
The installer will open with a welcome page that briefly explains the installation process. Click "Next" to proceed to the next step (Figure 6).
Step 7 - Accept license
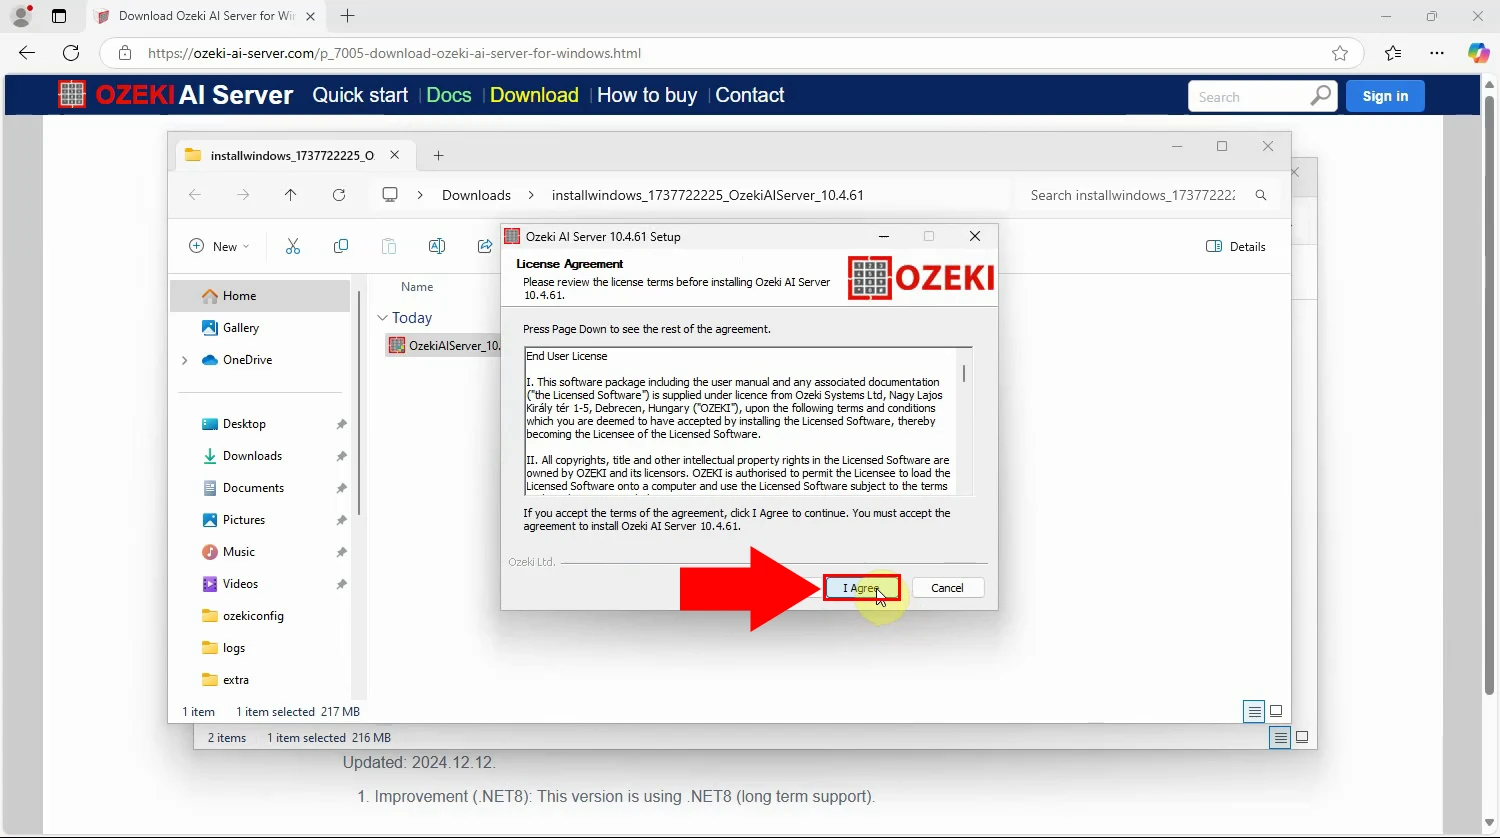
You will be presented with the license agreement. Read through the agreement. Click "I Agree" to proceed if you accept the terms (Figure 7).
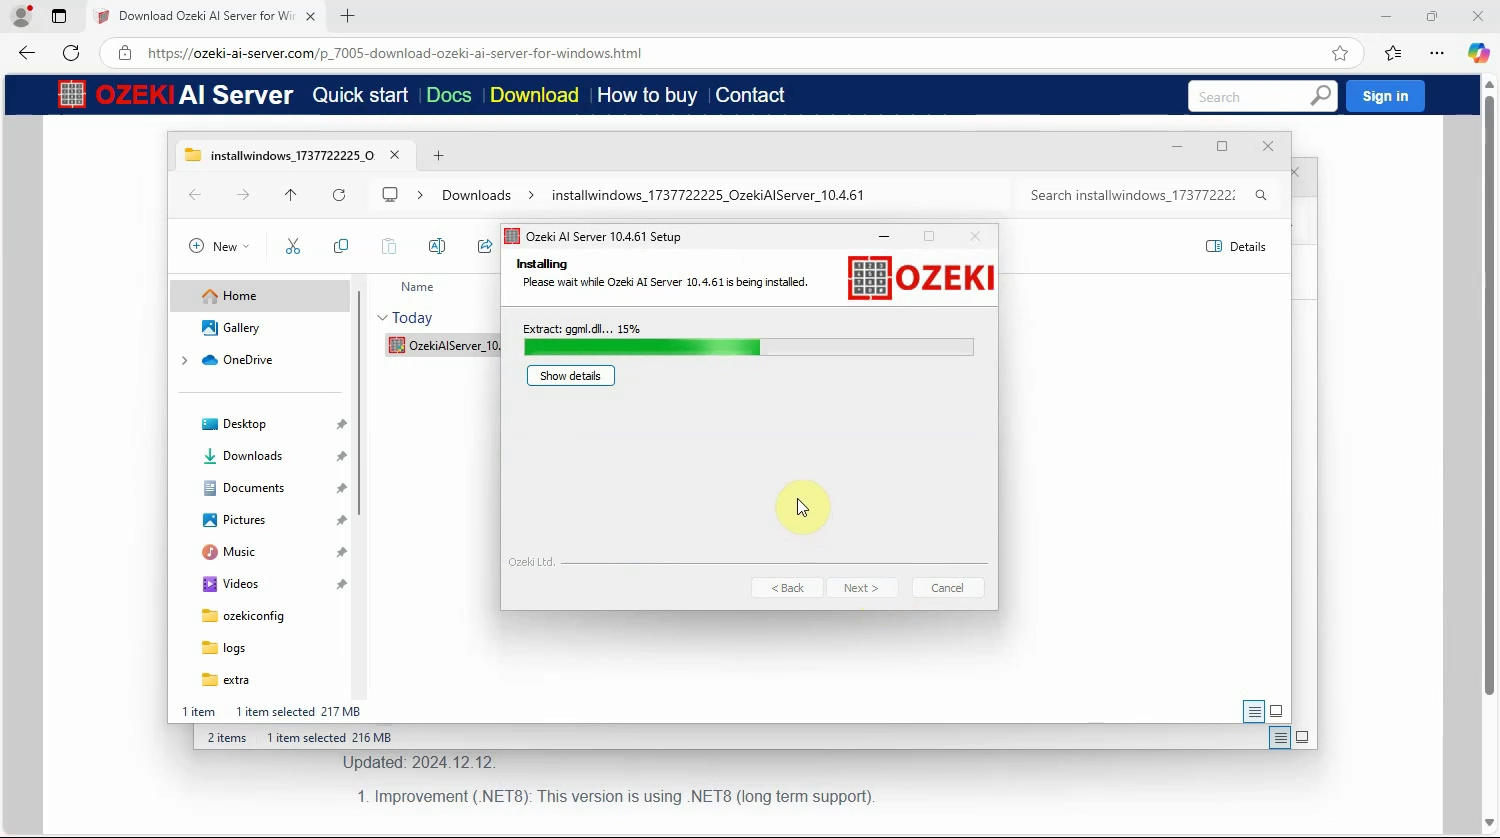
Step 8 - Installation process
The installer will begin copying the necessary files to your system. You can monitor the progress bar to see how much of the process is complete. Wait until the installation is fully completed (Figure 8).
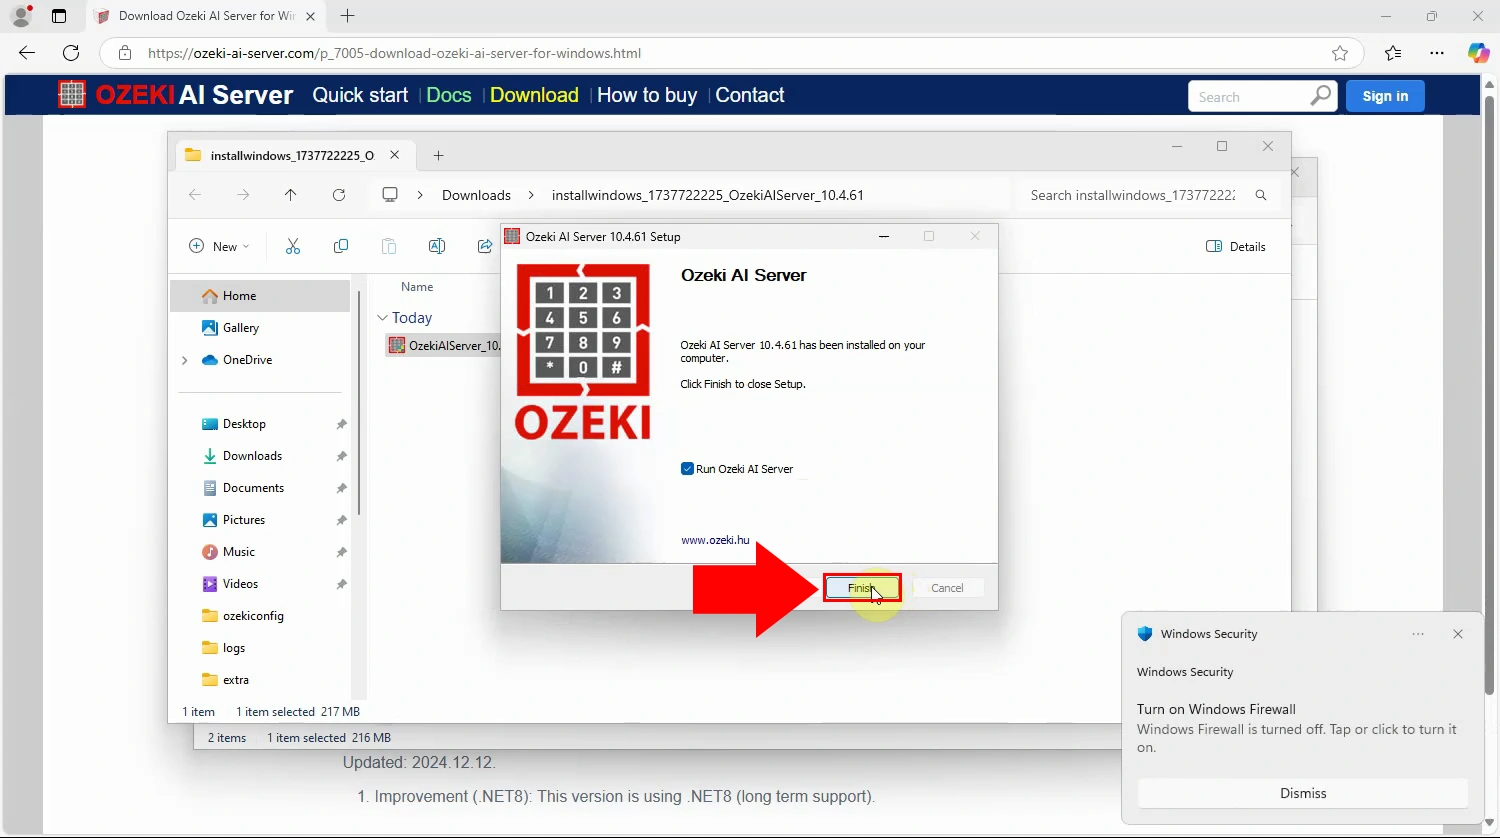
Step 9 - Installation finished
When the installation is finished, a confirmation message will appear. Ozeki AI Server is now successfully installed. Check "Run Ozeki AI Server" to start the program after closing the installer. Click "Finish" to close the installer (Figure 9).
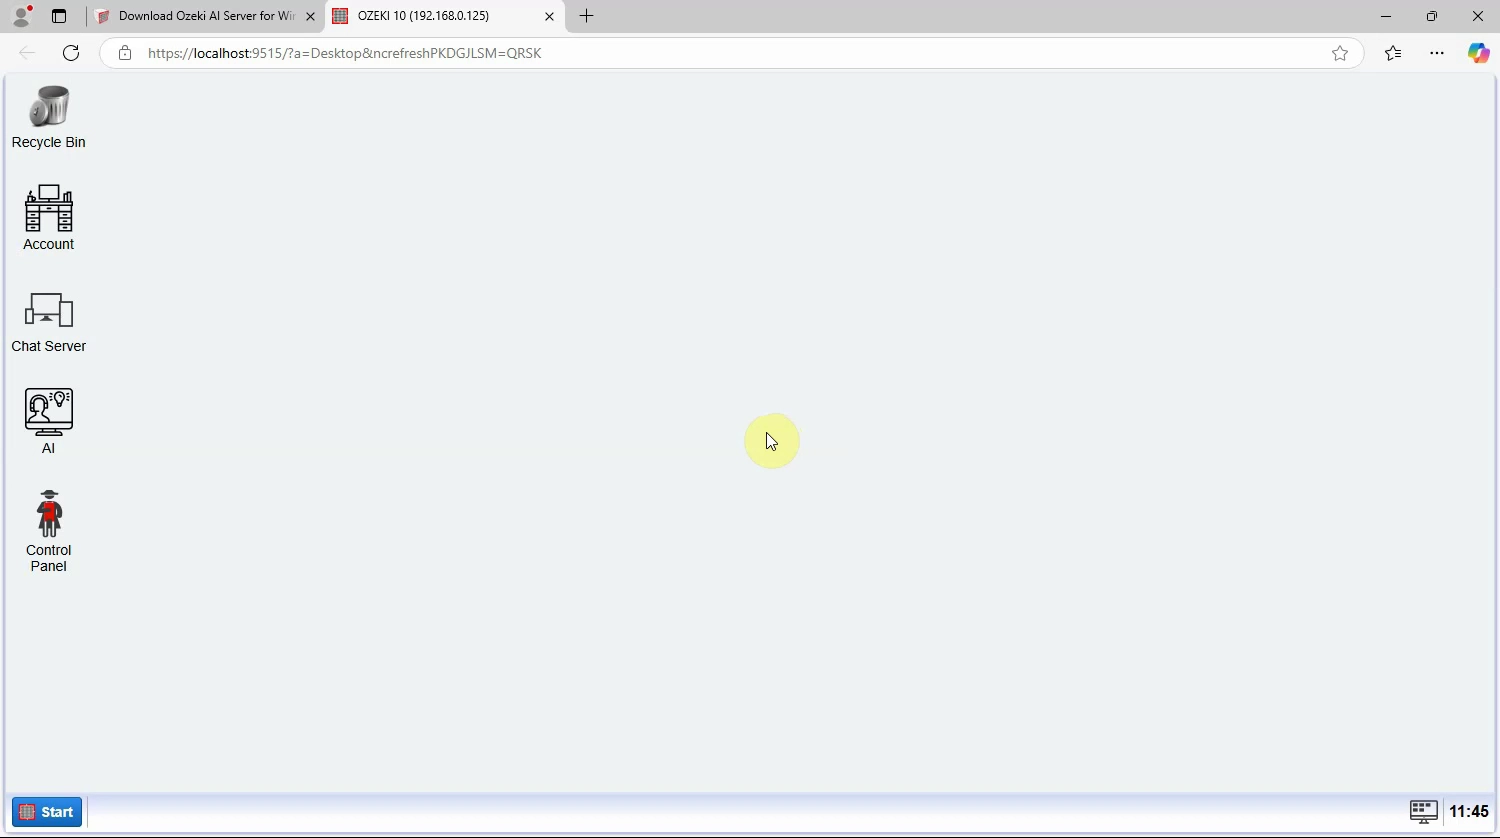
Step 10 - AI server started
Start the Ozeki AI Server application. You should see the following screen after the startup.
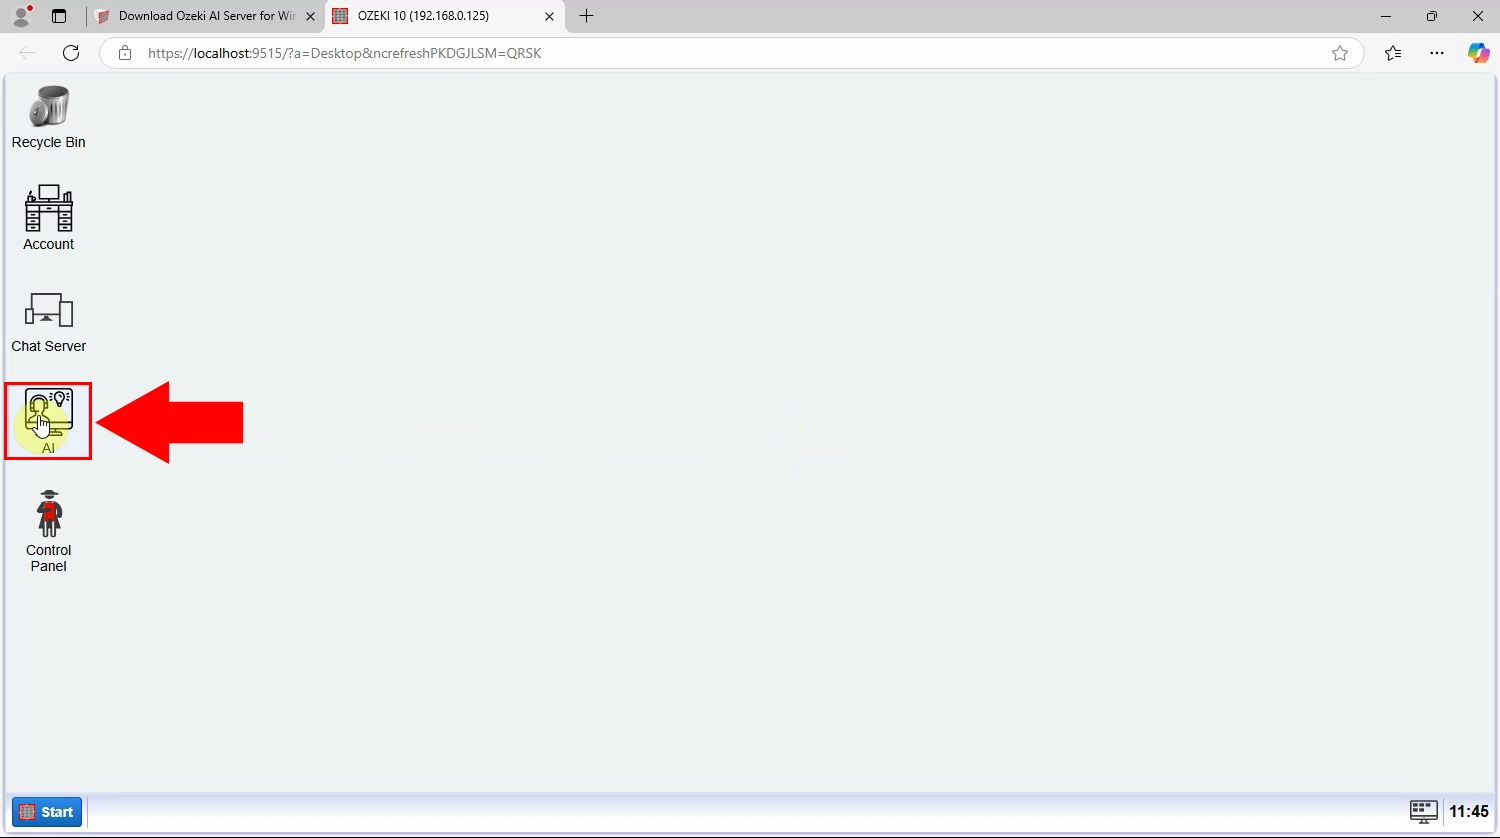
Step 11 - Open AI Server
From the main screen, click on "AI" to access the tools and features for managing your AI models. This will allow you to configure, deploy, and switch between various AI models (Figure 11).
Step 12 - Ozeki AI Server opened
Once the software is running and the interface is displayed, you are ready to start building and managing your AI systems (Figure 12).
