How to use Oobabooga with Ozeki on Linux
This guide will teach you how to use Oobabooga on Linux systems. It follows you through all the steps, starting from downloading and setting up Oobabooga, to download and load the AI model from the Hugging face website. After that, you will learn how to use the Ozeki api with curl. Finally, it will teach you how to Oobabooga with Ozeki AI Studio.
What is Oobabooga?
Oobabooga's Text Generation Web UI is an open-source interface for running and interacting with language models locally. The main benefit of using Oobabooga compared to public chatbots that run in the cloud like ChatGPT is that these local models will keep all your data safe and private. With Oobagooba, you can also have complete control over your models.
Download Oobabooga on Linux (video tutorial)
Downloading and installing Oobabooga is a simple process, and this less than 2 minute video will guide you through all the steps. All you need to do is to locate the official Github repository of the Oobabooga web UI, and download it. After that, you will see how to start installing Oobabooga by running the start_linux.sh file. The video leads you through the whole installation process. Finally, it shows how to start running and how to open the web UI on your local URL.
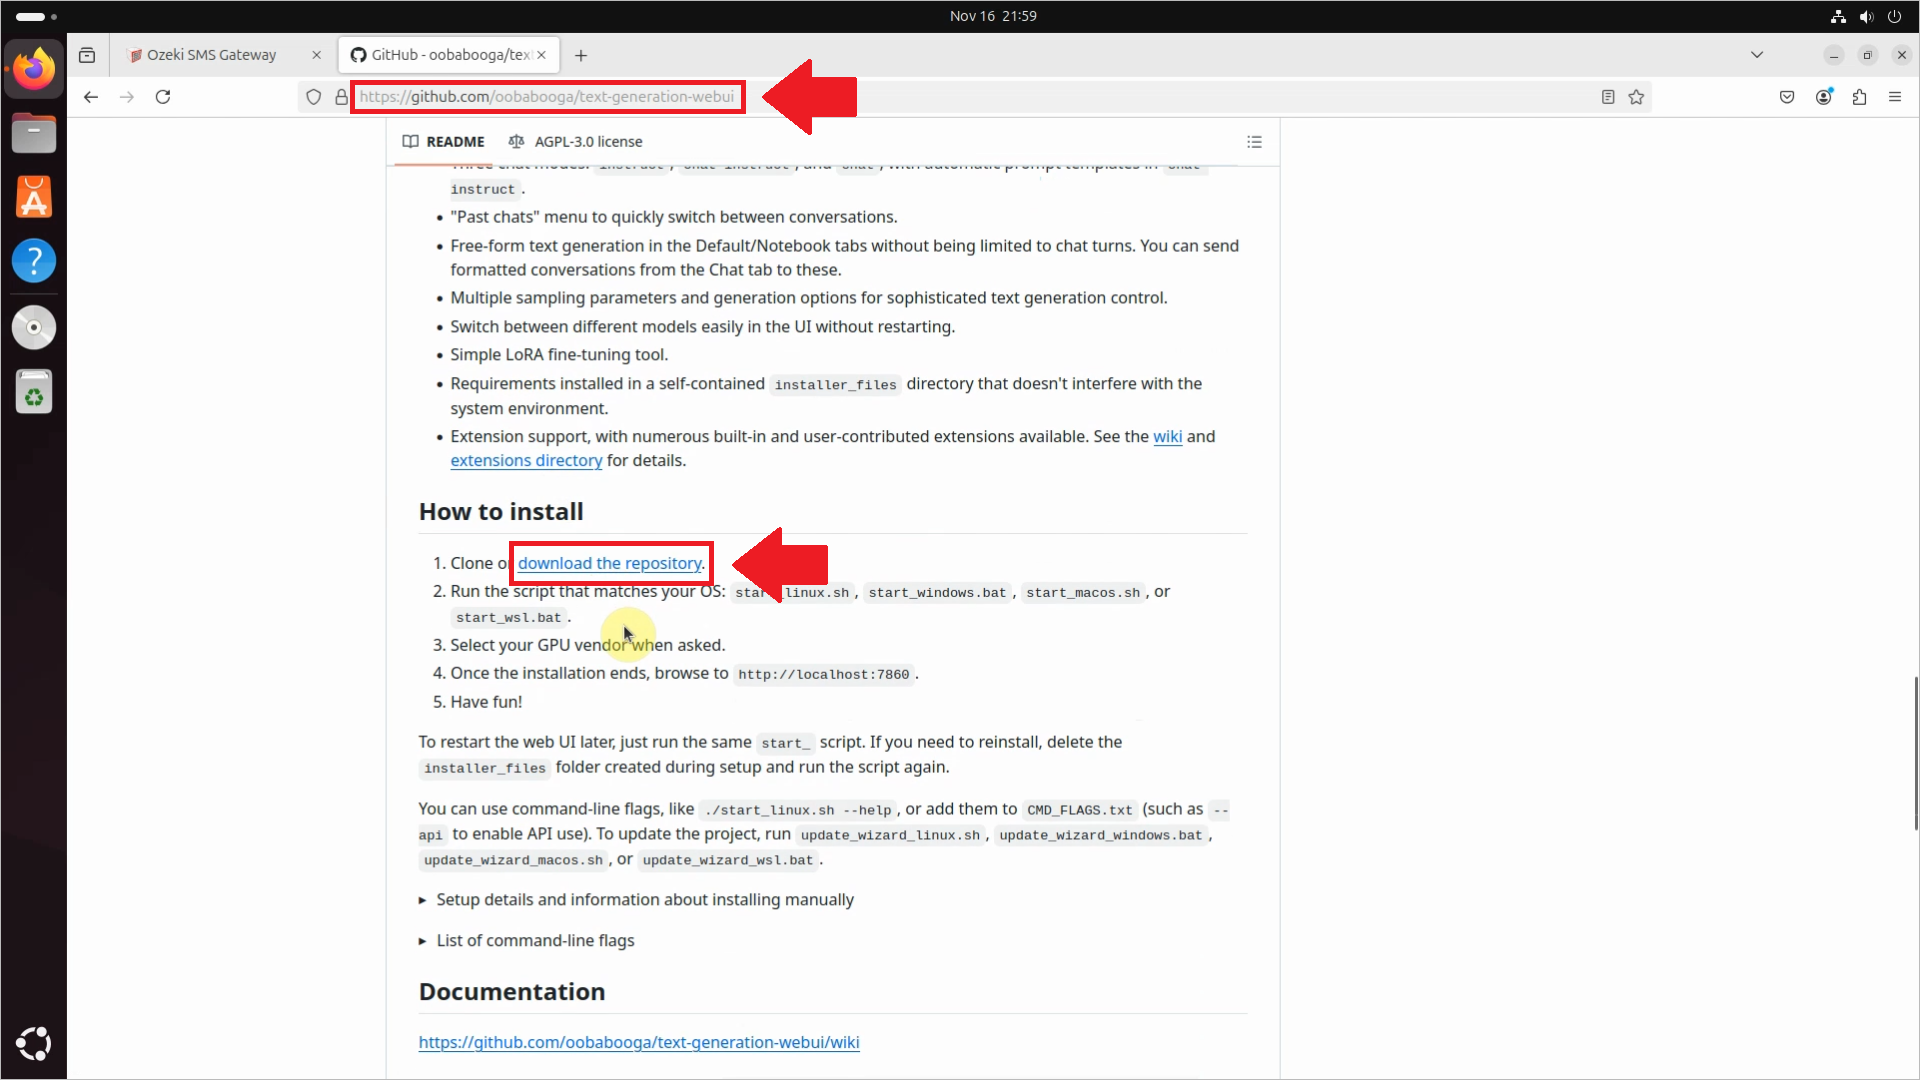
To download Oobabooga, the very first step is to navigate to it's official Github repository. You can see the link on Figure 1. Once you've opened it, you need to scroll down until you will see a download link. Just click on the link and the repository will be downloaded to your system.
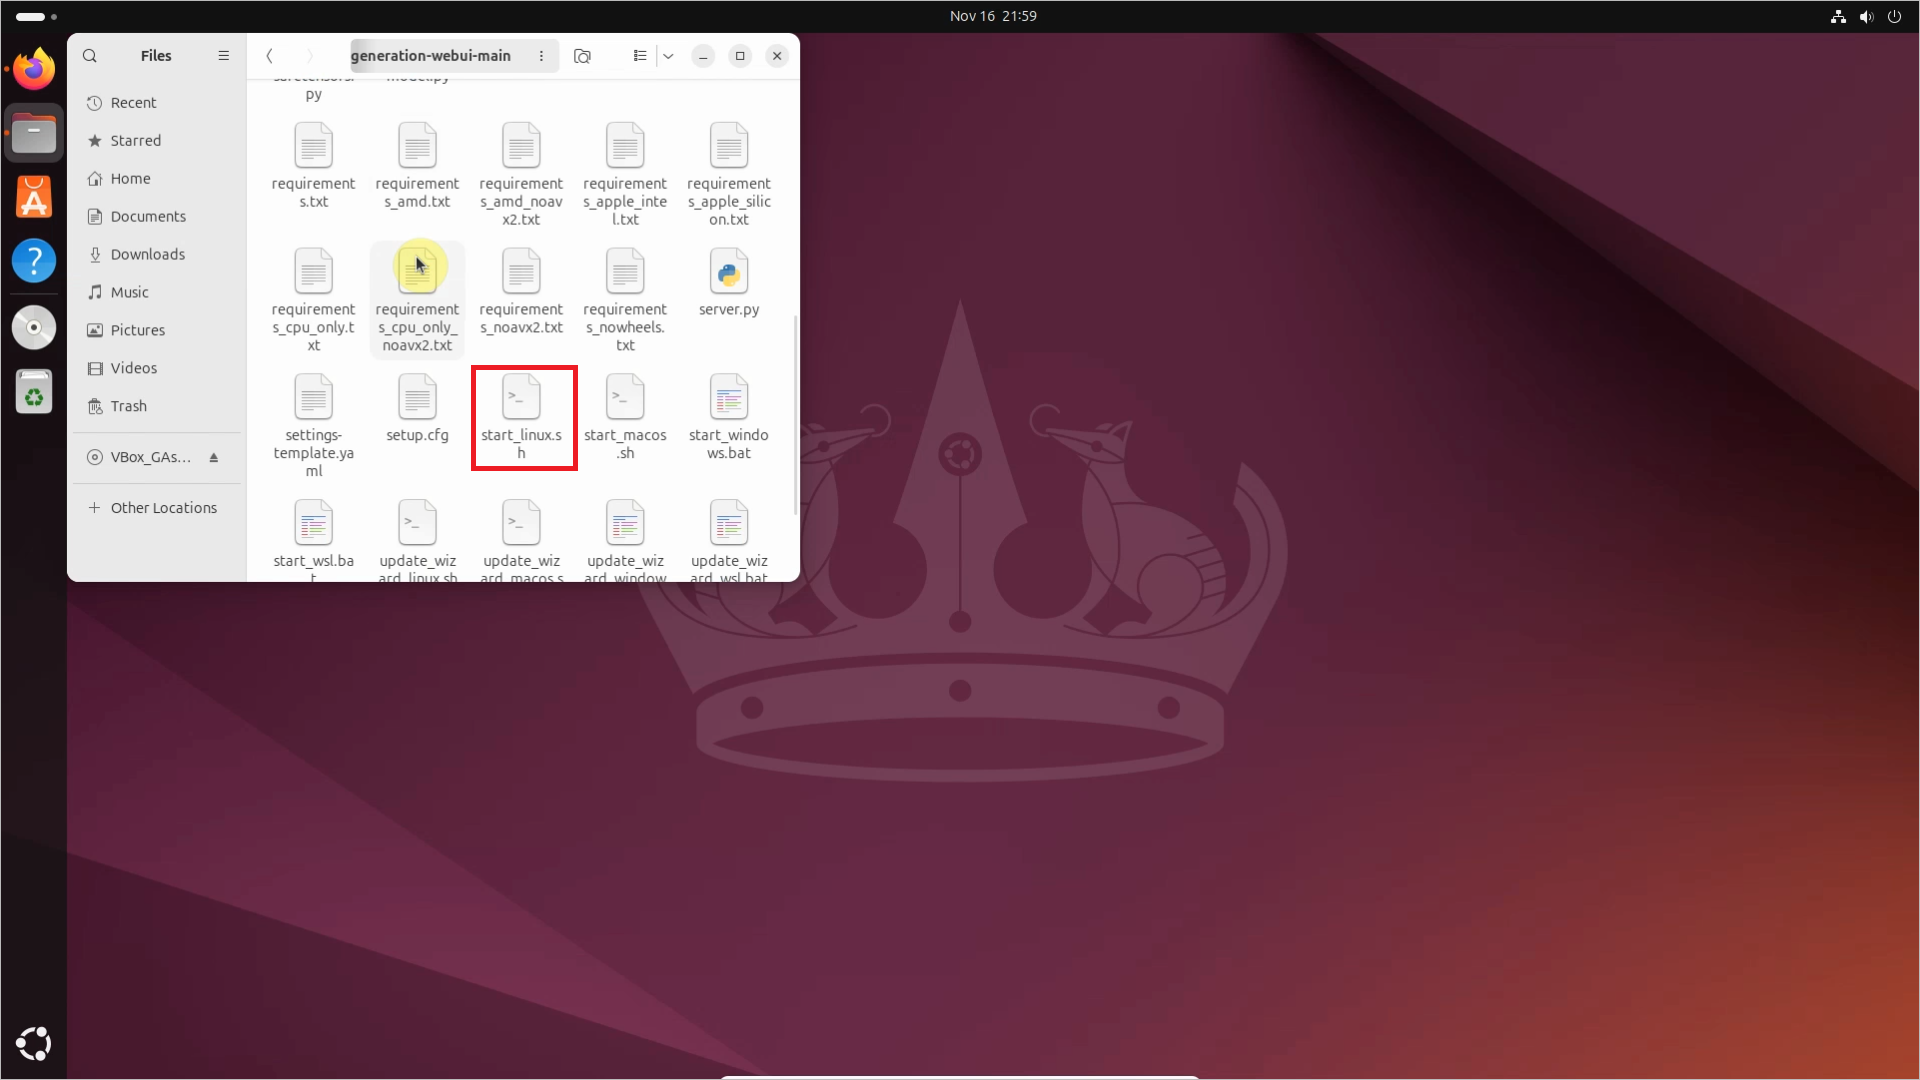
Once the folder is downloaded, you can start the installation process. On Linux, you need to run the start_linux.sh file. Similarly, if you have Windows, run the start_windows.bat file.
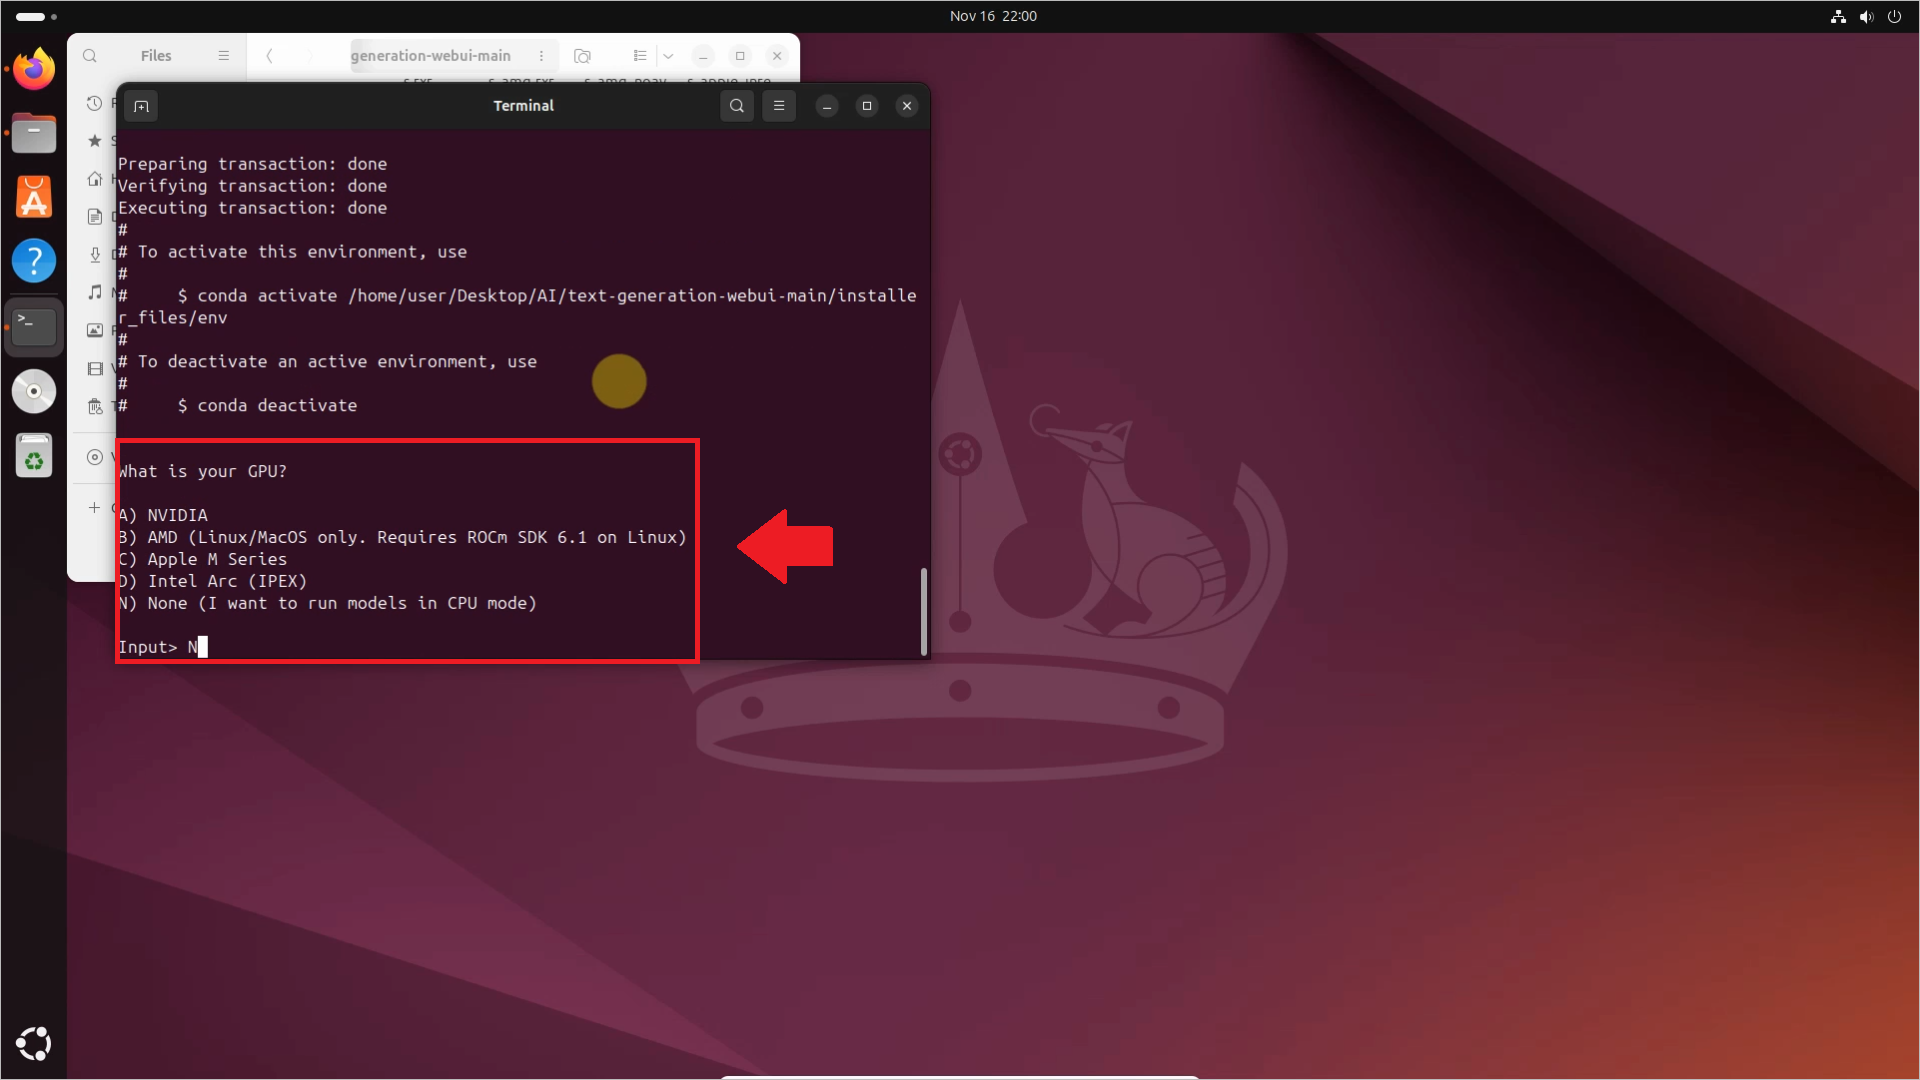
Installing Oobabooga will take a few minutes. During the process, you will be prompted to select the type of GPU you have. This tutorial was created using a virtual machine, but make sure to choose the option that corresponds to your GPU.
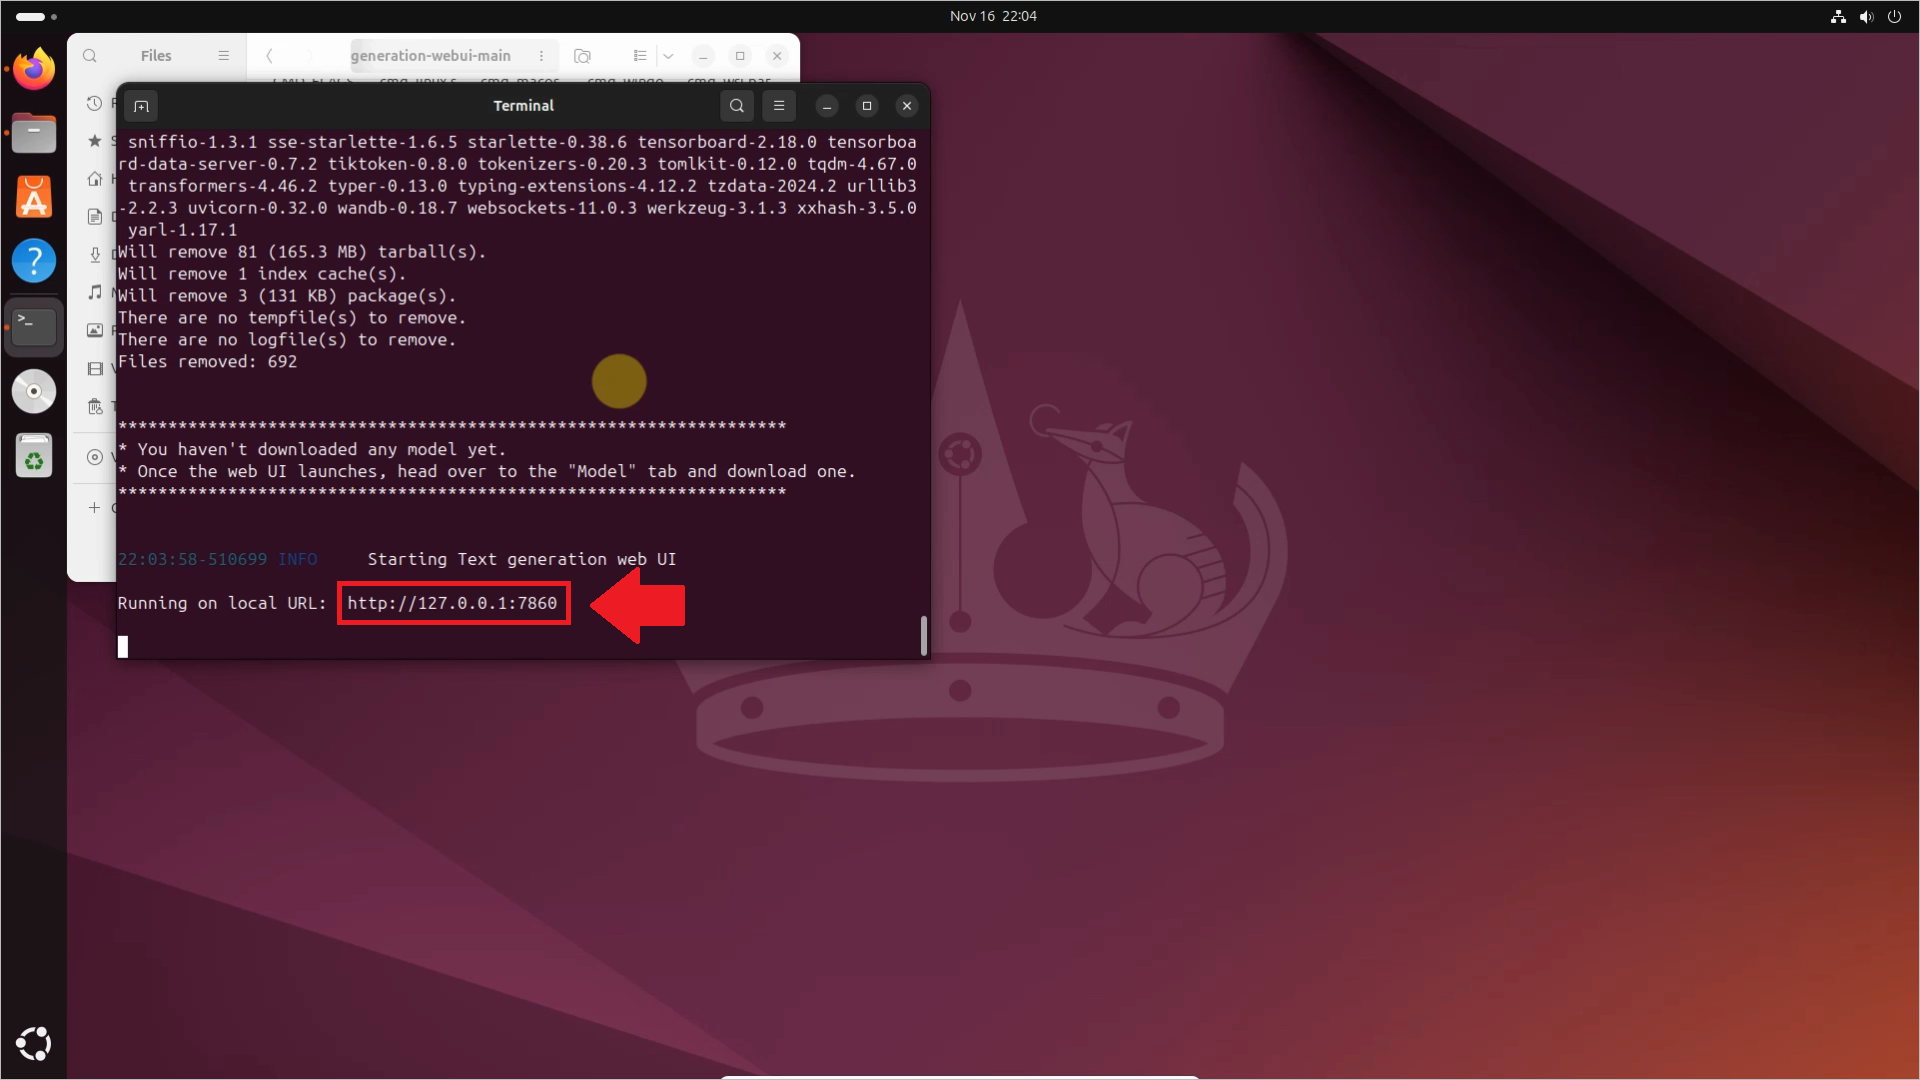
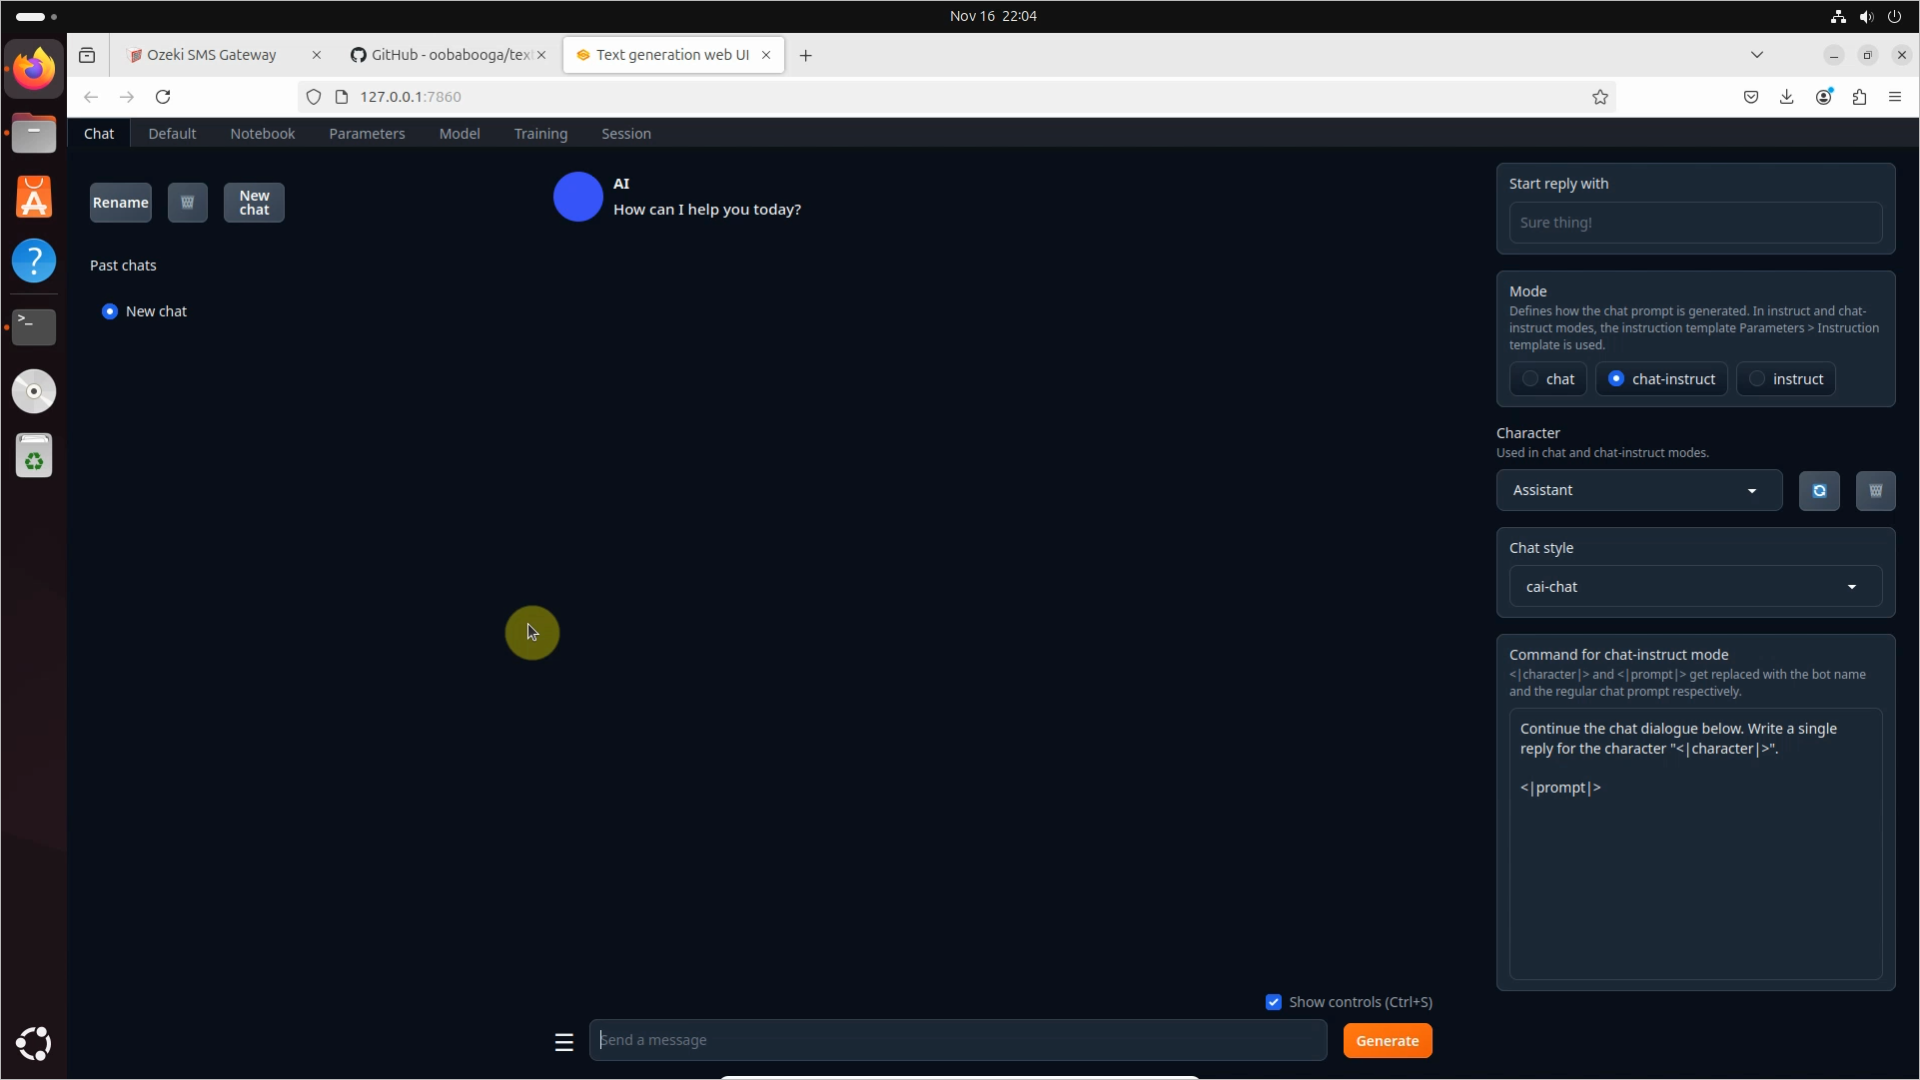
After the installation is complete, your local server will start automatically. By default, you will find it at http://127.0.0.1:7860, as you can see on Figure 4.
Once your server is started, Oobabooga is ready to use!
Load the Hugging face model to Oobabooga (video tutorial)
This one and a half minute video will teach you how to load a local AI model to Oobabooga. The video starts with downloading the AI model from a website called Hugging face. Hugging face is a really popular library for AI and machine learning models. After that, the video concludes with configuring and loading the downloaded model.
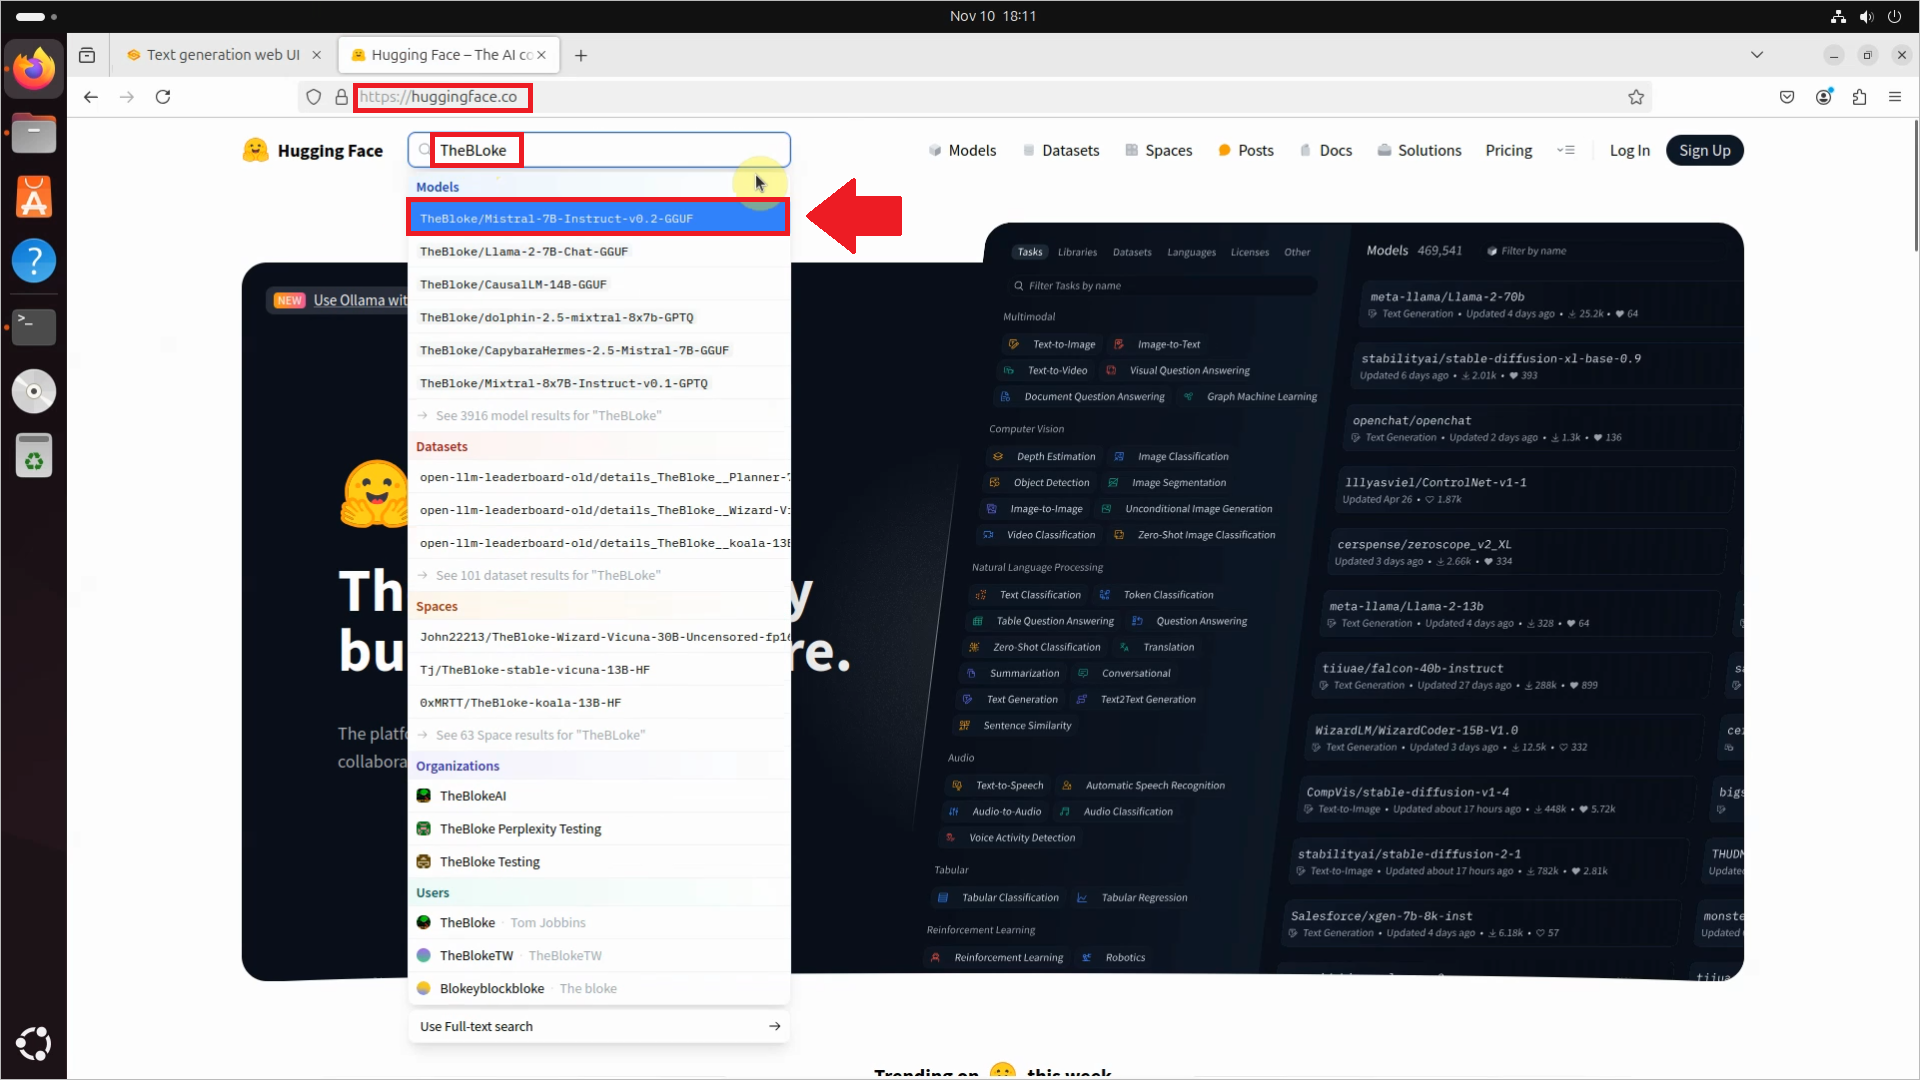
Your very first step will be to navigate to the Hugging face website, highlighted in Figure 6. On the search bar, you can select the model you want to download.
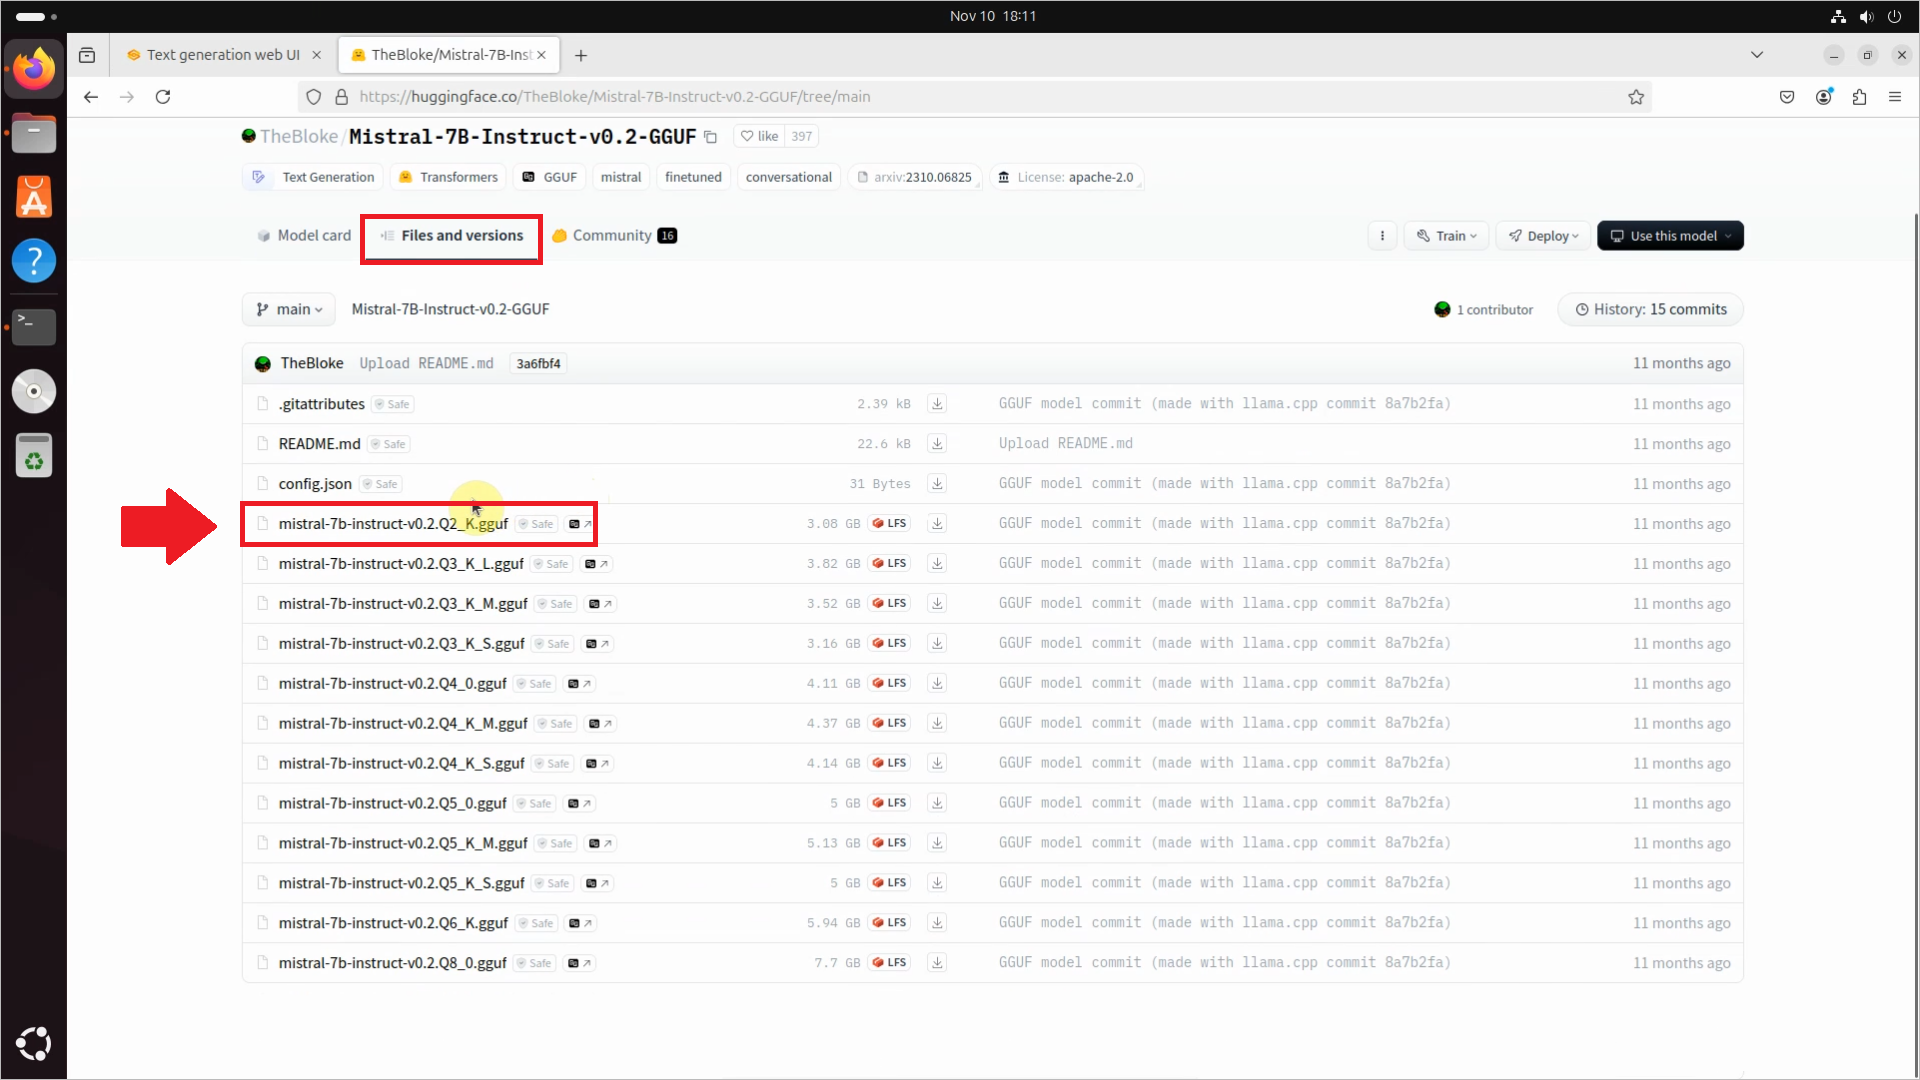
You will not need to manually download the model from the website. Just simply click on the Files and versions button on toolbar, and select the version you want to download.
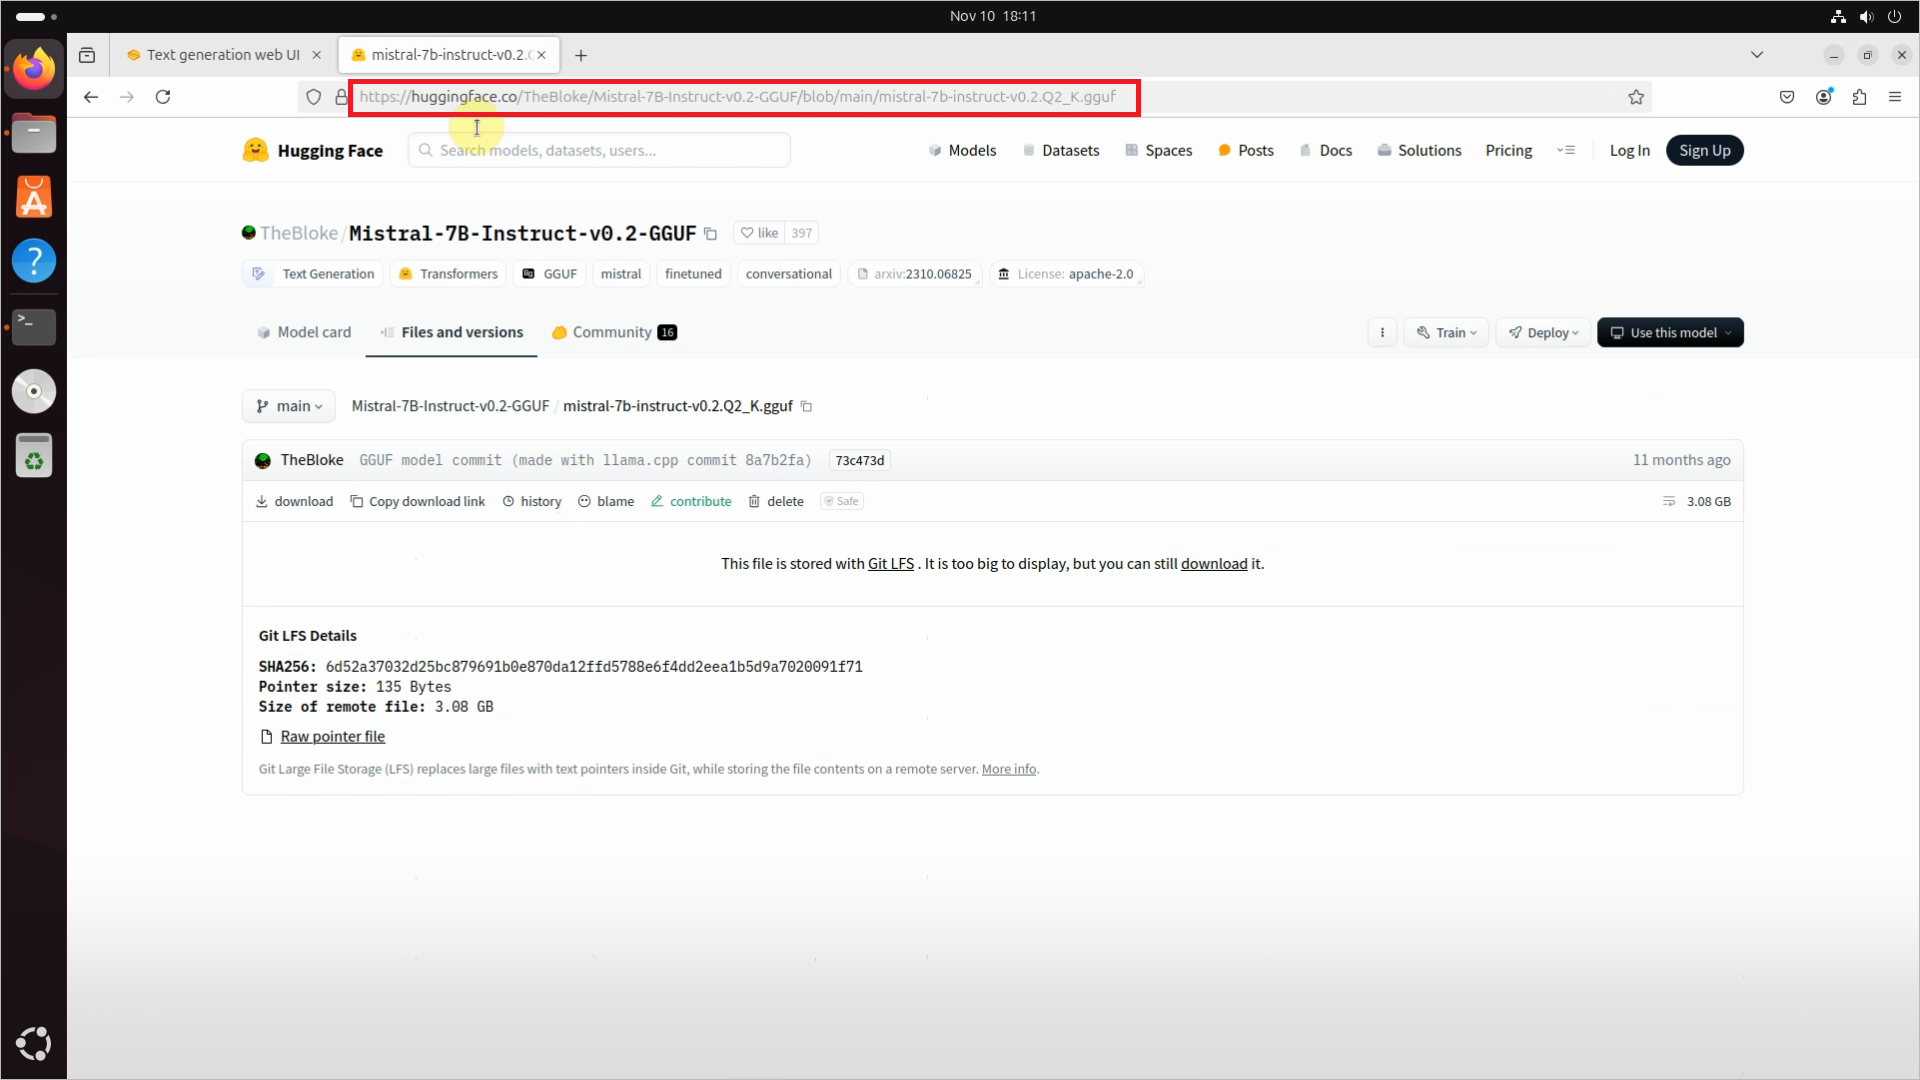
Instead of downloading the model directly, you can easily do that in the GUI itself. You will only need the link of the model and version you want to download.
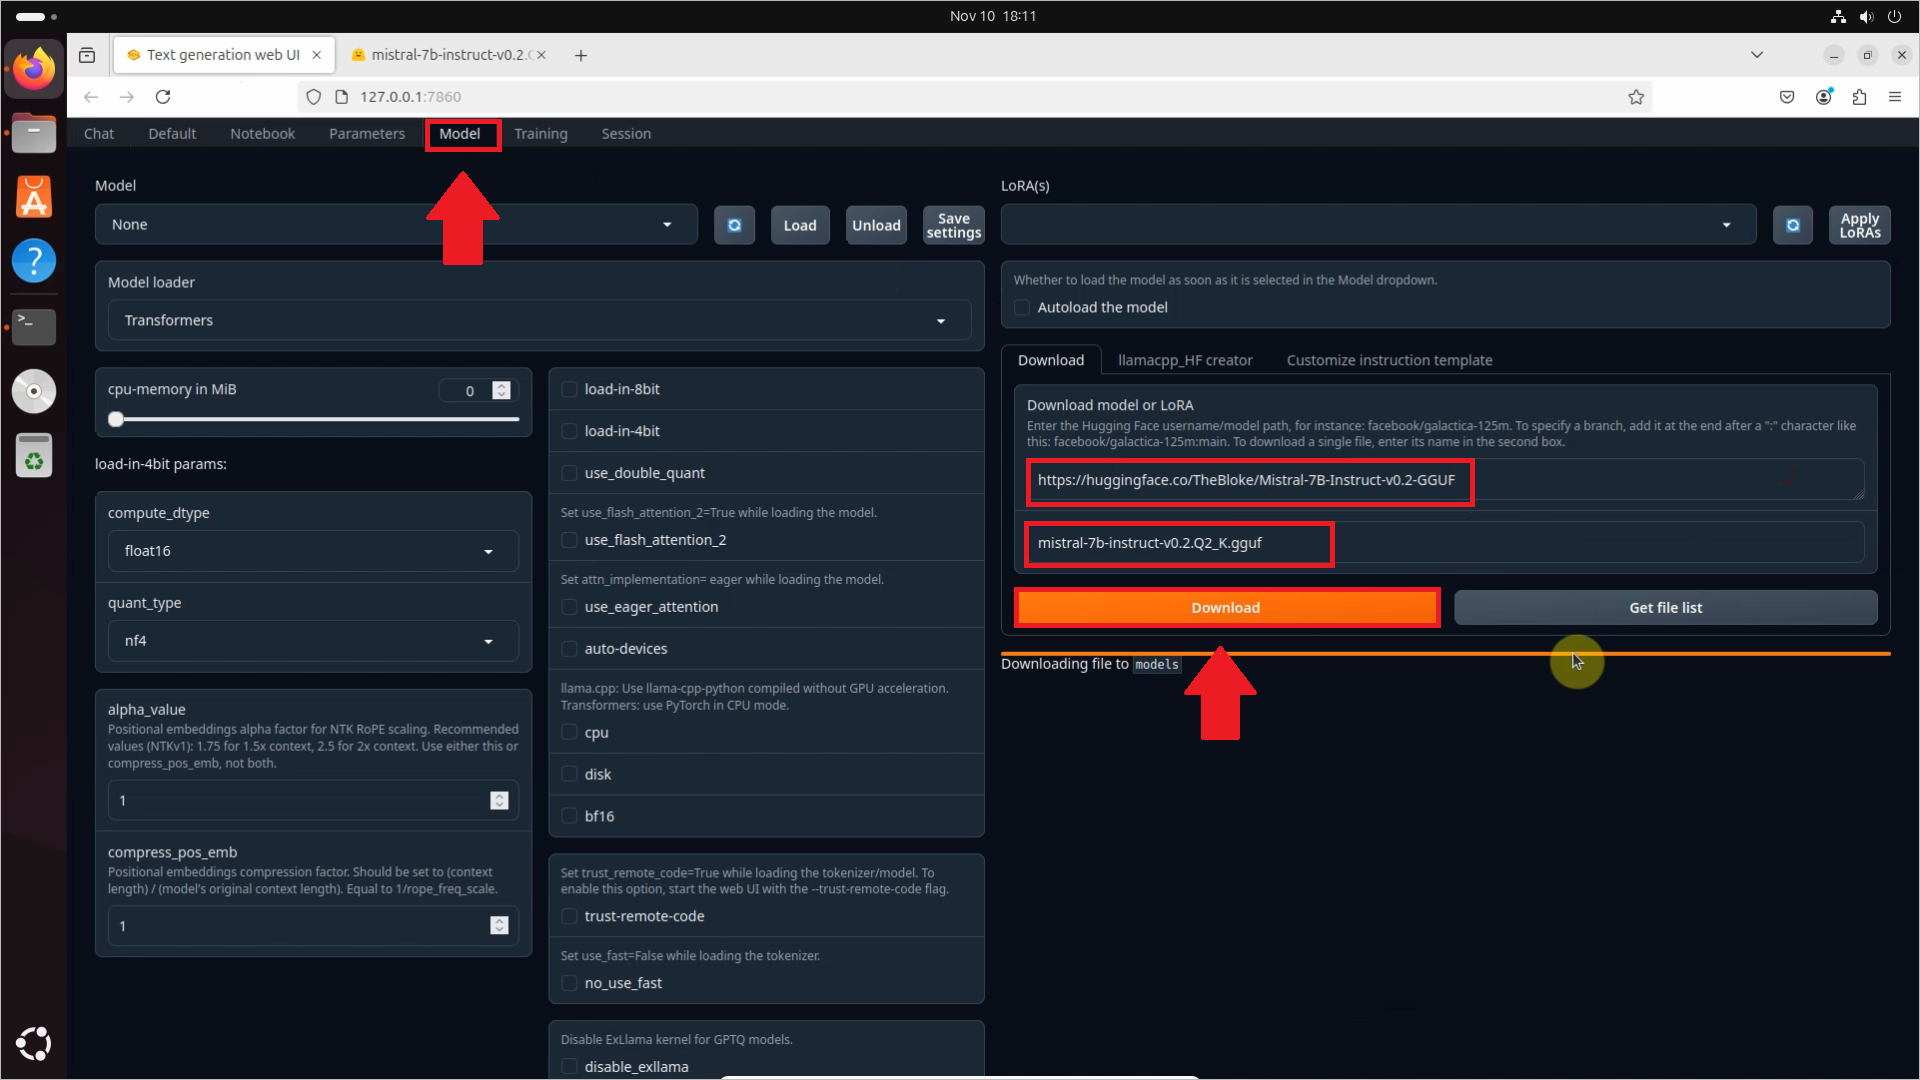
Just navigate back to your local web UI, and click the Model option on the toolbar. You can download the model there. You need to copy the URL of the model in the first box, and the URL of the specific version in the second box. After you're done, click the Download button and your model will be successfully downloaded.
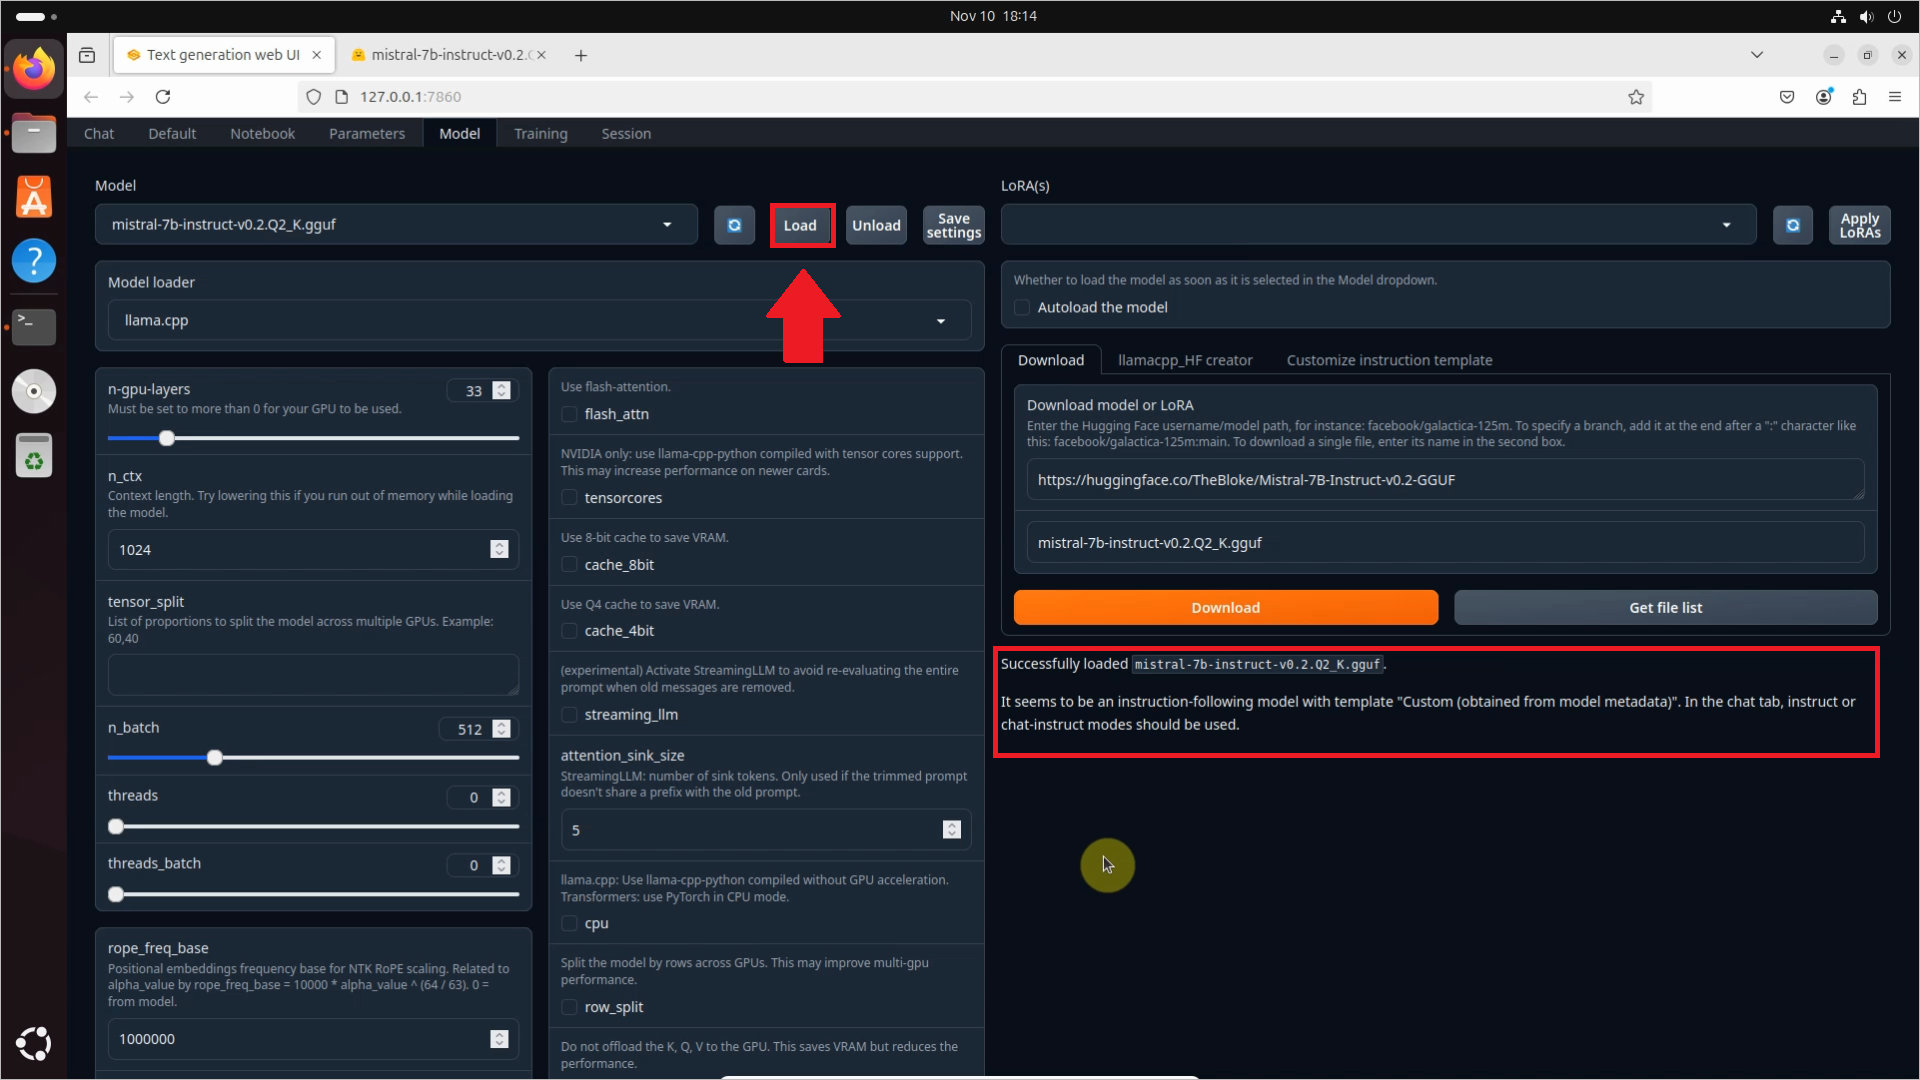
After downloading the model, there's only one thing left to do: to actually load it into the server. This is really easy to do, just select the model and click the Load button. After a few seconds, your model will be set and ready to use!
How to use Oobabooga api with curl (video tutorial)
In the following video, you will learn how to use the Oobabooga API with curl in just under three minutes. First, it shows you how to start the application in API mode from the command terminal. After that, it loads the model from the web UI. In the final three steps, the video will show three different examples of sending HTPP Post requests to the local server, along with the responses.
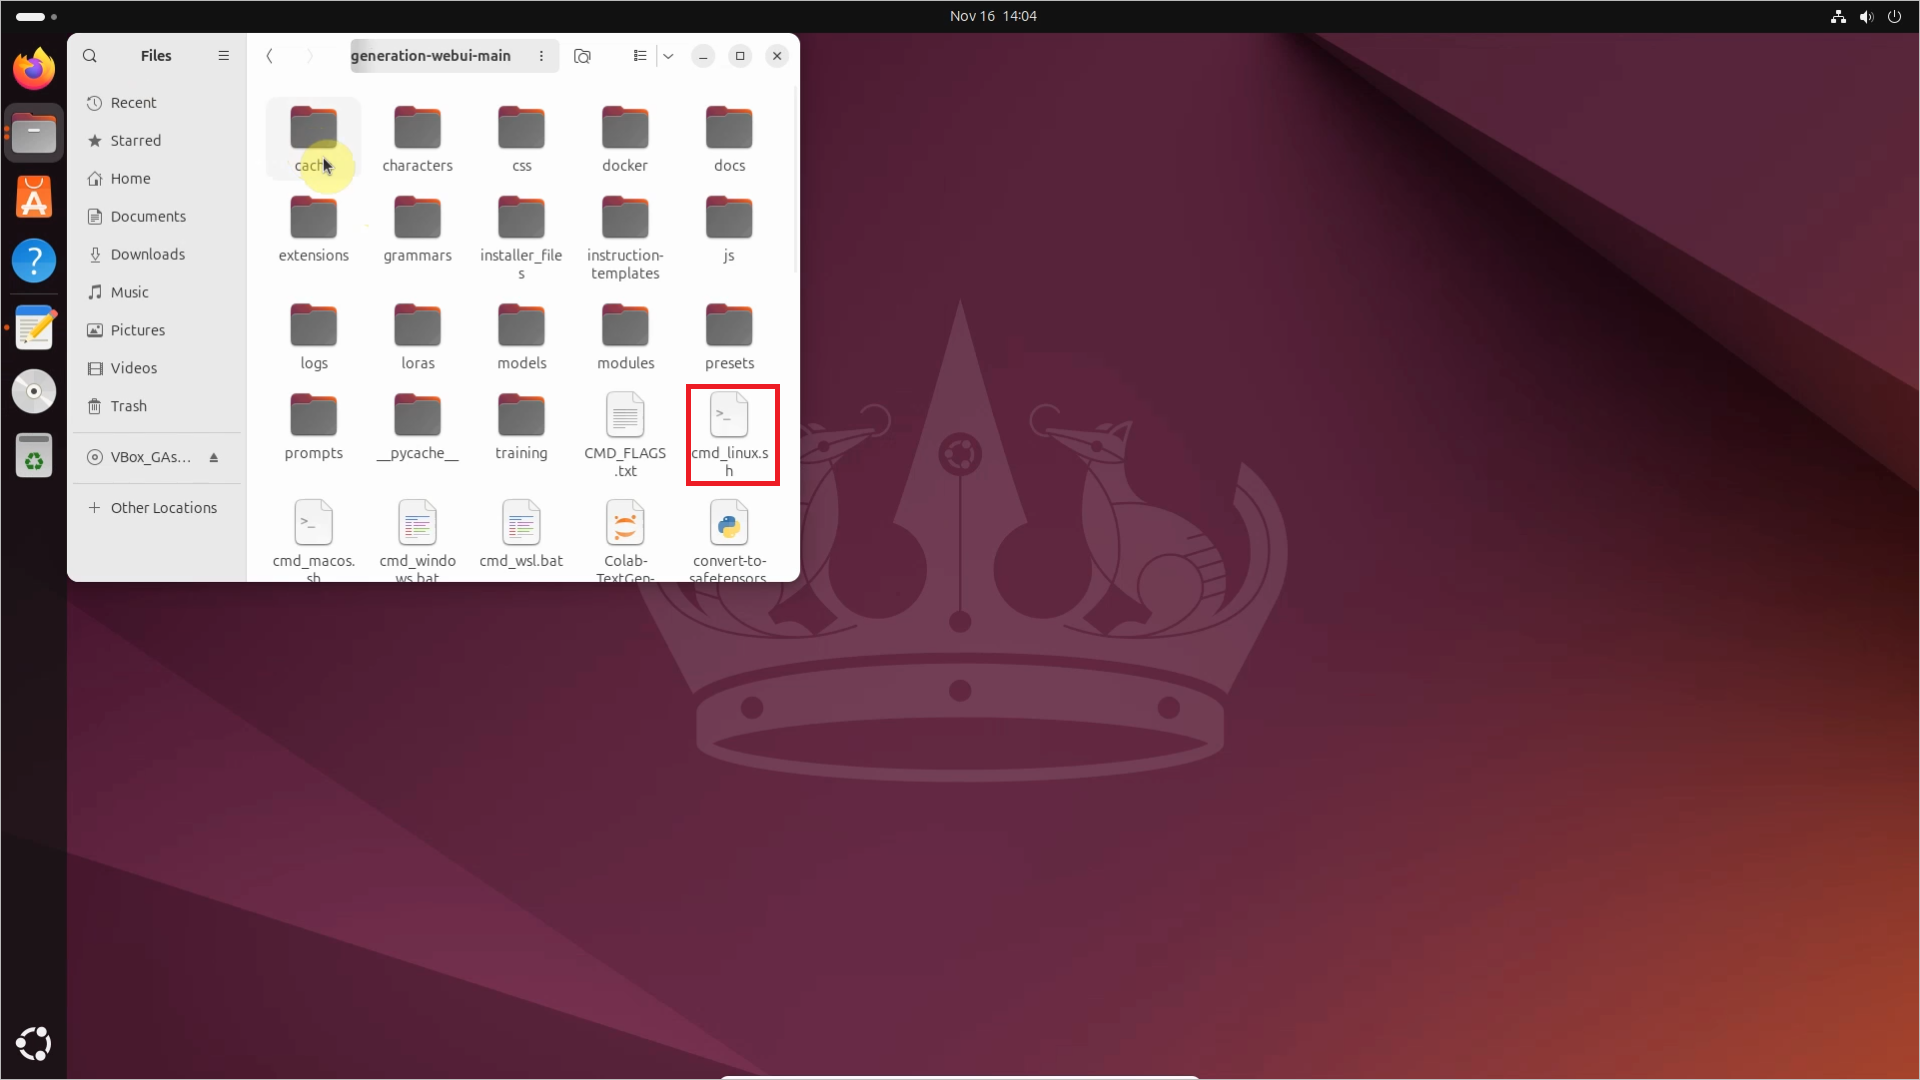
To use Oobabooga in api mode with curl, the first thing you need to do is to open a command terminal. You can do this by running the cmd_linux file in the Oobagooba folder.
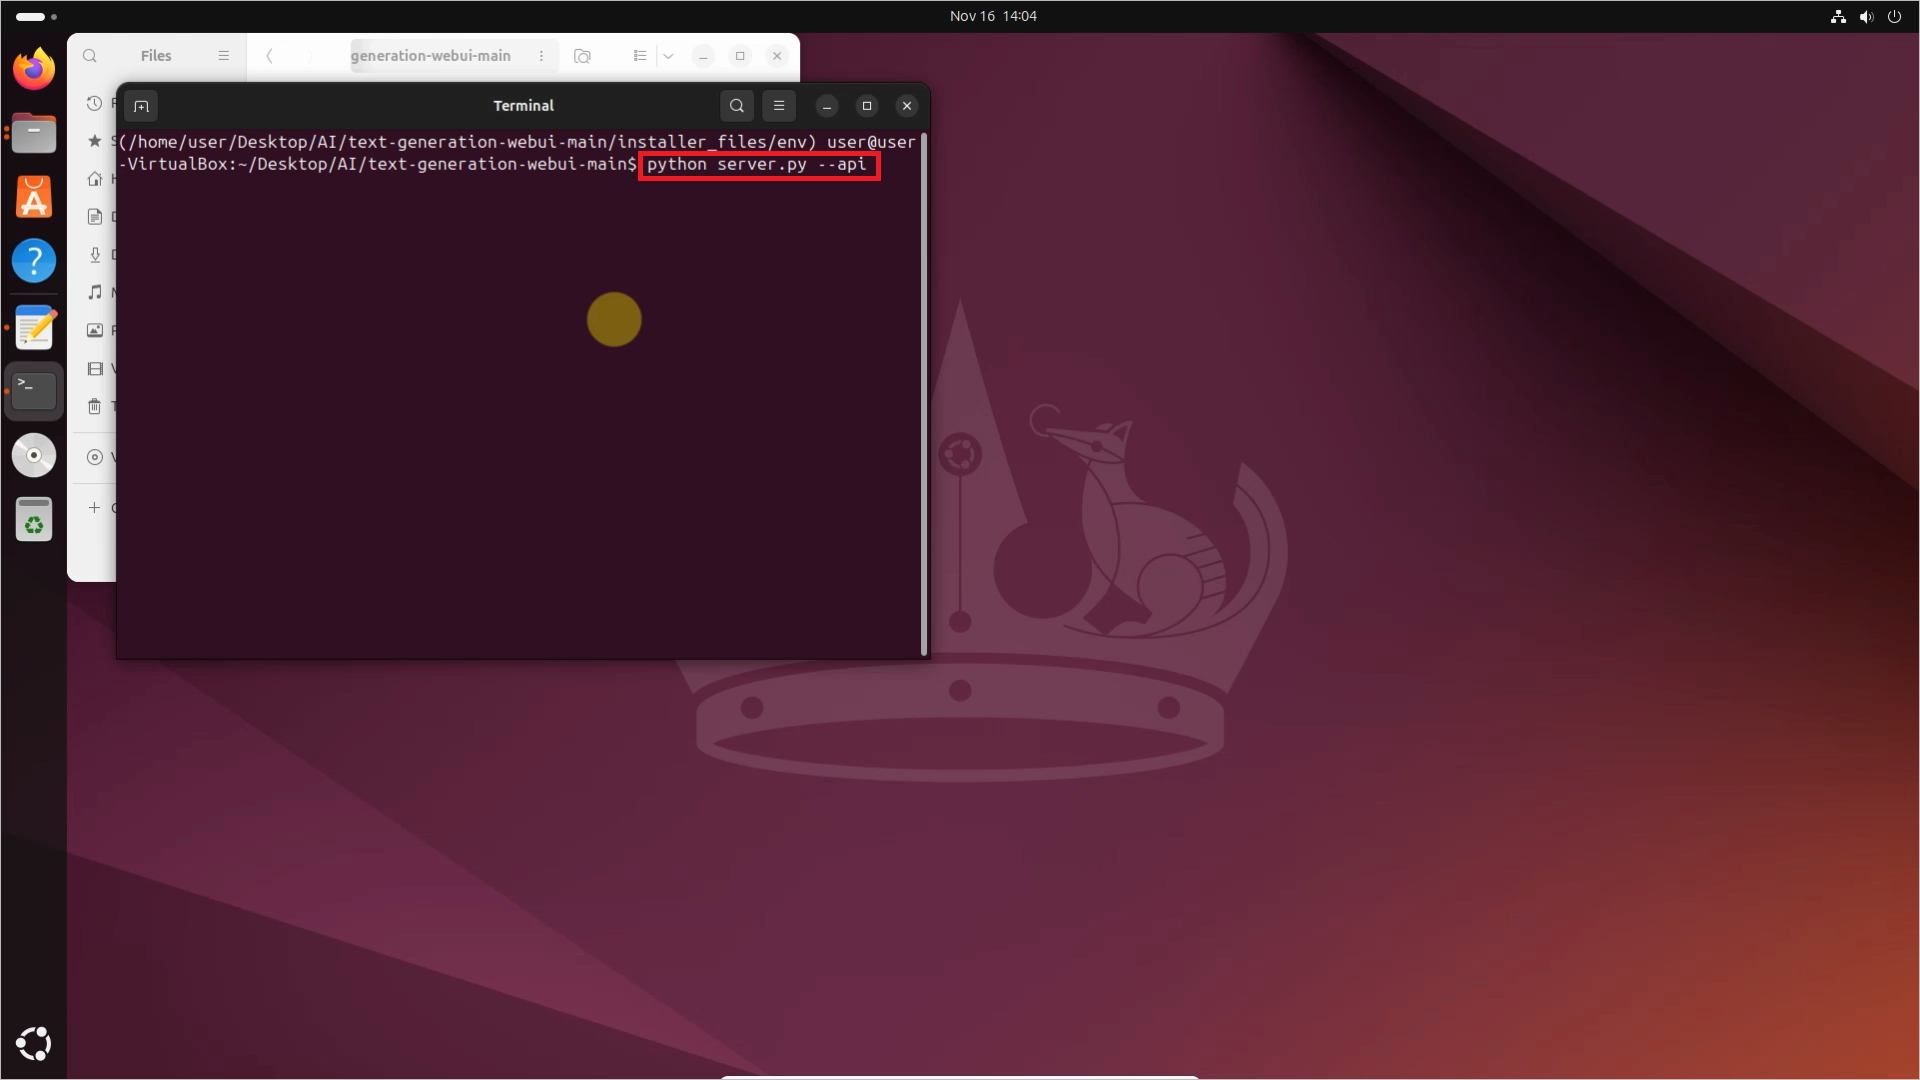
To start the web server in api mode, you need the python server.py --api command. In api mode, the default addres is http://127.0.0.1:5000. Once the server is on, don't forget to load the model. After that, you can start to experiment with curl!
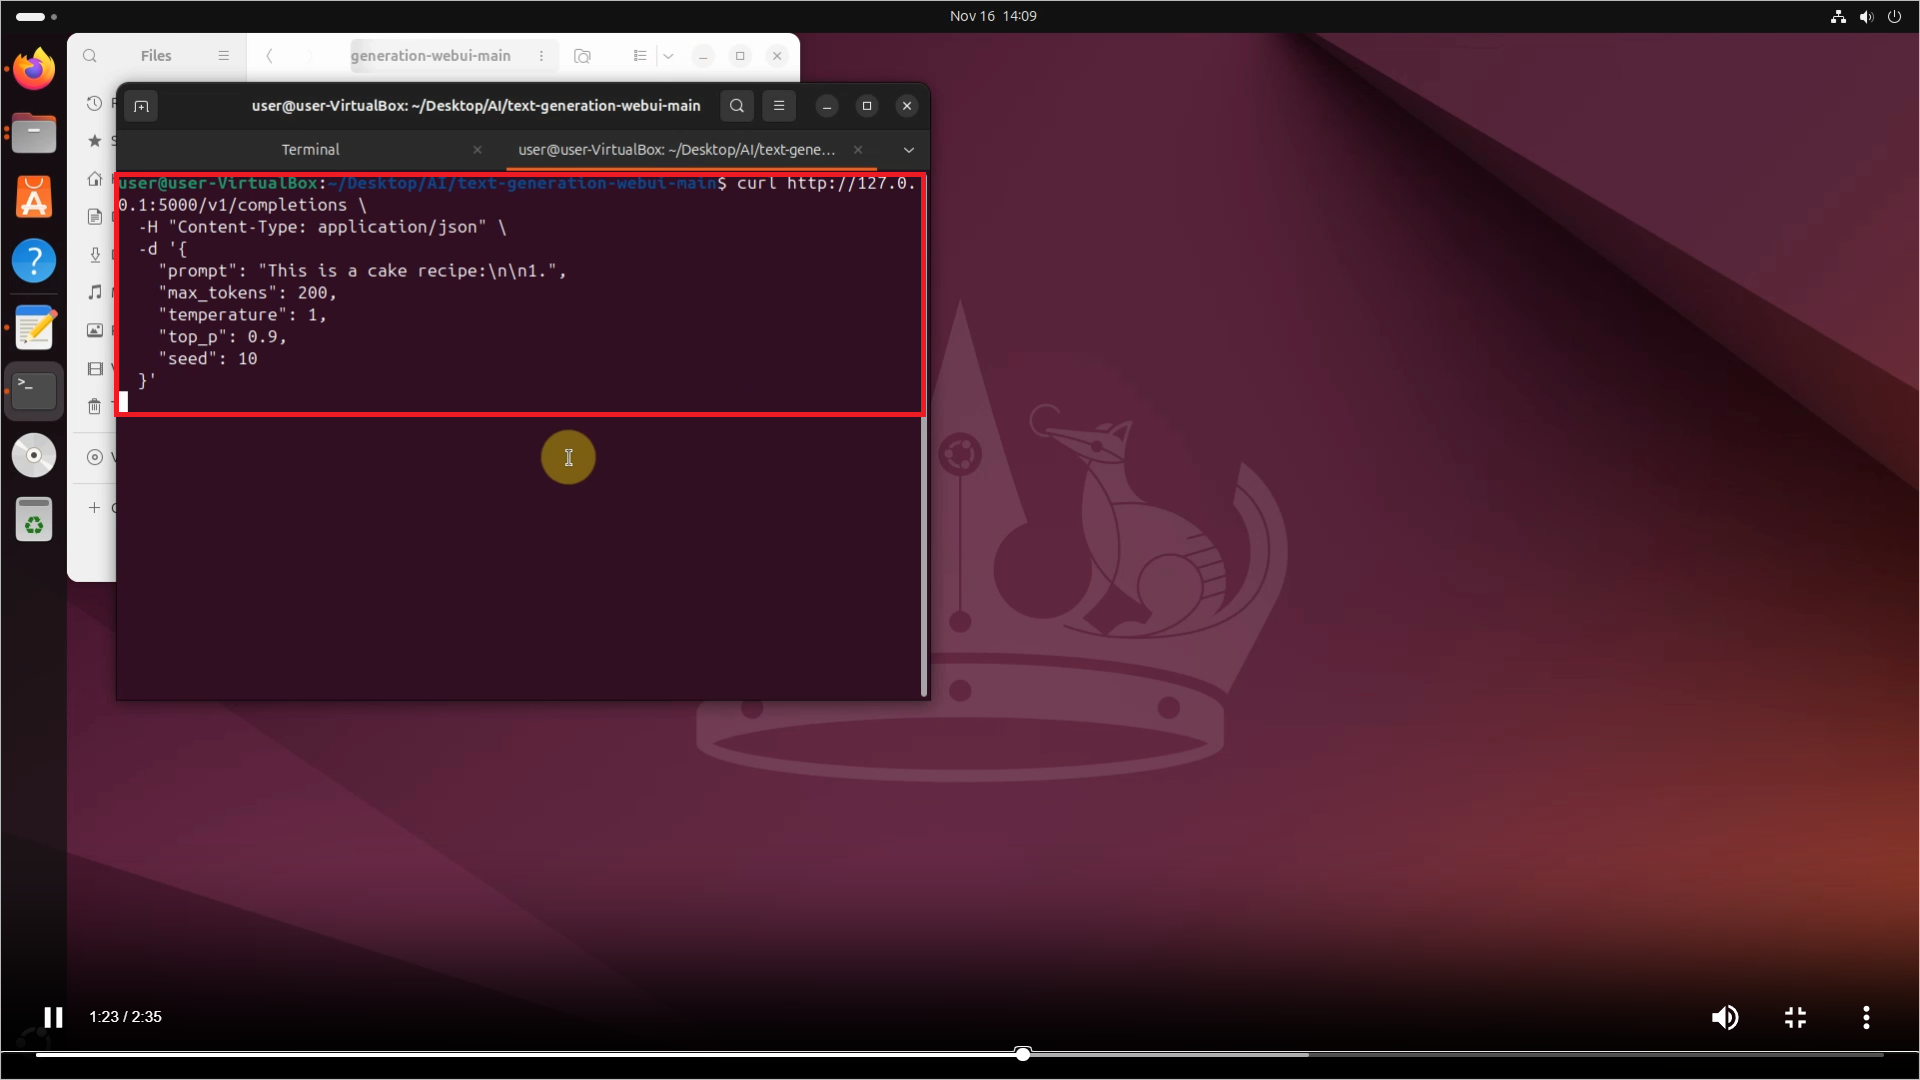
This tutorial will show three basic http requests with curl. The first one is a very basic completion request. As you can see in Figure 13, it listens to the /v1/completions endpoint. It's main purpose is to simply generate text based on the prompt the user gives to it. ou can customize the output by setting parameters like max_tokens to limit the length, temperature to adjust randomness, and seed for consistent results with the same prompt.
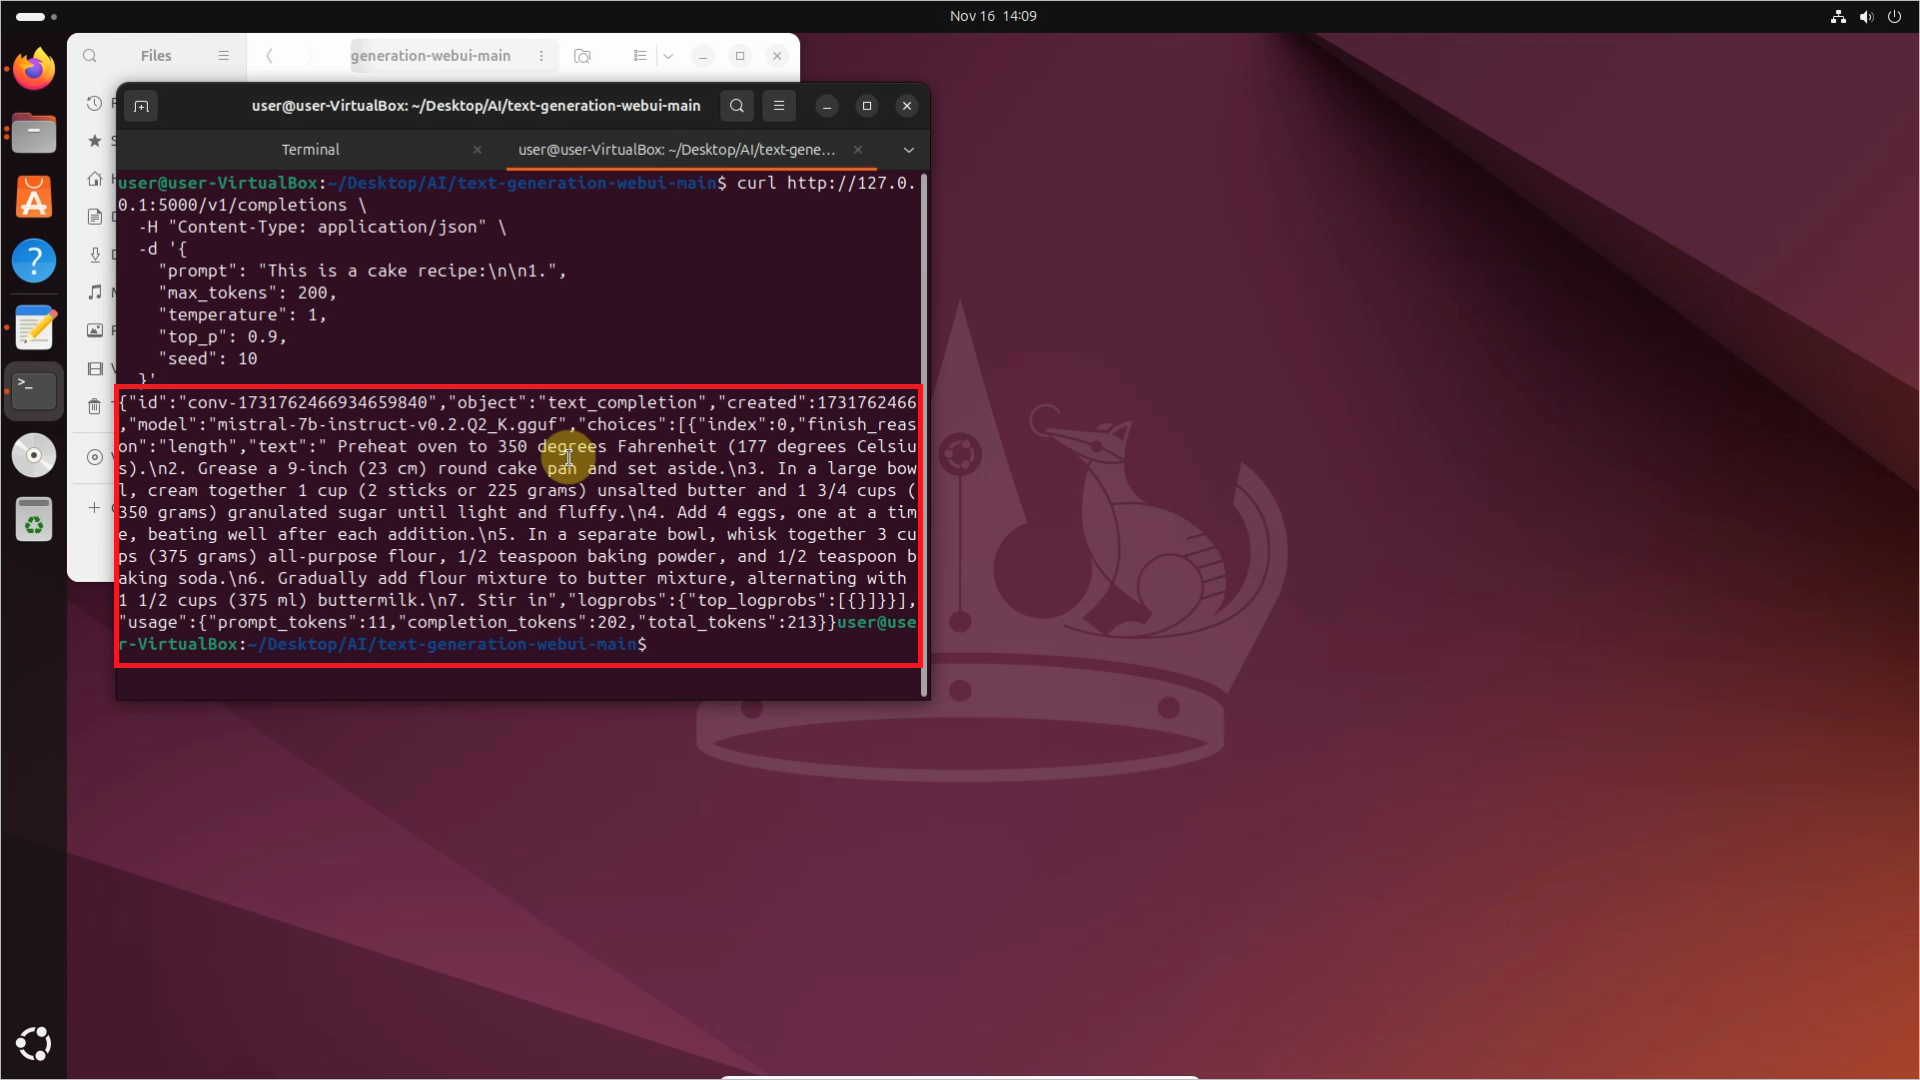
In Figure 14, you can see the response from the AI model. The response includes several details, such as the timestamp when it was created, the model's name, the reason the generation process stopped, and the number of tokens used for both the prompt and the generated text. Of course, it also contains the generated text itself.
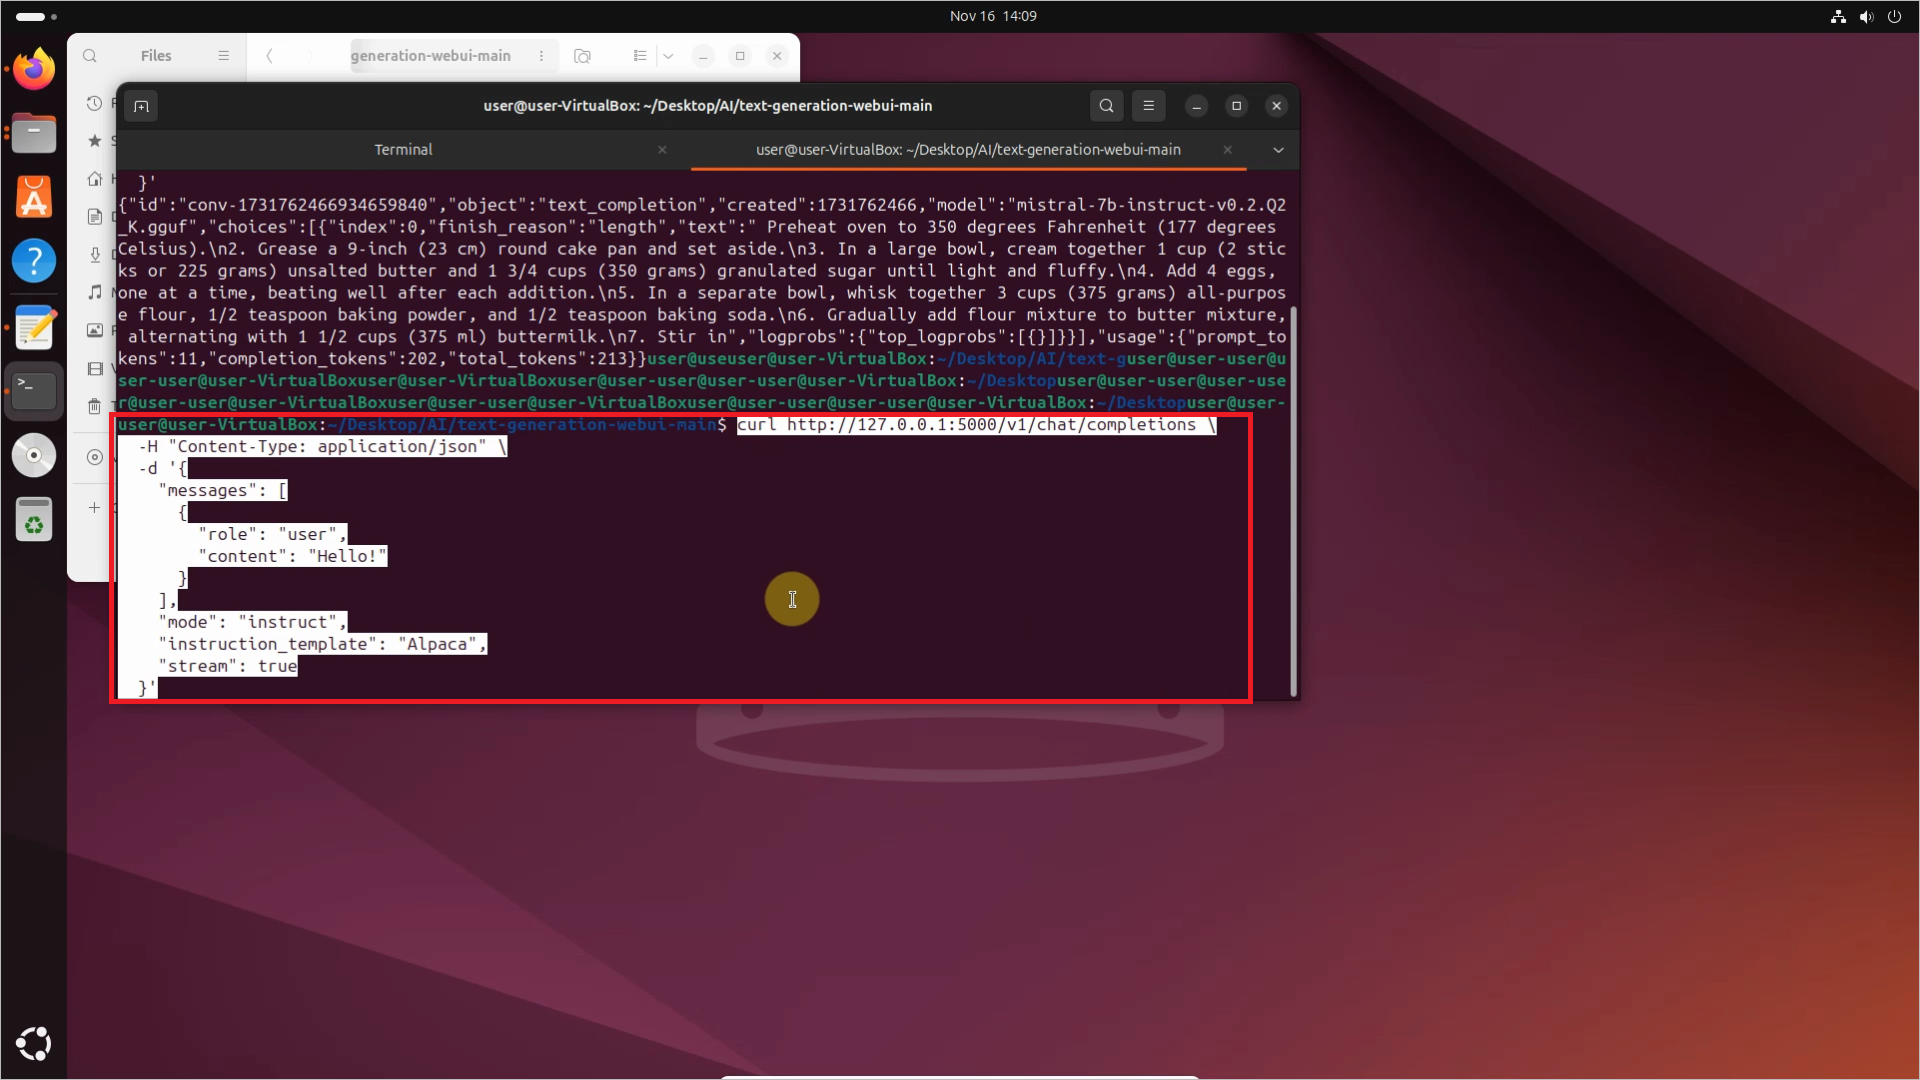
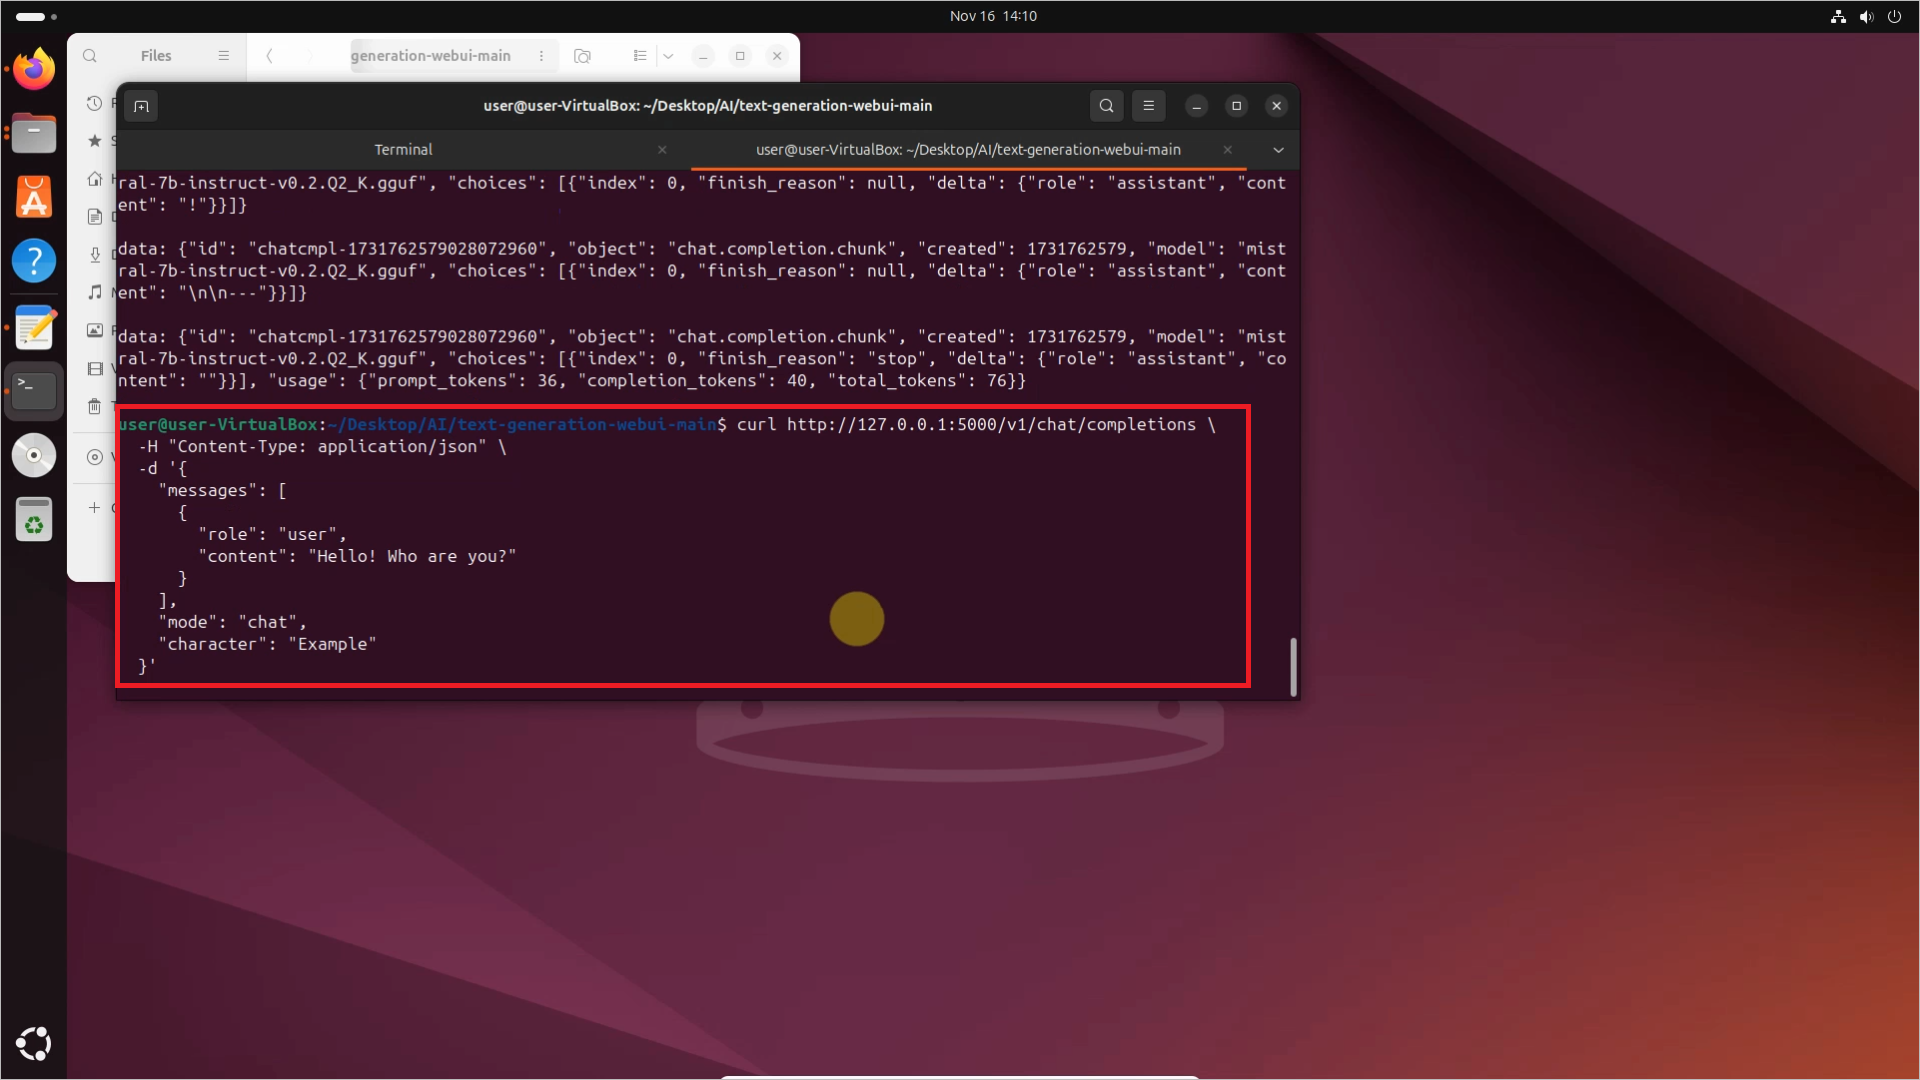
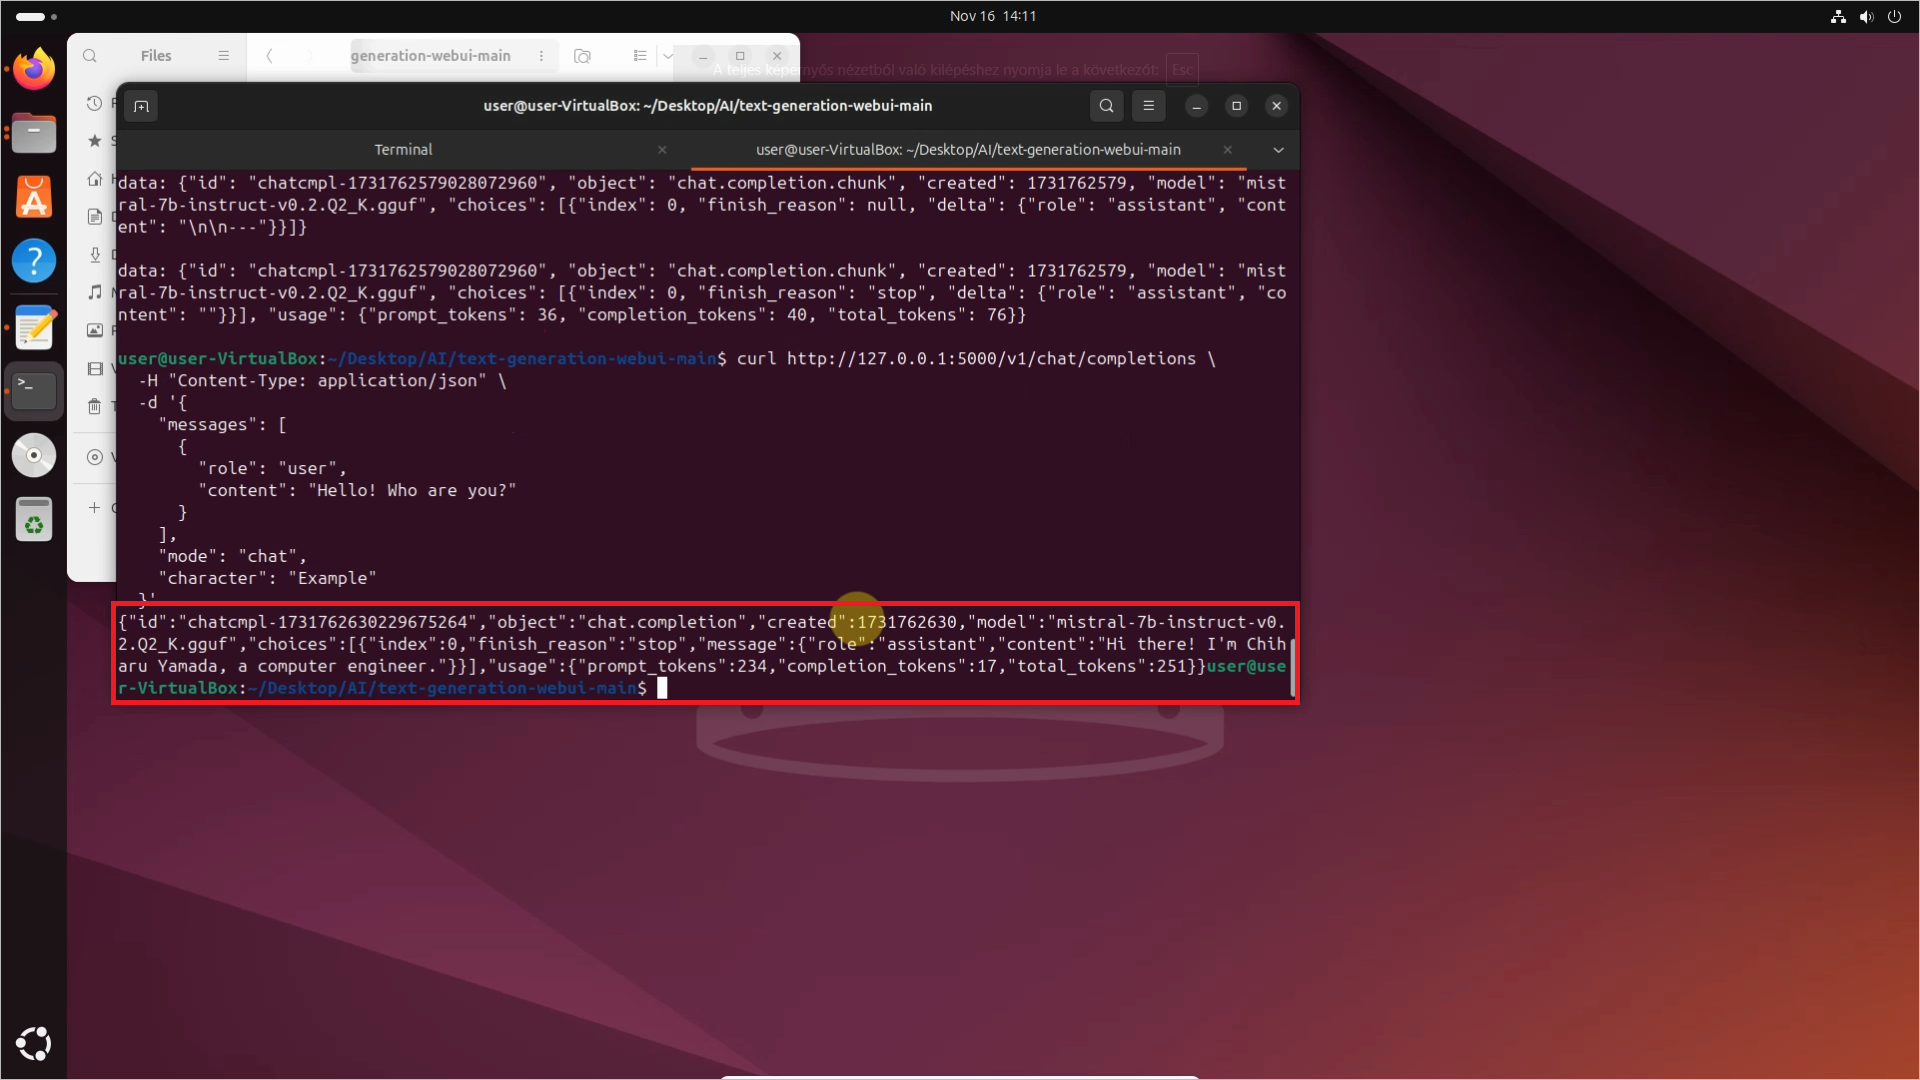
The second request is called chat completion. With these kind of requests, you can mimic conversational AI interactions. It's mostly used by instruction-followed models like ChatGPT. It maintains a conversation history via messages.
You can see the response on Figure 16. The response contains similar data as seen in the completion request, along with the role specification.
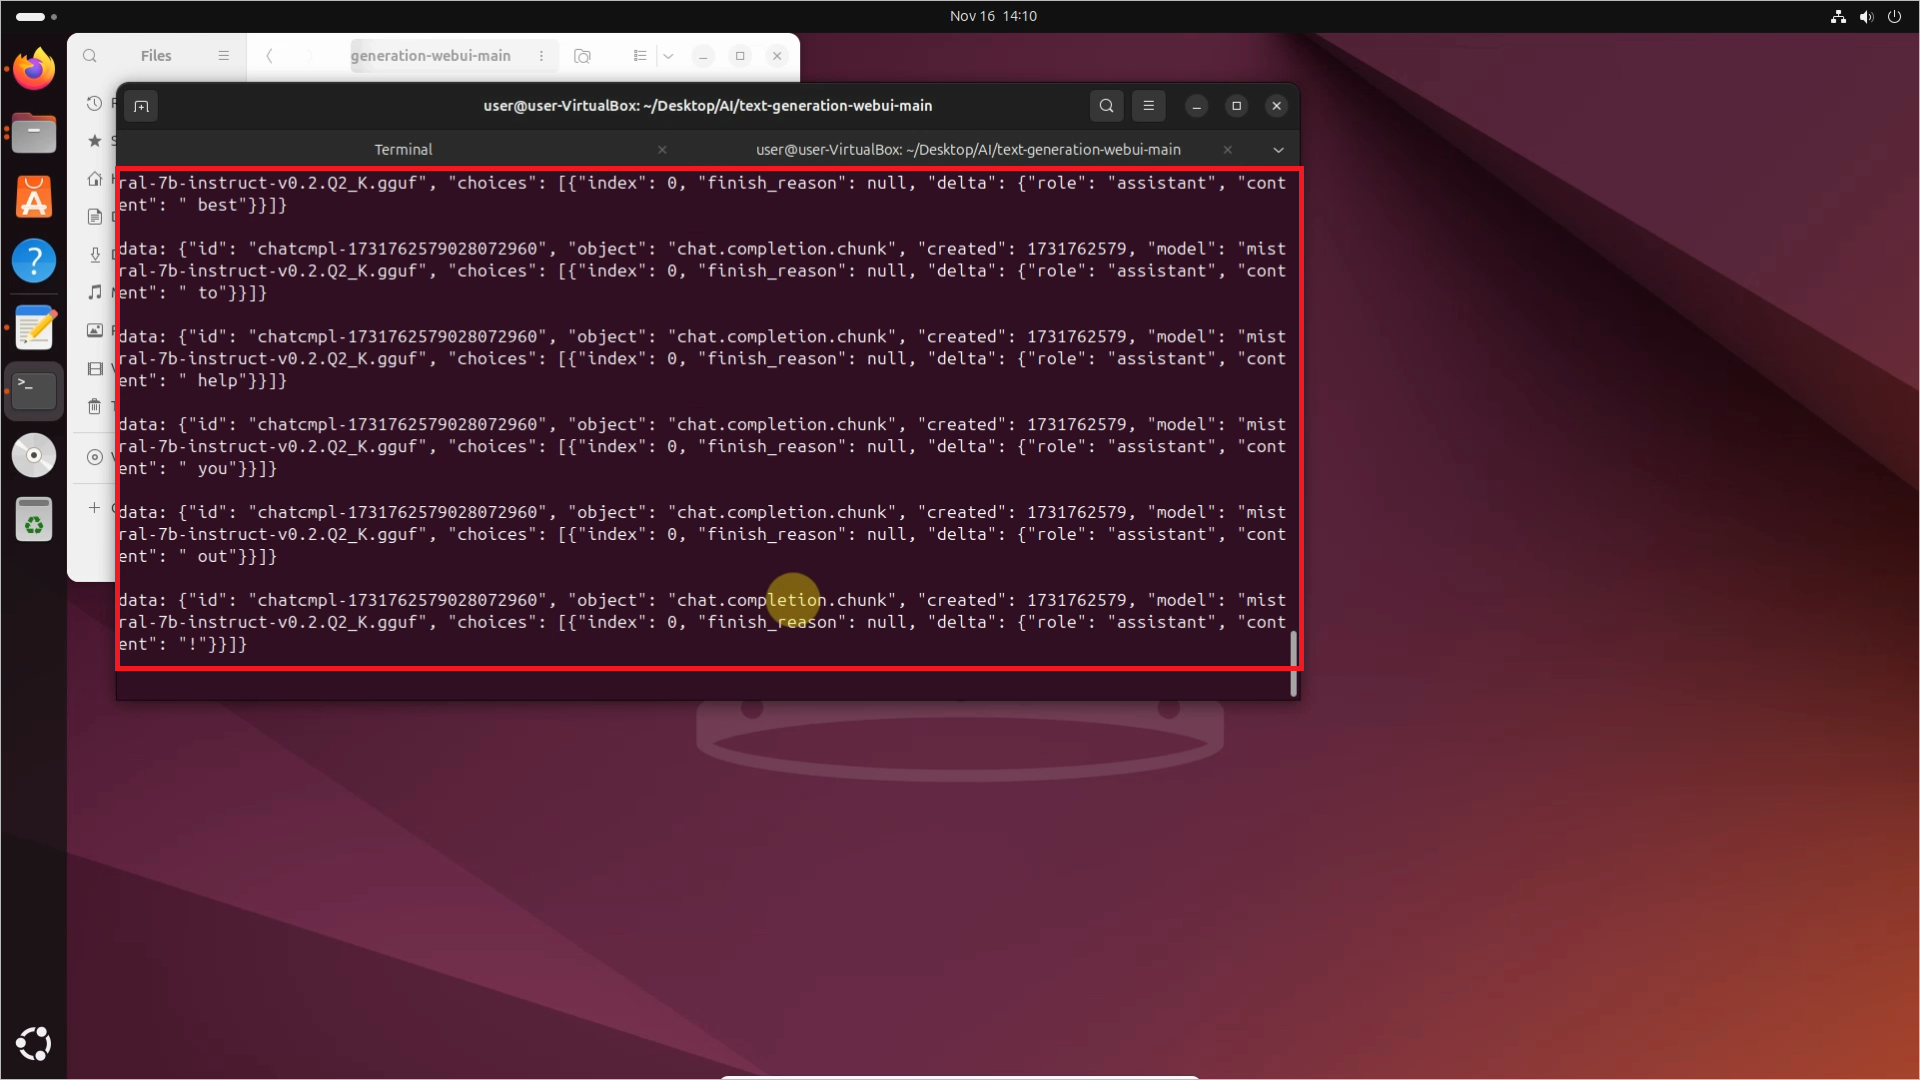
The last request is called SSE-Streaming. It allows the server to send real-time updates to the client. This is ideal for use cases like live chats, where the model's response can be streamed back to the user in real-time. In this response, stream: true indicates that the server should use SSE to send the response back to the client in a streaming manner.
As you can see, the response is entirely similar to the other cases. It generates the text along with other data, like the time of the creation, the object type, or the number of tokens used for generating the response.
FAQs
Is Oobabooga private?
Yes, Oobabooga is 100% private and offline.
How much disk space do I need?
It really depends on the model. Smaller models like GPT-J only requires a few gigabytes, but there are models that may require tens of gigabytes or even more.
What models does Oobabooga support?
Oobabooga supports many open-source models, including LLaMA LLaMA-2, GPT-J, and GPT-NeoX or Pythia.
Final thoughts
In this guide, you learned how to use Oobabooga on Linux, from downloading and setting up the tool to loading AI models from Hugging Face. You explored how to use the Oobabooga API with curl and saw how to integrate Oobabooga with Ozeki AI Studio for enhanced functionality. With Oobabooga, you gain full control over your AI models while keeping your data private and offline. Start experimenting with these steps today, and dive into the world of local AI applications! If you wish to learn more about Ozeki AI Studio, click the link.

