How to use the random model
What is random model?
The random model is a simple AI model available in Ozeki AI Server that generates completely random responses to incoming messages. It does not rely on machine learning or natural language understanding, making it ideal for testing chatbot routing, response handling, and integration logic without the need for a trained AI model. This model is useful for development and debugging purposes, where the focus is on system functionality rather than meaningful conversation.
What is Ozeki AI Server?
Ozeki AI Server is a software platform that integrates artificial intelligence (AI) with communication systems, enabling businesses to develop and deploy AI-driven applications. It facilitates task automation, including text messaging, voice calls, chatbots, and machine learning processes. By connecting AI capabilities with communication networks, it enhances customer support, streamlines workflows, and improves user interactions across different industries. Ozeki AI Server provides a powerful solution for organizations looking to optimize communication through AI technology.
How to use the Random model (Quick Steps)
- Launch Ozeki AI Server and open the AI Models.
- Create New AI Model and select the random model.
- Define random response options.
- Create a new AI Chat Bot.
- Assign the previously created random model to the bot.
- Enable the bot.
- Open the bot’s chat interface.
- Send messages to test random responses.
How to use HTTP API (Quick Steps)
- Open Chat Gateway and add a new HTTP user.
- Set a username and password, then generate an API key.
- Open Postman and set the POST request URL to your API endpoint.
- Use the Bearer Token authentication with your API key.
- Define the request body in JSON format.
- Click Send to submit the request.
- View the AI-generated response in Postman.
- Repeat for further API testing or integration.
Install random model (Video tutorial)
In this video you will learn how to install and configure the Random model in Ozeki AI Server. The tutorial will guide you through the steps of creating a new AI model and how to set up response options.
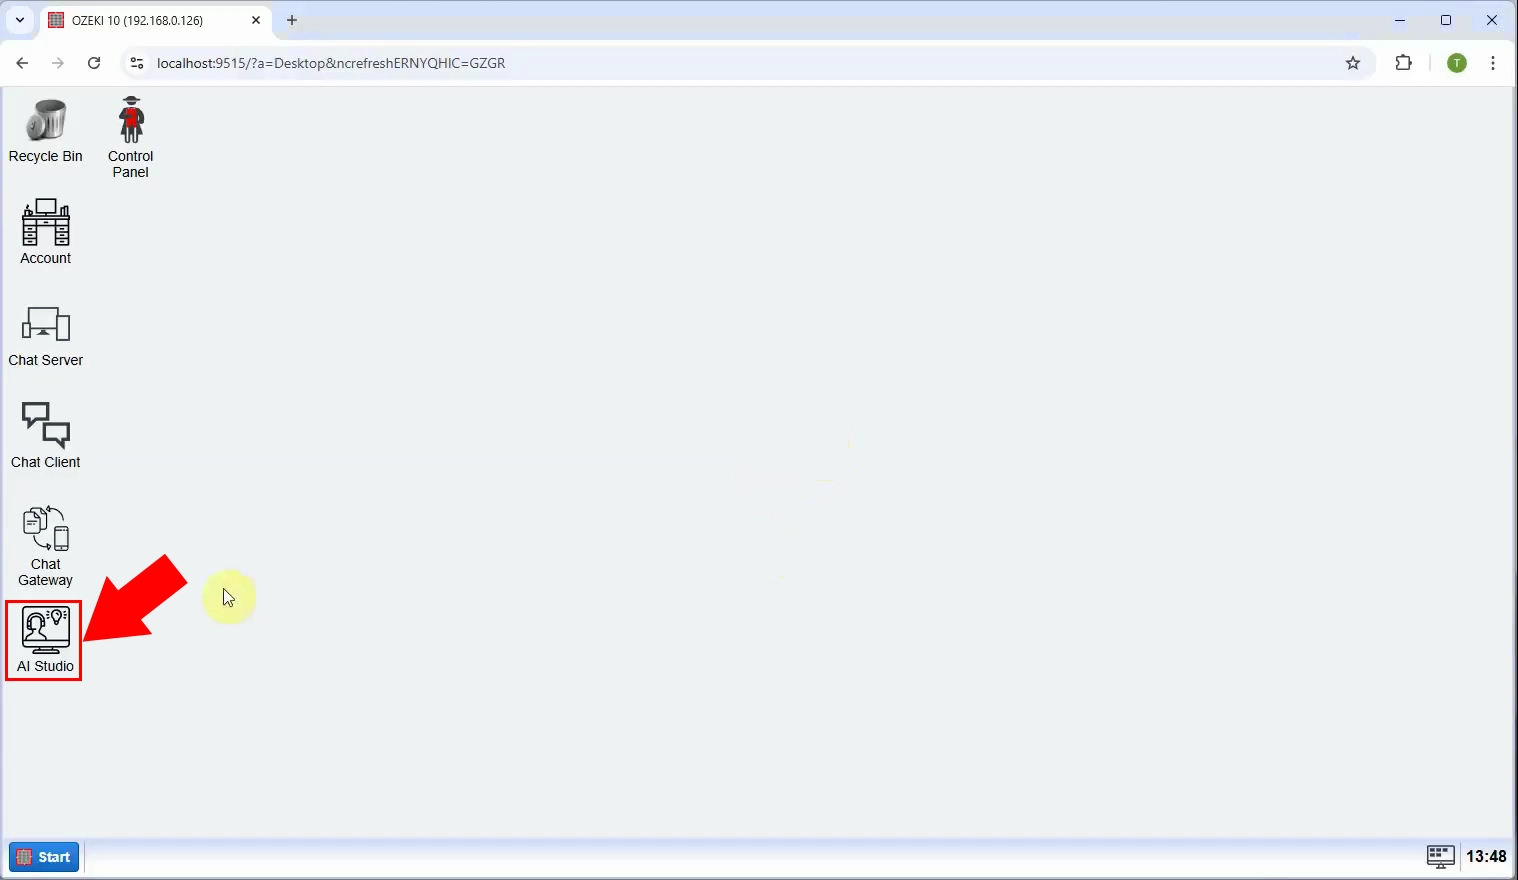
Step 1 - Open Ozeki AI Server
Launch the Ozeki AI Server application on your system to begin setting up the connection (Figure 1).
Step 2 - Create new random AI model
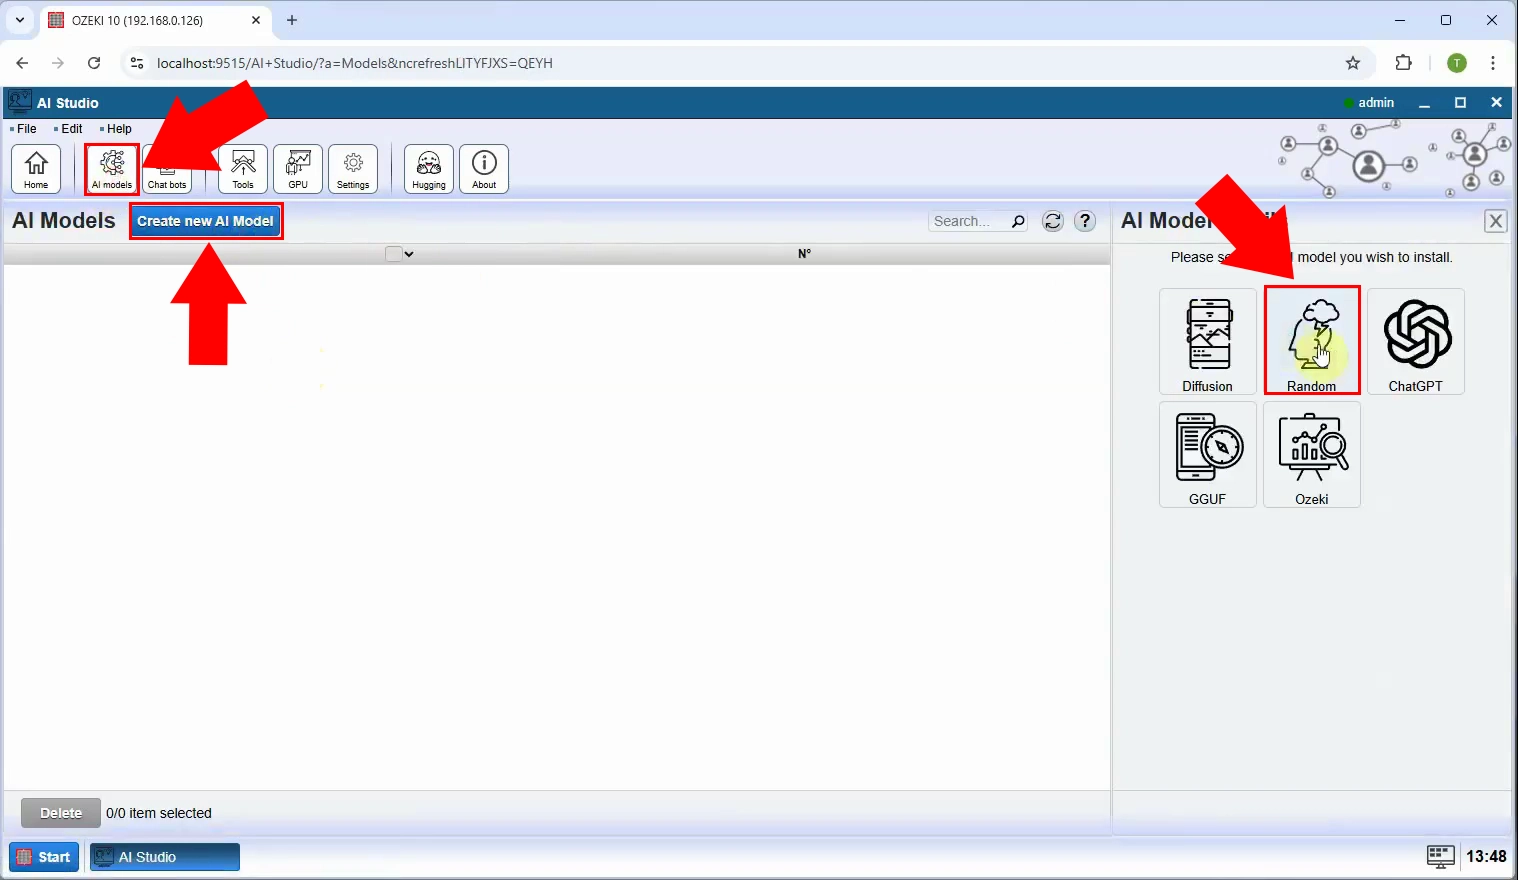
The Ozeki AI Server interface is now visible on the screen. To create a new Random model, start by clicking on "AI Models" at the top of the screen. Next, click the blue button labeled "Create a new AI Model". On the right side of the interface, you will see various options, select the "Random" menu (Figure 2).
Step 3 - Set random outputs
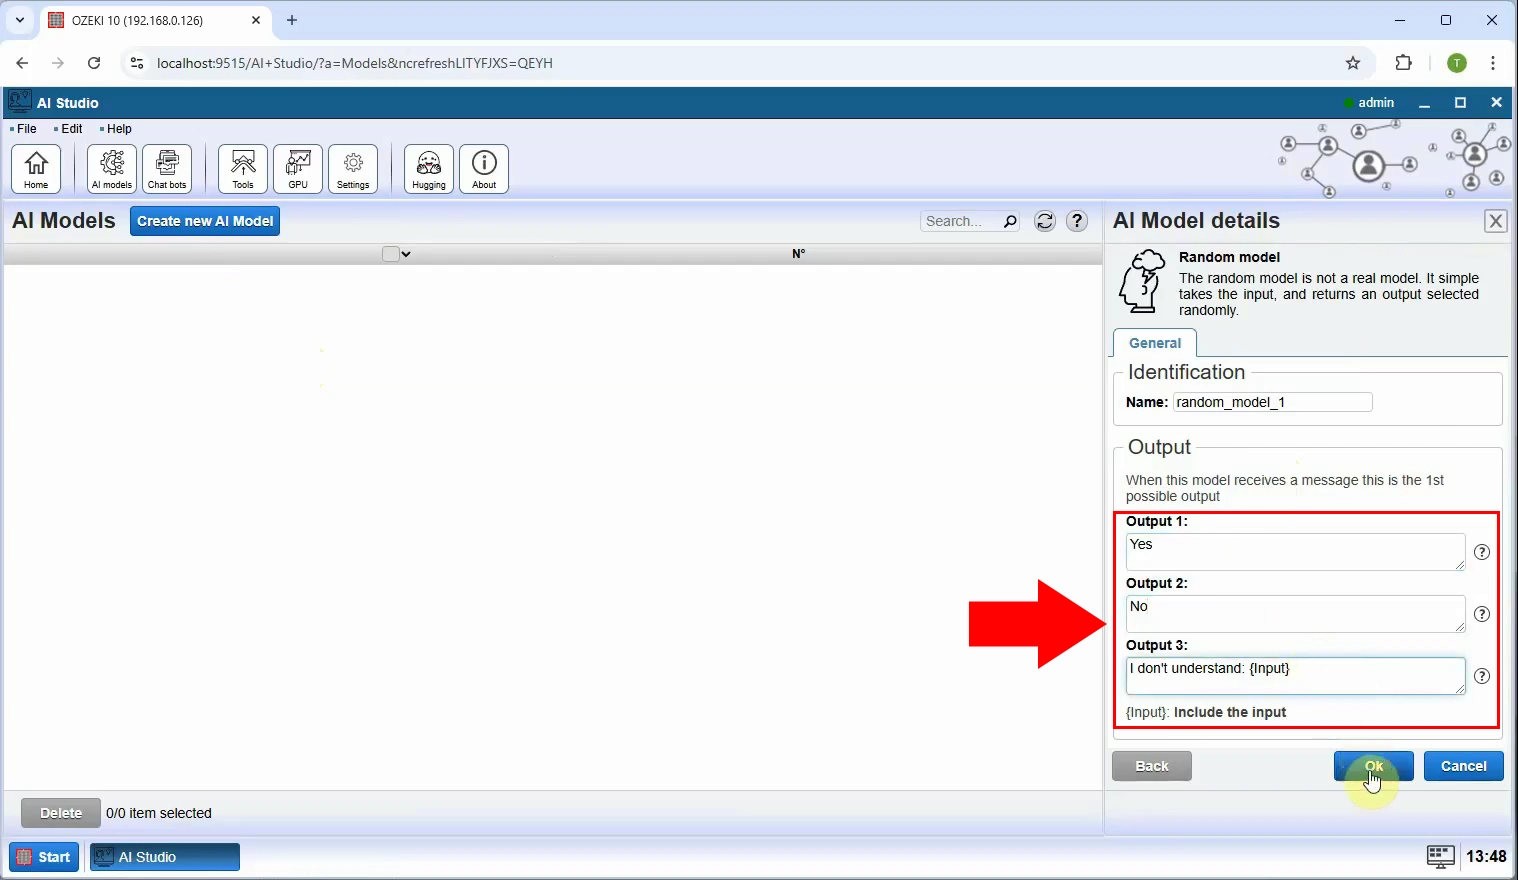
Under the Random model "General" settings on the right, you can set the random outputs. After you have set it up, press "Ok" (Figure 3).
Step 4 - Random model created
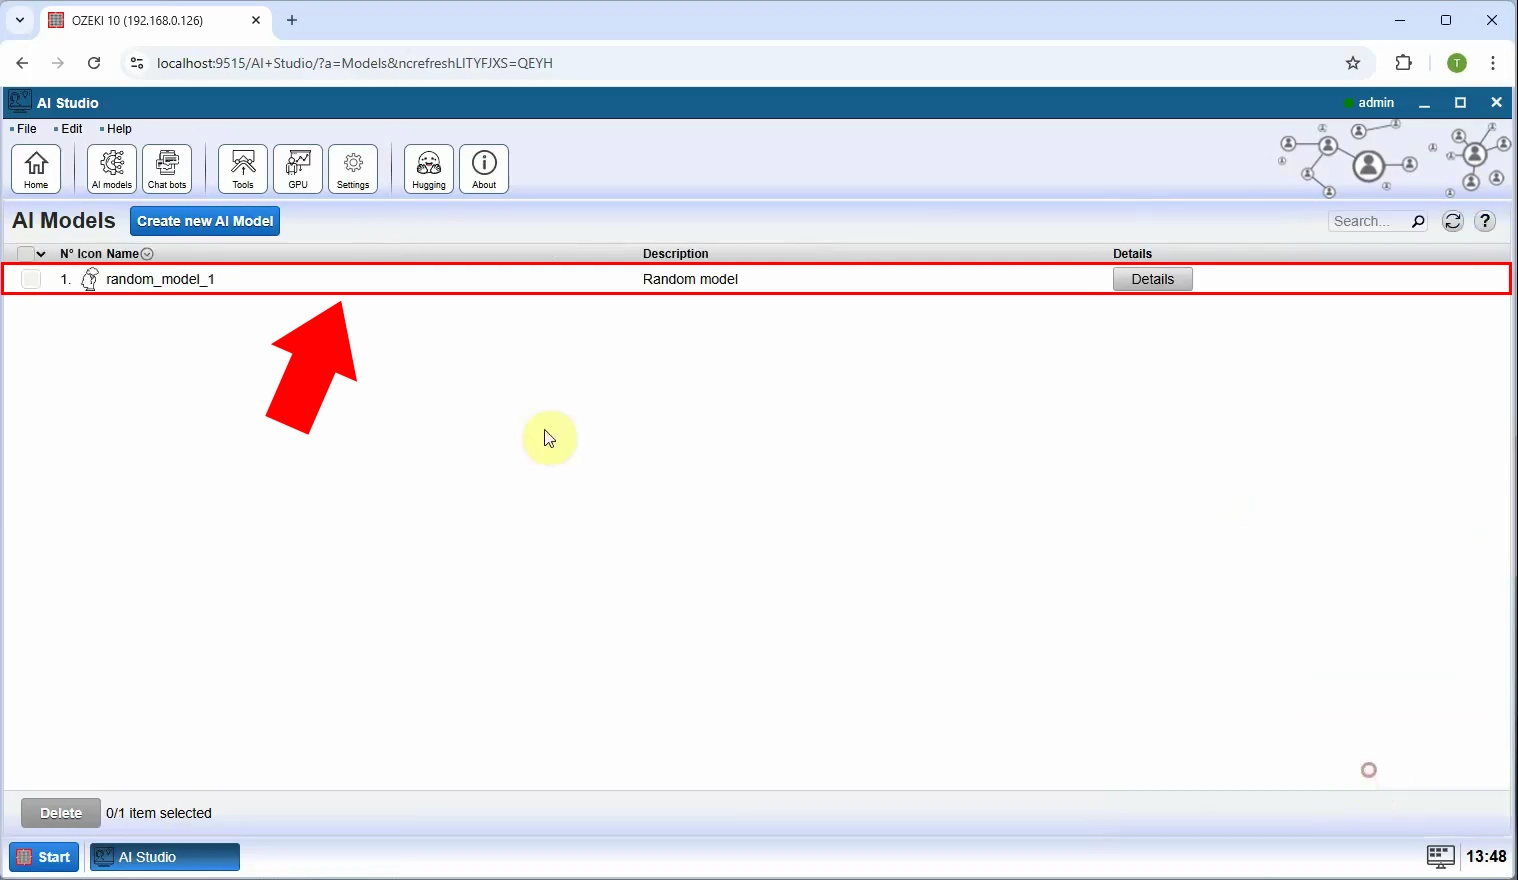
Once you have successfully installed and configured. In AI Models you will see the created "random_model_1" (Figure 4).
Chat with Random model (Video tutorial)
In this video, you will see how to interact with the Random model using Ozeki AI Server's chat interface. The tutorial demonstrates how to connect your chatbot to the Random model, activate the chat session, and send messages to observe how the model generates unpredictable, random responses.
Step 5 - Create new AI chat bot
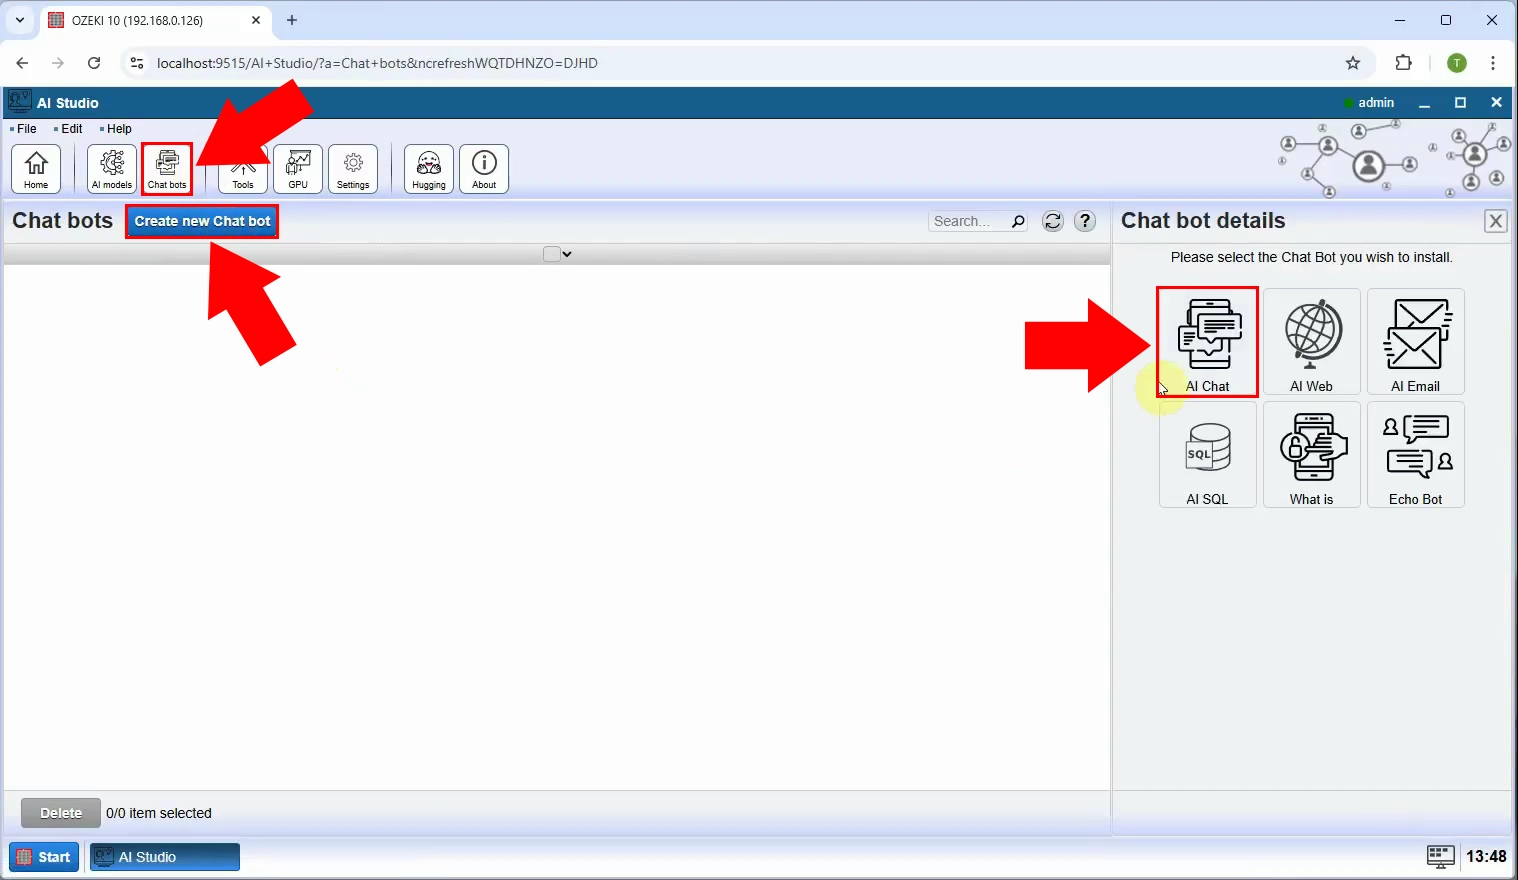
The Ozeki AI Server interface is now visible on the screen. To create a new AI Chat bot, start by clicking on "Chat bots" at the top of the screen. Next, click the blue button labeled "Create new Chat bot". On the right side of the interface, you will see various options, select the "AI Chat" menu (Figure 5).
Step 6 - Select random model
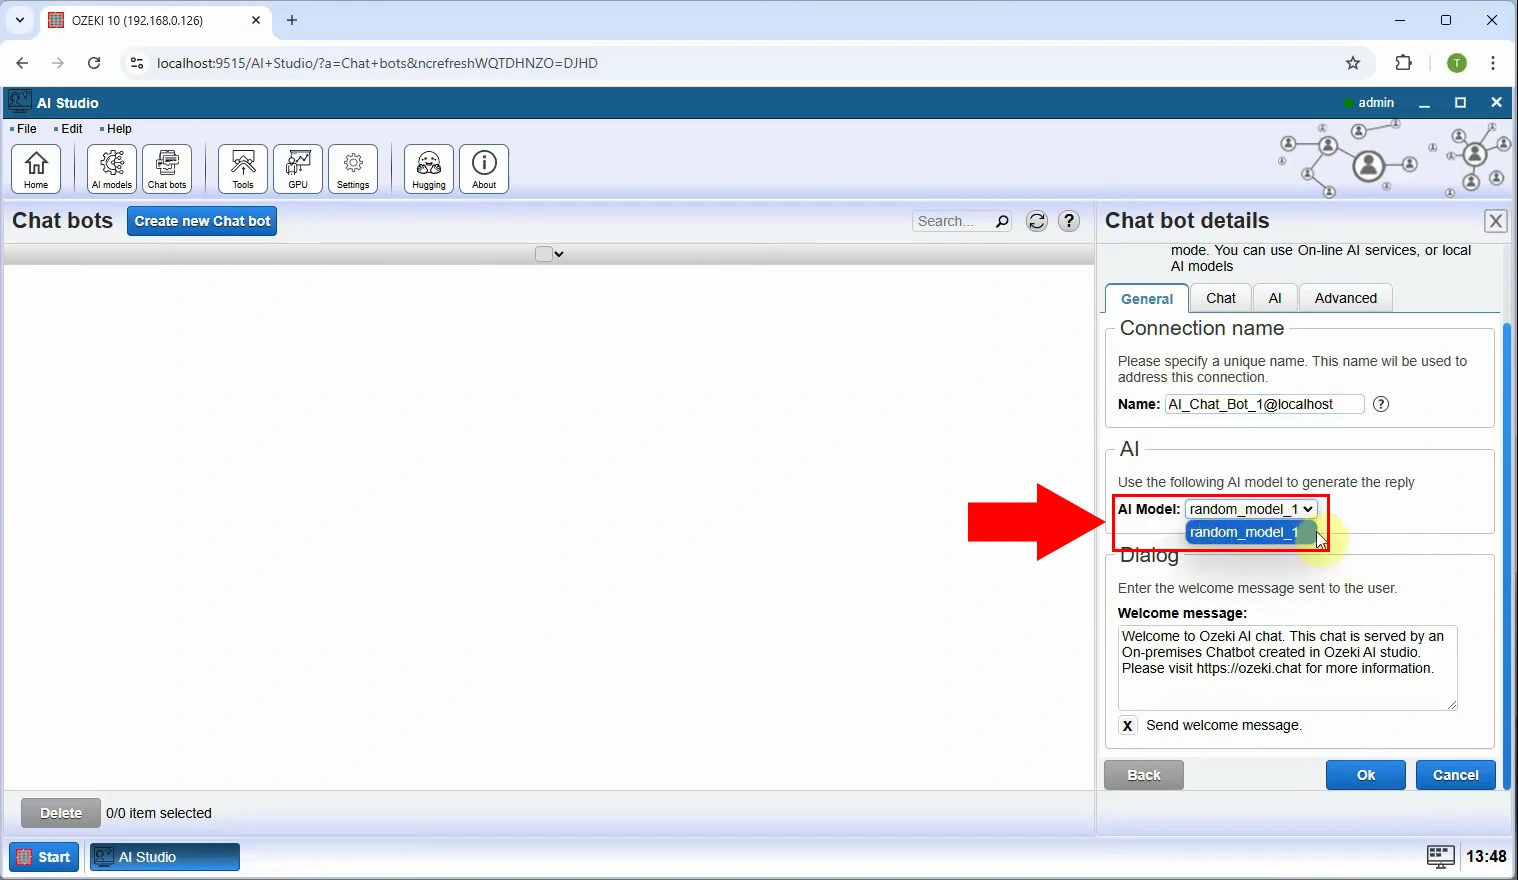
Next step is to connect the chat bot to the AI model, for this select the created "random_model_1" as "AI Model" under the "General" tab (Figure 6).
Step 7 - Open chat bot
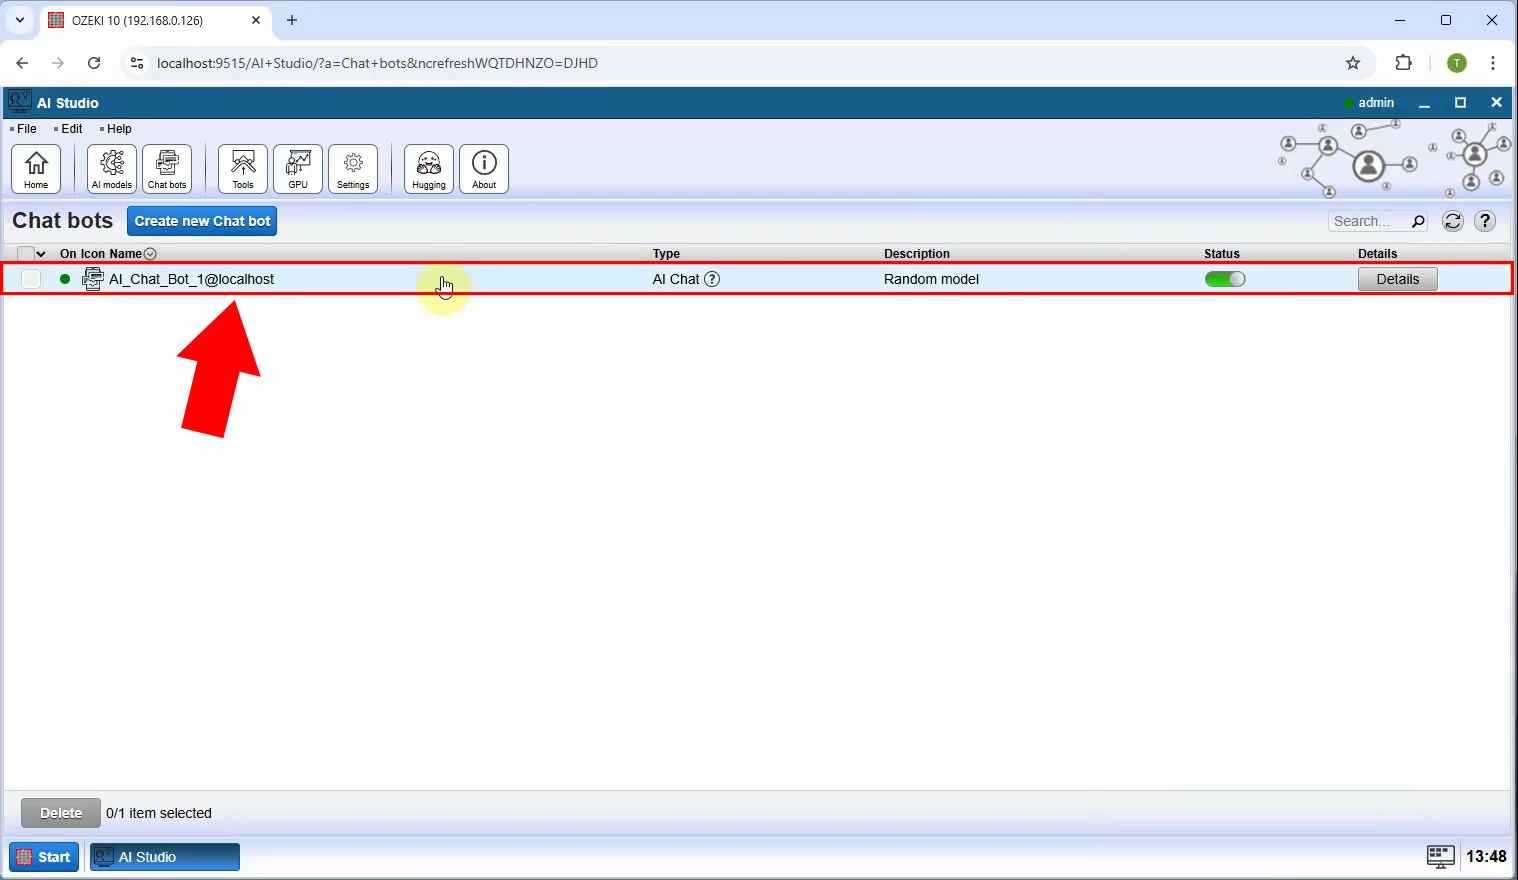
Activate the chat bot you have created by toggling the "Status" switch to green to turn it on, then click on it to open it and start communicating with it (Figure 7).
Step 8 - Conversation with chat bot
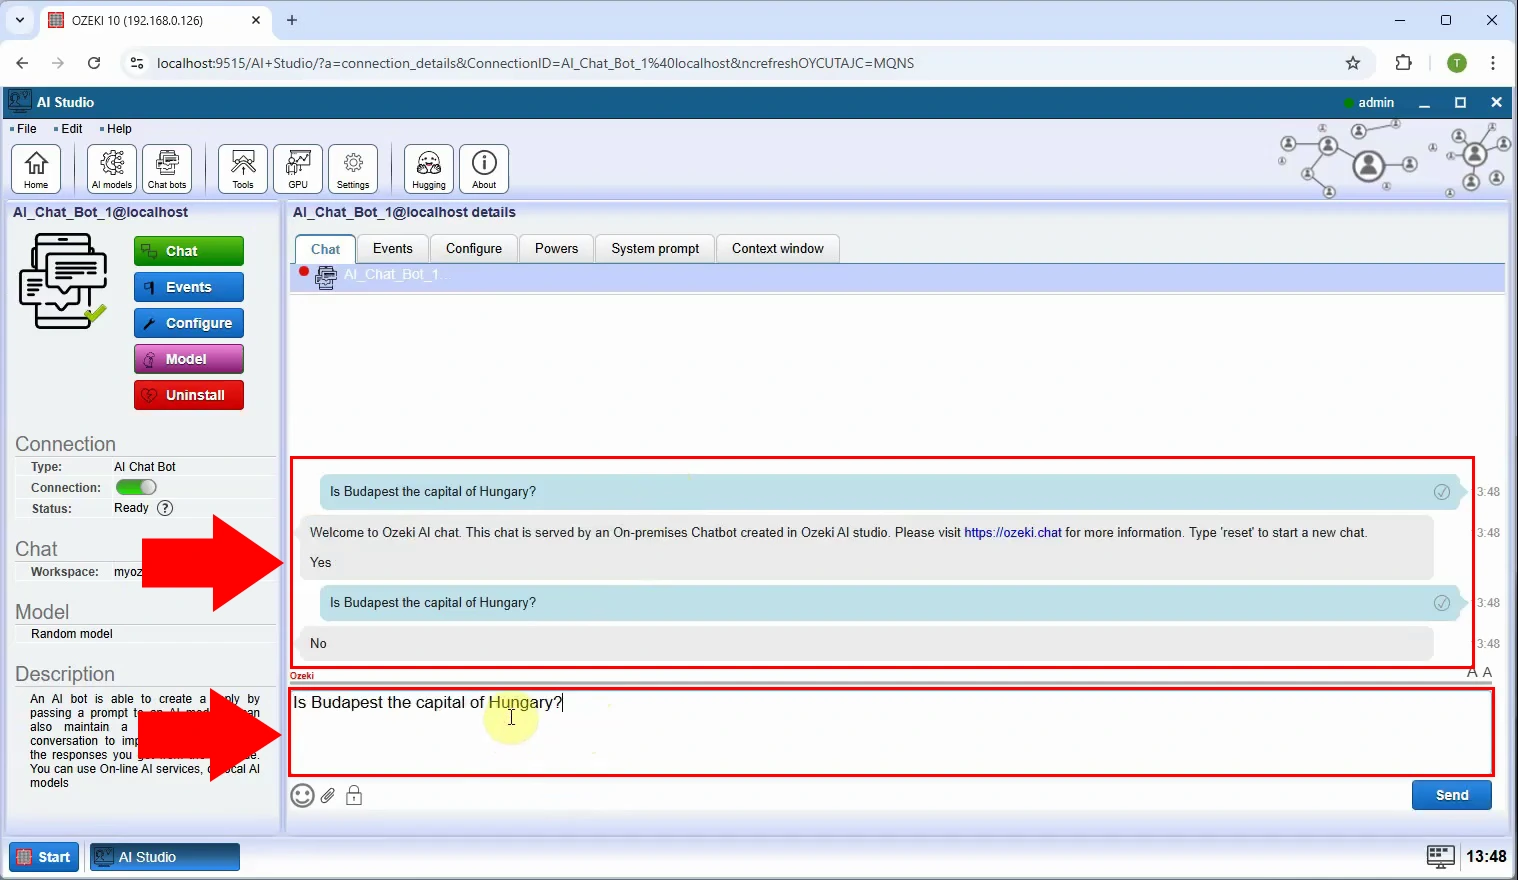
Start a conversation with your chatbot connected to the Random model by sending a message in the chat interface. You will receive spontaneous and unpredictable responses, allowing you to test how the chatbot handles random outputs (Figure 8).
Install HTTP API (Video tutorial)
In this video, you will learn how to install and configure the HTTP API service in Ozeki Chat Gateway. The tutorial will guide you through accessing the installation menu, selecting the HTTP API option, and setting it up so external applications can communicate with your AI models via HTTP requests and how to generate API key.
Step 9 - Open chat gateway
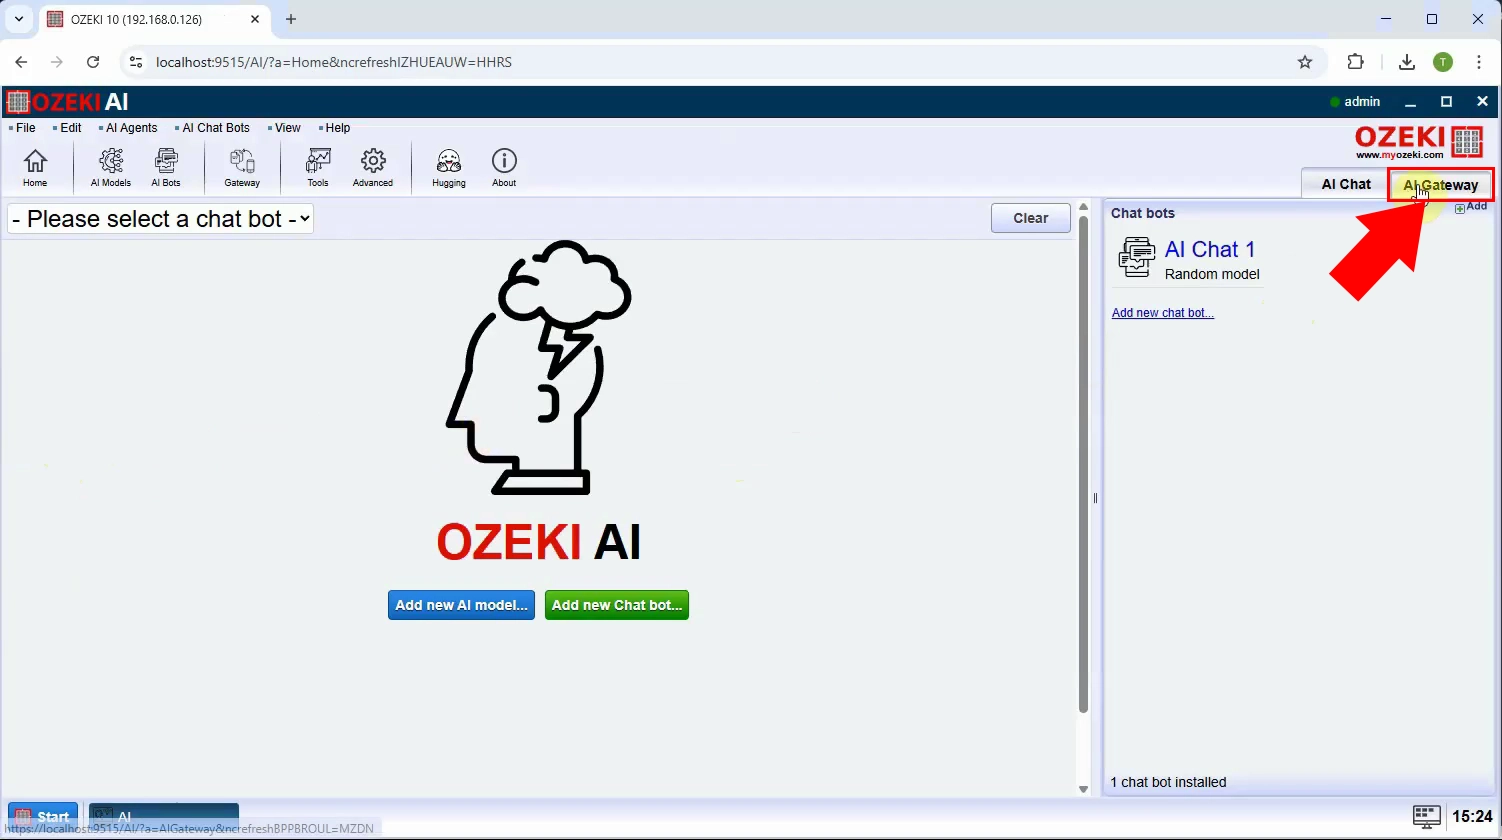
Open the AI Gateway application on your system to begin setting up the connection (Figure 9).
Step 10 - Install HTTP user
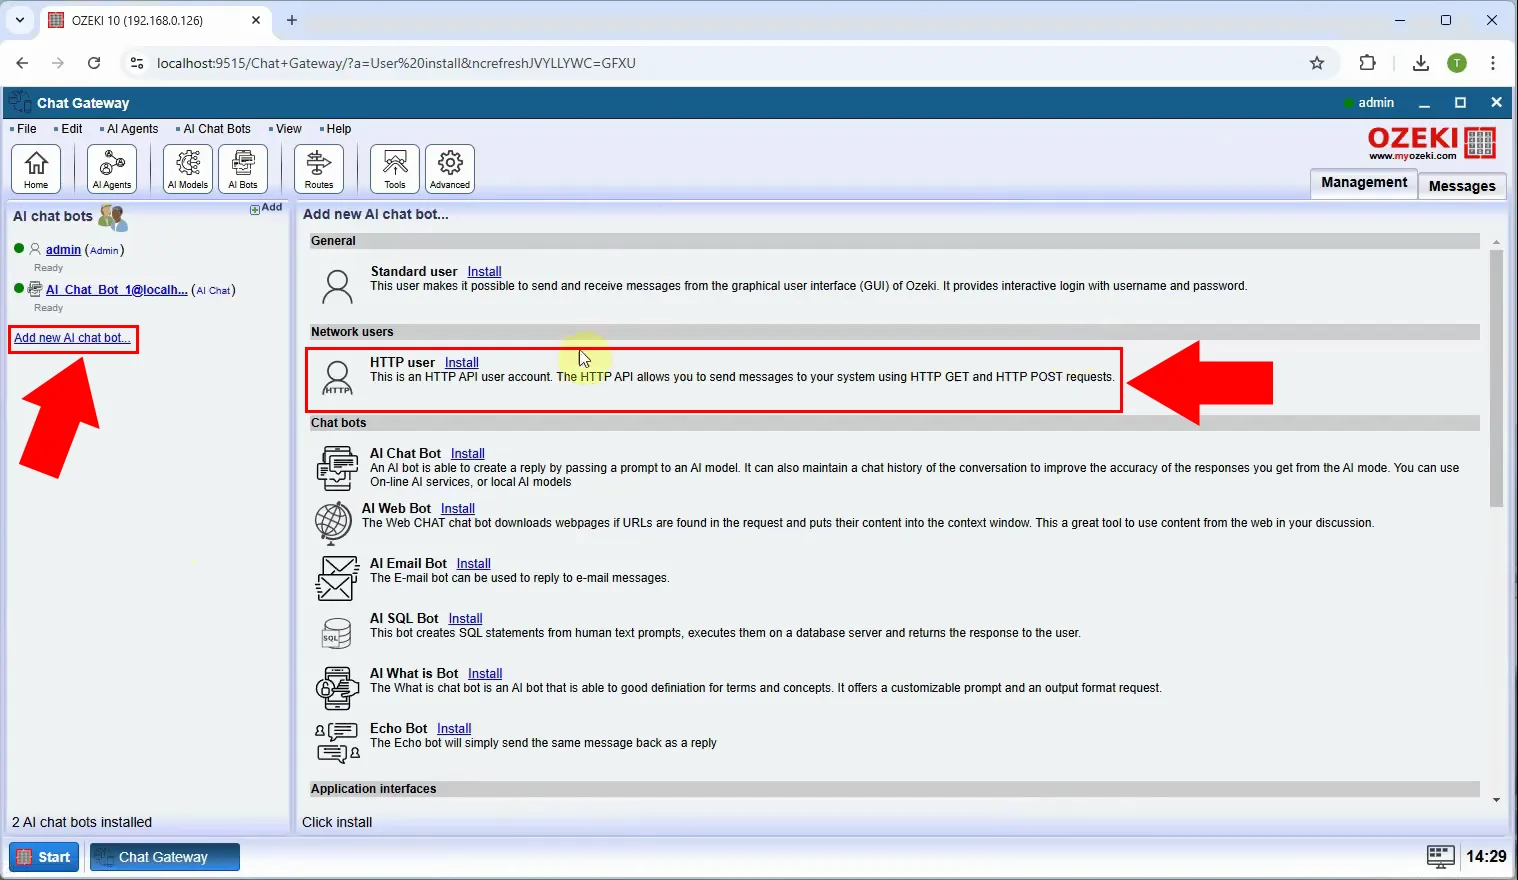
To create a new AI bot, click on "Add new AI chat bot..." option, then in the "Network Users" section, locate and select the option labeled "HTTP user" and "Install" to proceed with setting up a new HTTP user (Figure 10).
Step 11 - Set user name and password
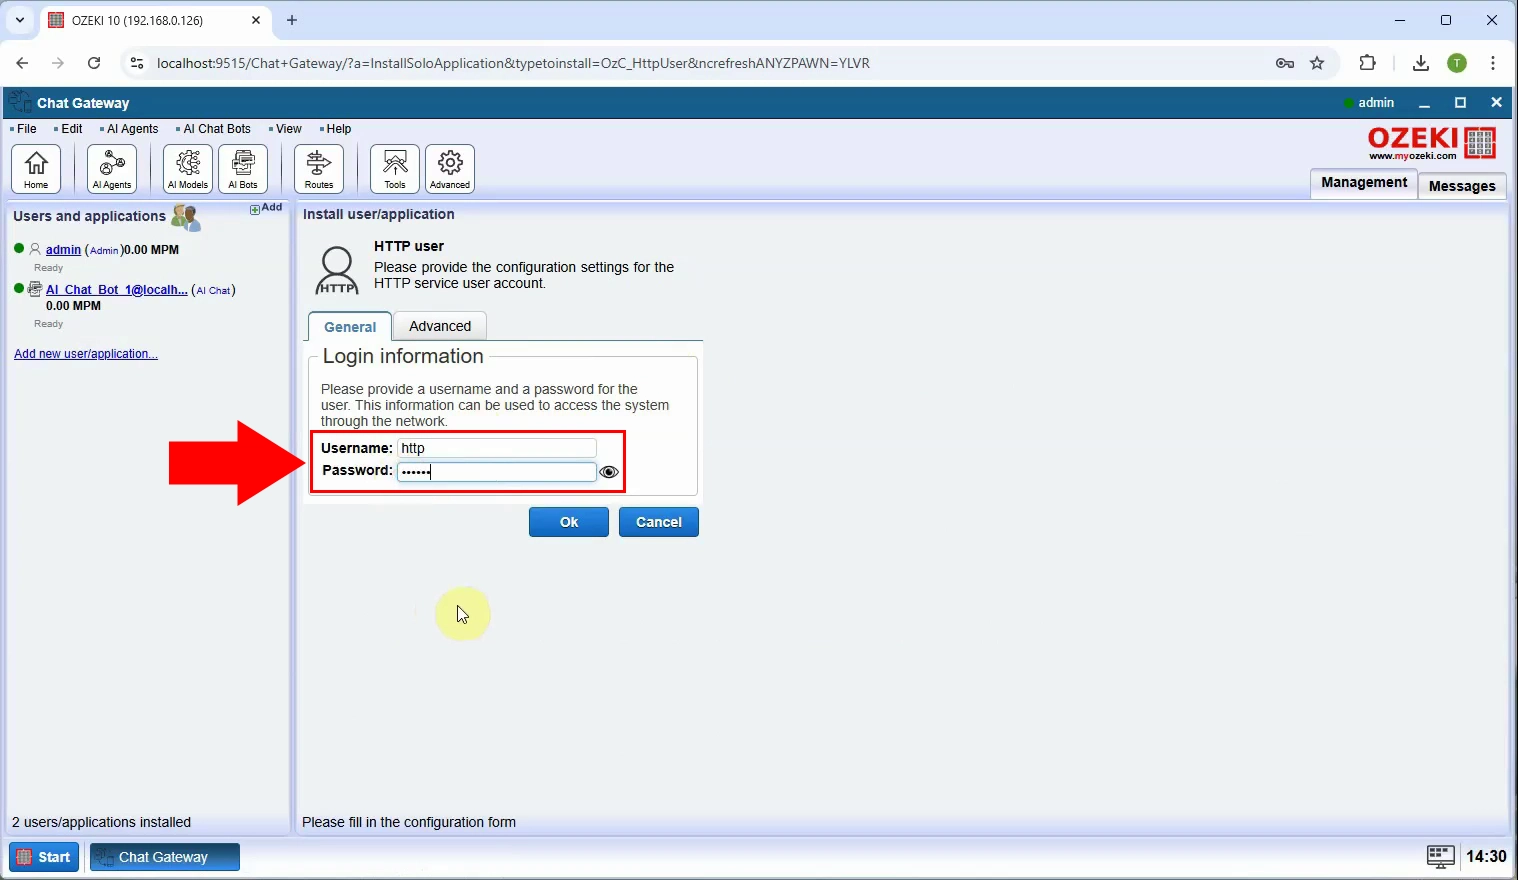
Set a username and password for the new HTTP user, after filling the inputs click on "Ok" (Figure 11).
Step 12 - Generate new API key
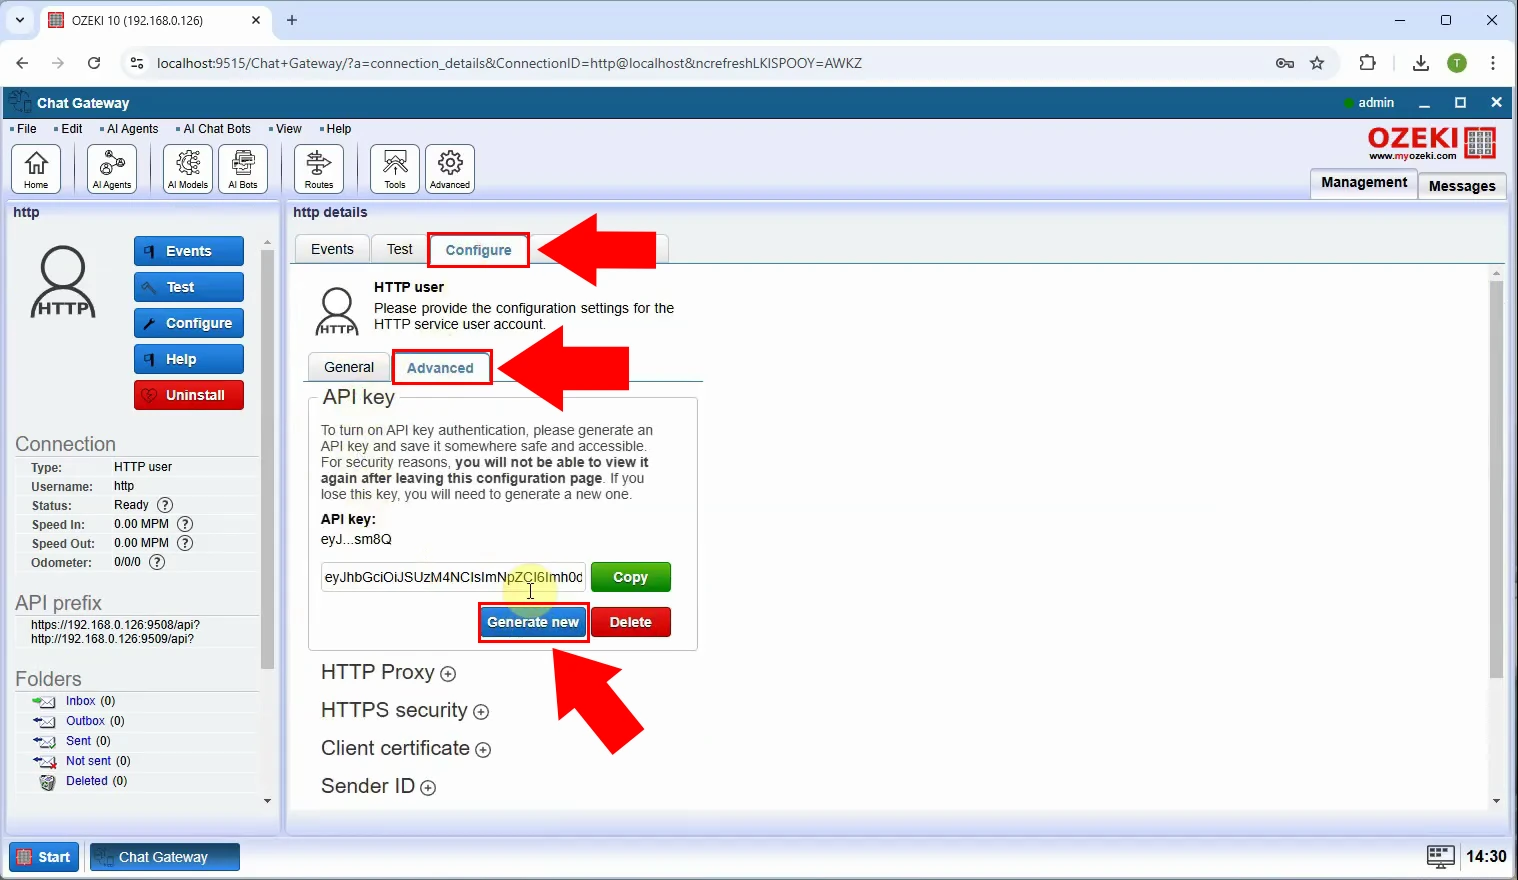
To generate an API key, select the "Configure" tab, then under the "Advanced" tab, click on the "Generate new" button to generate a new API key (Figure 12).
Send HTTP API request from Postman (Video tutorial)
In this video, you will see how to use Postman to send HTTP API requests to the Ozeki AI Server. The tutorial demonstrates how to configure a POST request, set the correct URL and parameters, and send a message to interact with your AI model. You’ll also learn how to view and interpret the AI-generated response, making it easy to test and integrate the API into your applications.
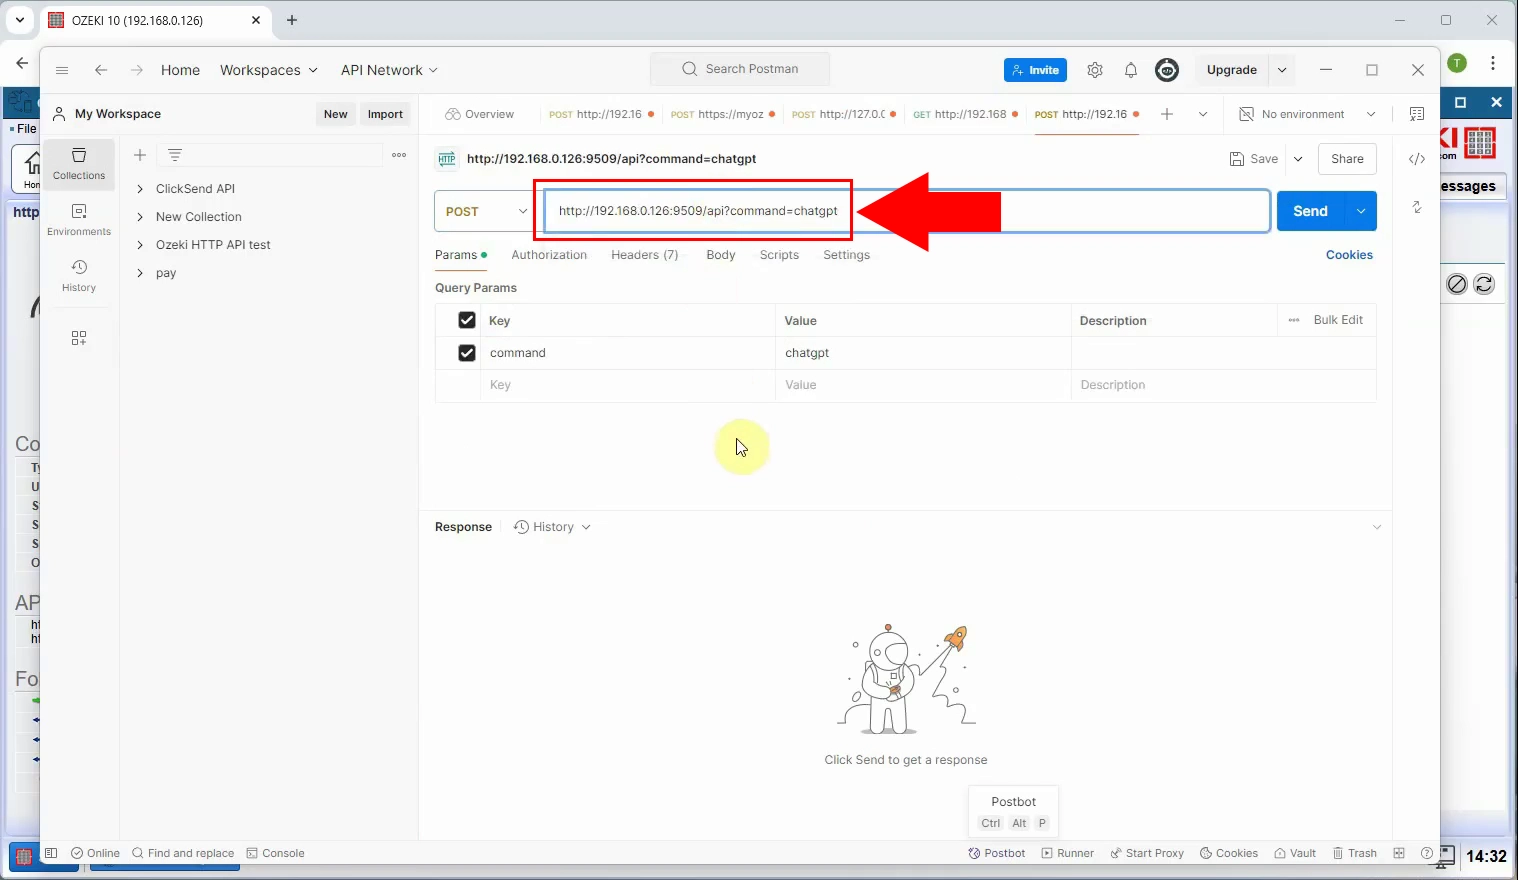
Step 13 - Set post URL
In Postman, enter the endpoint URL where the HTTP API request will be sent (Figure 13).
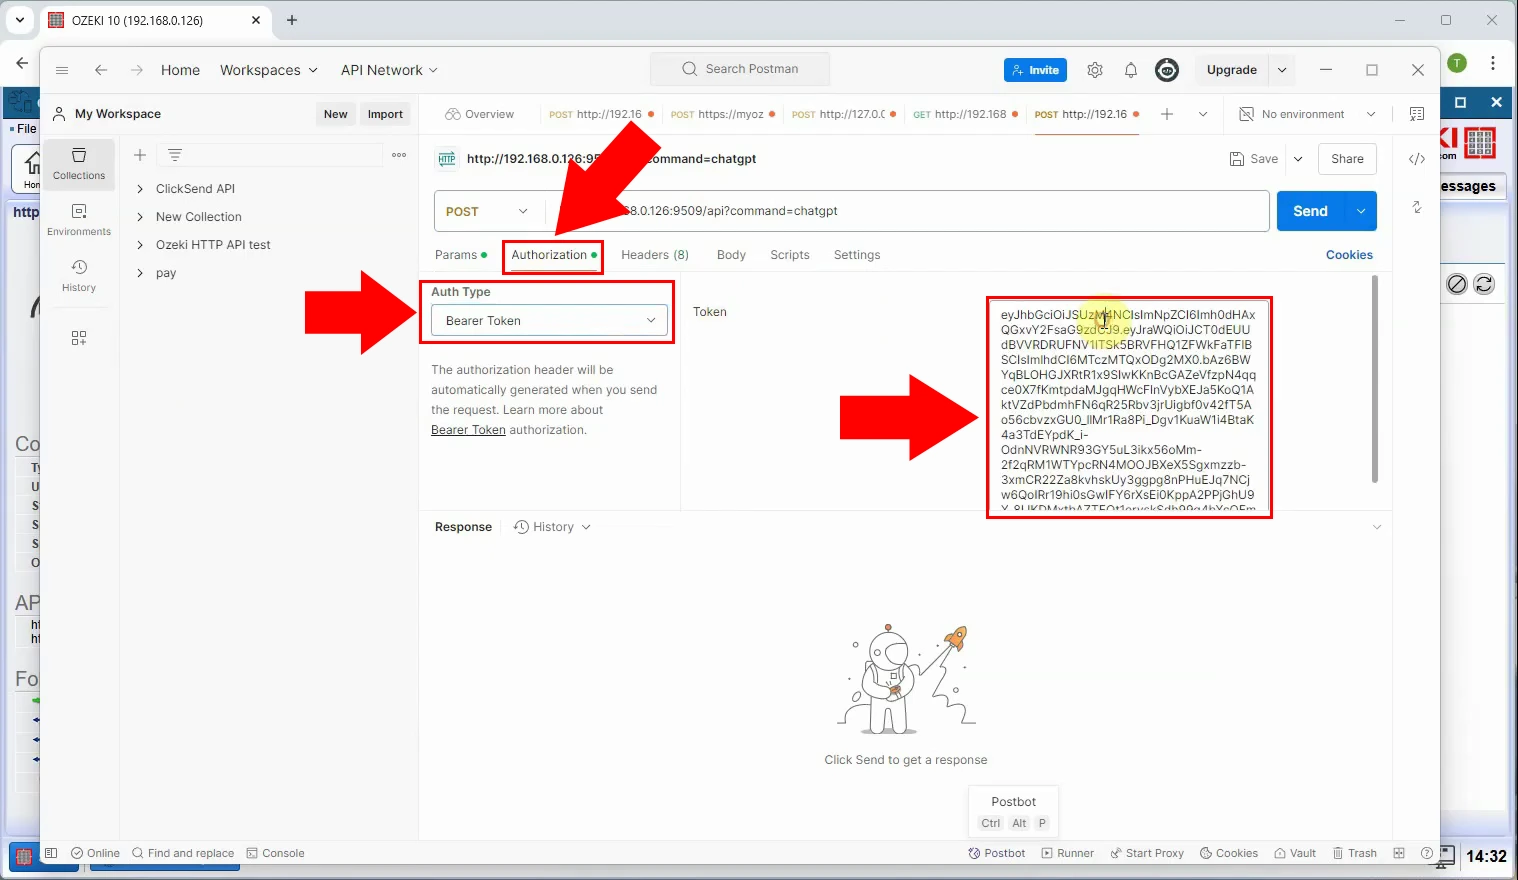
Step 14 - Set API key as authentication bearer token
Navigate to the Authorization tab and select "Bearer Token" as the type. Paste your API key into the token field to authenticate your request securely (Figure 14).
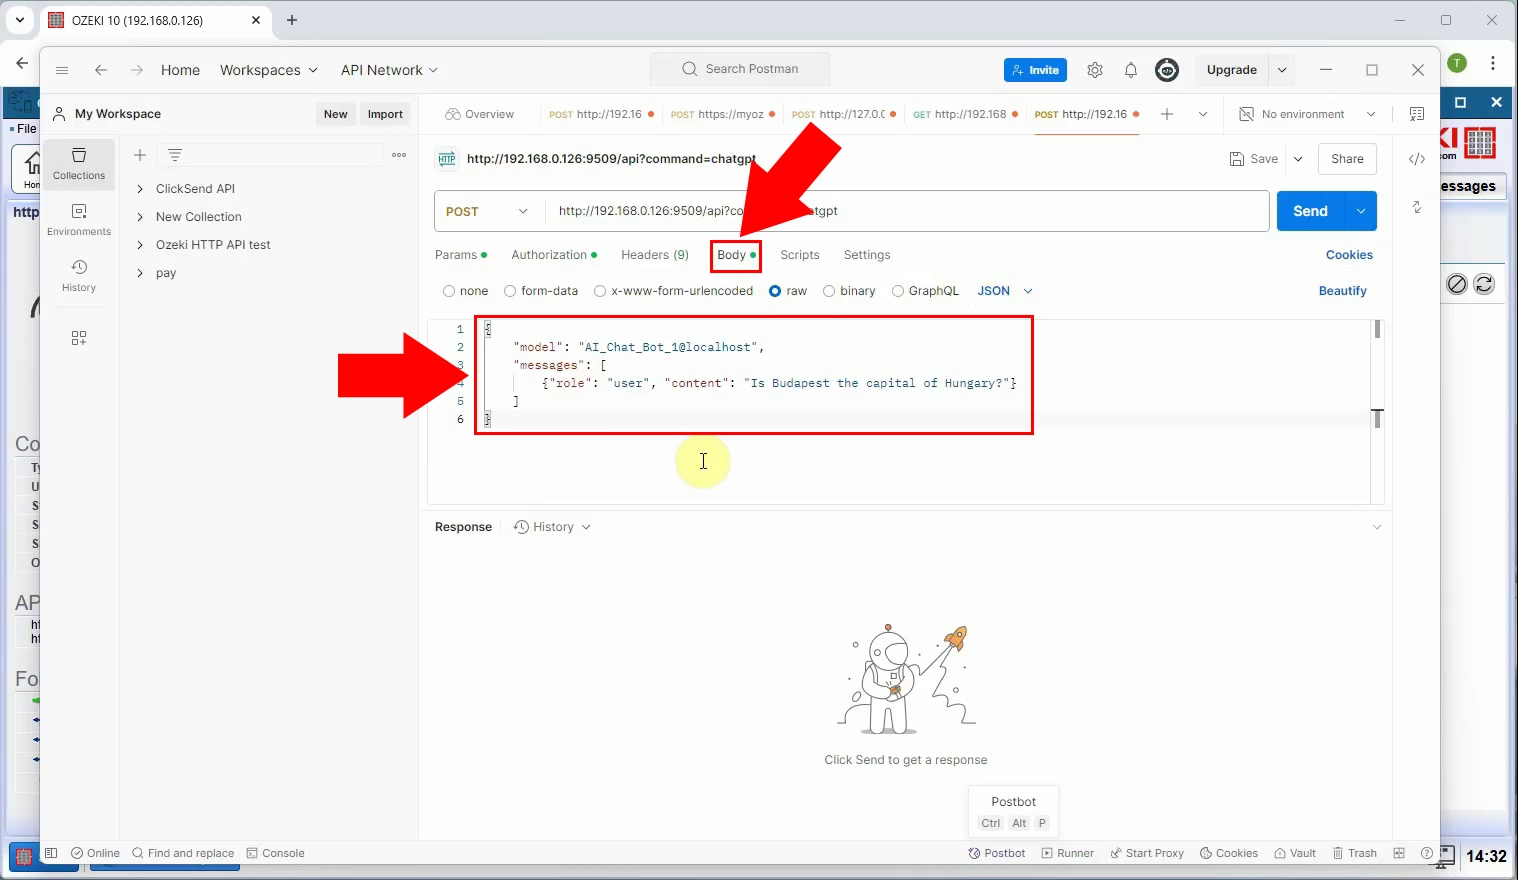
Step 15 - Insert request body
Switch to the Body tab, select "raw" and choose JSON format. Here, you will define the content of your request, such as the prompt or message you want to send to the AI (Figure 15).
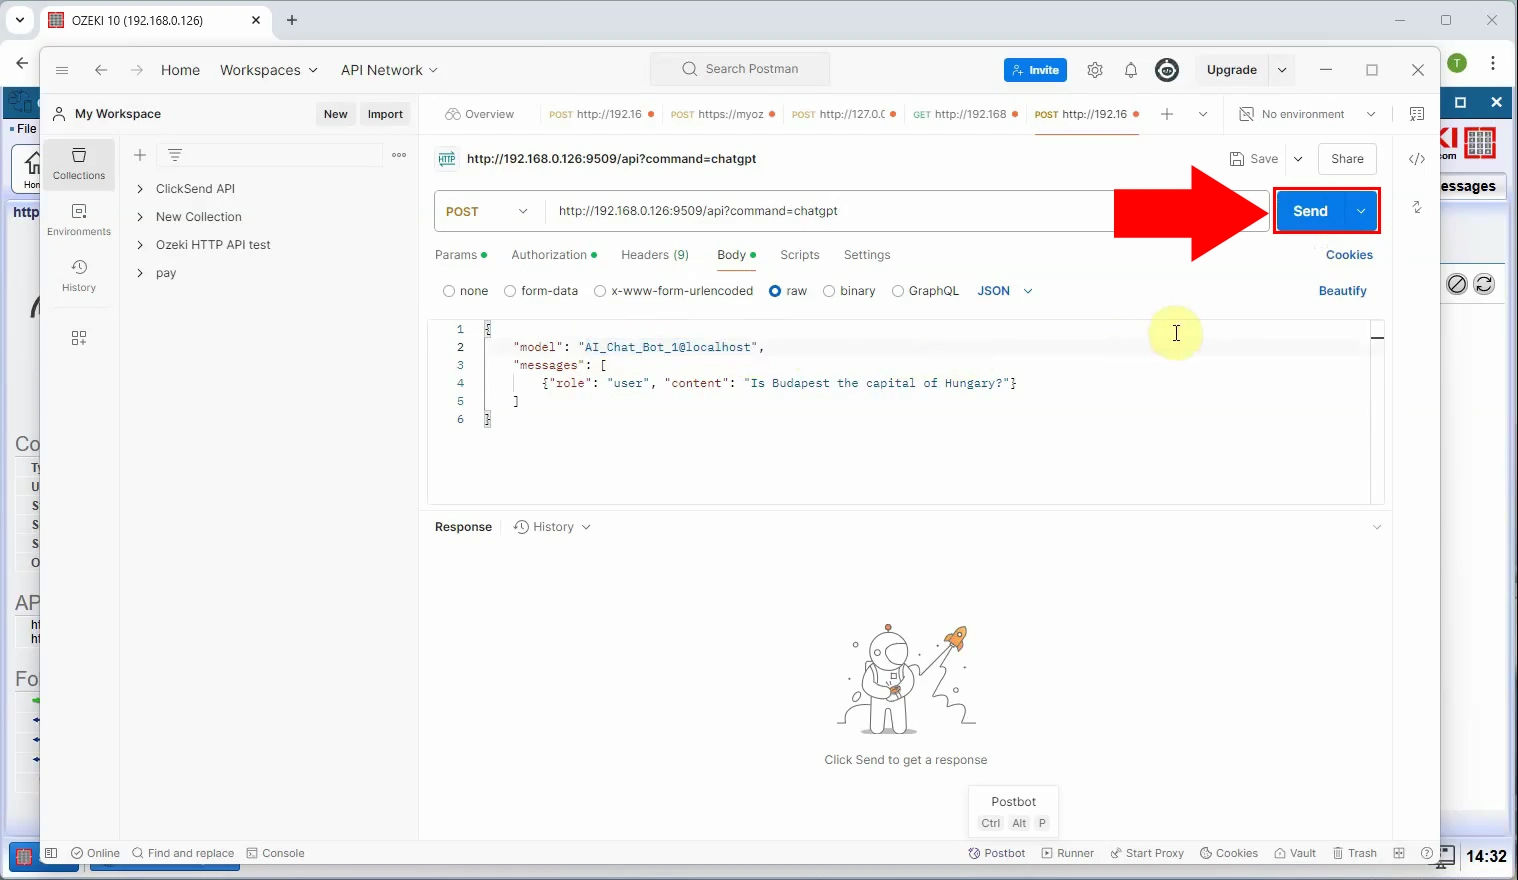
Step 16 - Send request
Click the "Send" button in Postman to execute your configured HTTP POST request and communicate with the Ozeki AI Server (Figure 16).
Step 17 - Response received
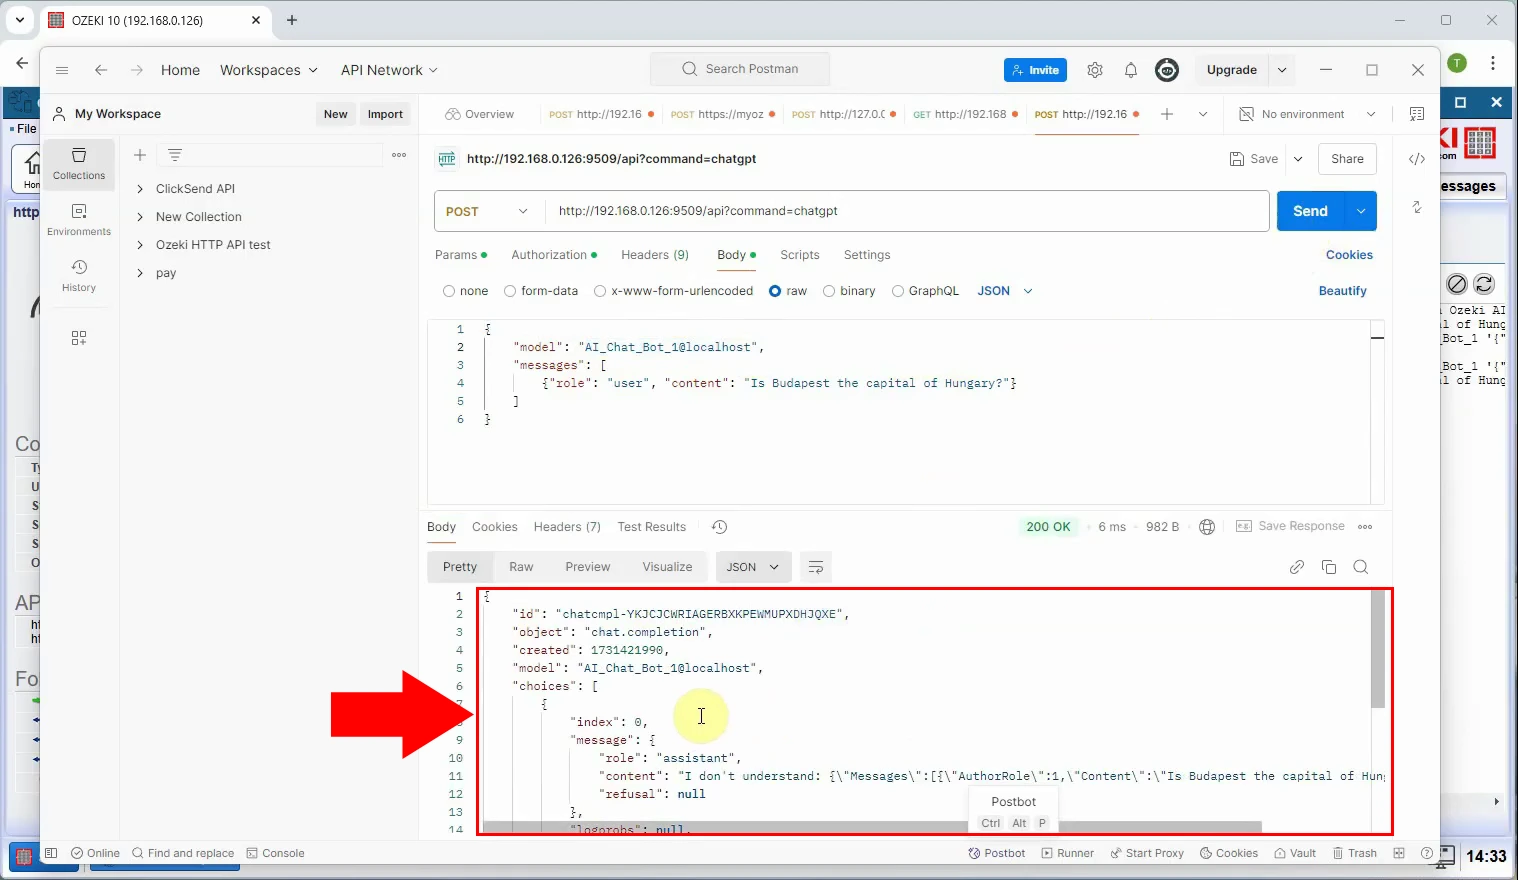
After sending the request, check the lower panel in Postman where the AI server's response will appear. This response contains the AI-generated reply based on your input (Figure 17).
