Compare a reasoning AI model to a standard AI model
In this article, we will compare a reasoning AI model with a standard AI model using the Ozeki AI Server. We will explore the key differences between these models. While standard AI models excel in pattern recognition and predefined tasks, reasoning AI models can analyze information, make logical inferences, and adapt to new situations. By the end of this article, you will gain a clear understanding of how these models function and when to use each type for optimal results.
What is Reasoning AI model?
A Reasoning AI model is an advanced type of artificial intelligence designed to go beyond simple pattern recognition and perform logical reasoning, inference, and decision-making based on available data. Unlike standard AI models, which rely heavily on predefined rules and large datasets for training, reasoning AI models aim to mimic human-like thinking by drawing conclusions, solving problems, and adapting to new situations.
What is Standard AI model?
A Standard AI model is a type of artificial intelligence that processes data based on predefined patterns, rules, and machine learning algorithms. Unlike Reasoning AI models, which can infer new information and adapt dynamically, standard AI models operate primarily by recognizing patterns and executing tasks based on their training data.
Response without reasoning (Quick Steps)
- Open Ozeki AI Server
- Open local model
- Select model file
- Enable chatbot
- Send a request
- Receive response without reasoning
Response with reasoning (Quick Steps)
- Open Ozeki AI Server
- Open local model
- Select model file
- Enable reasoning
- Enable chatbot
- Send a request
- Observe response processing
- Receive response with reasoning
Response without reasoning (Video tutorial)
In this video, we will demonstrate how an AI model operates on the Ozeki AI Server when it provides responses without justification. You will see how the AI processes queries and generates answers based solely on its trained knowledge and predefined algorithms, without explaining the reasoning behind its conclusions.
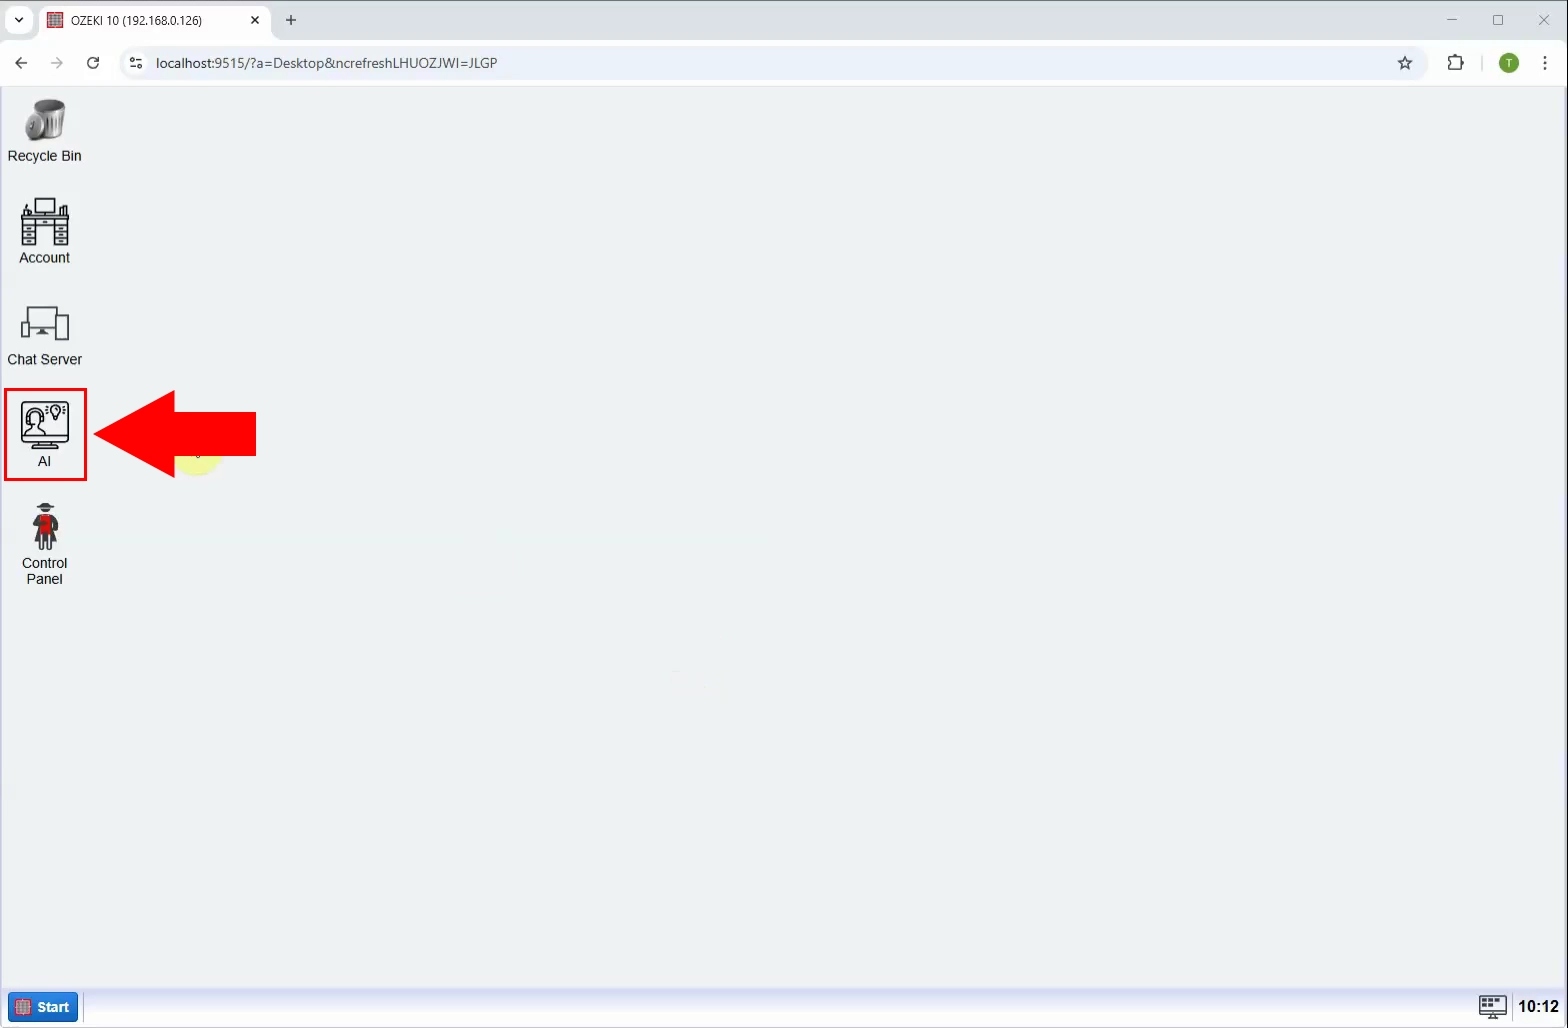
Step 1 - Open Ozeki AI Server
Launch the Ozeki 10 app. If you don't already have it, you can download it here. Once opened, open the Ozeki AI Server (Figure 1).
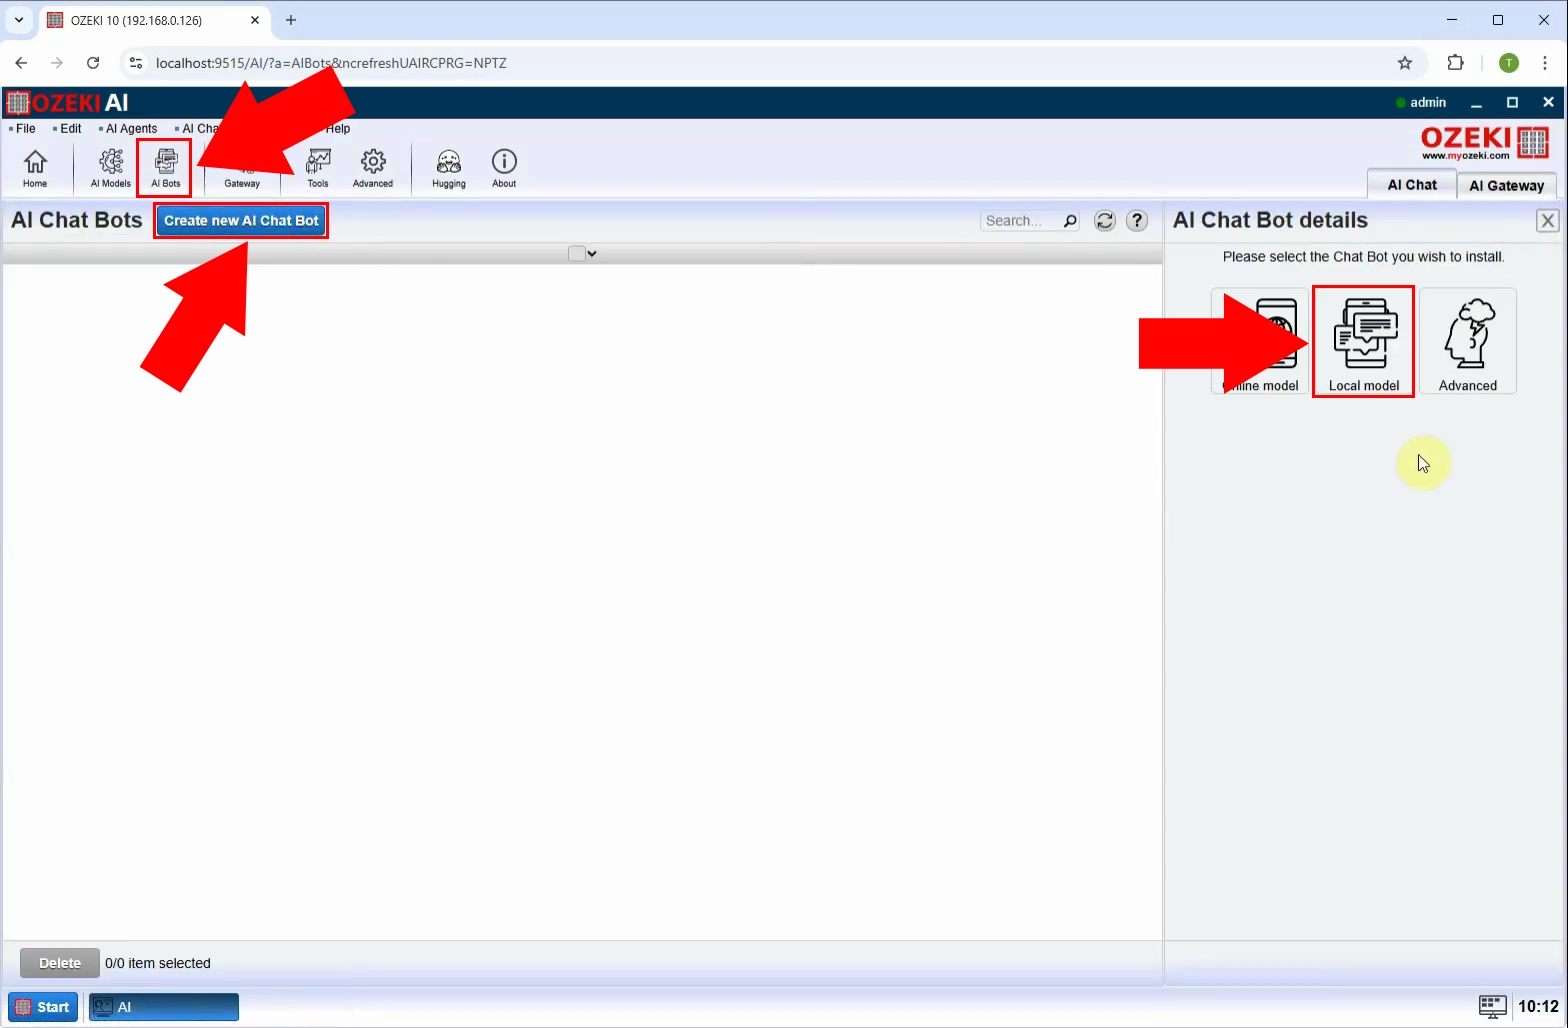
Step 2 - Create new local model
At the top of the screen, select "AI bots". Press the blue "Create new AI Chat Bot" button, then select "Local model" on the right (Figure 2).
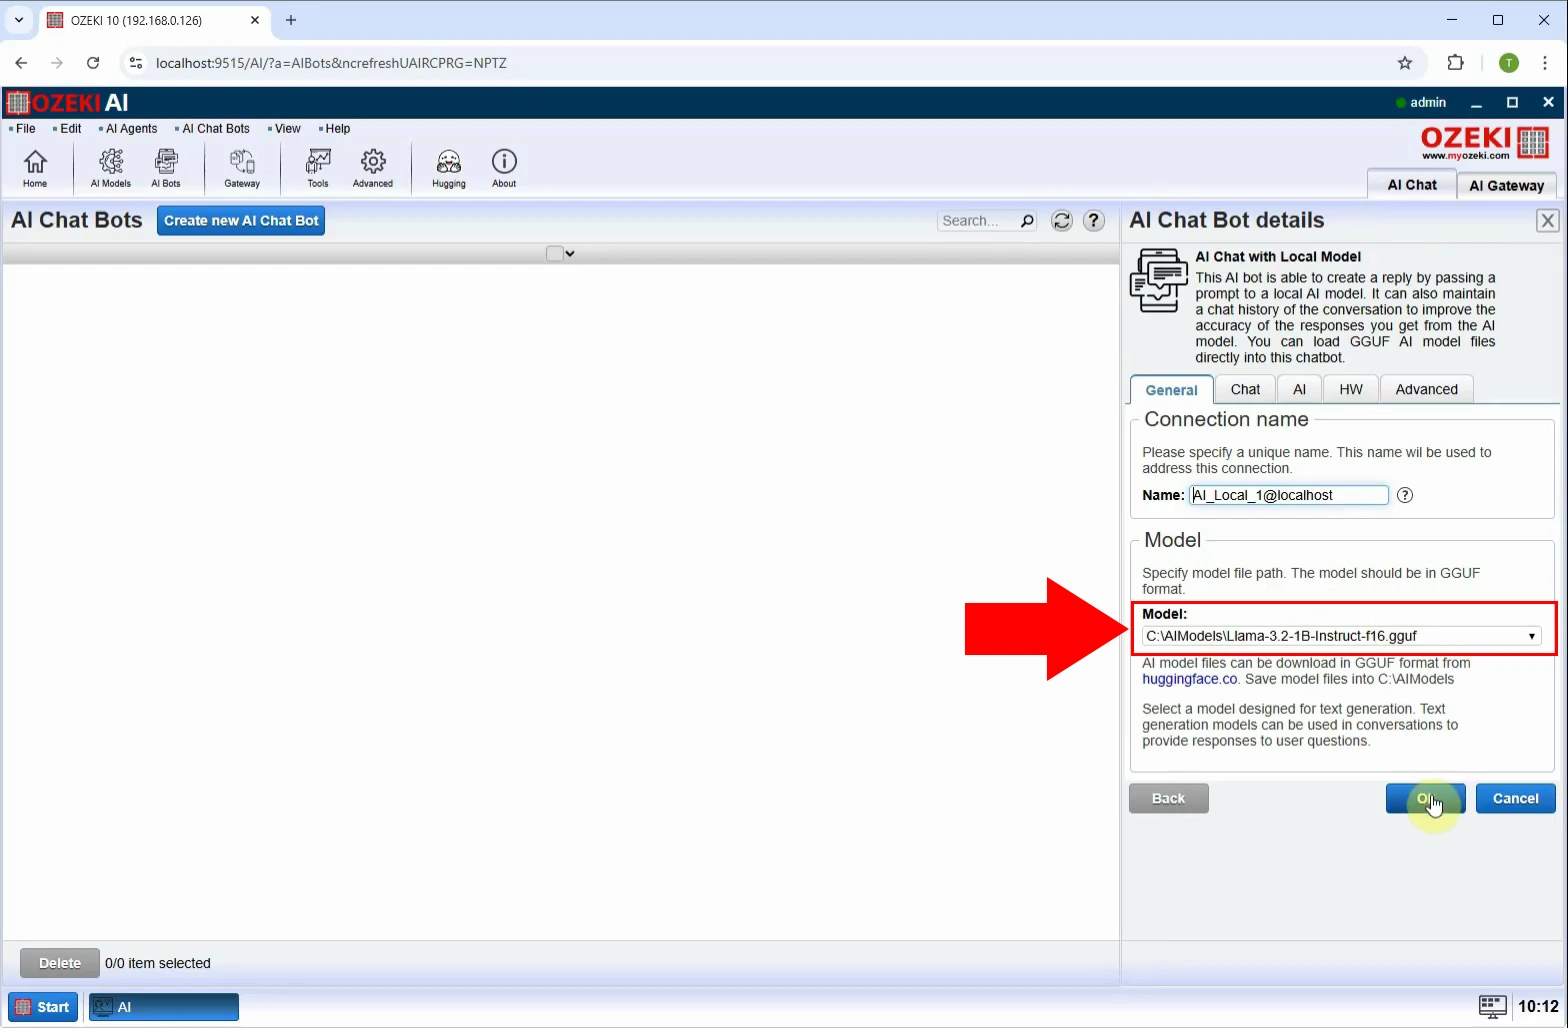
Step 3 - Select model file
Choose a pre-downloaded AI model, in this case "Llama-3.2-1B-Instruct-f16.gguf" (Figure 3).
Step 4 - Enable chatbot
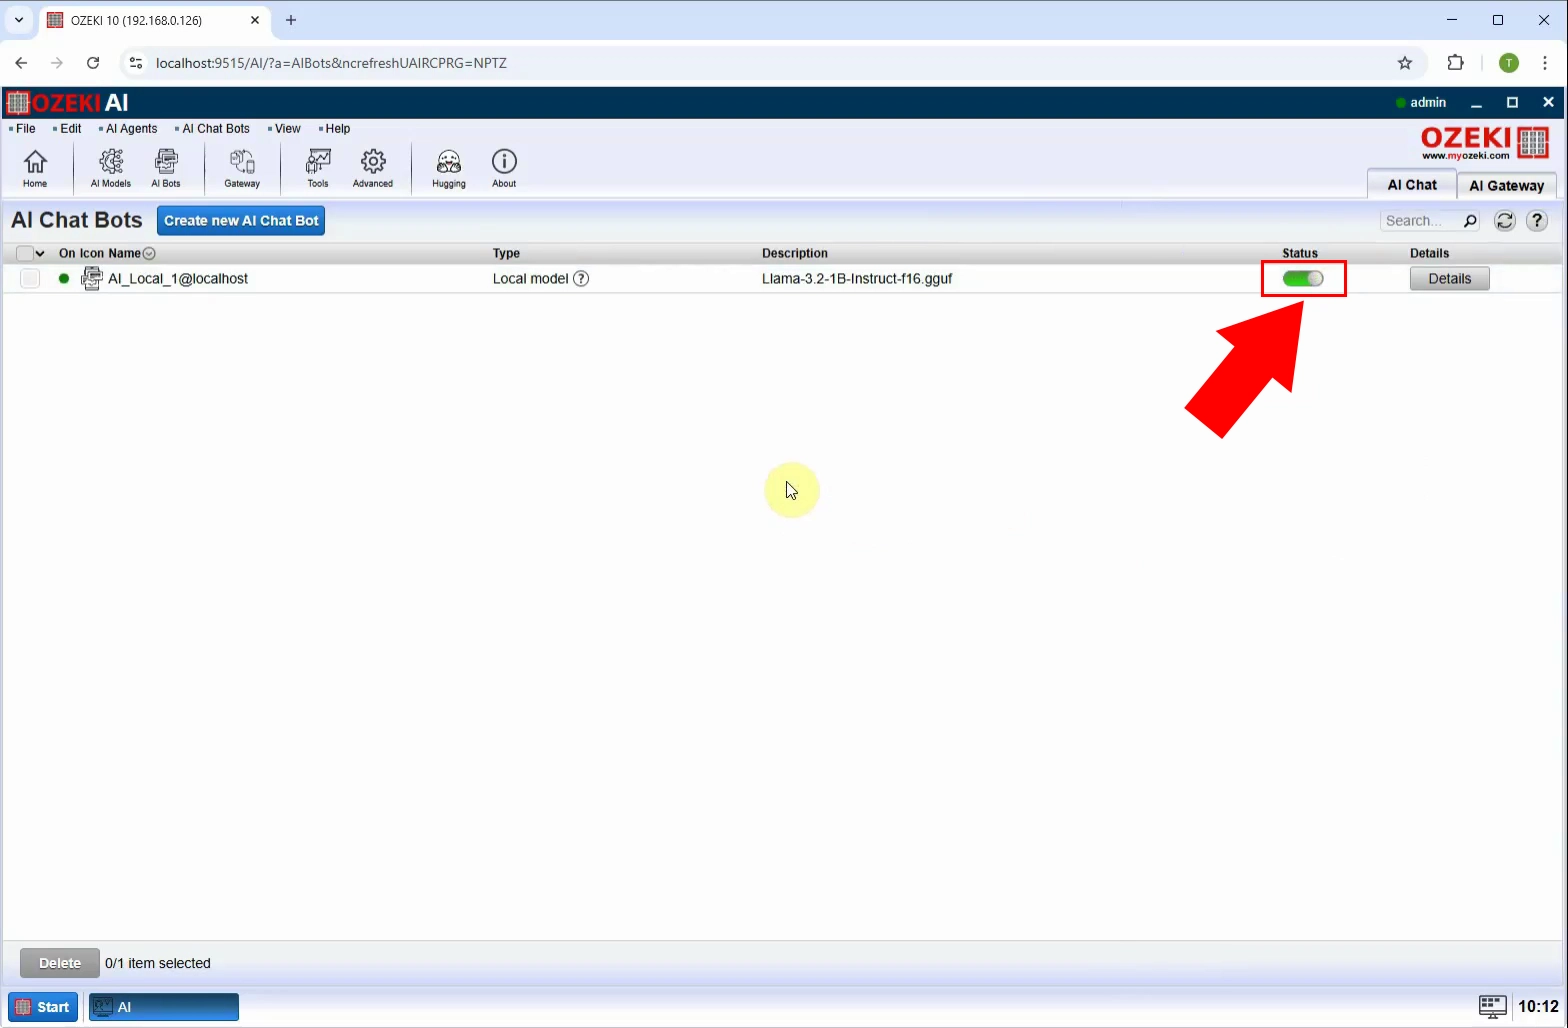
To enable the chatbot, turn on the switch at "Status" and click on AI_Bot_1 (Figure 4).
Step 5 - Send request
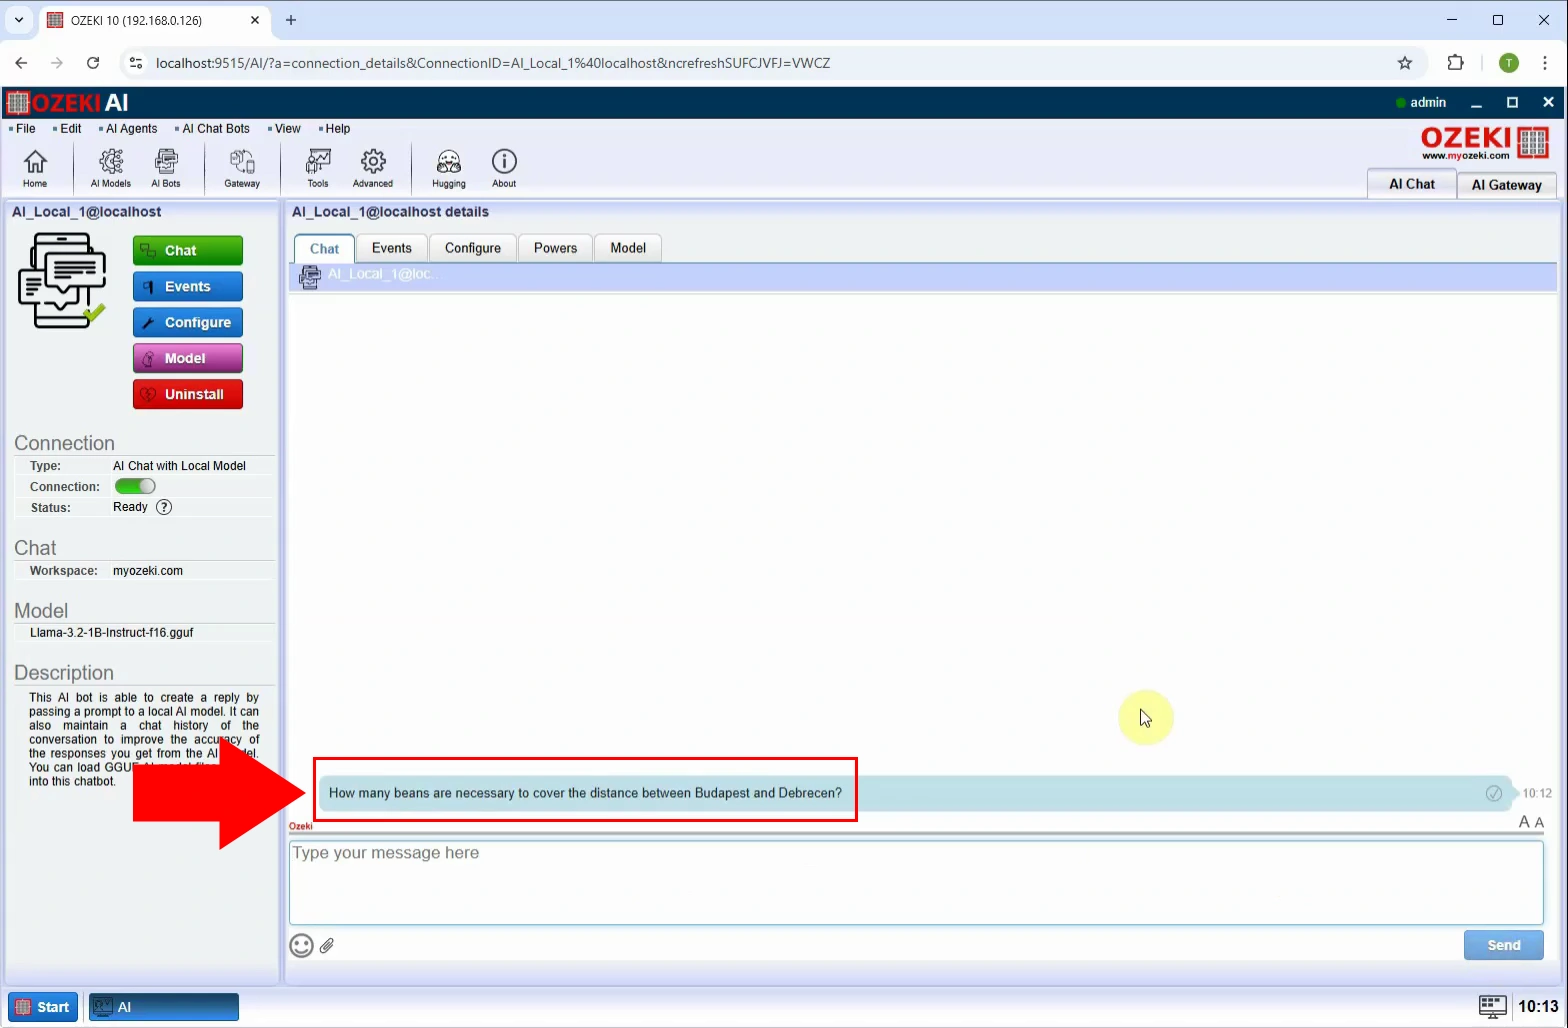
Under the "Chat" tab, ask the chatbot a question (Figure 5).
Step 6 - Response received without reasoning
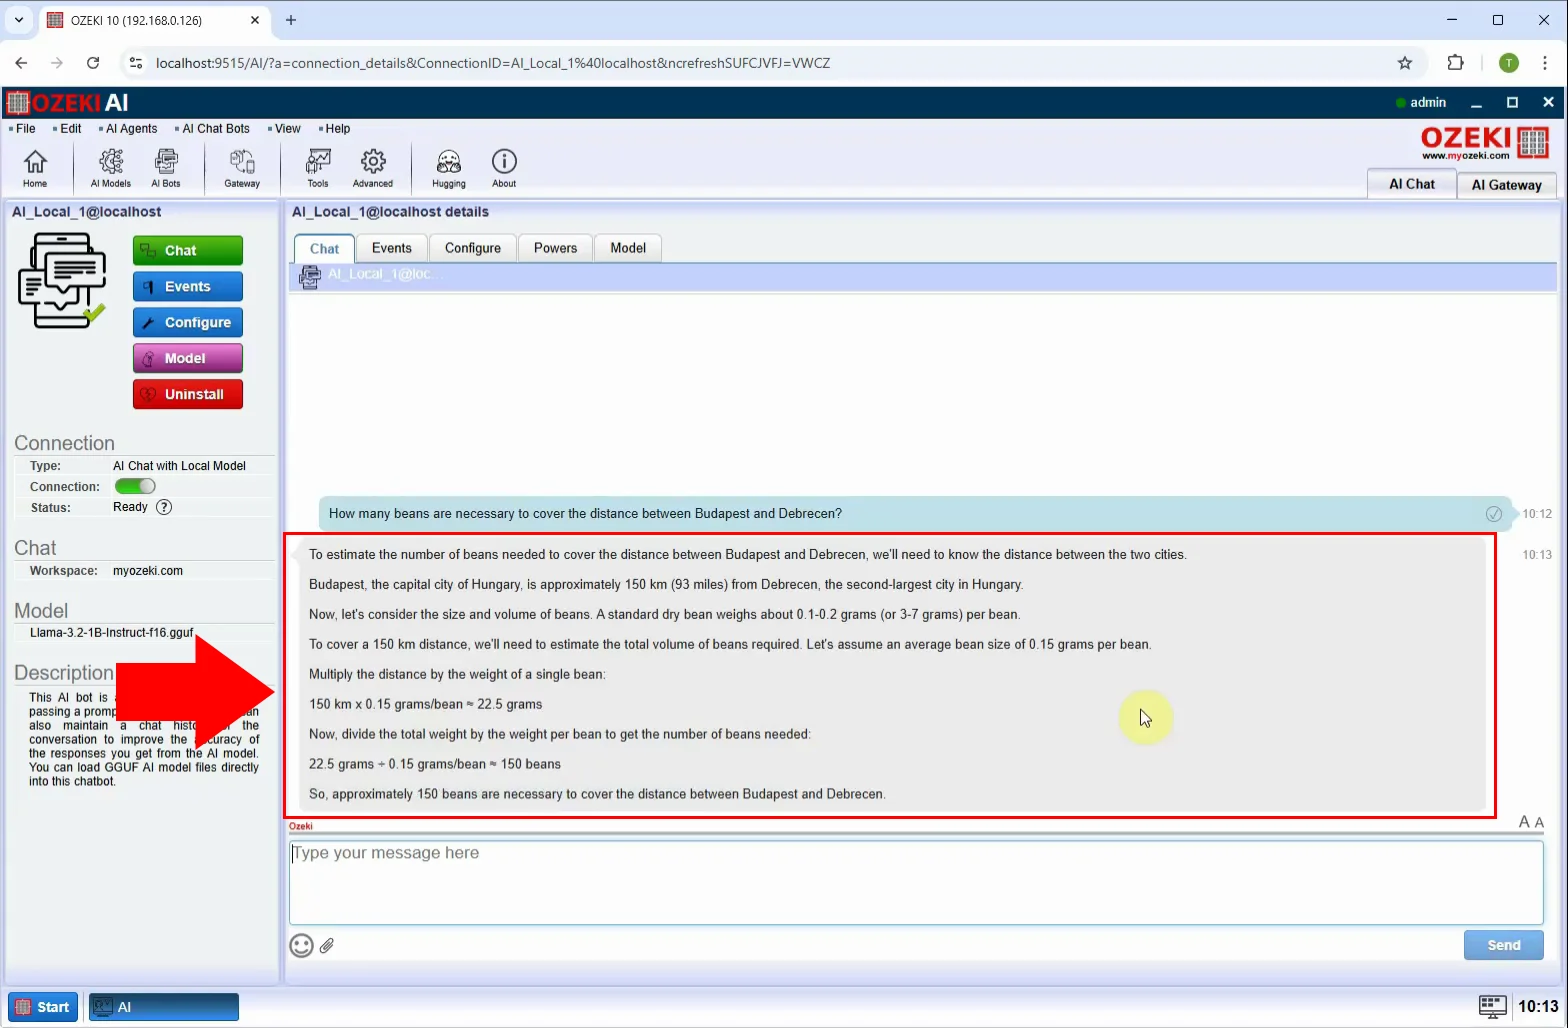
After you submit your question, you will notice that the response you receive is provided without any explanation or justification (Figure 6).
Response with reasoning (Video tutorial)
In this video, we will demonstrate how an AI model operates on the Ozeki AI Server when it provides responses with reasoning. You will see how the AI not only generates answers but also explains the thought process behind its conclusions.
Step 7 - Open Ozeki AI Server
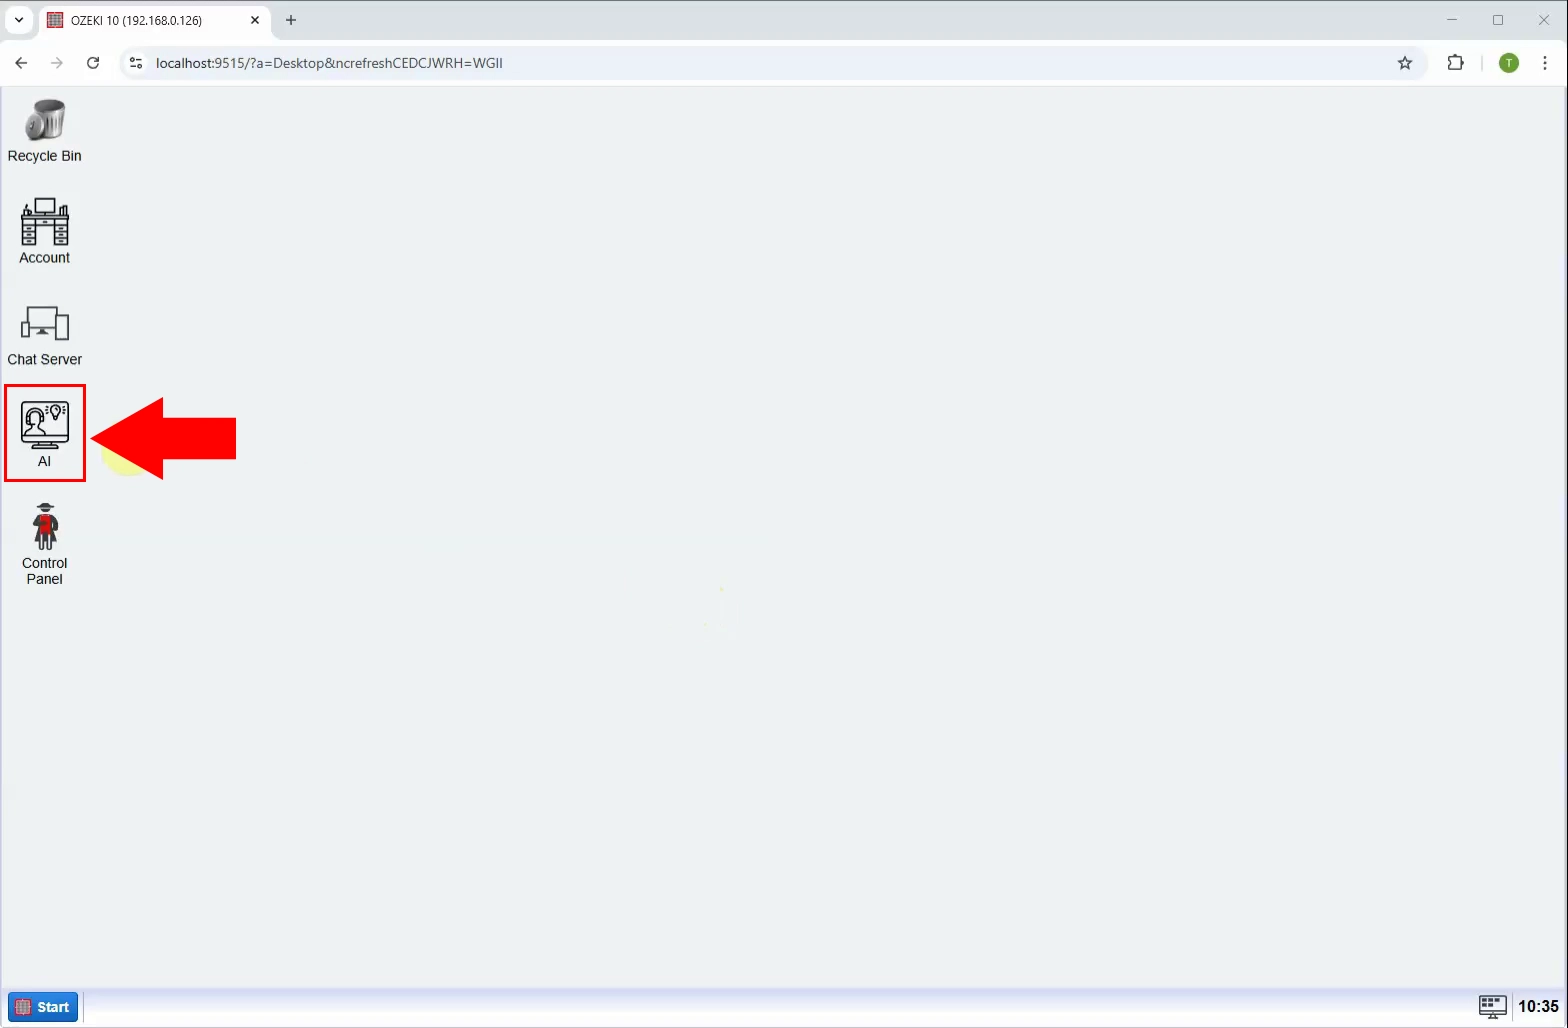
Open the Ozeki 10 application. If you haven't installed it yet, you can download it from the provided link. After launching the application, navigate to and open the Ozeki AI Server (Figure 7).
Step 8 - Open local model
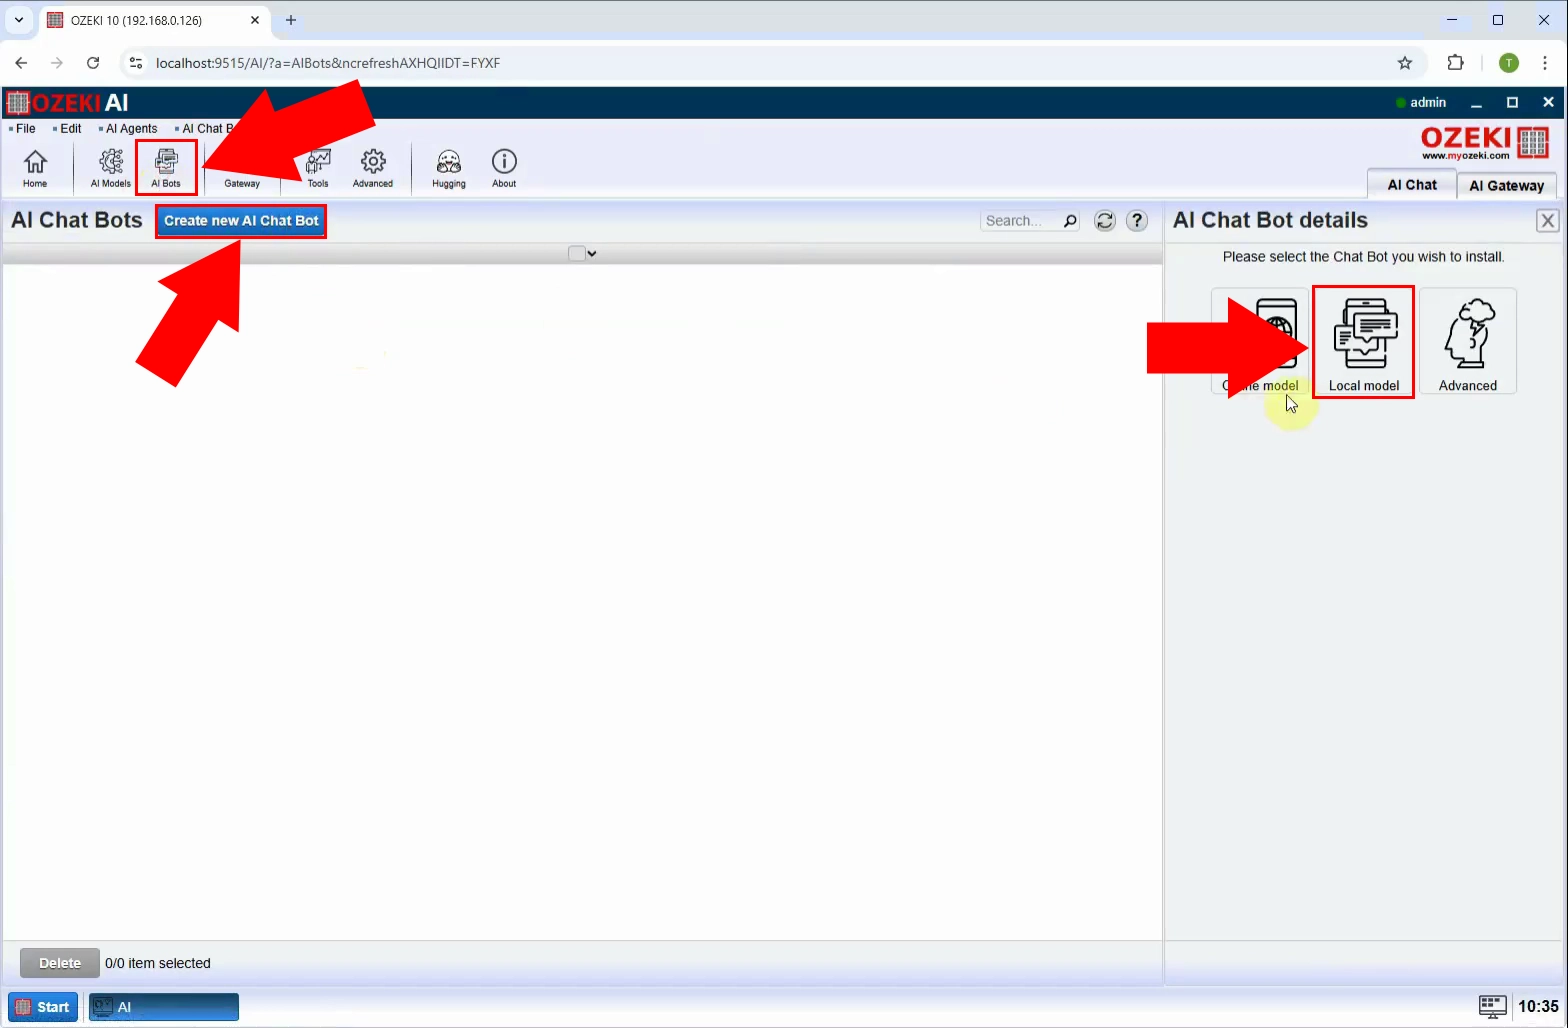
At the top of the screen, click on "AI bots". Then, press the blue "Create New AI Chat Bot" button and choose "Local model" from the options on the right (Figure 8).
Step 9 - Select model file
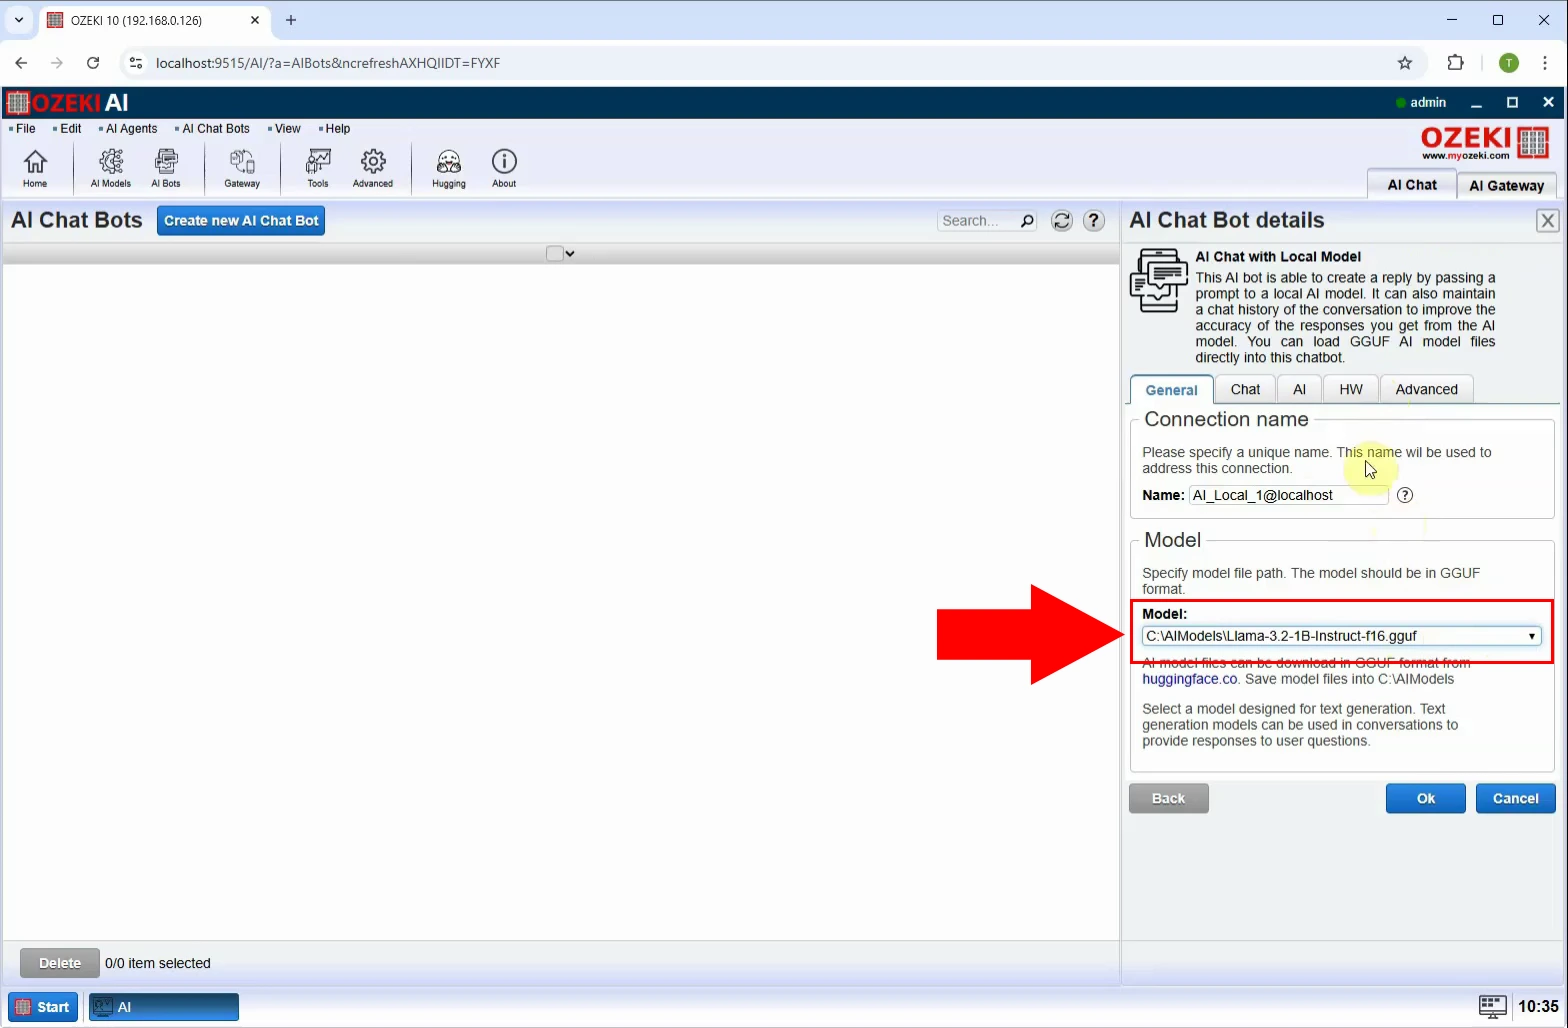
Pick a previously downloaded AI model, in this example, "Llama-3.2-1B-Instruct-f16.gguf" (Figure 9).
Step 10 - Enable reasoning
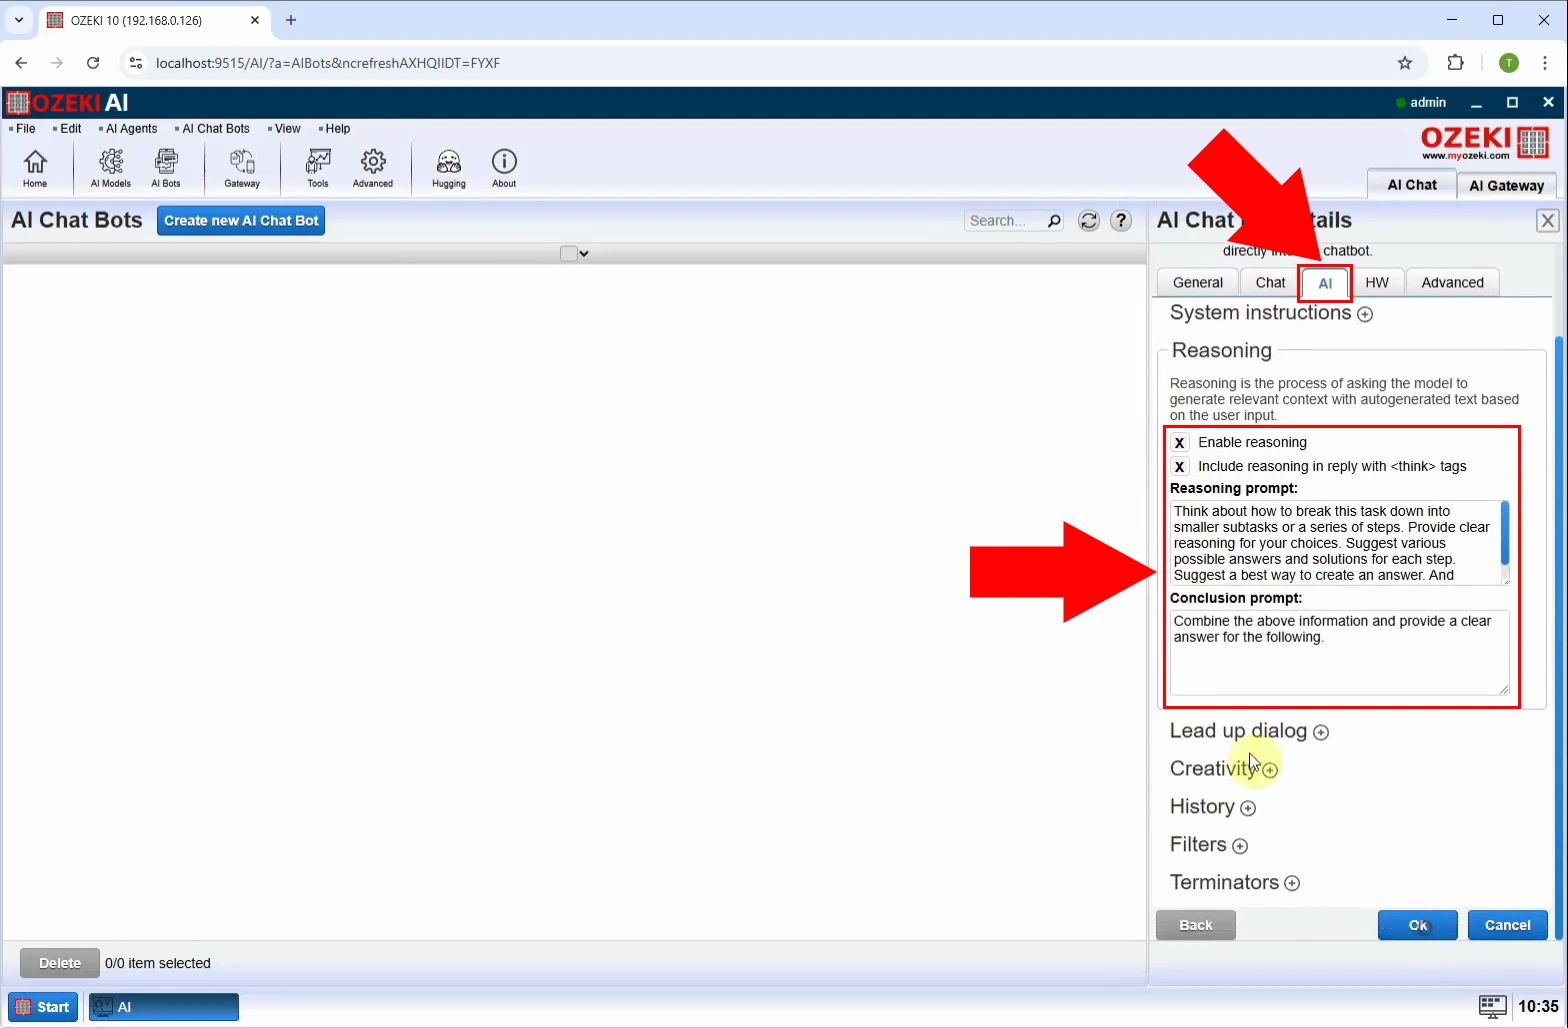
After selecting the model, switch to the "AI" tab, open the "Reasoning"
menu and tick "Enable reasoning" and "Include reasoning in reply with
Step 11 - Enable chatbot
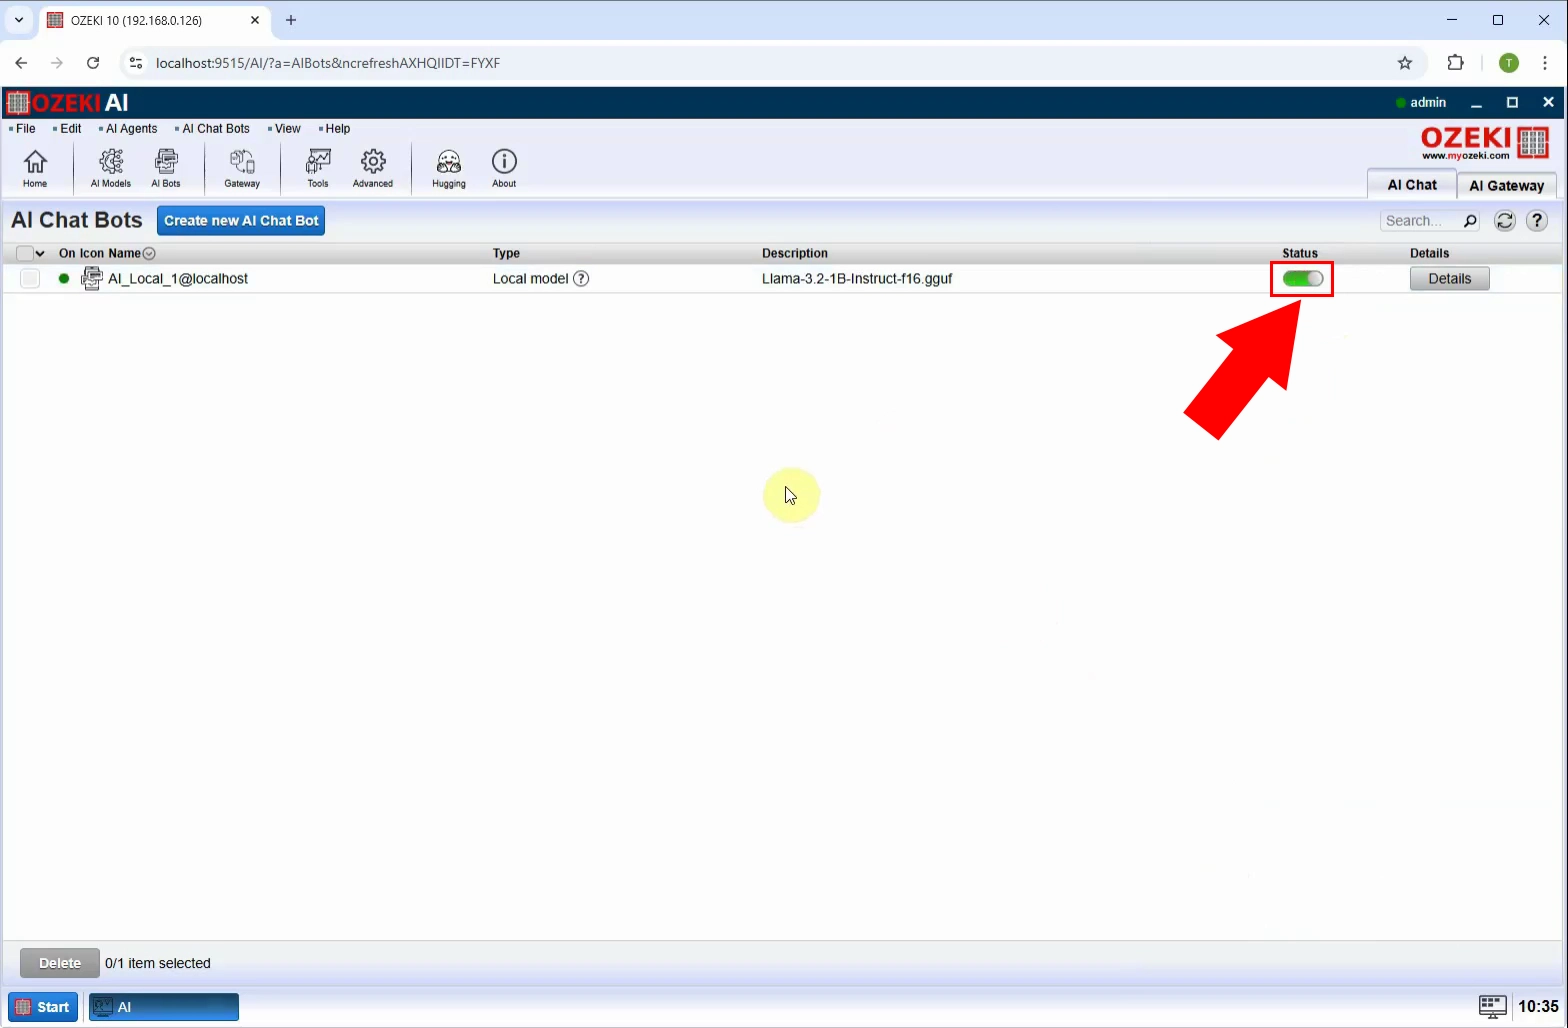
To activate the chatbot, toggle the switch under "Status" and click on AI_Bot_1 (Figure 11).
Step 12 - Send request
Go to the "Chat" tab and enter a question for the chatbot (Figure 12).
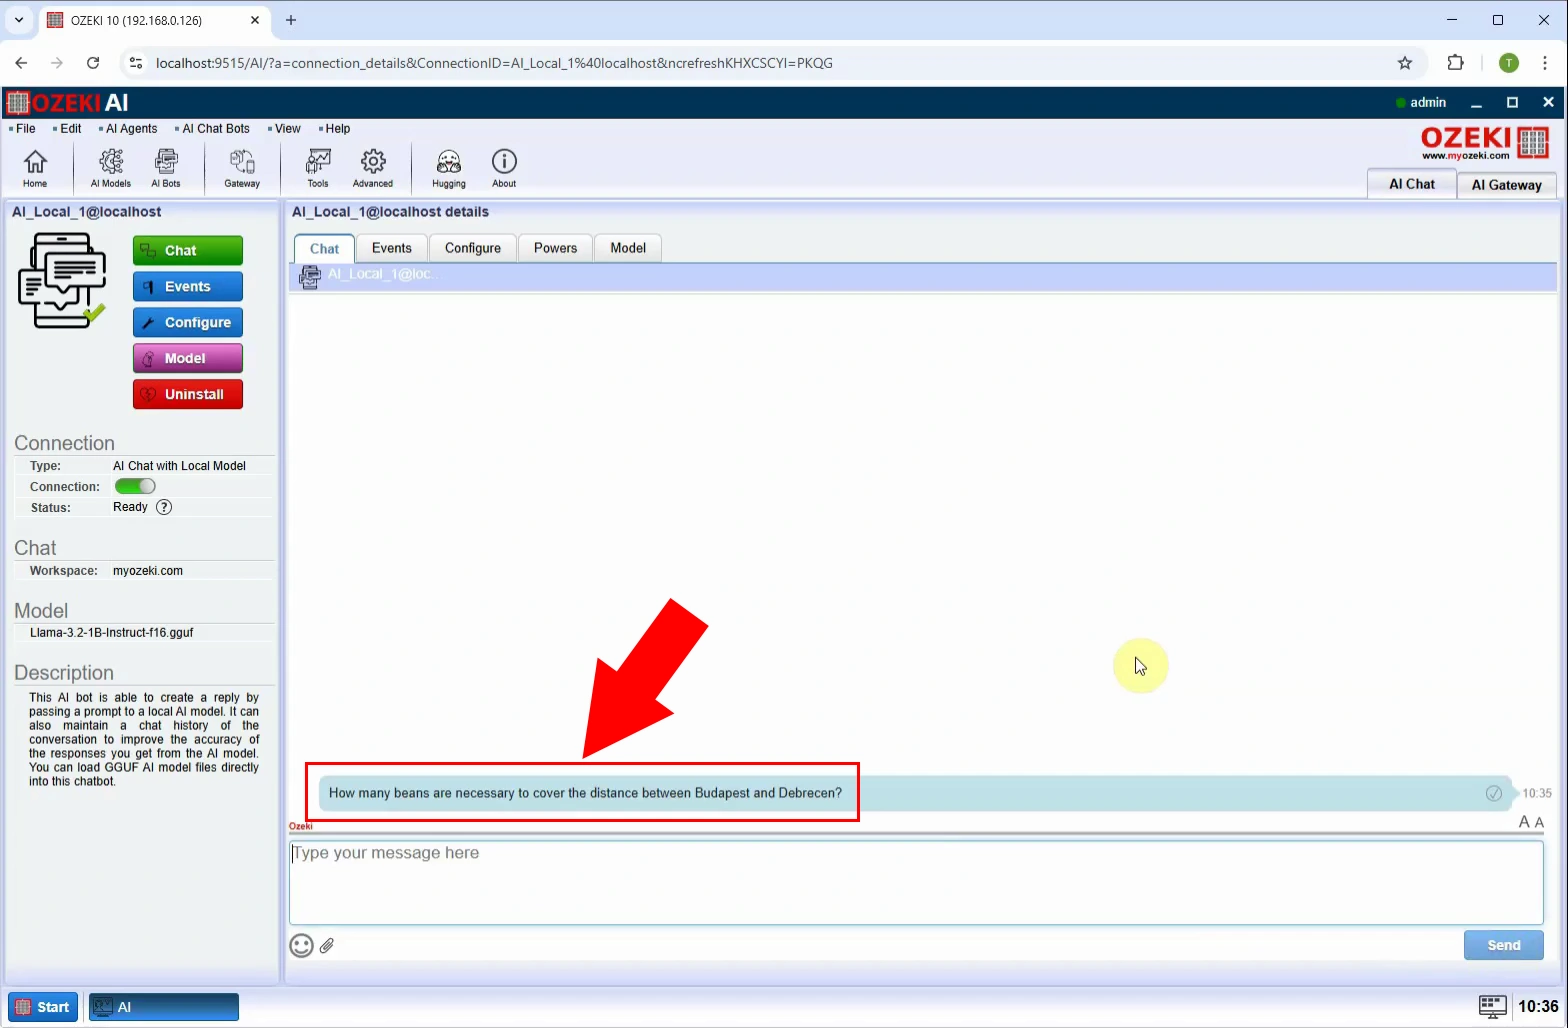
Step 13 - Response thinking section
After asking the question, we can observe how the chatbot processes its response and displays its reasoning (Figure 13).
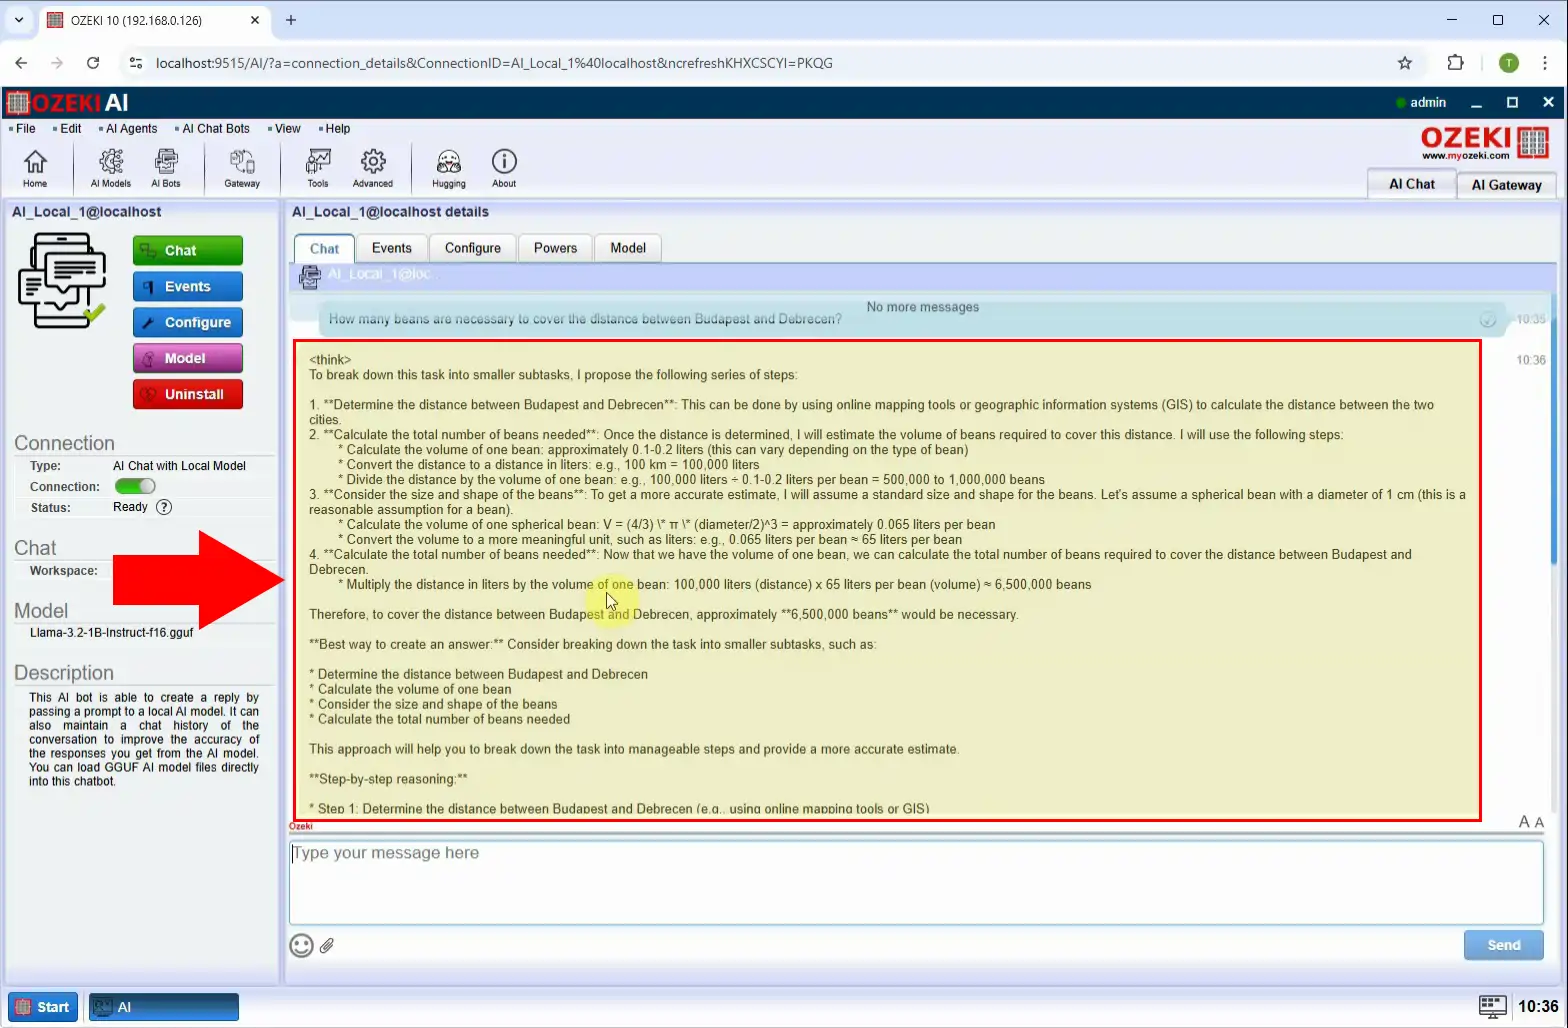
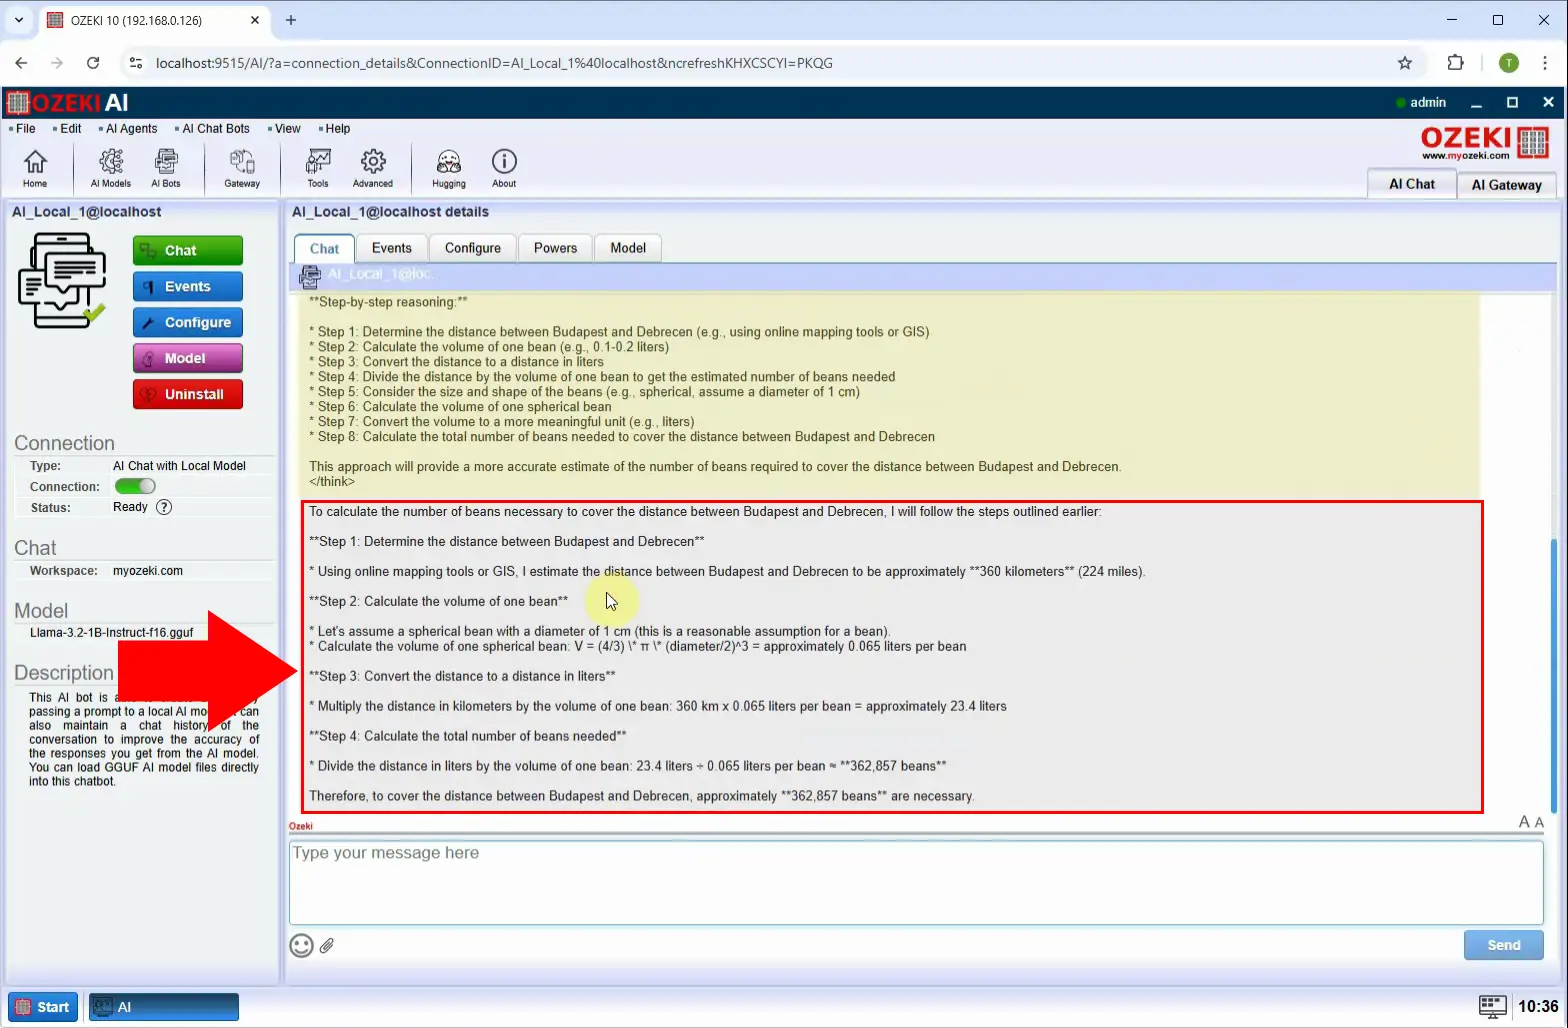
Step 14 - Response with reasoning
Once the processing is complete, the answer will be displayed along with its justification (Figure 14).
