Install Anaconda and create virtual environment on Windows
In this chapter, we will provide a step-by-step guide on how to install Anaconda on the Windows operating system and create a virtual environment for your development work. Anaconda is a popular tool that simplifies the use of Python and other programming languages while enabling easy management of various packages and dependencies.
What is Anaconda?
Anaconda is an open-source distribution of Python and R that simplifies package management and deployment, especially for data science, machine learning, and scientific computing. It comes with Conda, a powerful package and environment manager, allowing users to create isolated environments for different projects, preventing dependency conflicts.
How to download Anaconda (Quick Steps)
- Open download page
- Download Windows installer
- Run Anaconda installer
- Select installation options
- Wait for installation
- Launch Anaconda Navigator
- Installation completed
How to create virtual environment (Quick Steps)
- Open environment menu
- Create a new environment
- Wait for environment creation
- Open environment in terminal
- Virtual environment created
Download Anaconda (Video tutorial)
In this video, you will learn how to download and install Anaconda on a Windows system. We will guide you through the entire process, from accessing the official Anaconda website to completing the installation and verifying that everything is set up correctly. By the end of the video, you will have Anaconda installed and ready to use for your development projects.
Step 1 - Open download page
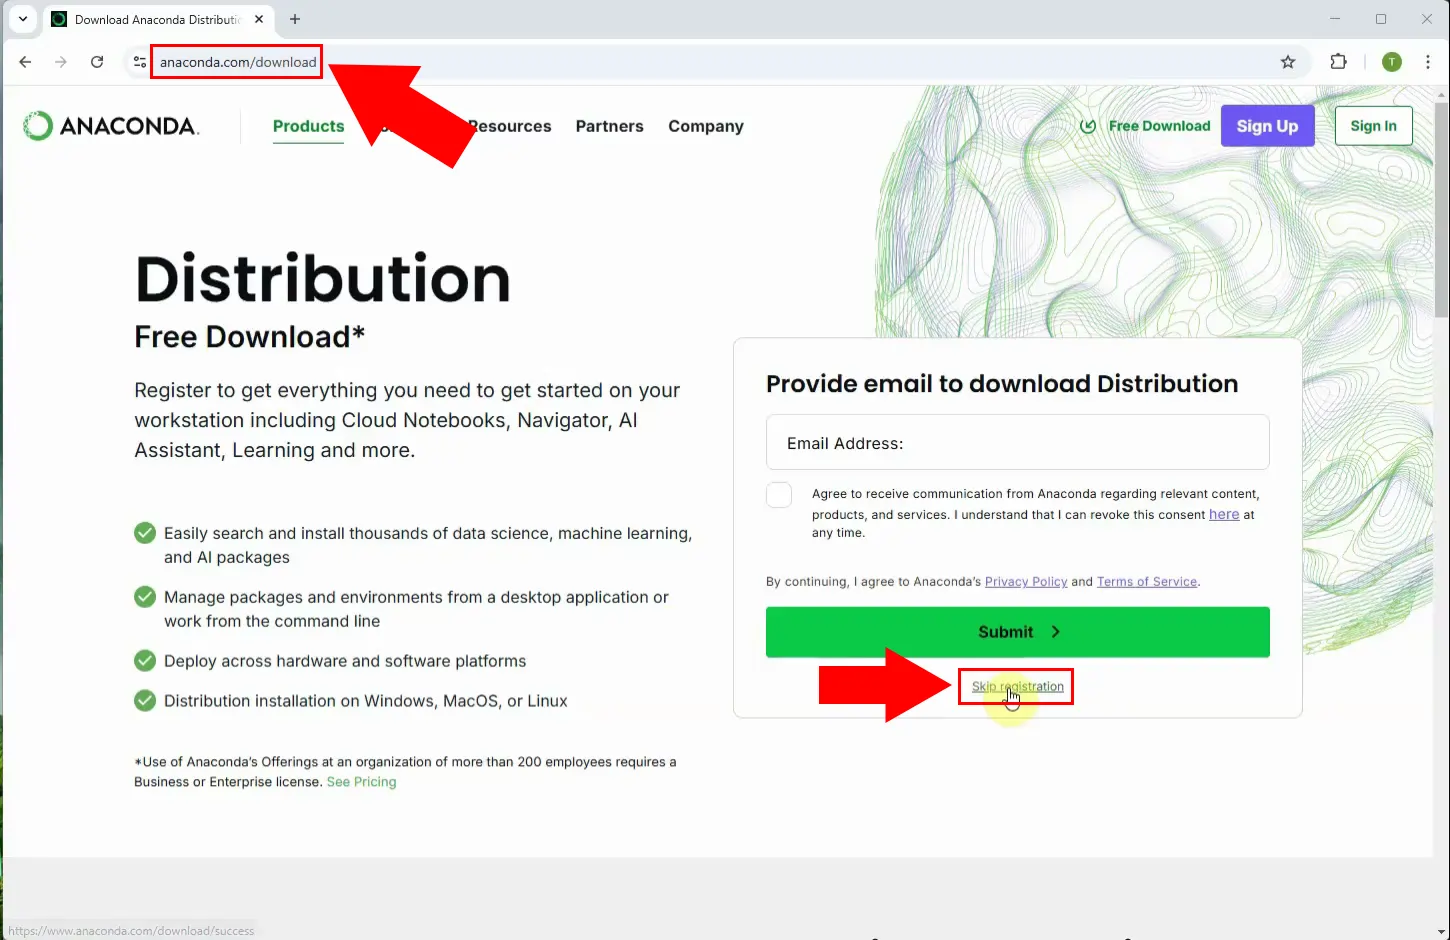
First, to download, open the Anaconda page and click on "Skip registration" to go to the download page (Figure 1).
Step 2 - Download Windows installer
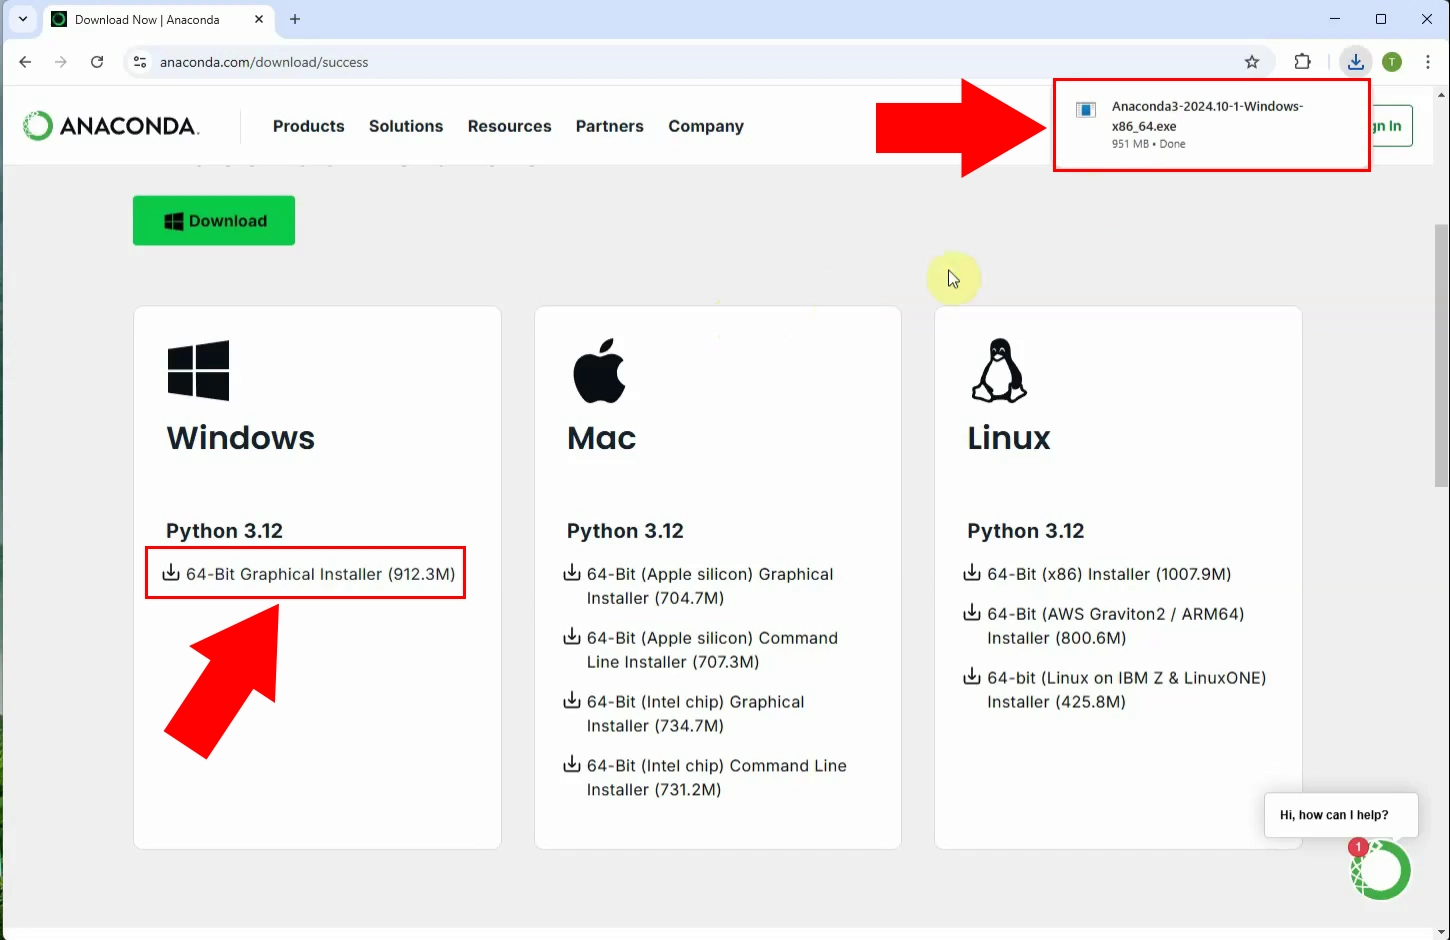
Choose the installer that suits your operating system. In this case, the Windows installer will be downloaded (Figure 2).
Step 3 - Anaconda installer
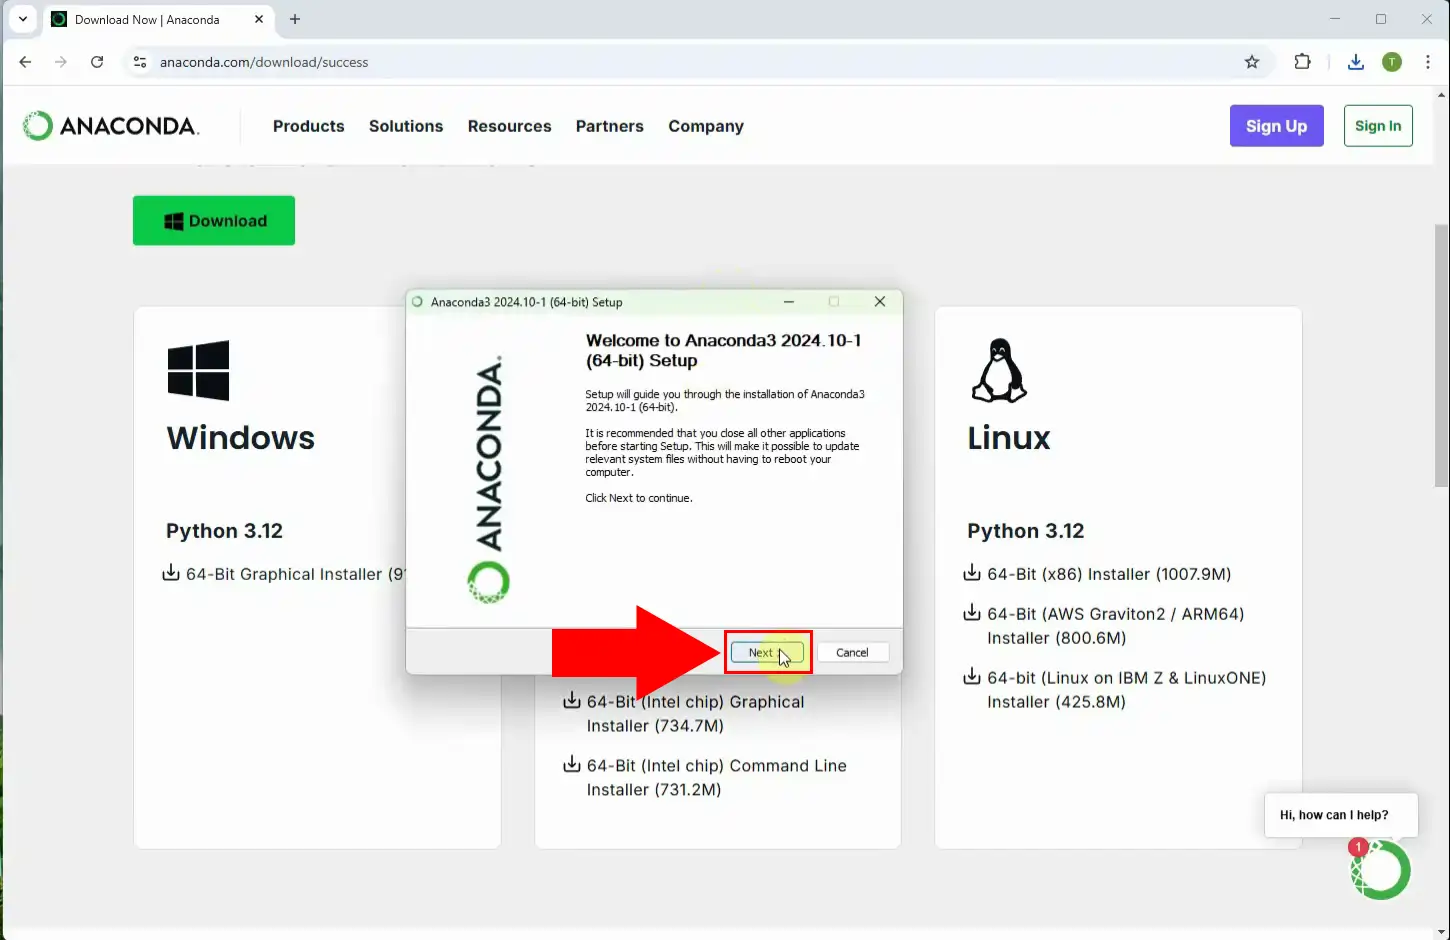
Open the installer and click "Next" to continue (Figure 3).
Step 4 - Select install options
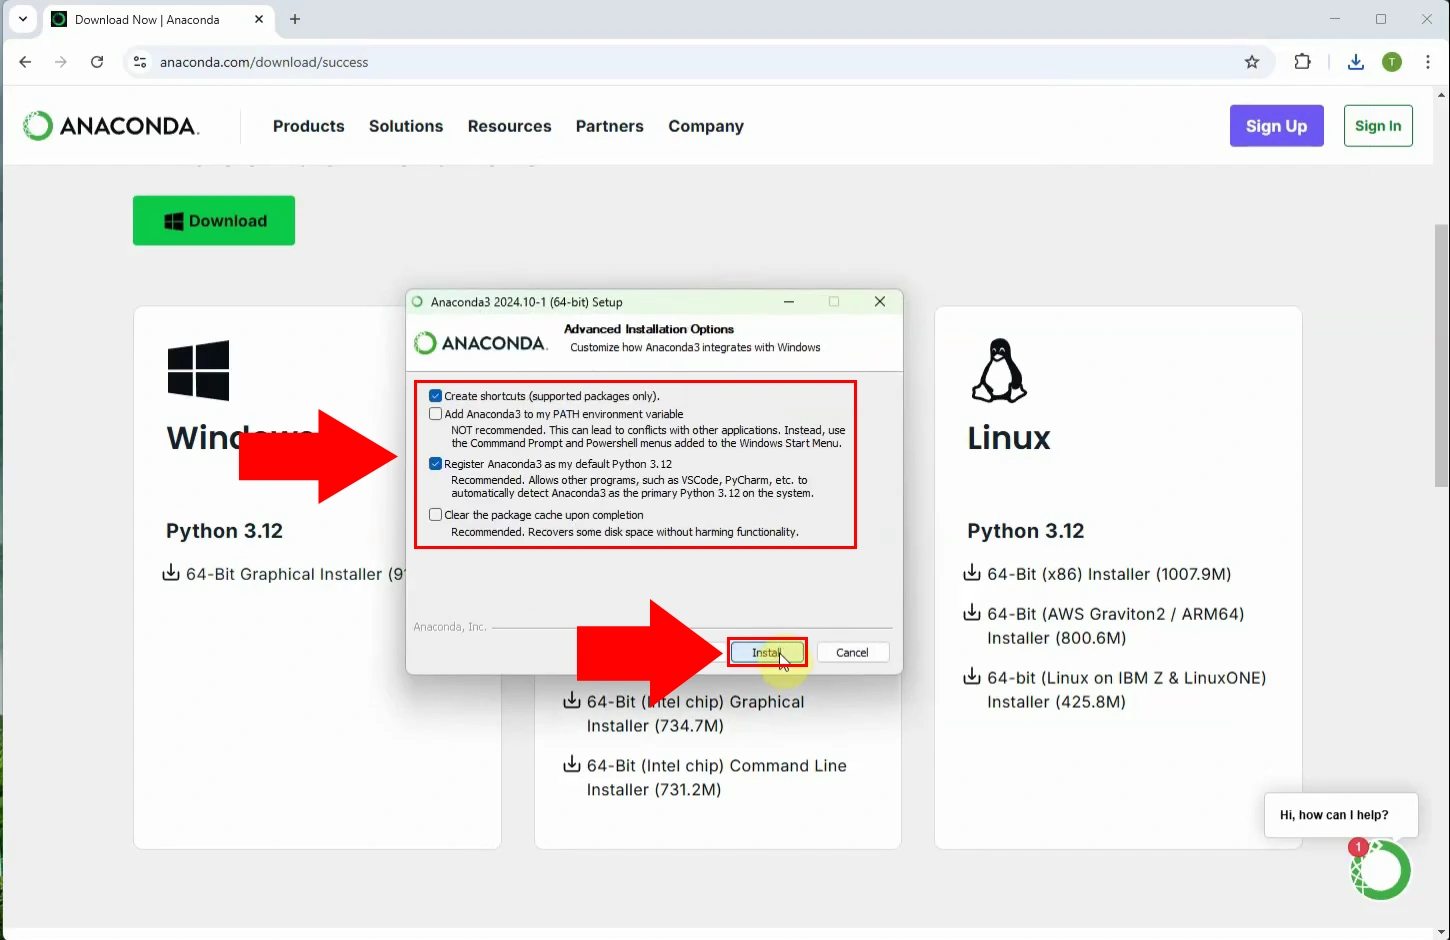
After selecting the terms and conditions and the installation location, tick the "Create shortcuts" and "Register Anaconda3 as my default Python 3.12" options and click "Install" (Figure 4).
Step 5 - Install process
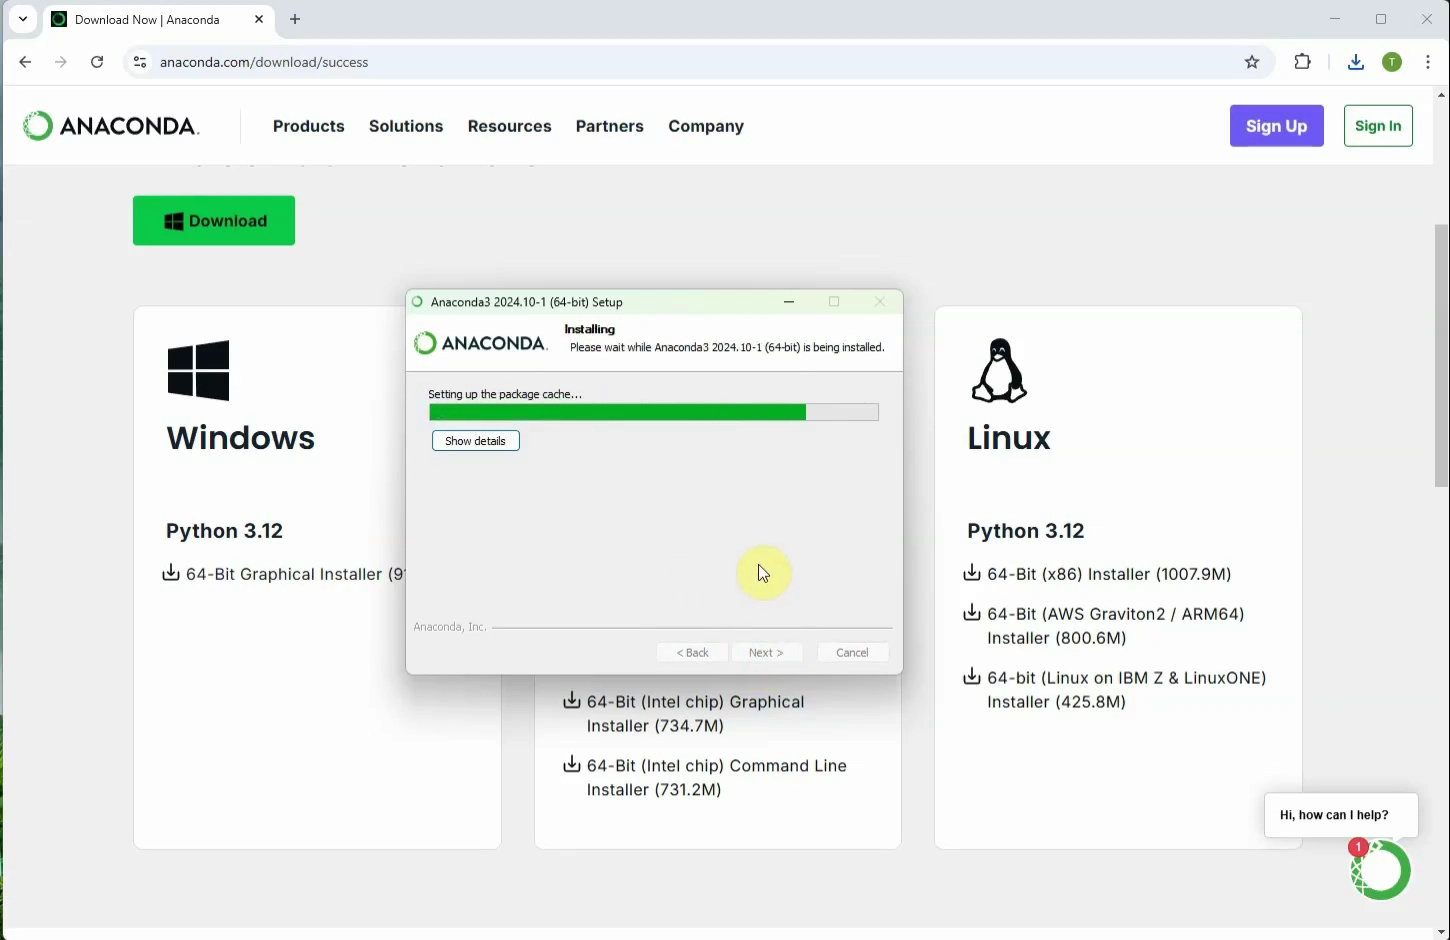
The installation has started, wait until it is finished (Figure 5).
Step 6 - Launch Anaconda Navigator
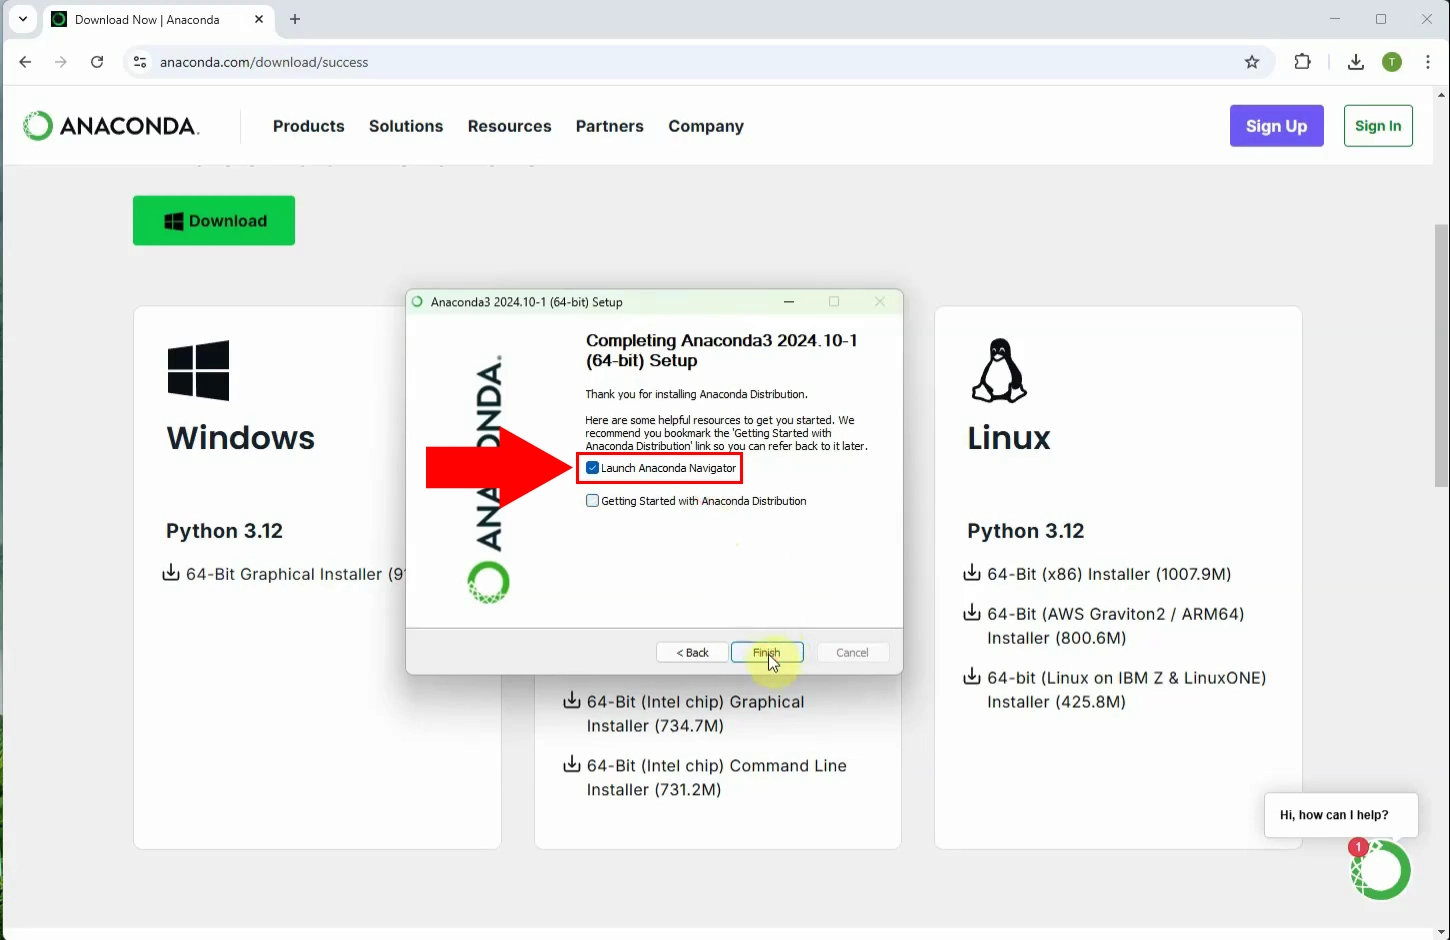
When the installation is complete, you will be offered the option to automatically launch the program by ticking the "Launch Anaconda Navigator" option, then click on "Finish" (Figure 6).
Step 7 - Anaconda Navigator opened
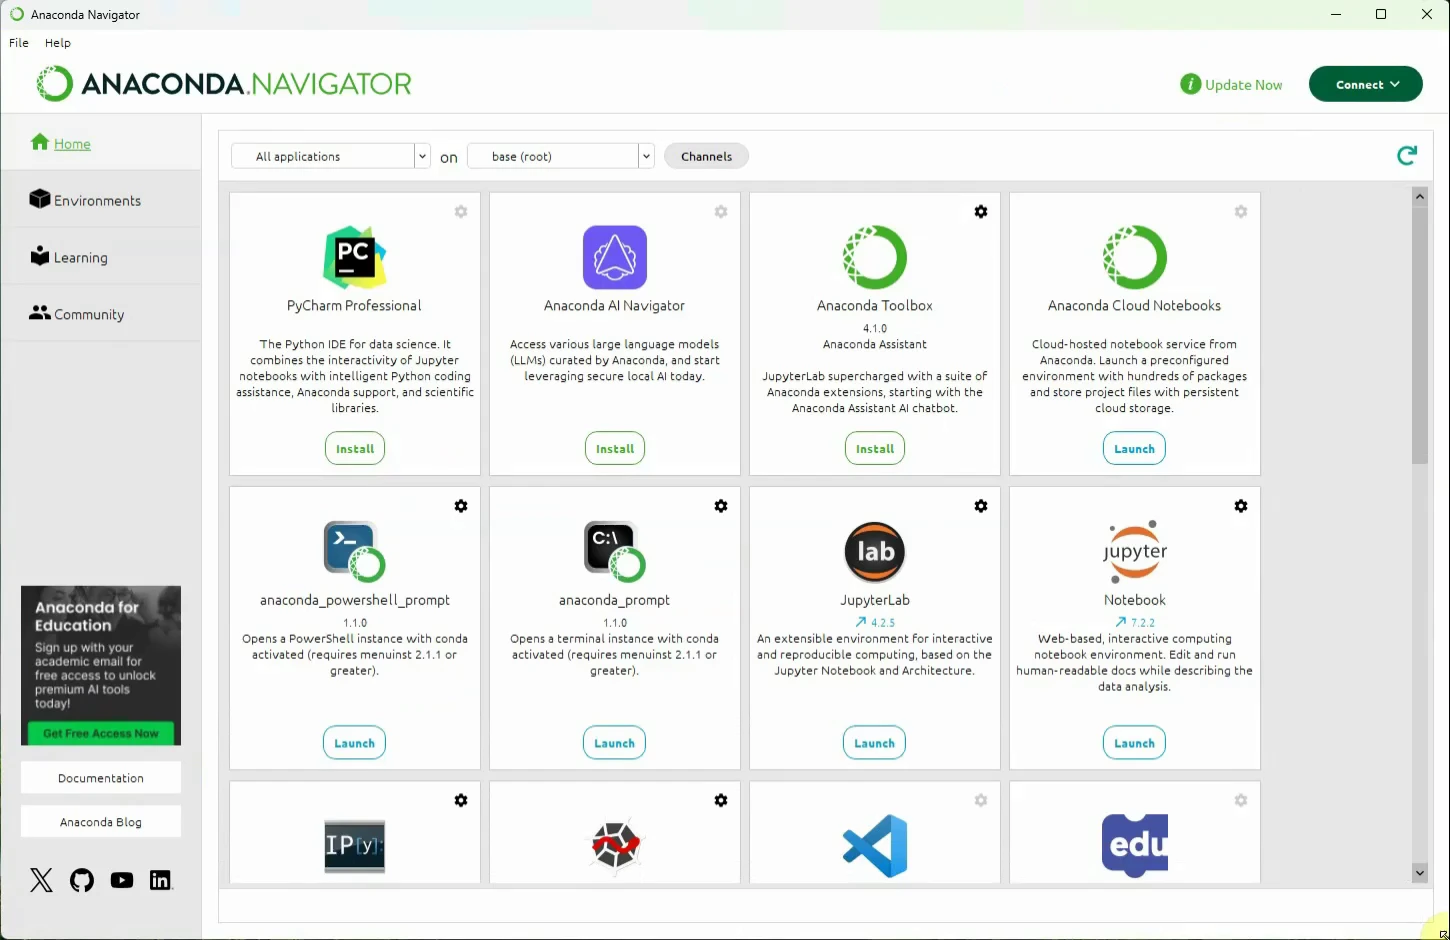
When you open Anaconda Navigator, you will be greeted by the following window, as you can see in the picture (Figure 7).
Create virtual environment (Video tutorial)
In this video, you will learn how to create a virtual environment using Anaconda. We will guide you through the process step by step, from opening Anaconda Navigator or the command prompt to setting up and activating a new environment. By the end of this tutorial, you will have a fully functional virtual environment ready for your projects.
Step 8 - Open environment menu
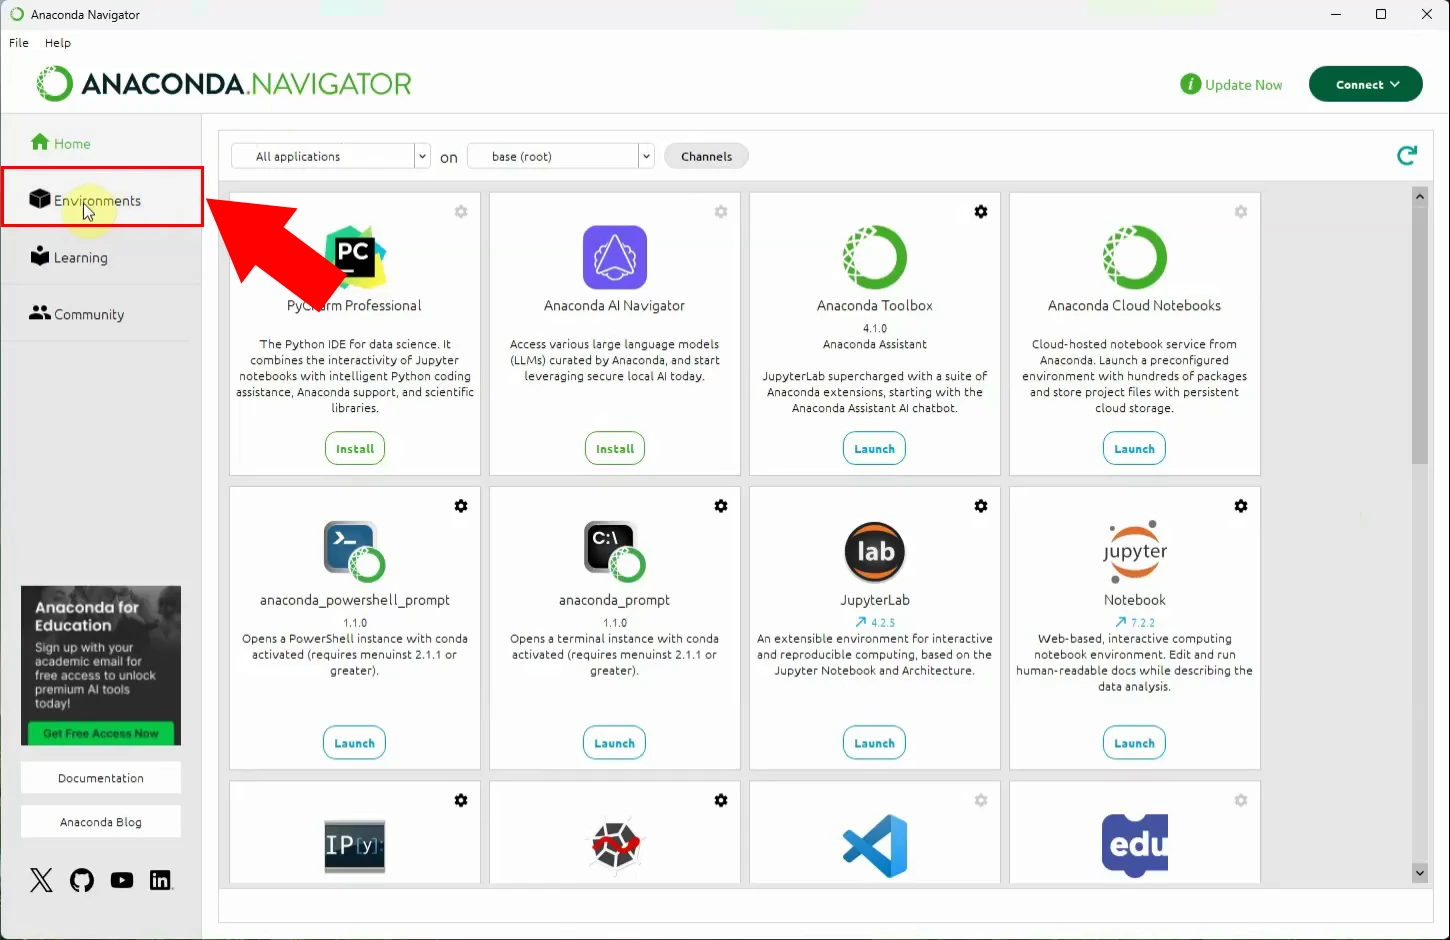
When you open Anaconda Navigator, select "Enviroments" on the left (Figure 8).
Step 9 - Create new environment
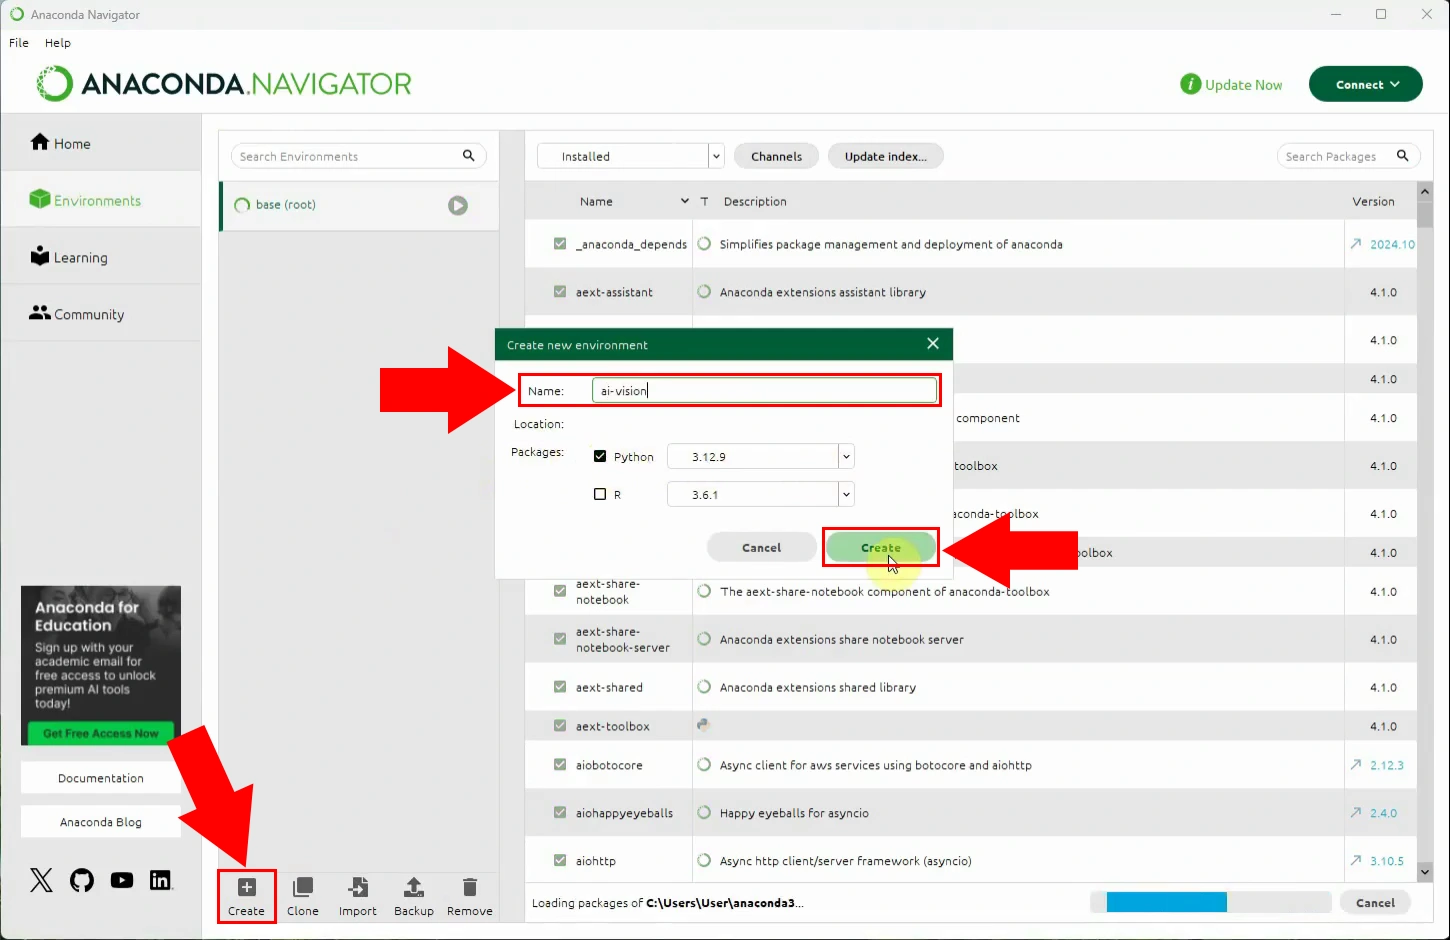
To create a new environment, at the bottom of the screen click on "Create". A "Create New Environment" window will appear, enter a name, such as "ai-vision", and then click "Create" to proceed (Figure 9).
Step 10 - Open environment in terminal
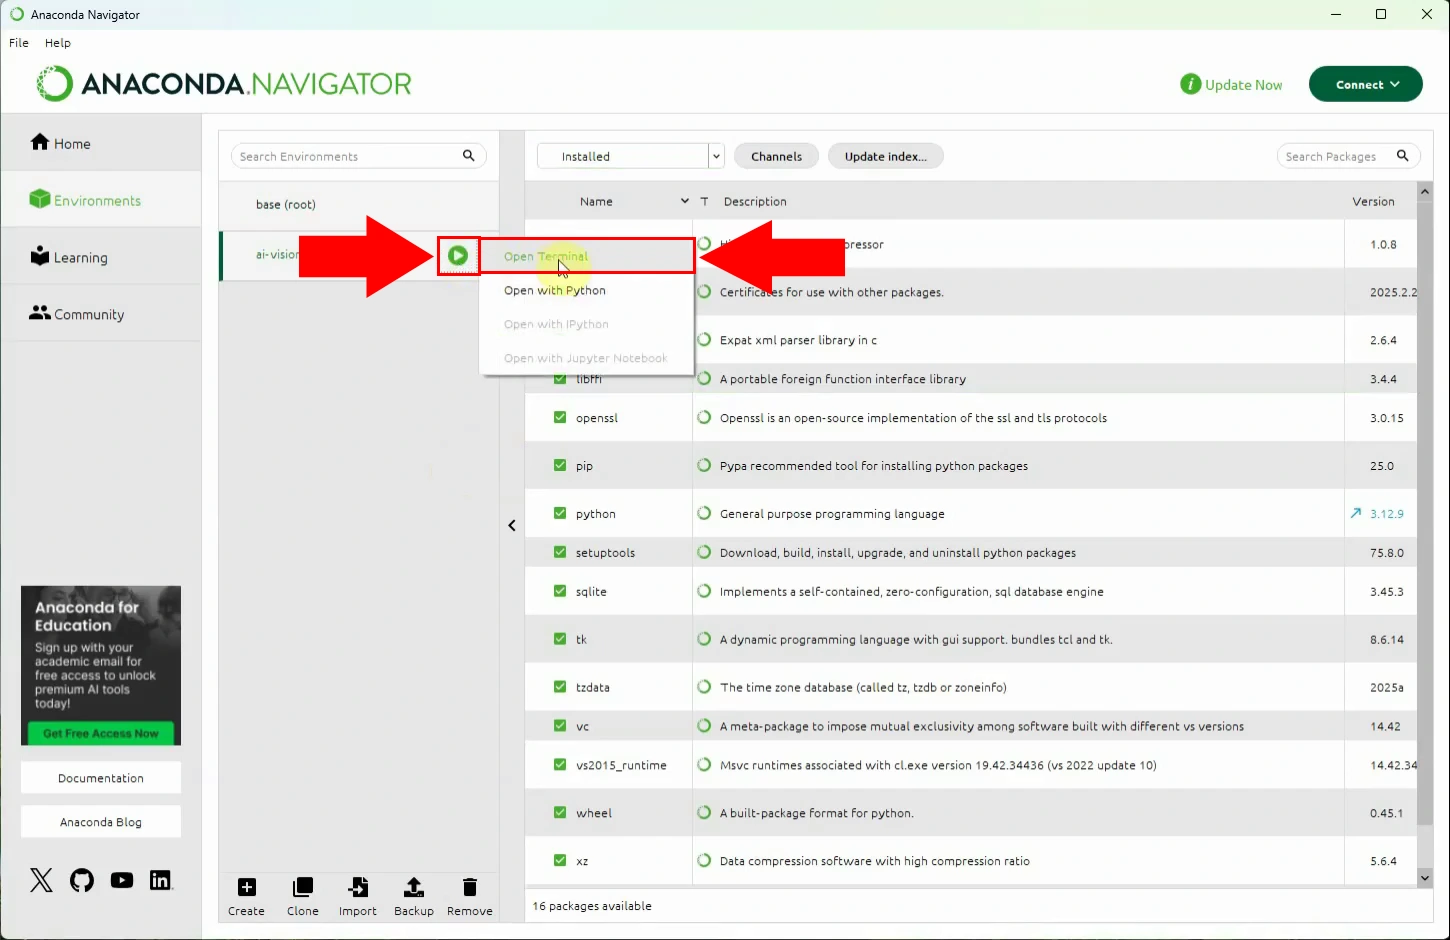
Wait until the enviroment is created, after it is successfully created you will see a small green start button. Click on it and select the "Open Terminal" option (Figure 10).
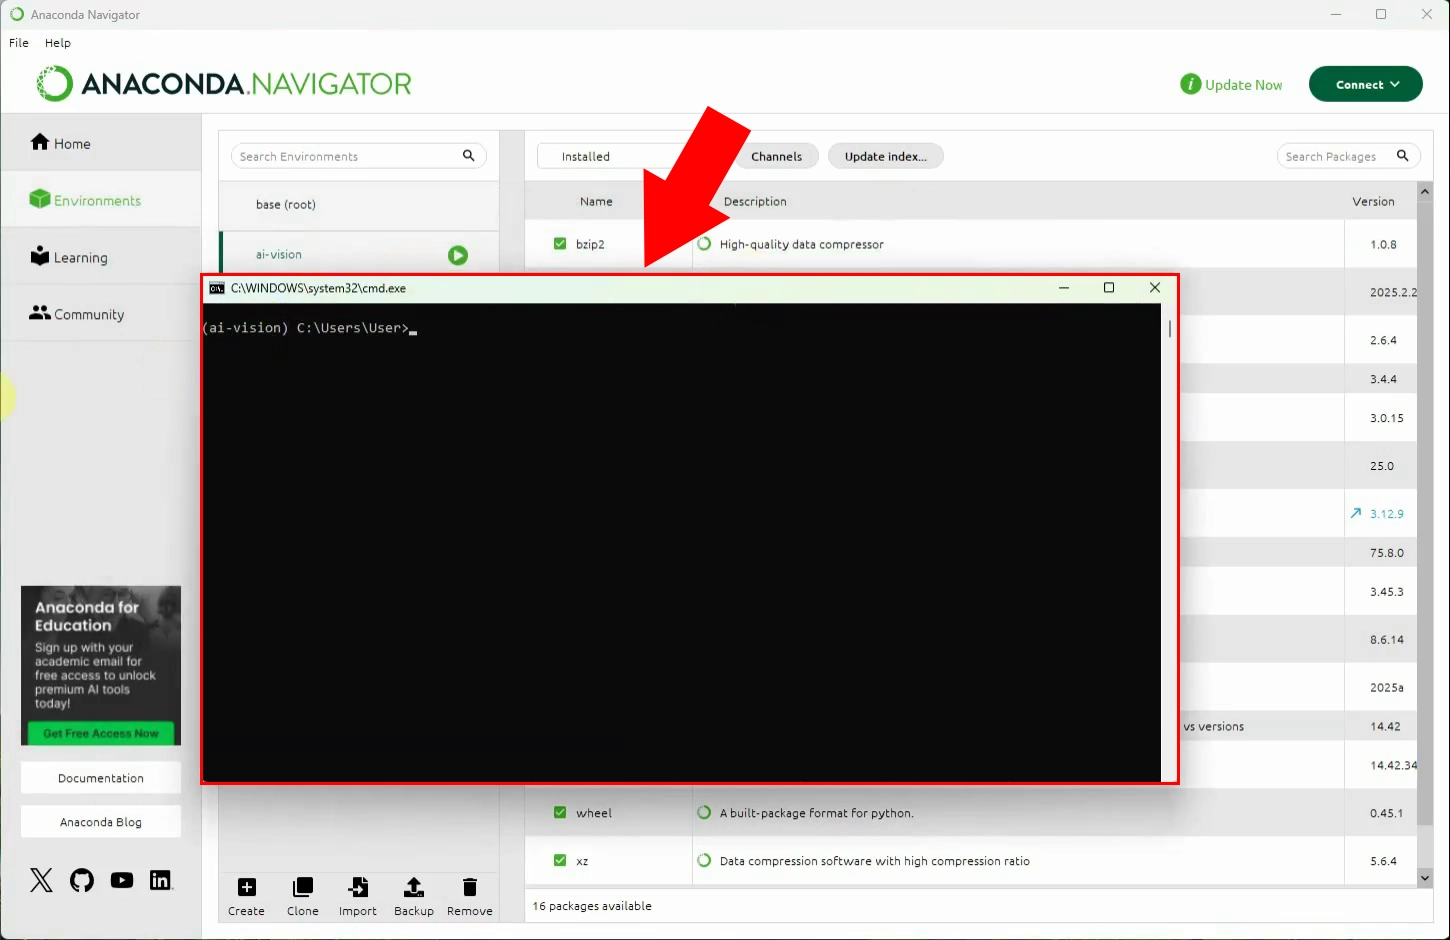
Step 11 - Virtual environment opened
You can see the successfully created "ai-vision" virtual environment in a command line window (Figure 11).
