How to generate API key
Generating an API key is a quick and essential step to authenticate requests and protect your data. In this guide, you’ll learn how to create an API key, configure permissions, and start using it for your applications. Whether you're integrating third-party services or building your own API, this process ensures secure and controlled access. Let’s get started!
What is an API key?
An API key is a unique code that authenticates and controls access to an API. It helps secure communication between applications, track usage, and prevent unauthorized access. Developers use API keys for integrating third-party services like payments, weather data, or AI models.
How to to generate API key? (Quick Steps)
To to generate API key:
- Open Ozeki AI Studio
- Open AI Gateway
- Install a new HTTP user
- Start using Ozeki AI extension
- Enable log communication events
- Select API section
- Generate API key
How to create an Ozeki AI HTTP API user? (Video Tutorial)
Watch this short guide to learn how to create an HTTP user in Ozeki AI. We’ll walk you through the setup process, from creating the user to configuring it for seamless communication.
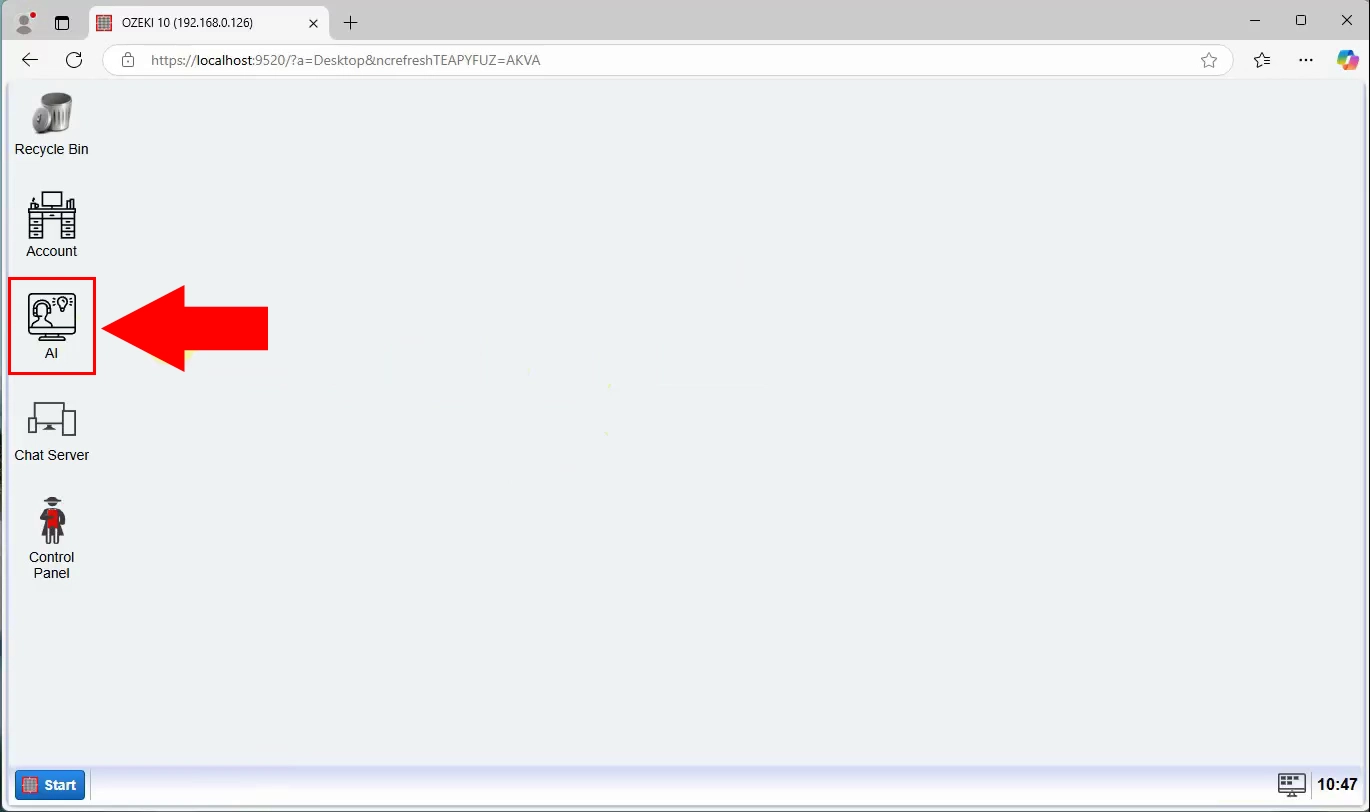
Step 1 - Open Ozeki AI
Open Ozeki AI, highlighted by a red arrow in Figure 1.
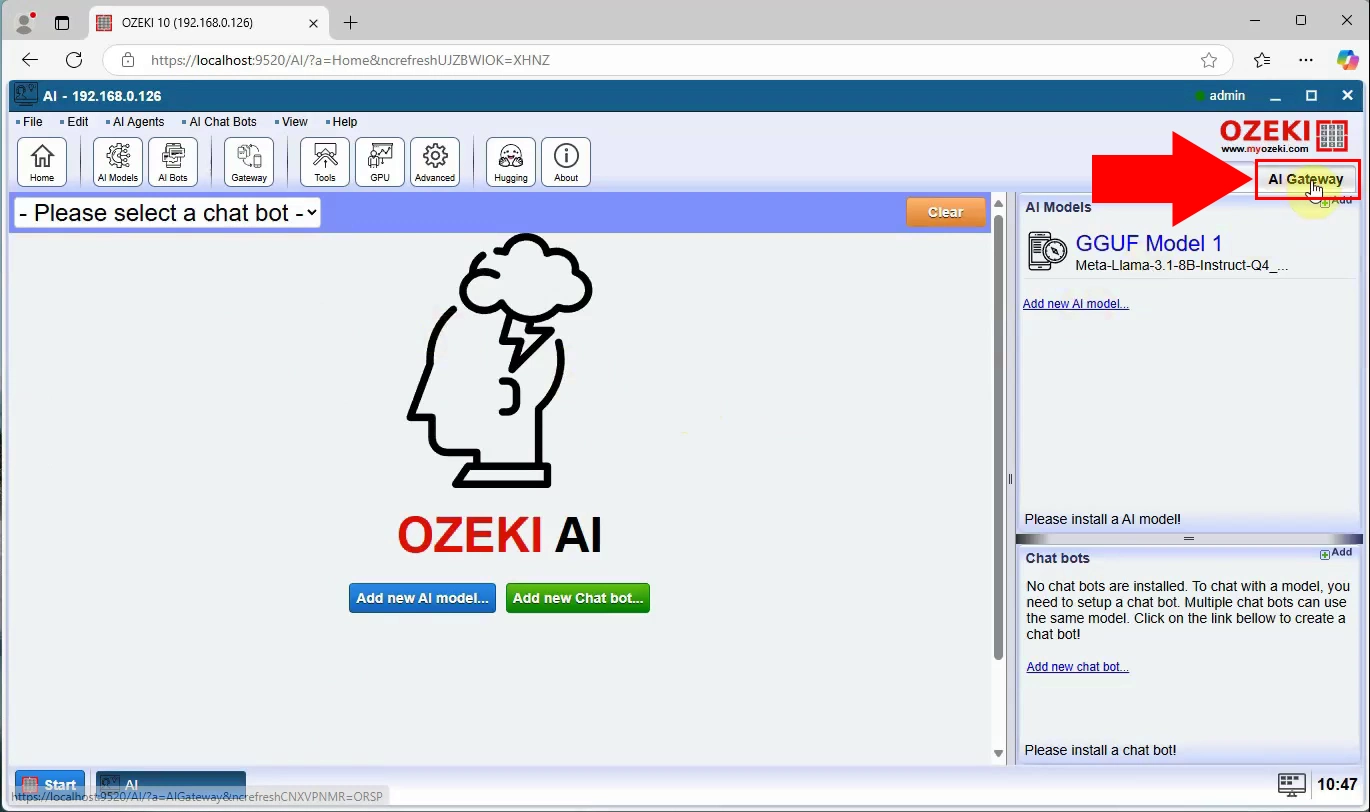
Step 2 - Open AI Gateway
Look at the right side of your screen and locate the "AI Gateway" button. Click on it. Doing this will let you create new AI chat bots. This is shown in Figure 2.
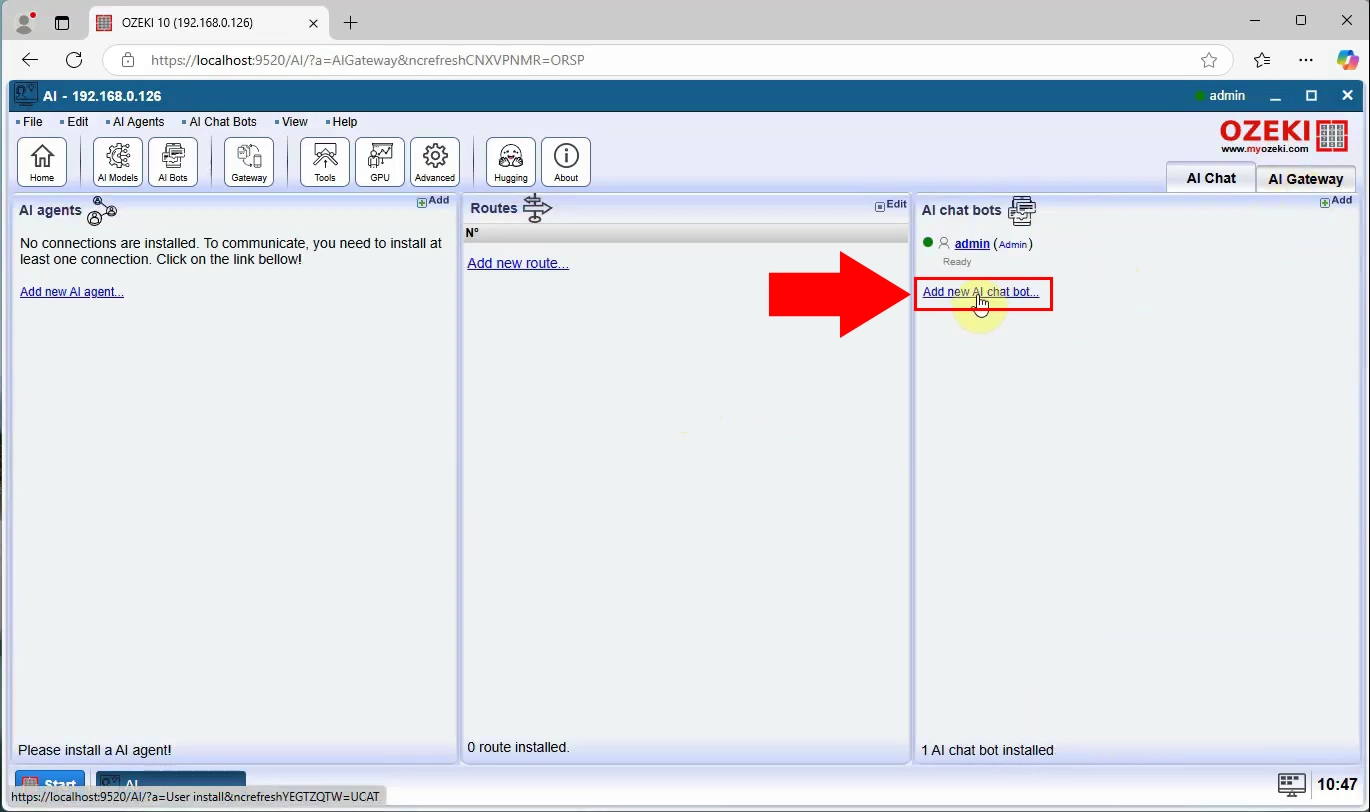
Step 3 - Add a new chatbot
In the right panel, click Add application or chatbot..., as shown in Figure 3. This action will direct you to a list of choices to select from.
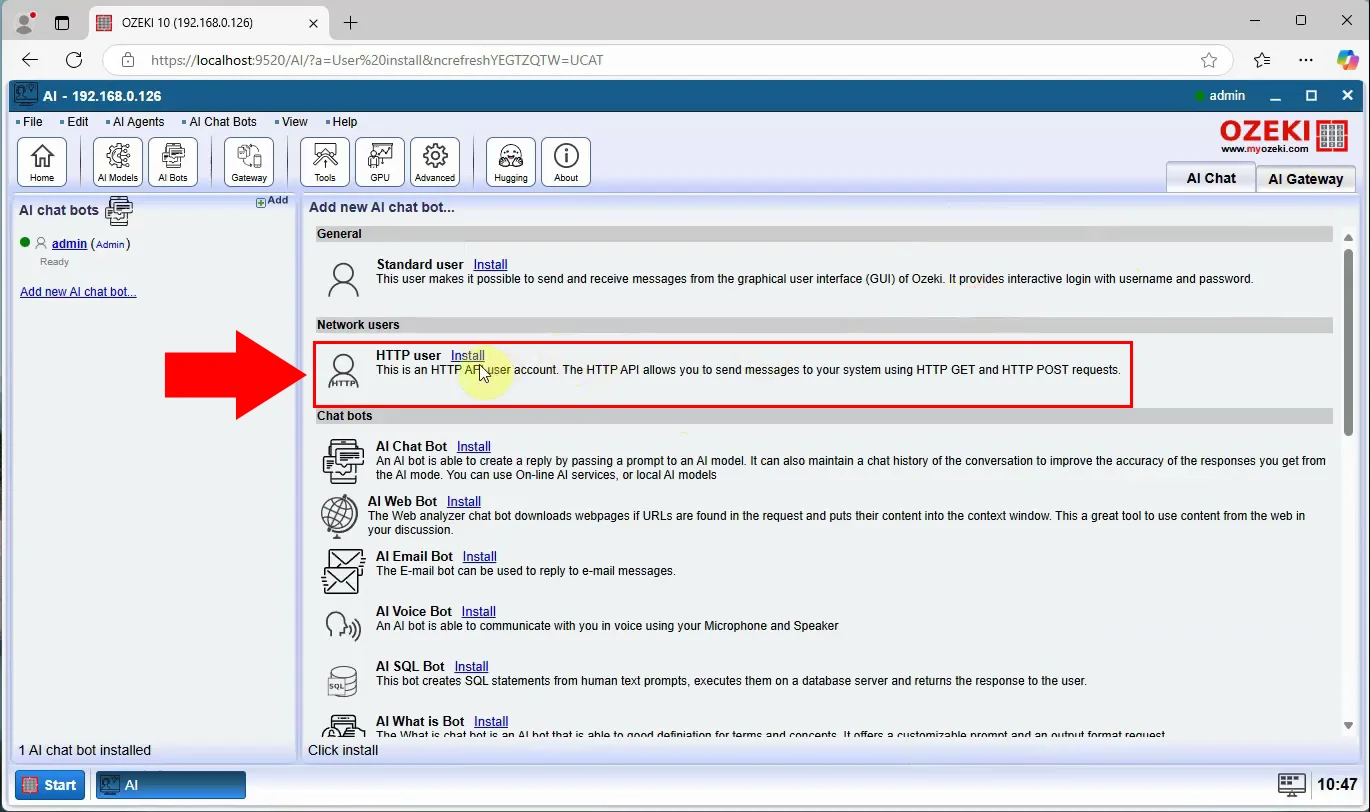
Step 4 - Install a new HTTP user
Look for HTTP user in the list, and click Install next to it, as demonstrated by Figure 4.
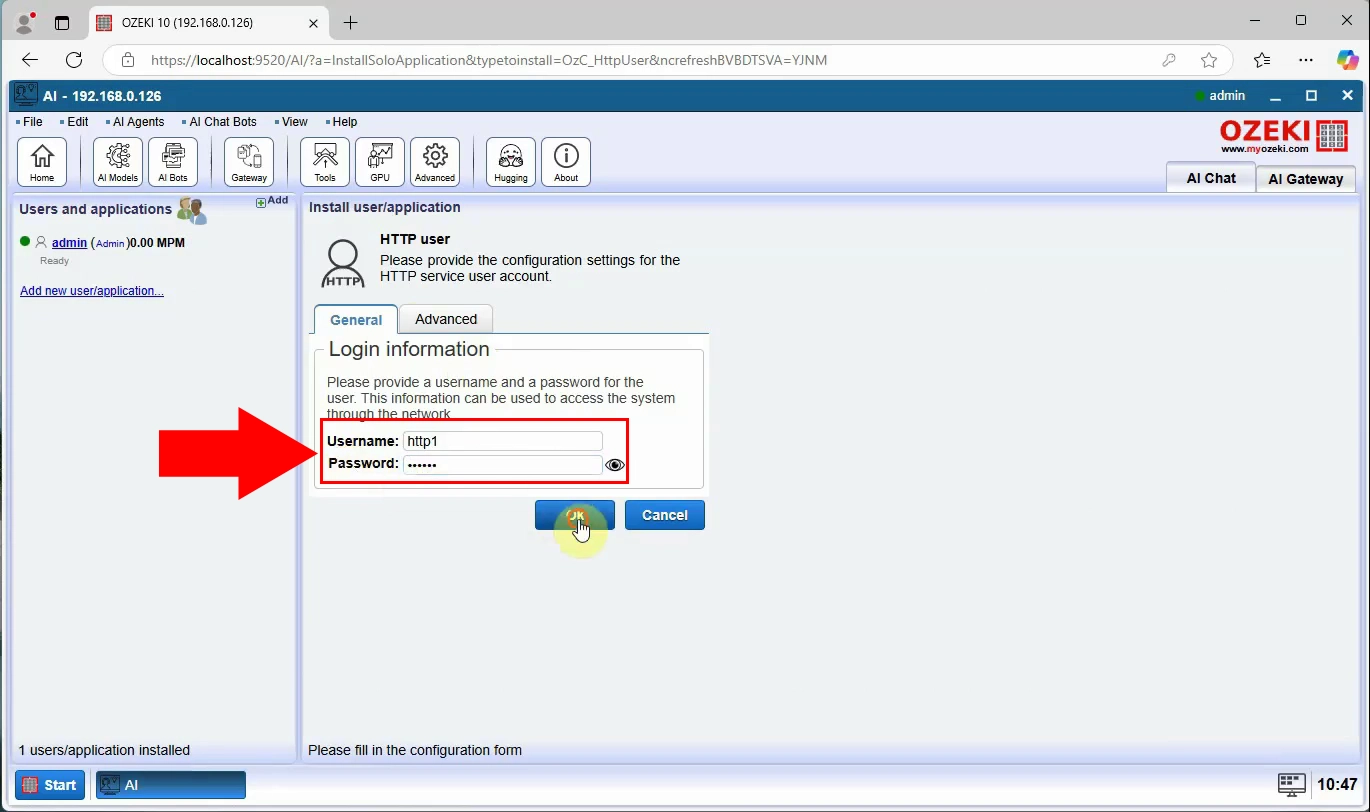
Step 5 - Add login information
Enter login credentials of this user, and click Ok, showcased in Figure 5.
Step 6 - Enable log communication events
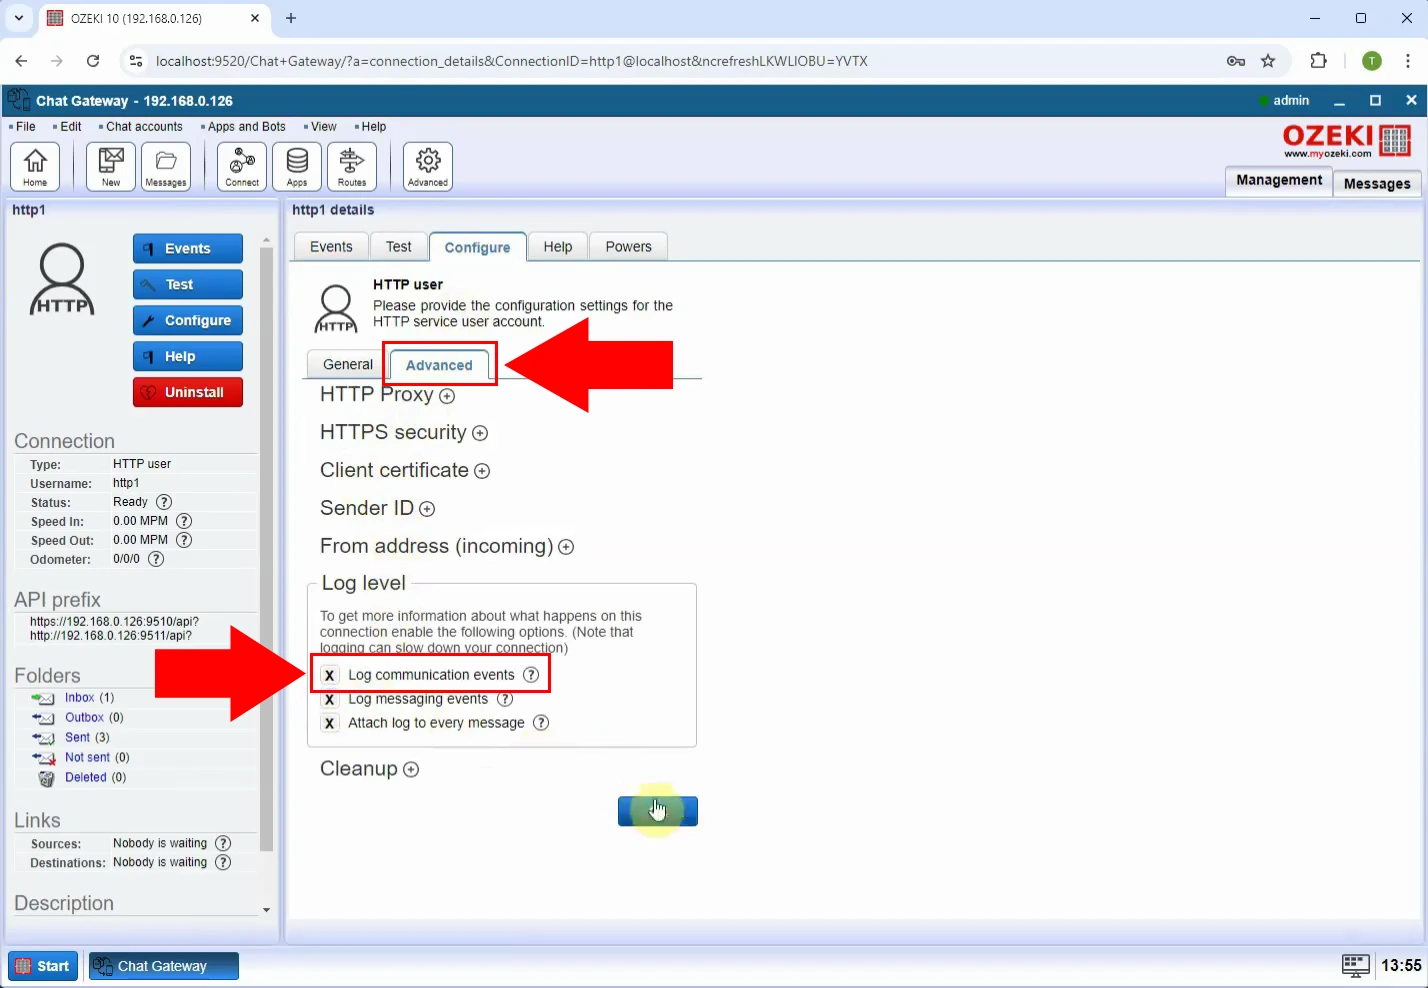
On the Advanced tab of the user's settings, look for Log level and click it. Tick the box next to Log communication events and hit Ok. Take a look at Figure 6 for an example.
How to generate an API key for a HTTP user? (Video Tutorial)
In this short guide video, you'll learn how to generate an API key for your HTTP user and test it using Postman. We’ll walk you through the steps to create the key, configure the necessary settings, and send a test request to ensure everything is working correctly.
Step 1 - Open AI Studio
Open the Ozeki desktop, and click on the AI studio to open it. Look at Figure 7.

Step 2 - Open AI Gateway
Locate the AI Gateway button on the right side of your screen and click on it to view the available options. This is shown in Figure 8.

Step 3 - Select HTTP user
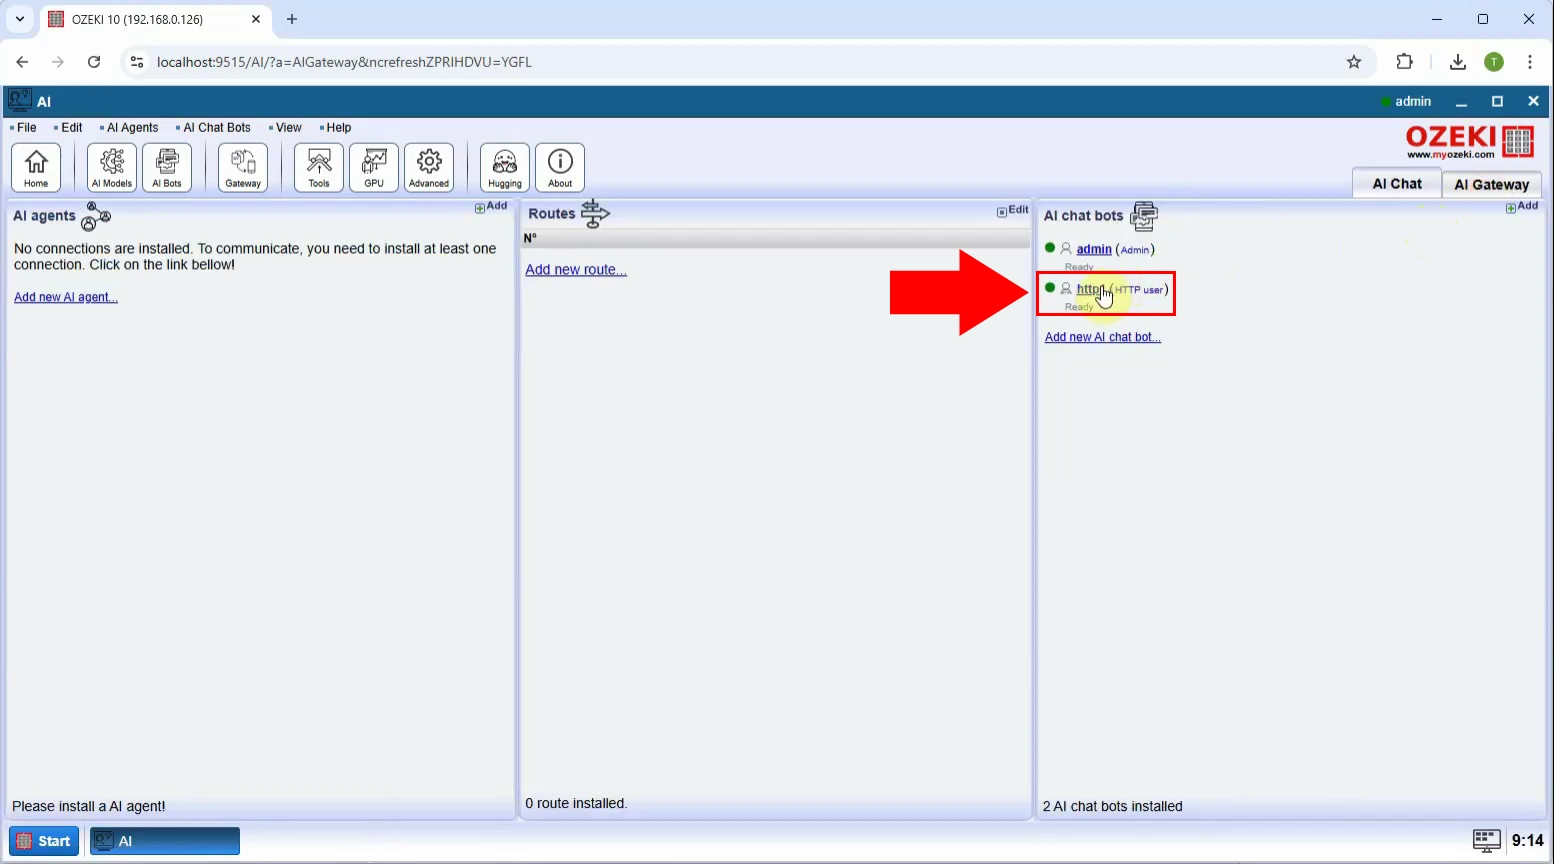
Find your newly created HTTP user under the AI Chat Bots section and click on it. This will take you to the settings page, where you can configure and manage the selected HTTP user. Figure 9 is here to help.
Step 4 - Select API key section
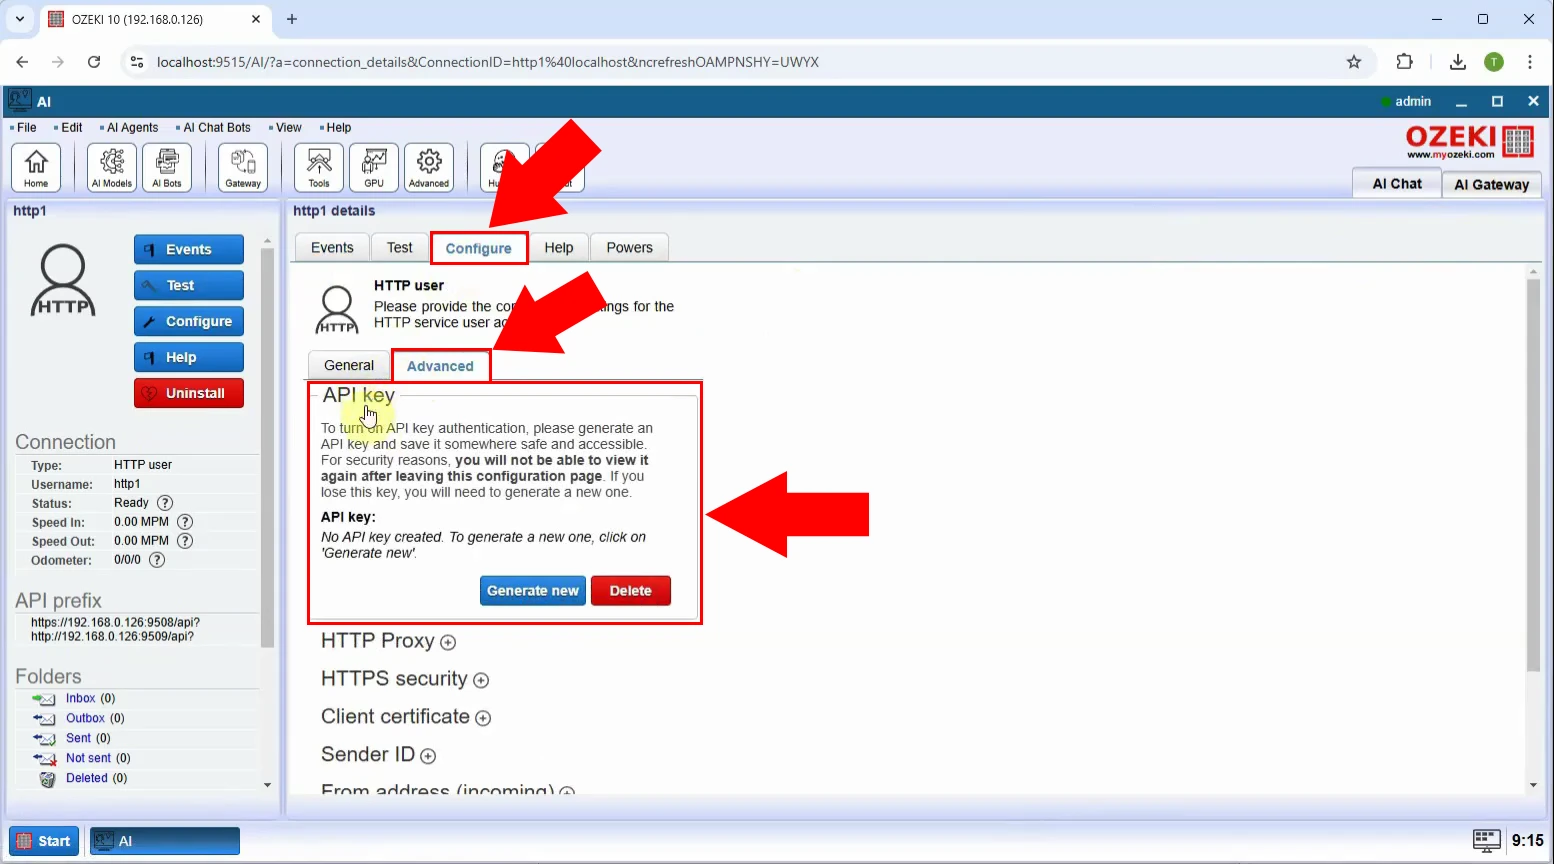
Locate the "Configure" tab in the settings menu, then click on "Advanced". From there, select the "API Key" option. Refer to Figure 10 for visual guidance.
Step 5 - Genetare new API key
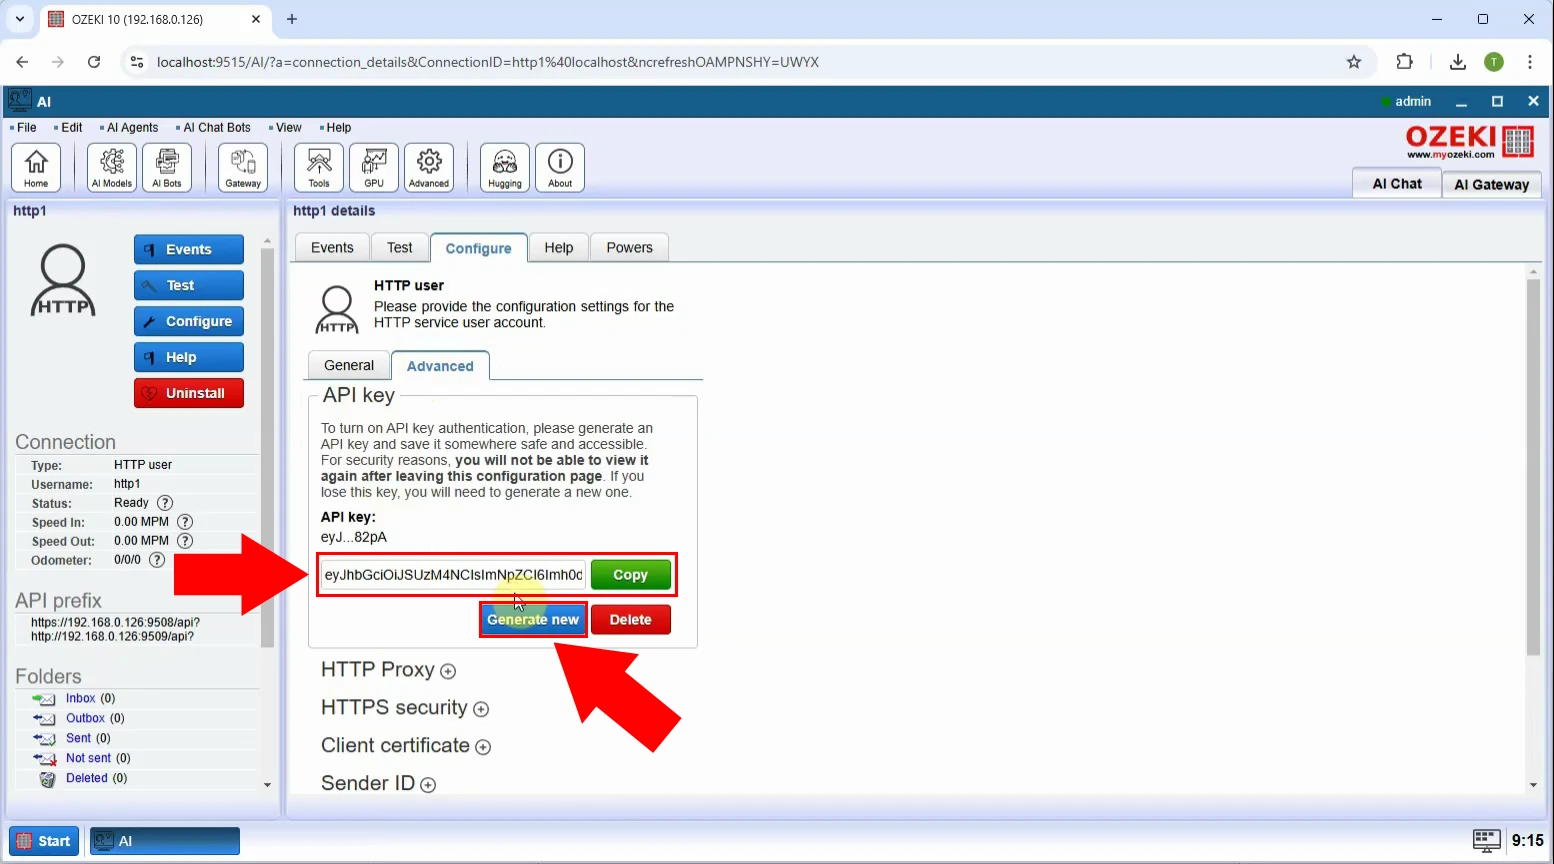
Click on "Generate New" to create a new API key. Once the key is generated, press the "Copy" button to save it to your clipboard for easy access. Figure 11 serves as a visual help.
Summary
This guide shows you how to create an API key for your HTTP user in Ozeki AI
and test it using Postman. After finding the AI Gateway and selecting your
HTTP user, you'll navigate to the Advanced Configuration section to generate
the API key. Once it's created, you can copy it and use it in your
applications to ensure secure communication.
If you're looking to set up a custom AI chatbot with ease, Ozeki AI has all
the tools you need for smooth integration. Give it a try and see how it can
improve your workflows!

