How to generate OpenAI API key
This guide will walk you through the process of generating an OpenAI API key. The key is essential for using OpenAI's models in your projects, whether you're developing chatbots, automating tasks, or experimenting with AI. We’ll take you step-by-step through creating and managing your API key so you can start using OpenAI's tools right away.
How to to generate a OpenAI API key? (Quick Steps)
To to generate a OpenAI API key:
- Open API key menu
- Create new API key
- Define API key name
- Generate API key
- Copy API key
How to generate a OpenAI API key? (Video Tutorial)
In this video, we'll walk you through the simple steps to generate an API key for your ChatGPT account. This key will allow you to access OpenAI’s powerful language models, such as GPT-3, and integrate them into your projects or applications. Whether you're building a chatbot or using the models for other tasks, this guide will help you get started quickly and easily.
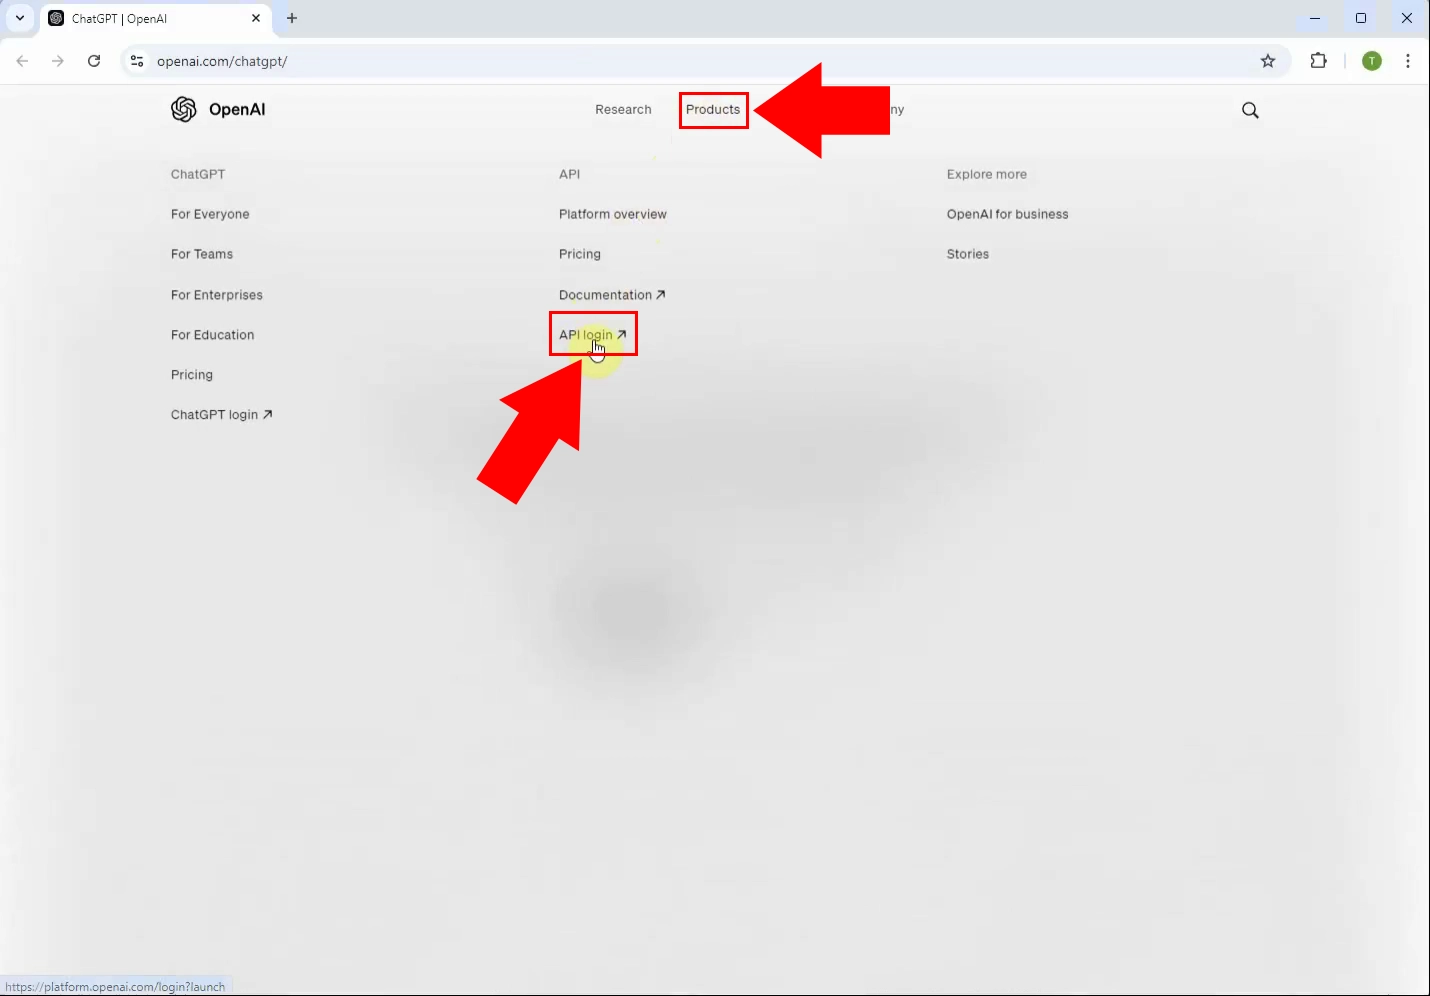
Step 1 - Open API login page
Visit openai.com and navigate to the Products tab. From there, locate and click on the API login button to access the API section. For a deeper dive, look at Figure 1.
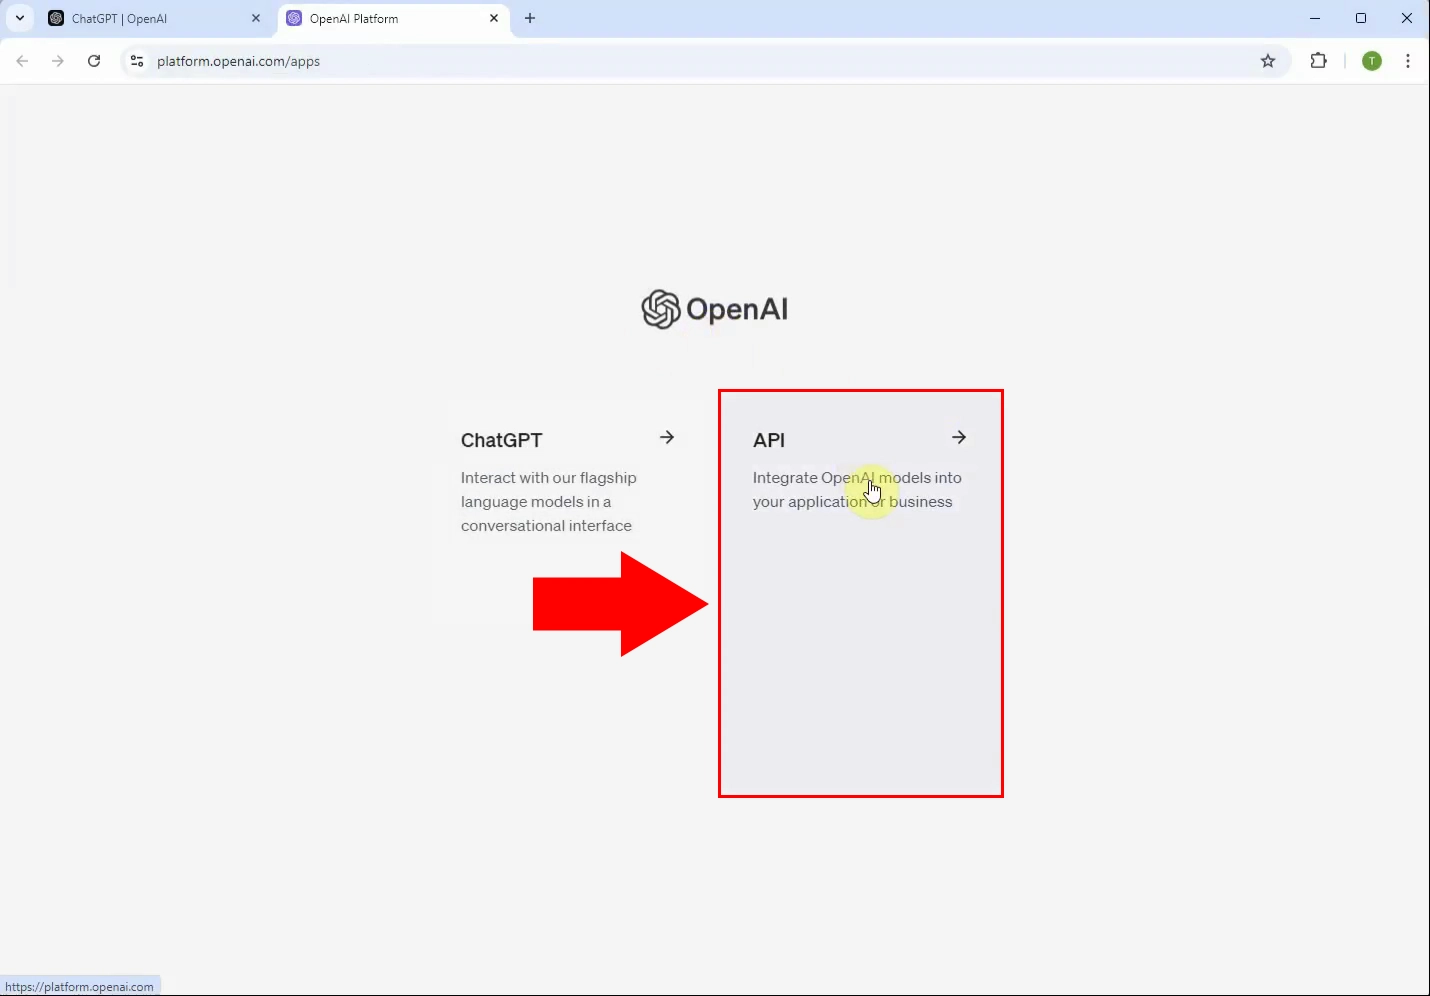
Step 2 - Select API page
Select the API option to continue the process. This will direct you to the page where you can manage your API access and generate a new API key for your ChatGPT account. Review Figure 2 to gain a clearer perspective.
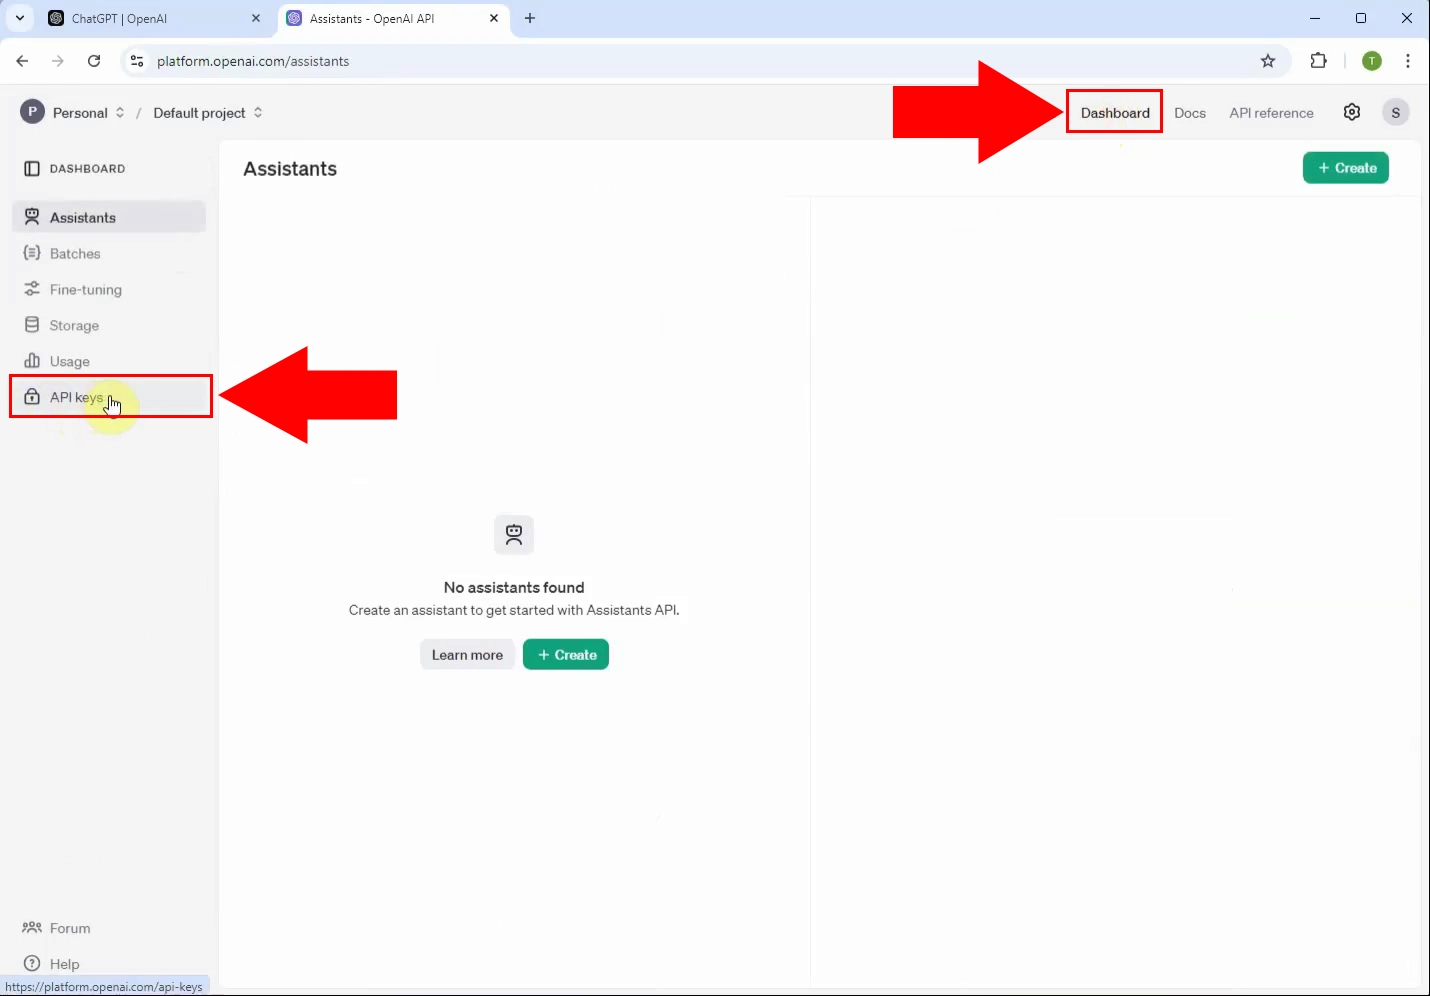
Step 3 - Select API Keys menu
Click on the Dashboard in the top right of your screen. Once you're on the dashboard, look for the button labeled API Keys and click it. This will take you to the section where you can manage and generate new API keys for your account. Figure 3 illustrates this in more detail.
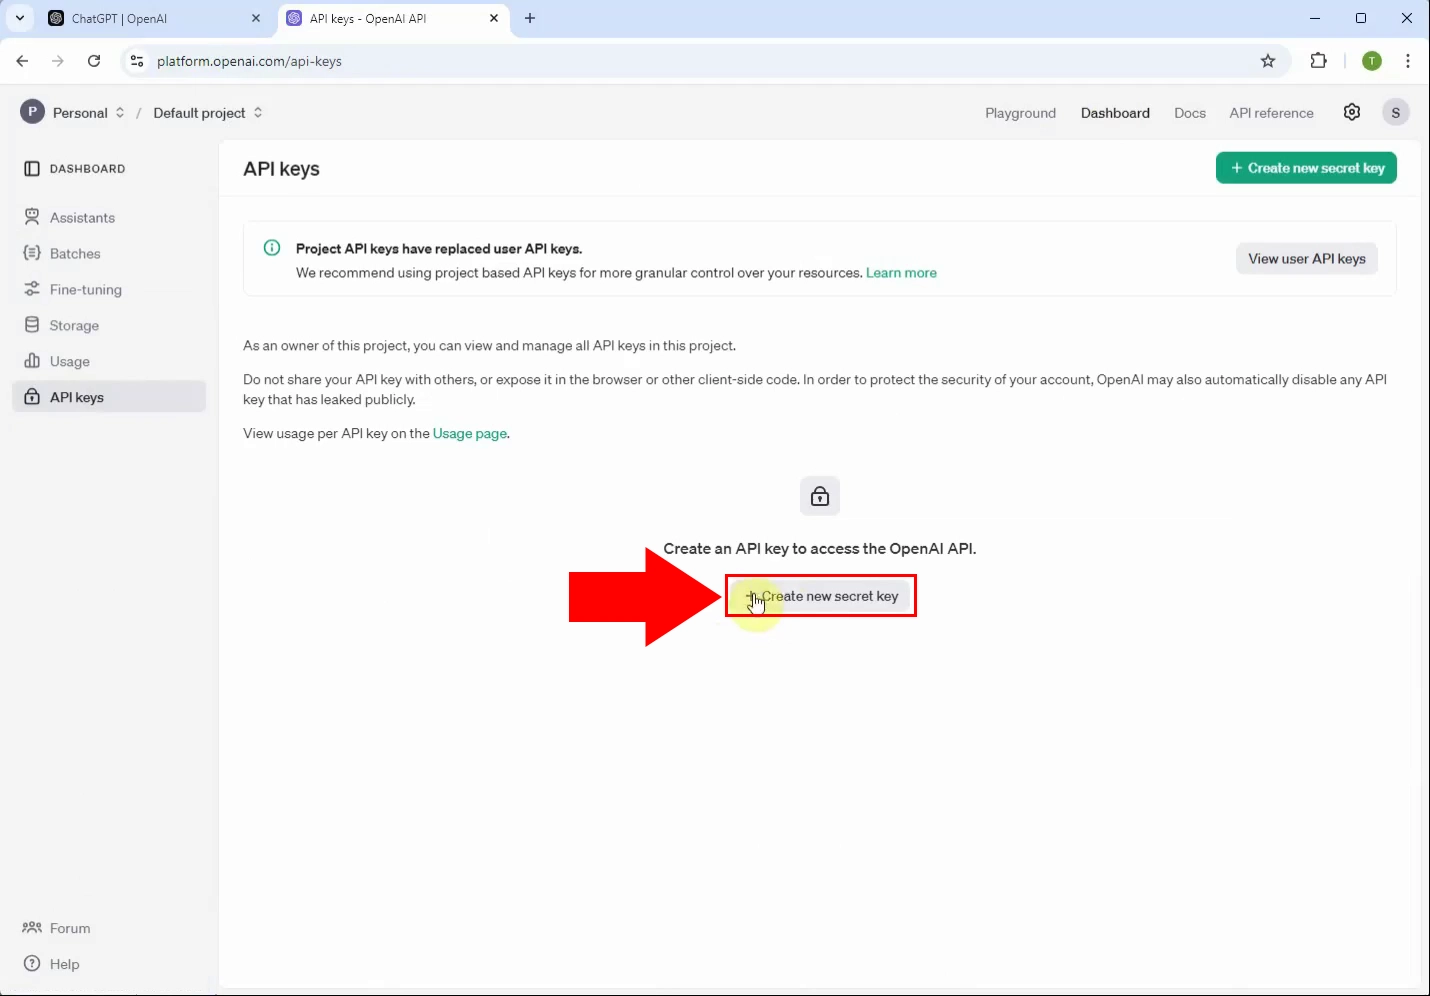
Step 4 - Create new secret key
In the middle of the screen, you will see the Create new secret key button. Click on it to generate a new API key for your account. Check Figure 4 for extra help.
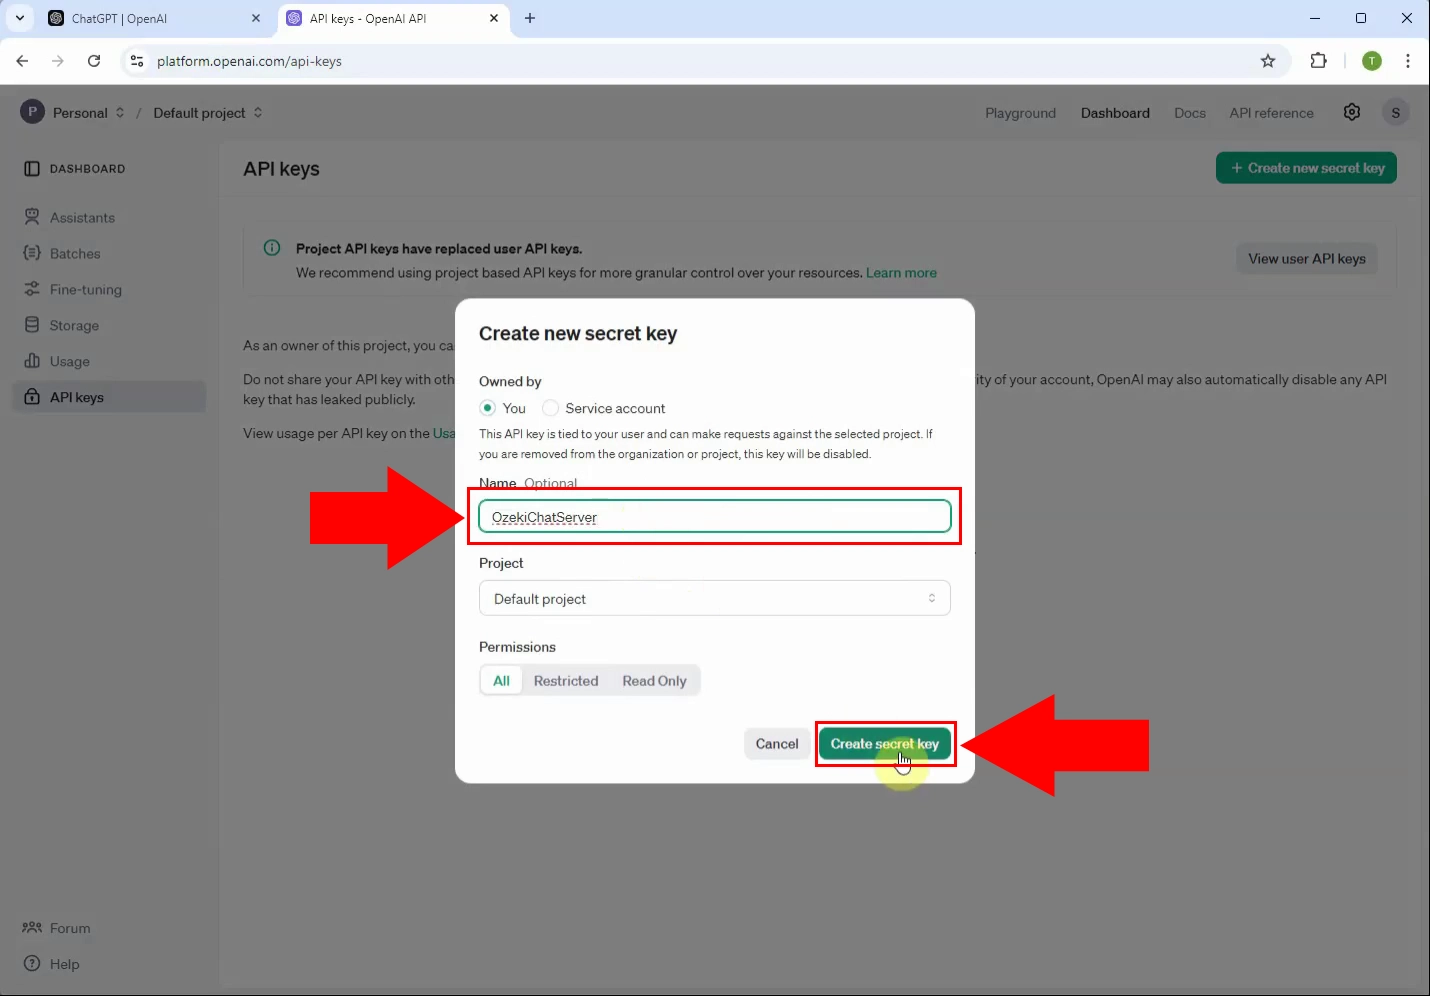
Step 5 - Create secret key
Give your API key a clear and straightforward name that reflects its intended use, then click the Create secret key button to generate your new key. This key will be displayed once it's created. Look at Figure 5 for a clearer view.
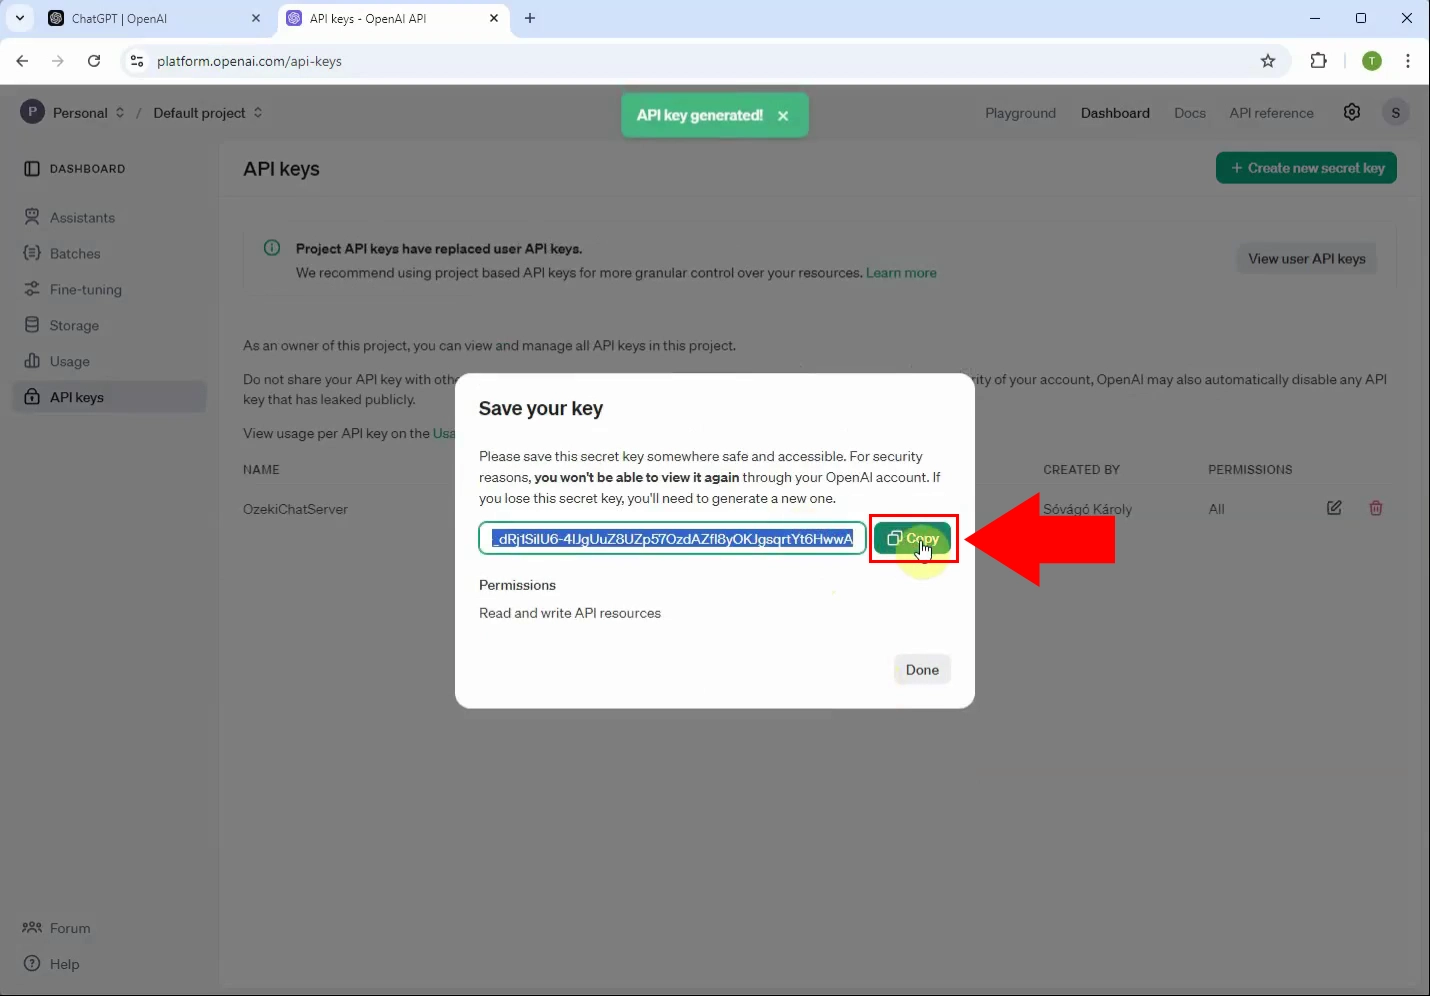
Step 6 - Copy secret key
Once the secret key is generated, make sure to copy the key immediately and store it securely. This key will not be shown again for security reasons, so it's essential to keep it safe for future use. See Figure 6 for a better understanding.
Summary
In this guide, we walked through the process of generating an API key for
your OpenAI account. This key is necessary for integrating and accessing
OpenAI’s API for tasks like using ChatGPT. After logging into your OpenAI
account, navigating to the API section, and creating a new secret key, you
can securely store it for future use in your projects.
For seamless integration with APIs like OpenAI's, you can also explore the
Ozeki AI platform, which simplifies connecting and managing various API
integrations. Whether you're building chatbots or automating processes,
Ozeki provides tools that streamline your workflow and boost your
productivity. Check out our Ozeki AI products to get started!

