How to test an Ozeki, ChatGPT or DeepSeek API Key using Postman
Testing your Ozeki, ChatGPT, or DeepSeek API key with Postman is an essential step to ensure that your integration is working correctly. By sending requests to the respective APIs, you can verify that your key is valid and properly configured. This process allows you to troubleshoot any issues before integrating the API into your application, making it a crucial part of the setup. In this guide, we'll walk you through how to test your API key using Postman, so you can be confident in your API's functionality.
What is Postman?
Postman is a popular tool for testing and debugging APIs, offering a simple interface for sending requests and inspecting responses. It supports authentication, automation, and collaboration, making API development more efficient.
How test an Ozeki, ChatGPT or DeepSeek API Key using Postman? (Quick Steps)
To to test an Ozeki, ChatGPT or DeepSeek API Key using Postman:
- Open Postman
- Configure authorization in Postman
- Send request in Postman
- Response in Postman
- HTTP User communication log
- Model log
How to test an Ozeki, ChatGPT or DeepSeek API Key using Postman? (Video Tutorial)
This video will demonstrate how to test your Ozeki, DeepSeek, and OpenAI API keys using Postman. Follow along to see the step-by-step process for verifying that your API keys are properly configured and working. By the end of this guide, you'll be ready to integrate these APIs into your projects with confidence.
Step 1 - Configure authorization in Postman
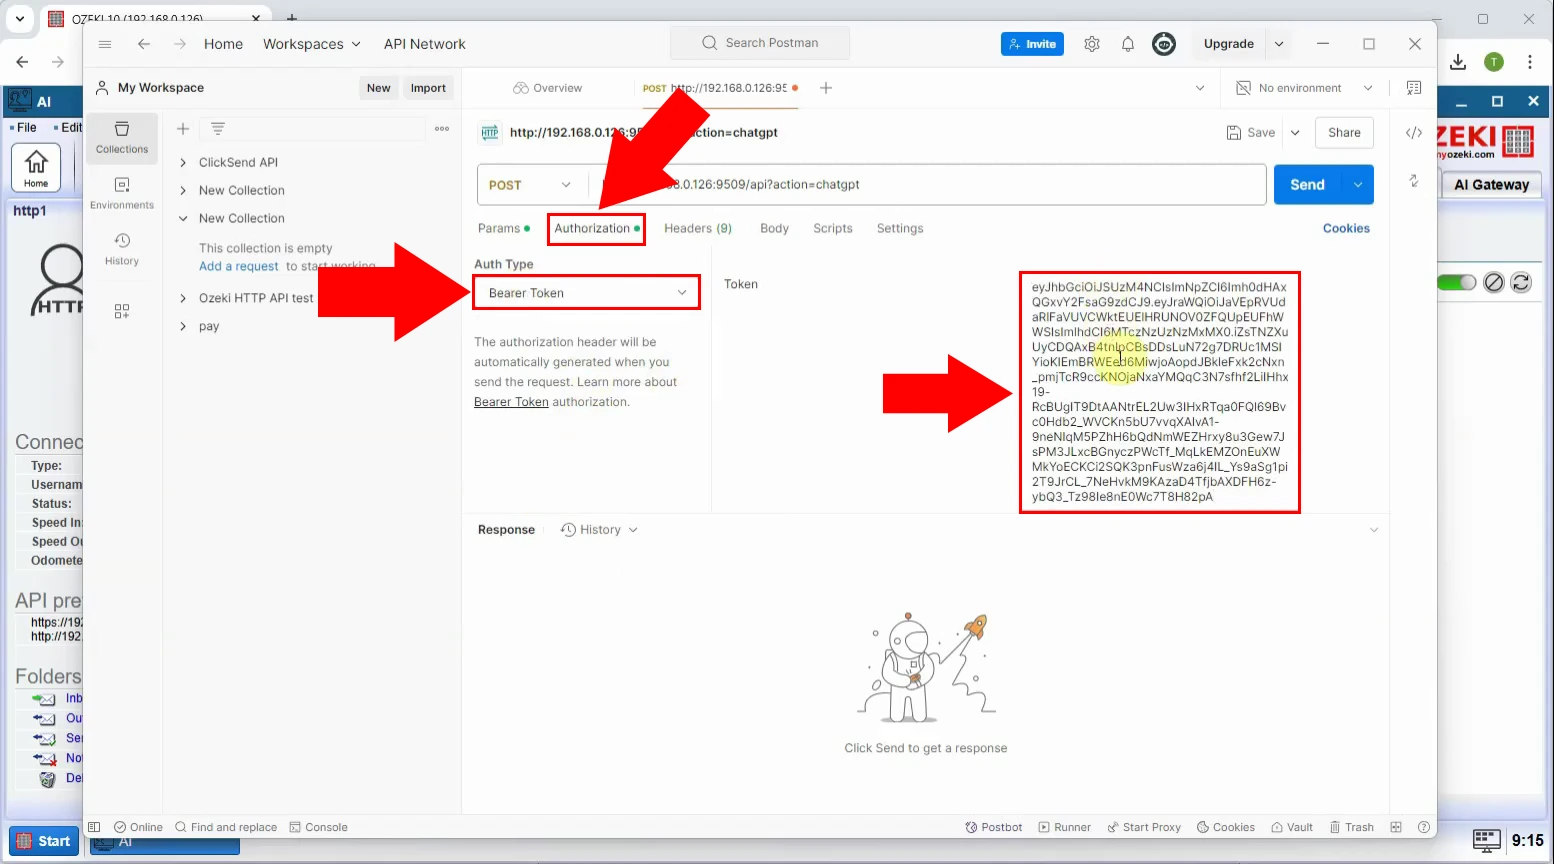
Press the Authorization tab, select Bearer Token, and then paste your copied API key into the provided field. This step will authorize your request, allowing the API to respond to you. See Figure 1 for more.
Step 2 - Send request in Postman
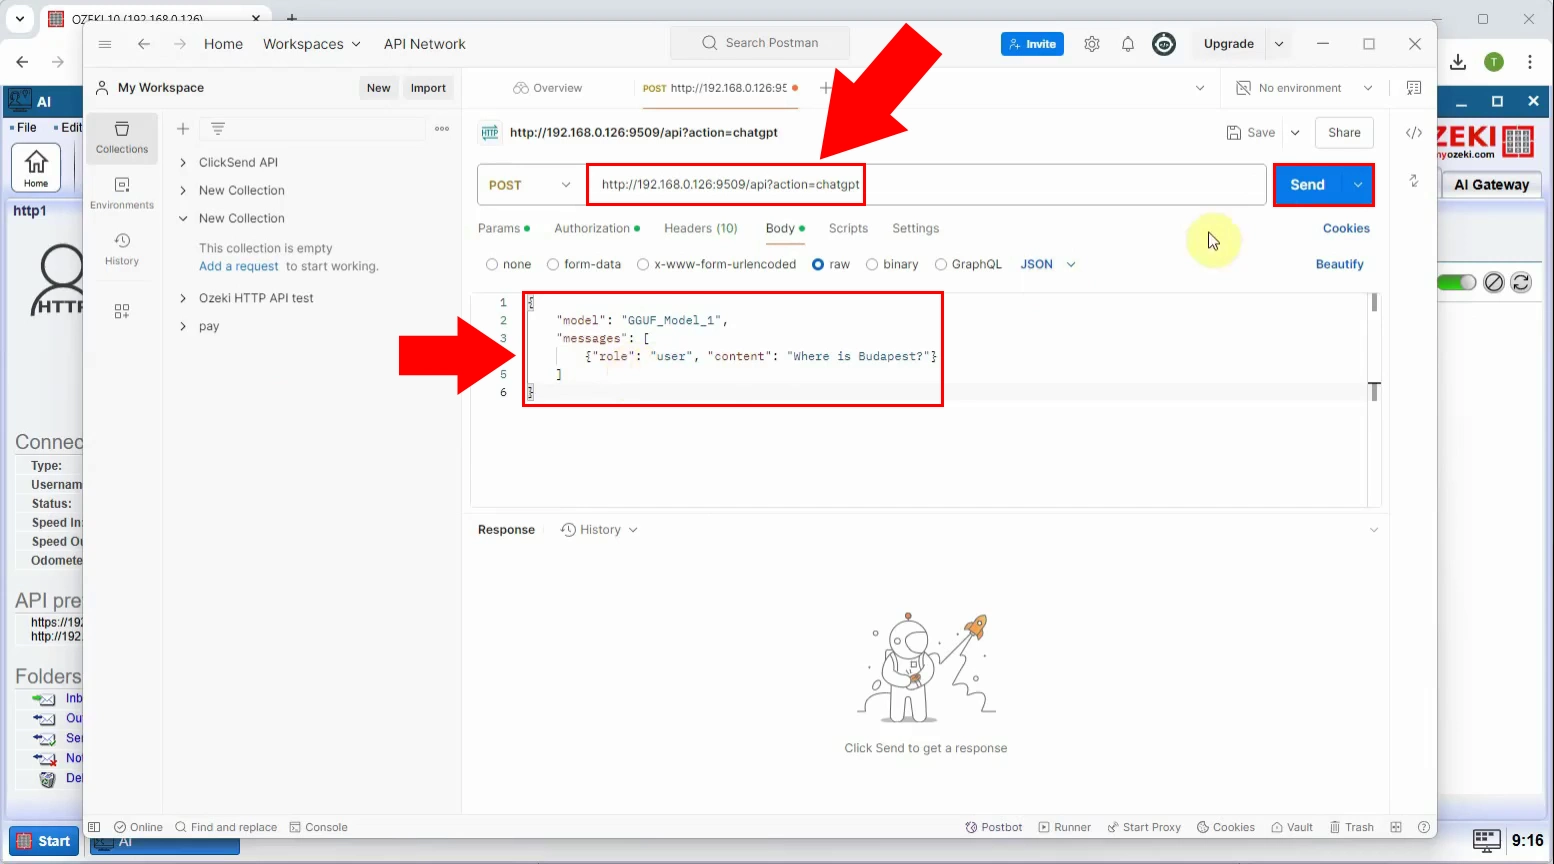
Select the request type as POST and enter your API URL in the appropriate field. Next, click on the Body tab and choose the raw option. Paste the same code(but change the model name according to your model) as shown in Figure 2 into the body section. Once everything is ready, press Send to make the request. Check Figure 2 for help.
Step 3 - Response in Postman
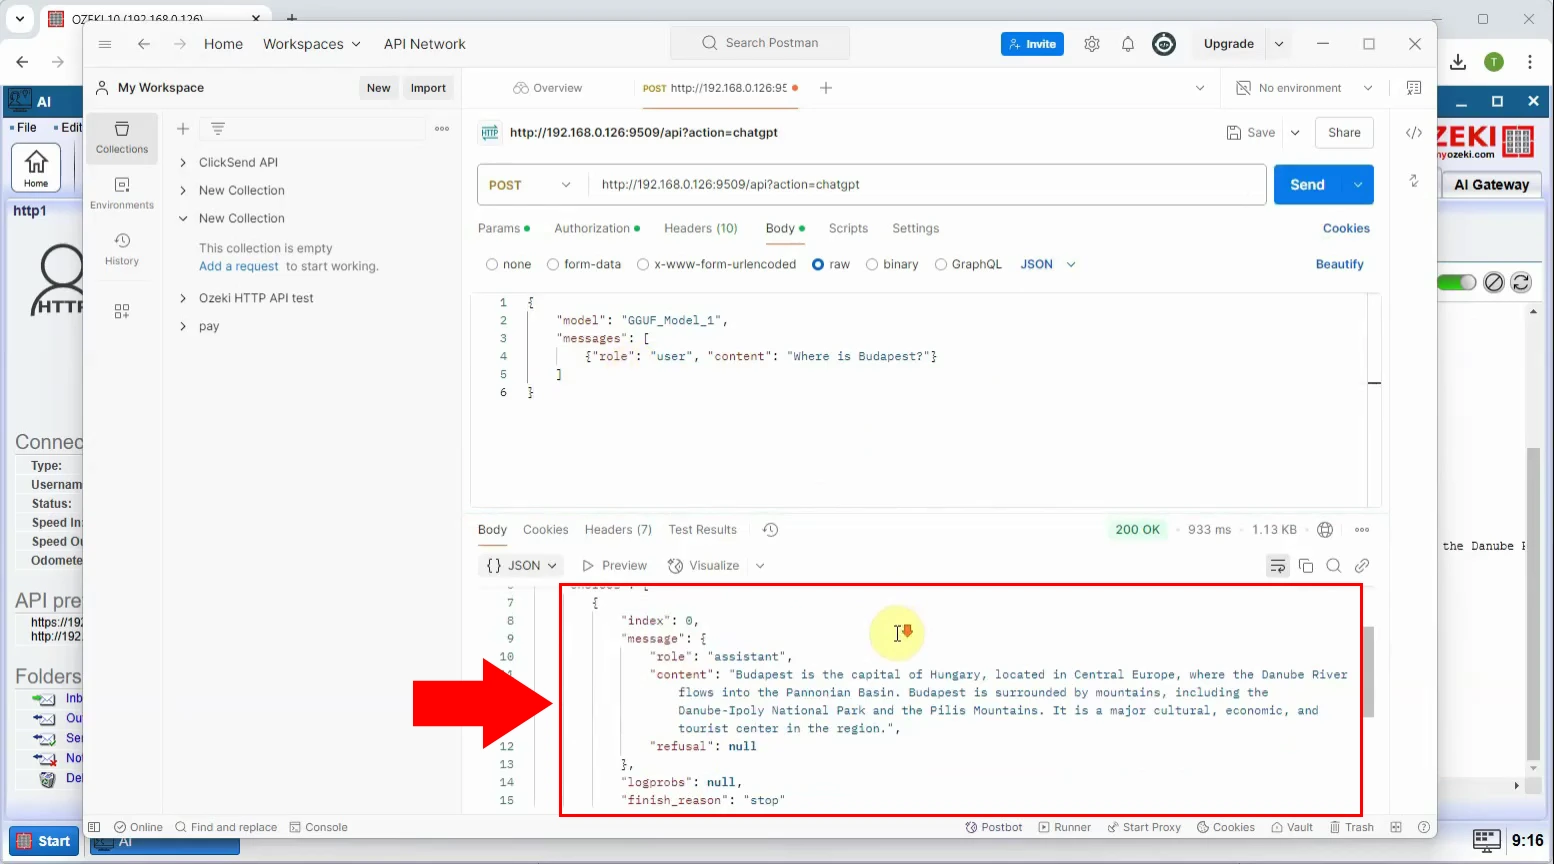
If everything was successfully configured,you will receive a response from the API. The response will be in JSON format, containing the data or message returned by your API based on the request you made. Look at Figure 3 for details.
Step 4 - Check HTTP User communication log
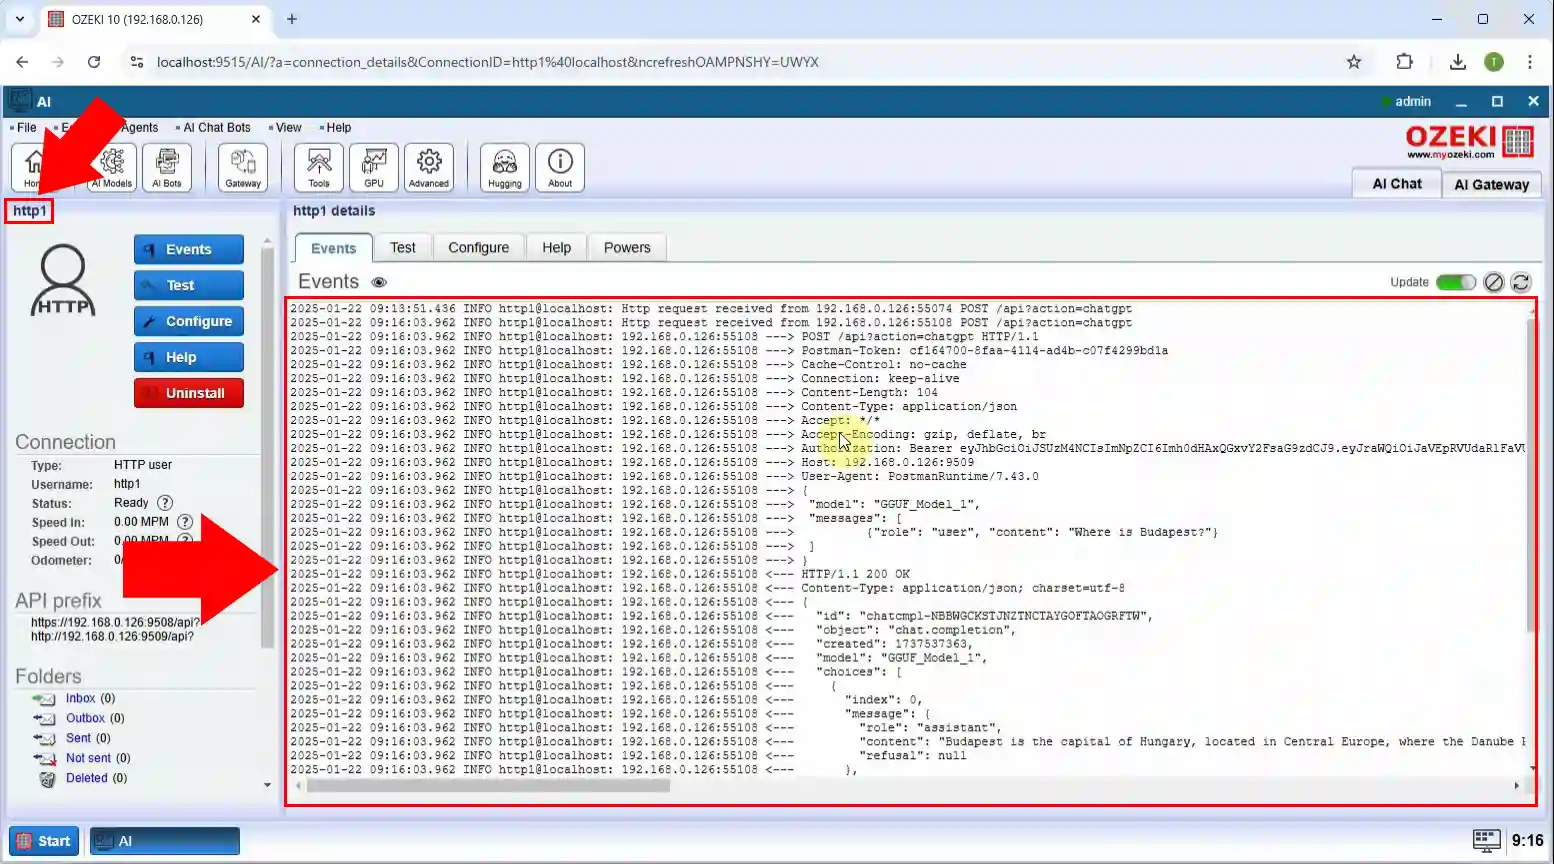
Access the HTTP user section you created in Ozeki AI and click on the Events tab. This will open the communication log, where you can review all requests and responses between your HTTP user and the API. The log will help you track any issues or verify successful interactions with the API. Refer to Figure 4 for more info.
Step 5 - Check the model log
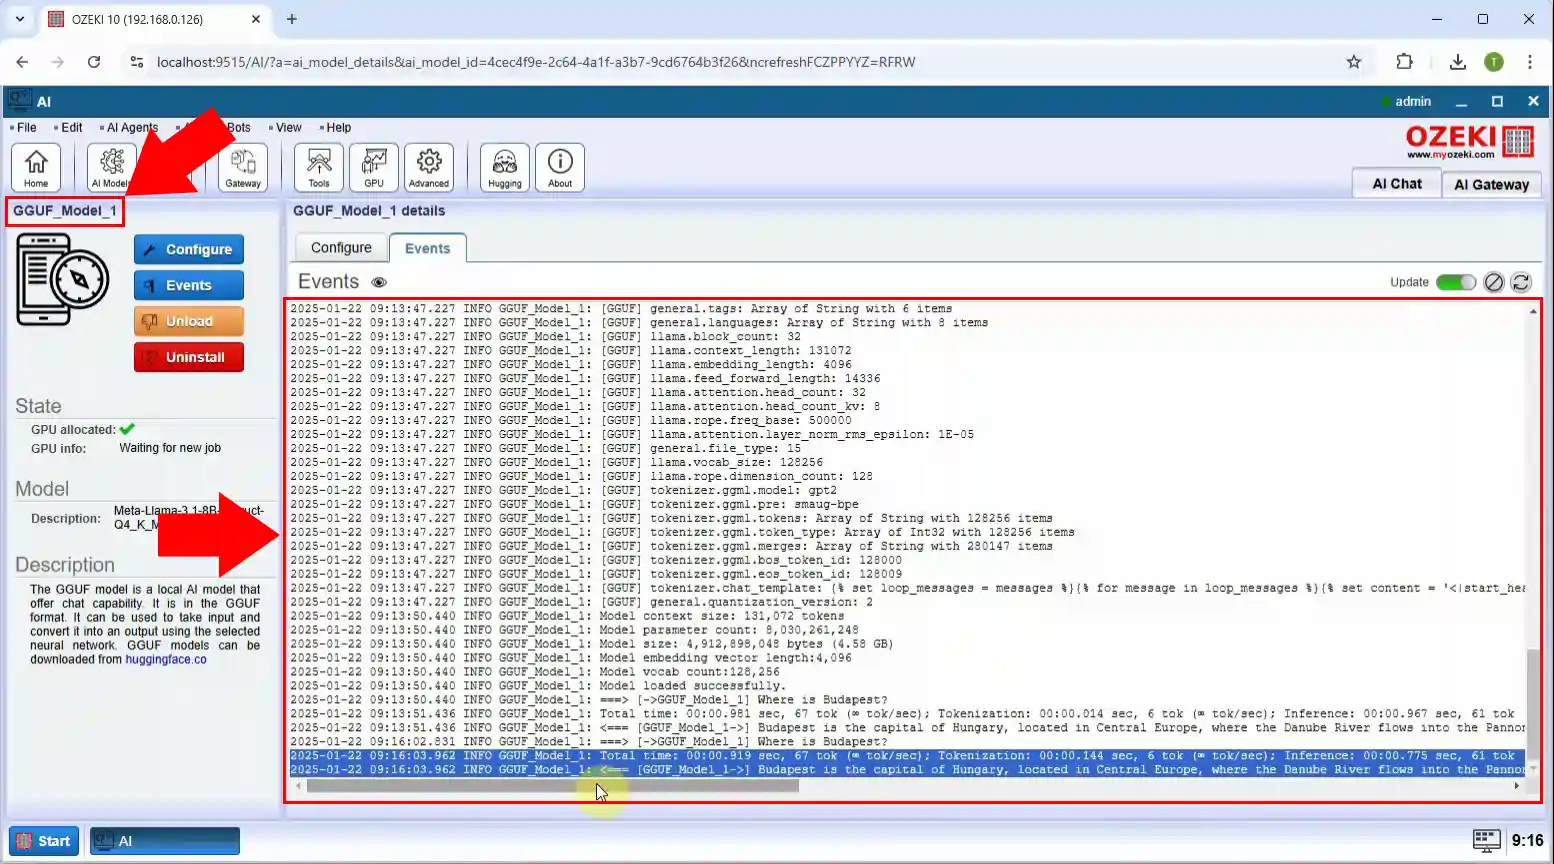
Open the Ozeki AI application and navigate to your model. Here, you can review detailed records of interactions, including system responses, errors, and processing details. This log helps in debugging and optimizing the performance of your AI model. Figure 5 can help.
Summary
Verifying your API key is an essential step to ensure your setup is functioning properly. With Postman, you can quickly test your Ozeki, ChatGPT, or DeepSeek API key by sending a request and checking the response. A successful test means your API is ready to use, while any issues can be traced through the logs available in Ozeki AI. This makes troubleshooting easier and helps maintain a smooth workflow. Ozeki AI provides a reliable way to manage chatbot integrations—explore its features to streamline your automation process.

