How to run LLama 405B model on a desktop PC
In this chapter, we will explore how to set up and run the Llama 405B model on a personal computer (PC). While running large-scale models like Llama 405B can be resource-intensive, advancements in model optimization and hardware acceleration have made it possible for high-end PCs to run such models efficiently. Additionally, you will learn how to integrate the Llama 405B model with the Ozeki AI Server, allowing you to take advantage of its AI capabilities, how to talk to it.
What is LLama 405B model?
The Llama 405B model is a large language model with 405 billion parameters, capable of performing complex language tasks such as text generation and question-answering systems. It is built on a transformer architecture, which efficiently handles sequential data like text. The Llama 405B excels in understanding and generating natural language, enabling a wide range of applications.
What is Ozeki AI Server?
Ozeki AI Server is a software platform designed to integrate artificial intelligence (AI) with communication systems, providing tools to build and deploy AI-powered applications for businesses. It enables the automation of tasks like text messaging, voice calls, and other communication processes, machine learning, and chatbots. By connecting AI capabilities with communication networks, Ozeki AI Server helps improve customer support, automate workflows, and enhance user interactions in various industries.
How to download LLama 405B model (Quick Steps)
- Go to the huggingface.co website
- Search for Hermes 3 Llama 3.1 405B GGUF
- Click on "Files and versions"
- Click on "Hermes-3-Llama-3.1-405B-IQ2_M"
- Download all four .gguf files one by one, with the arrow pointing down
How to create Ozeki AI Server model and Chatbot (Quick Steps)
- Check your PC system specification
- Open Ozeki 10
- Create new GGUF model, configure it
- Create new AI chatbot, configure it
- Have a good conversation with the chatbot
How to download LLama 405B model (Video tutorial)
In this video tutorial, we will guide you through the simple steps to download the Llama 405B model from Huggingface.co and save it directly to the C:\AIModels directory on your computer. By following the instructions, you'll quickly learn how to get the model up and running with minimal effort, ensuring an easy setup process.
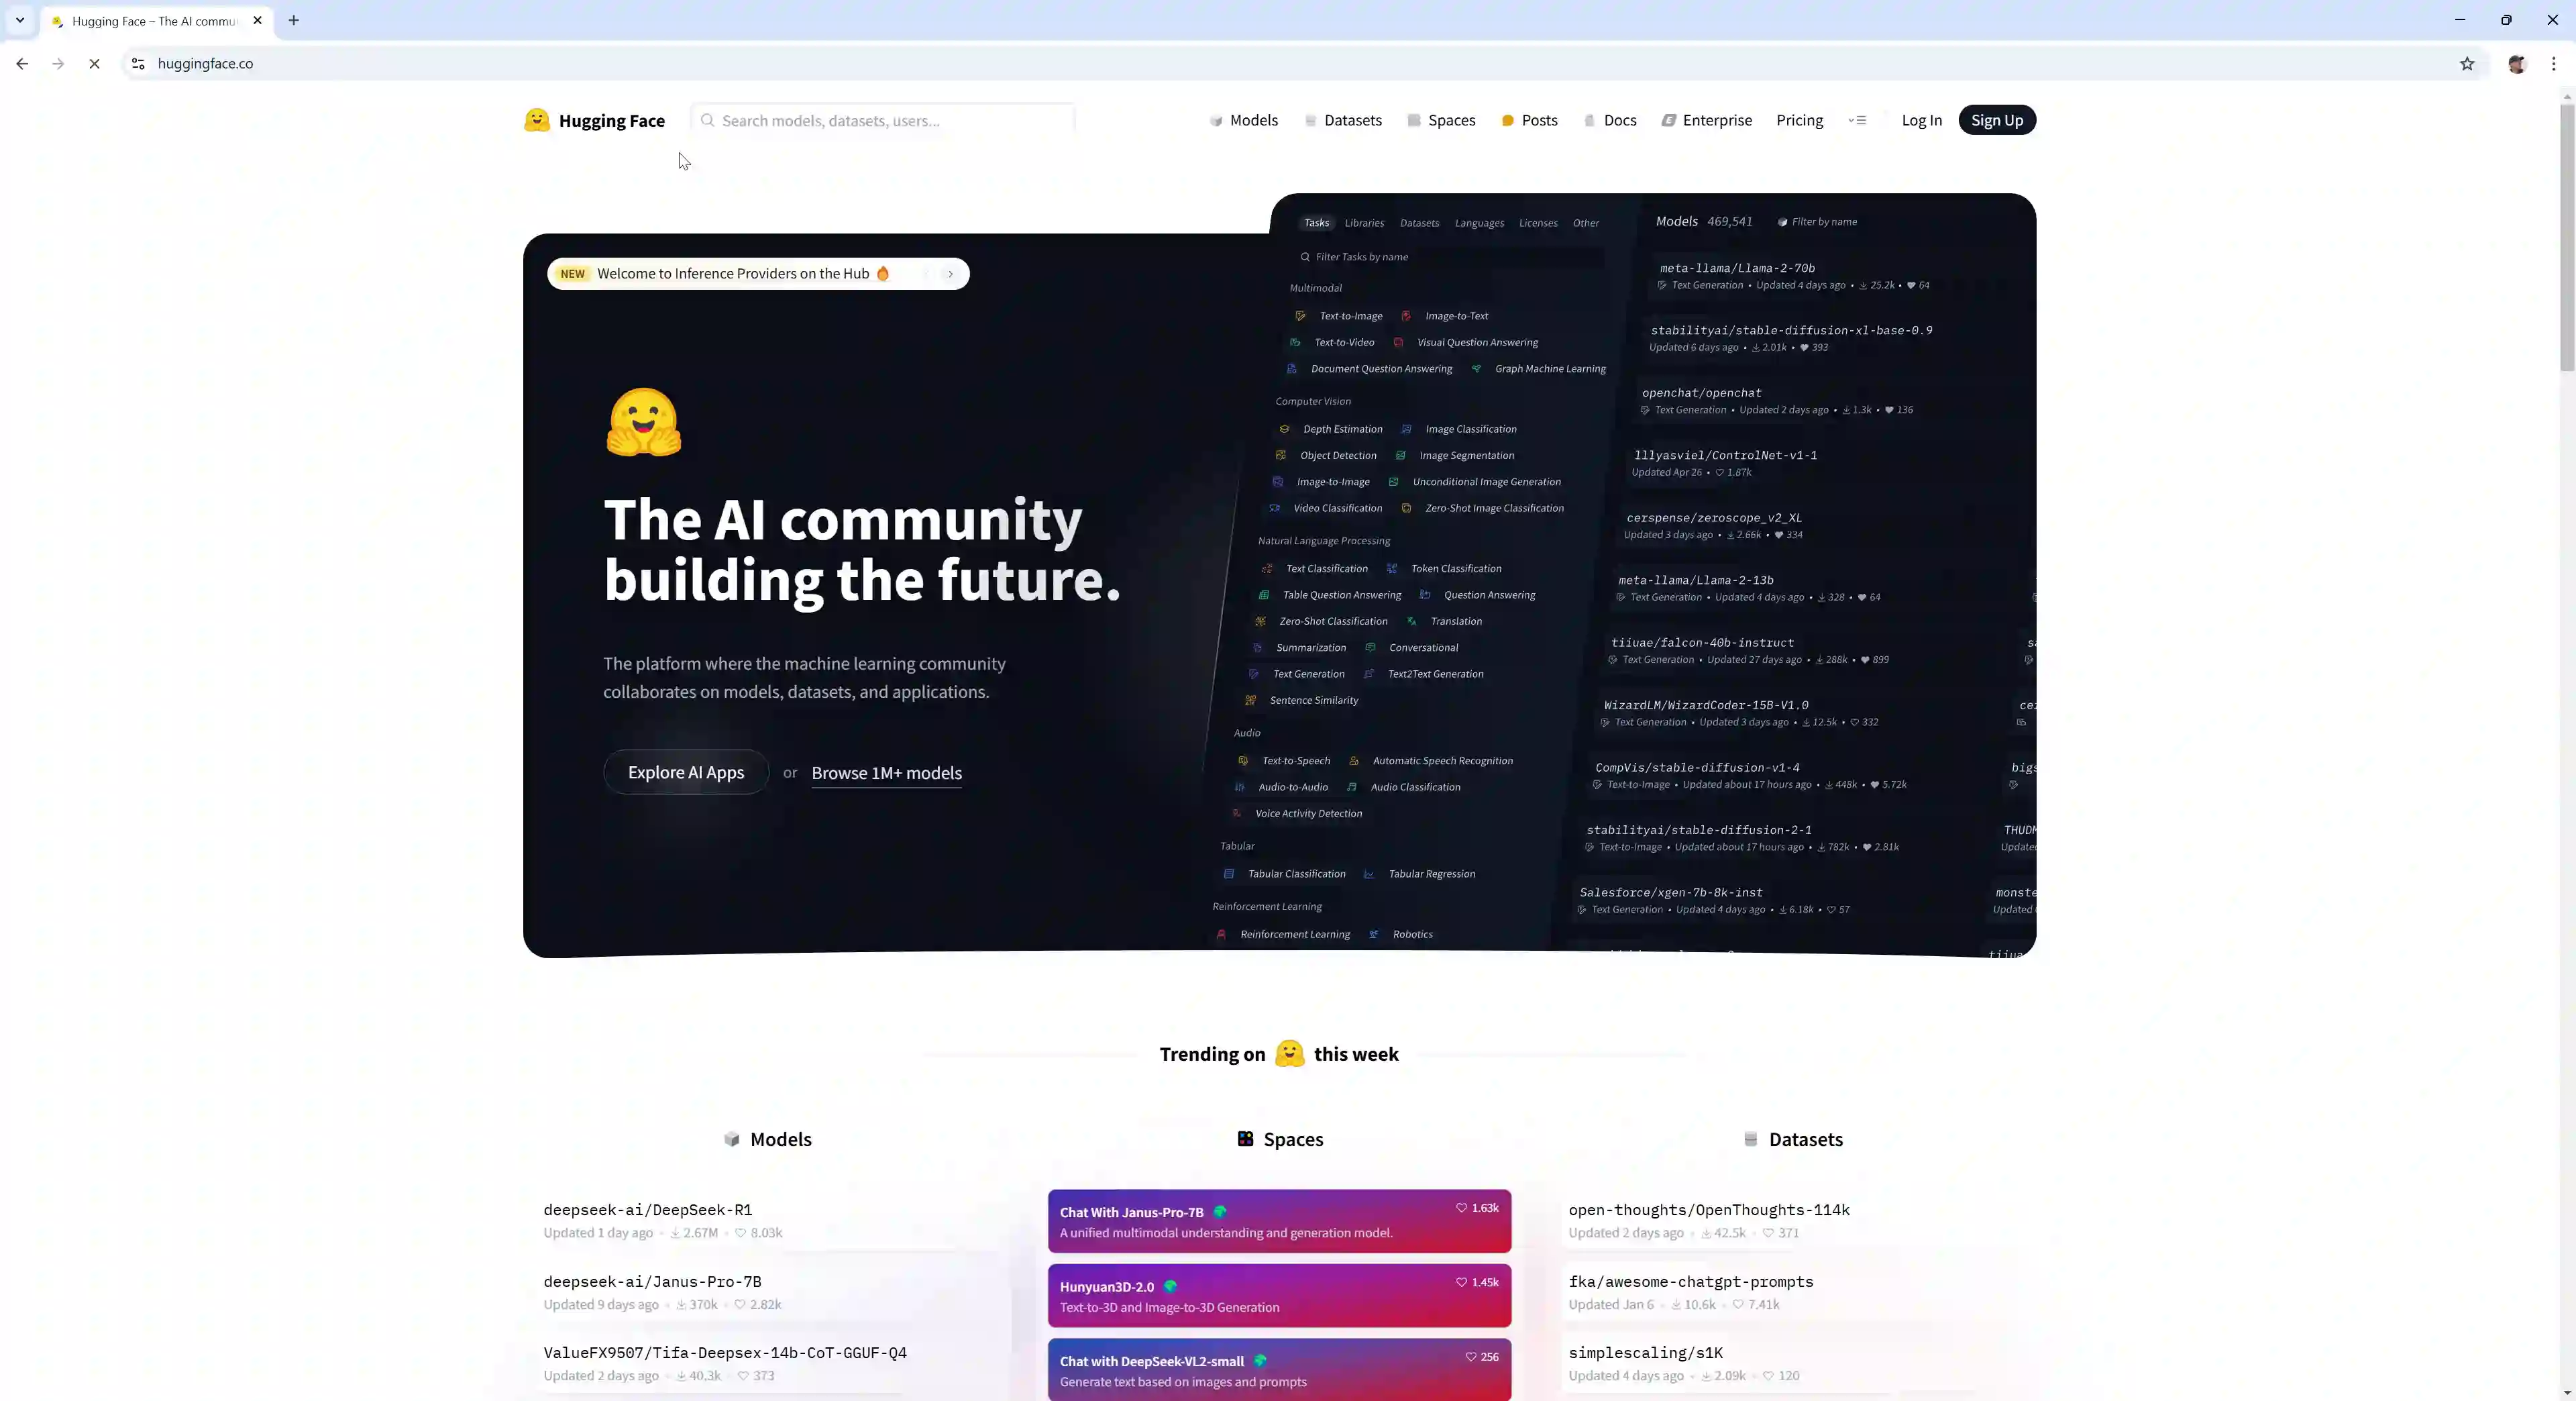
Step 1 - Open Huggingface.co page
First, go to the Huggingface website, then
click on the search bar and search for
"Hermes 3 Llama 3.1 405B GGUF"
(Figure 1).
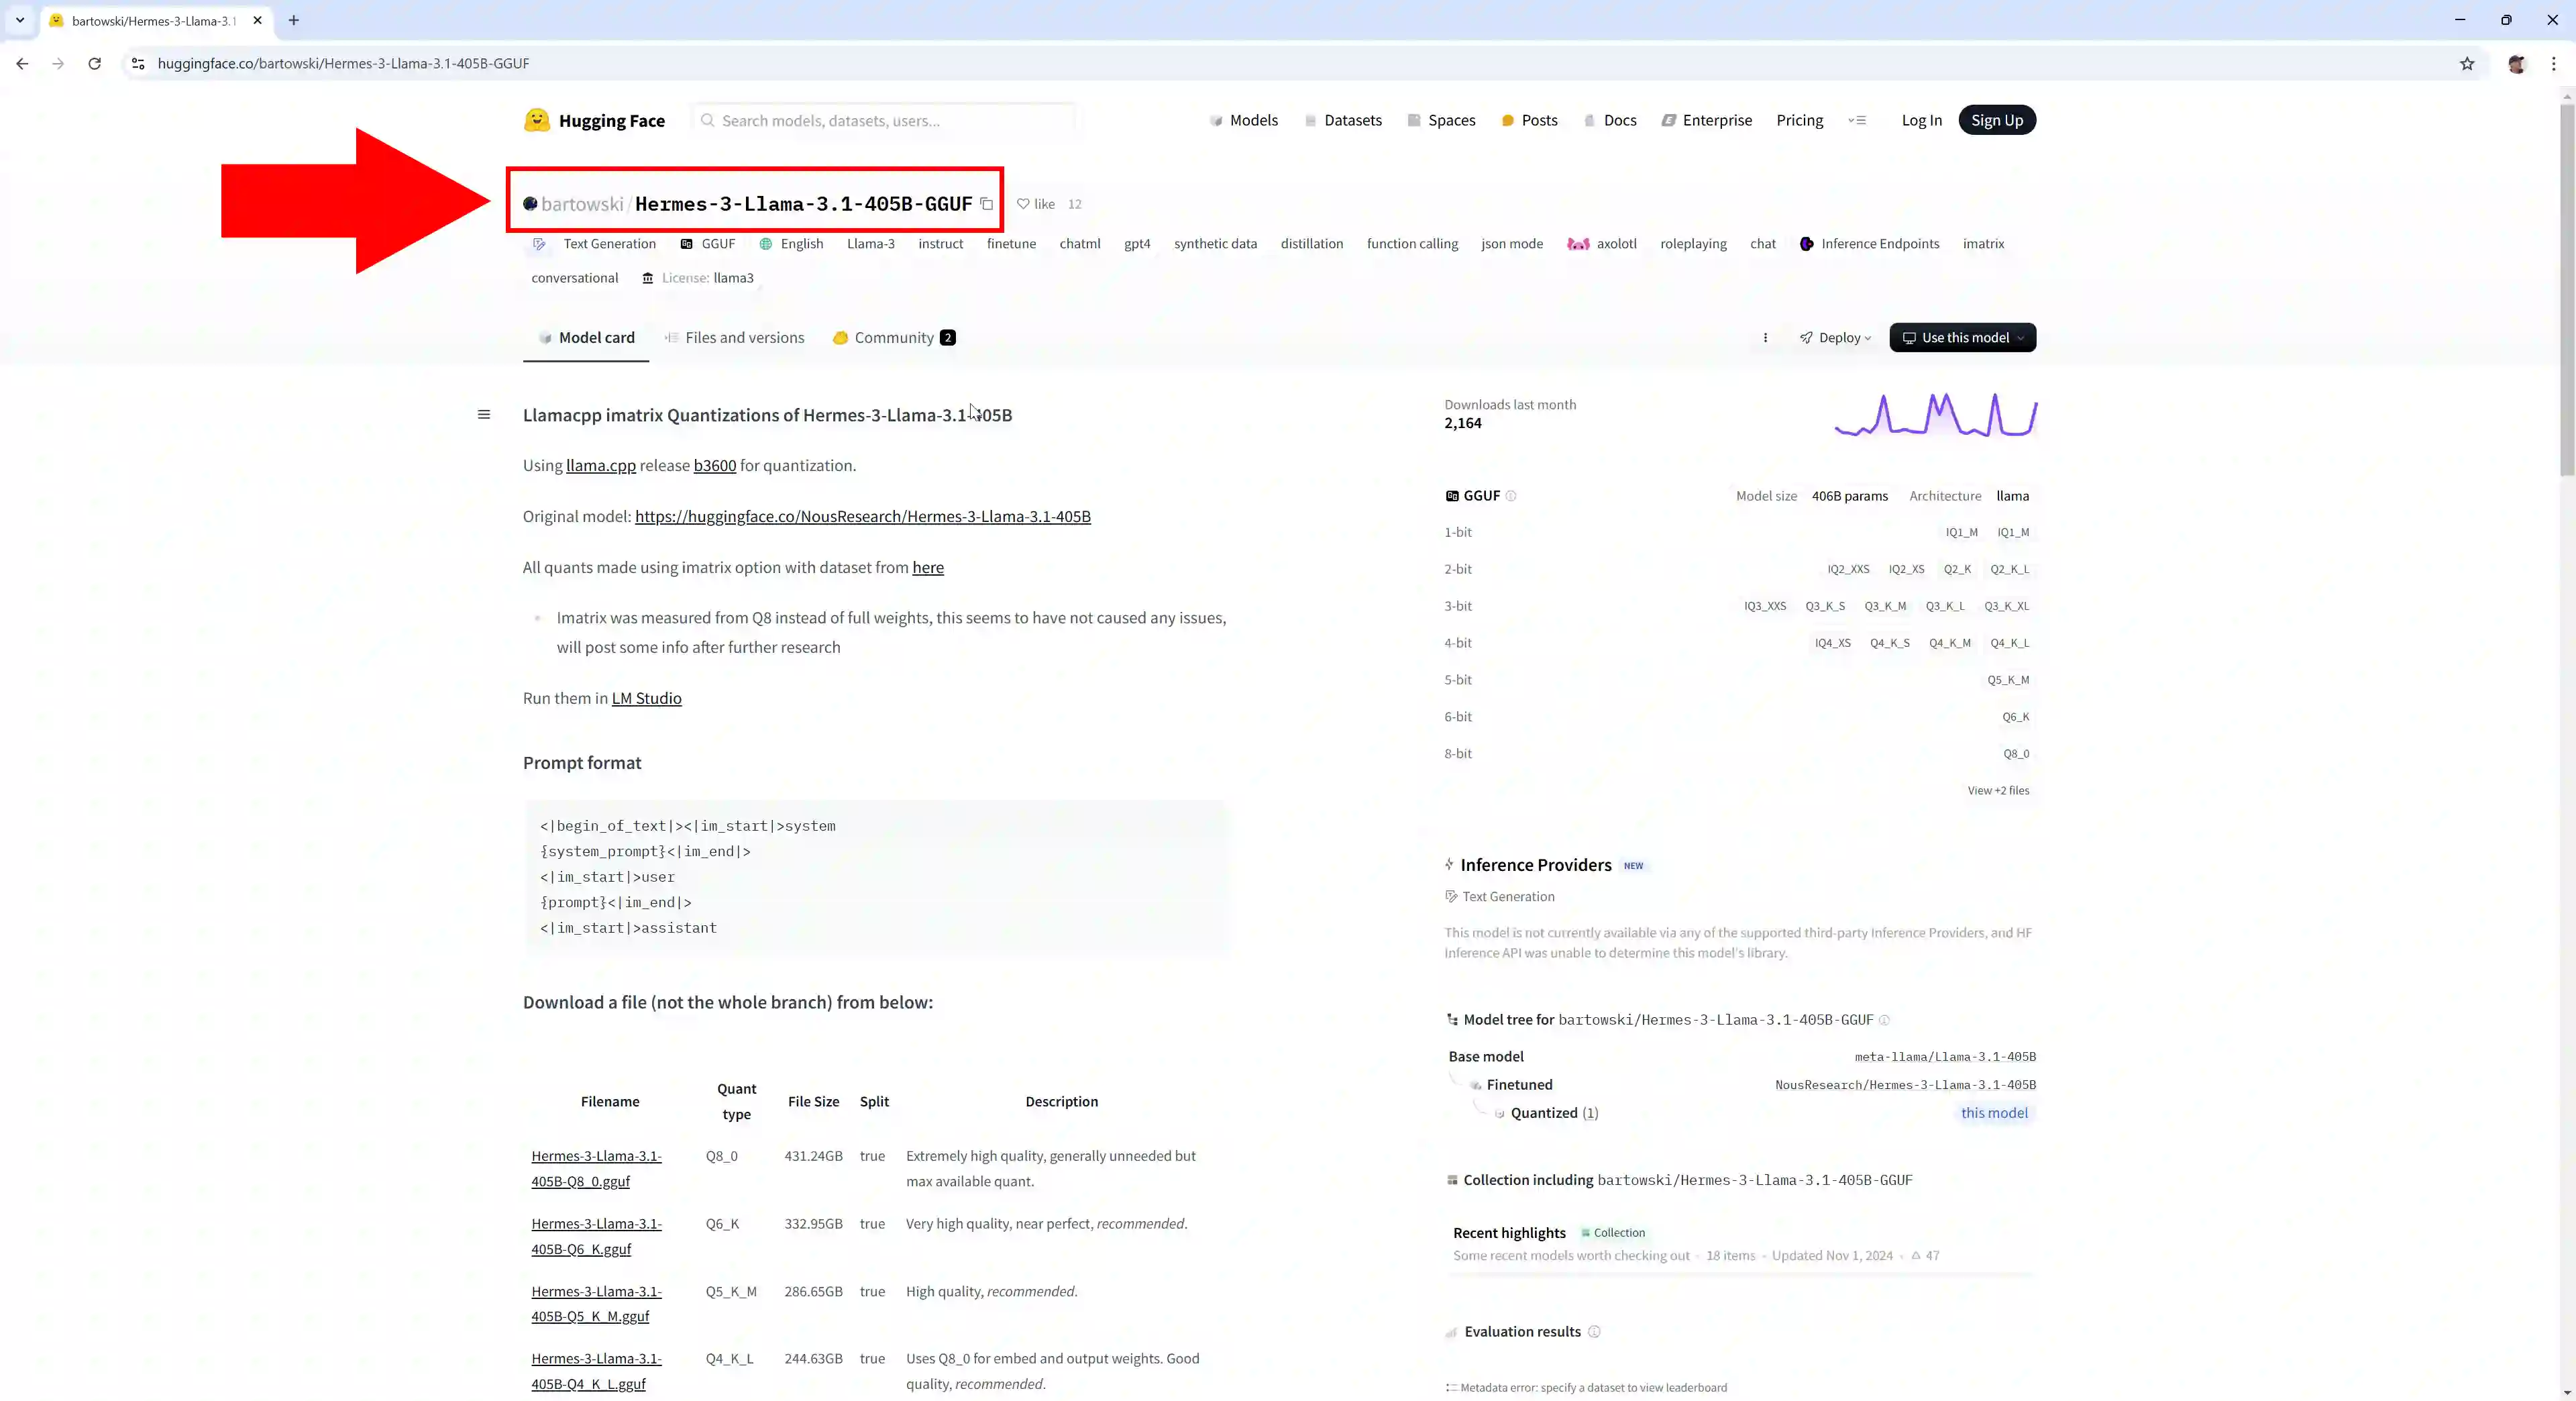
Step 2 - Open LLama 405B model page
Select the option "Hermes-3-Llama-3.1-405B-GGUF" and open it (Figure 2).
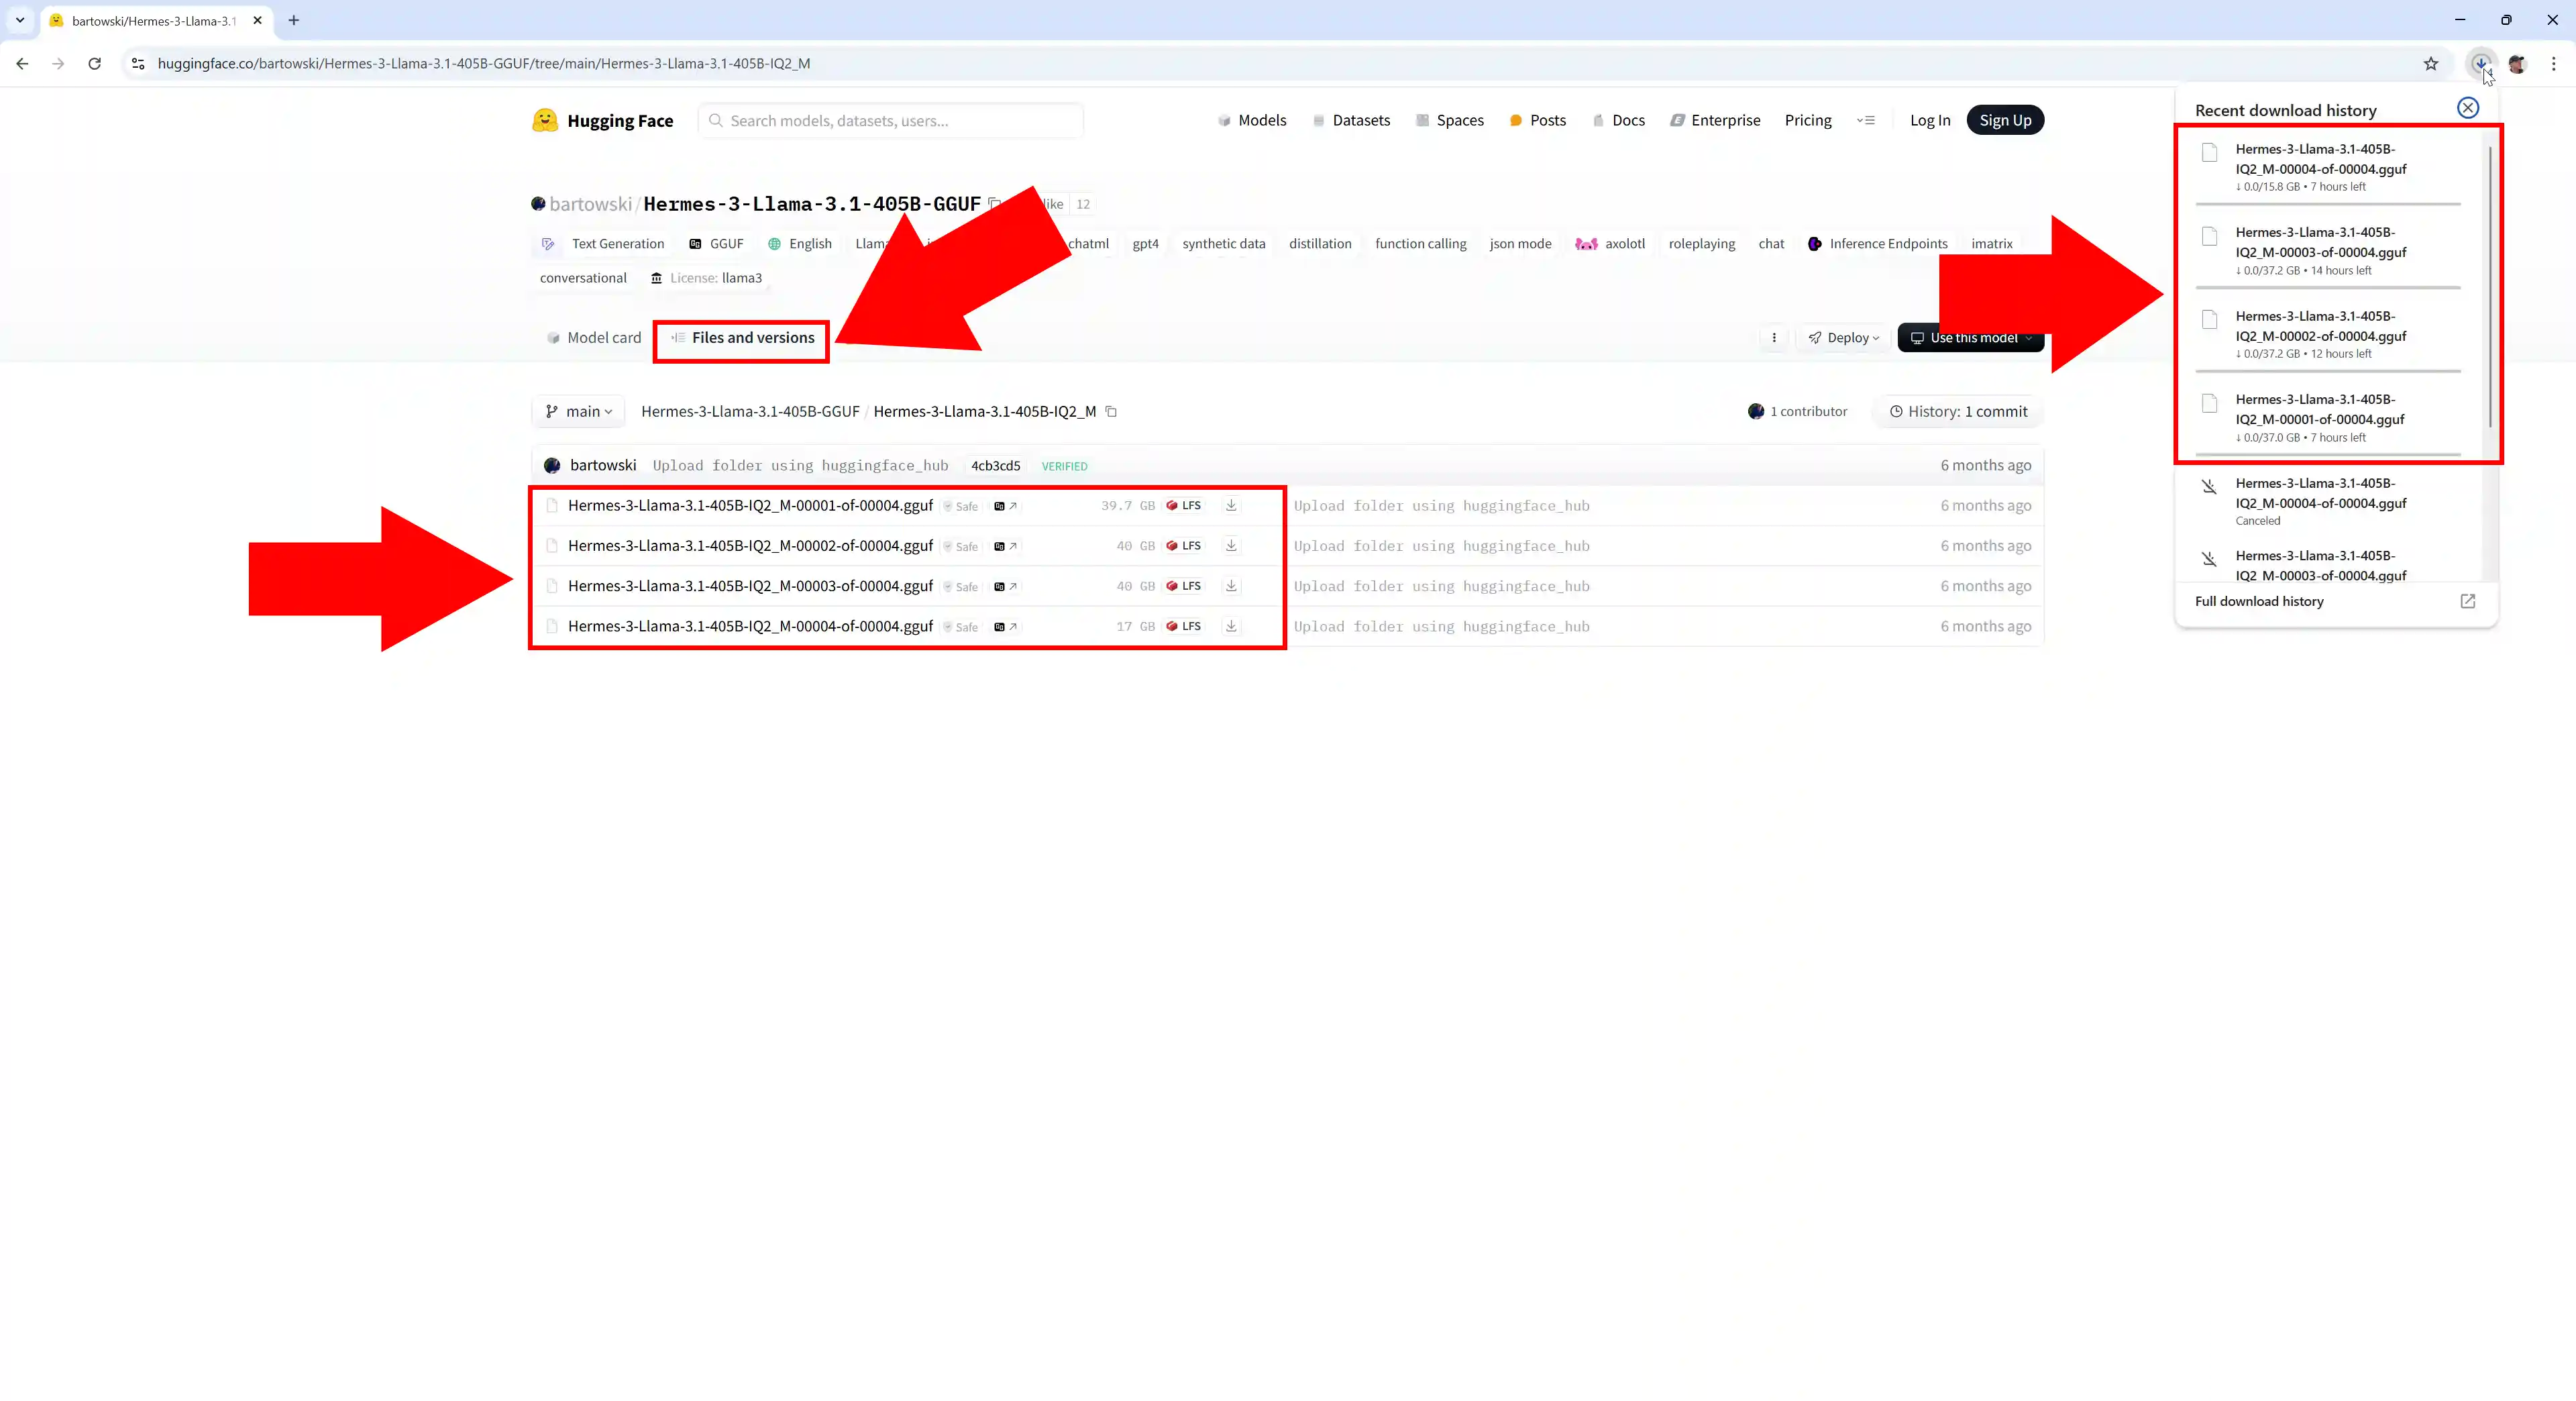
Step 3 - Download model files
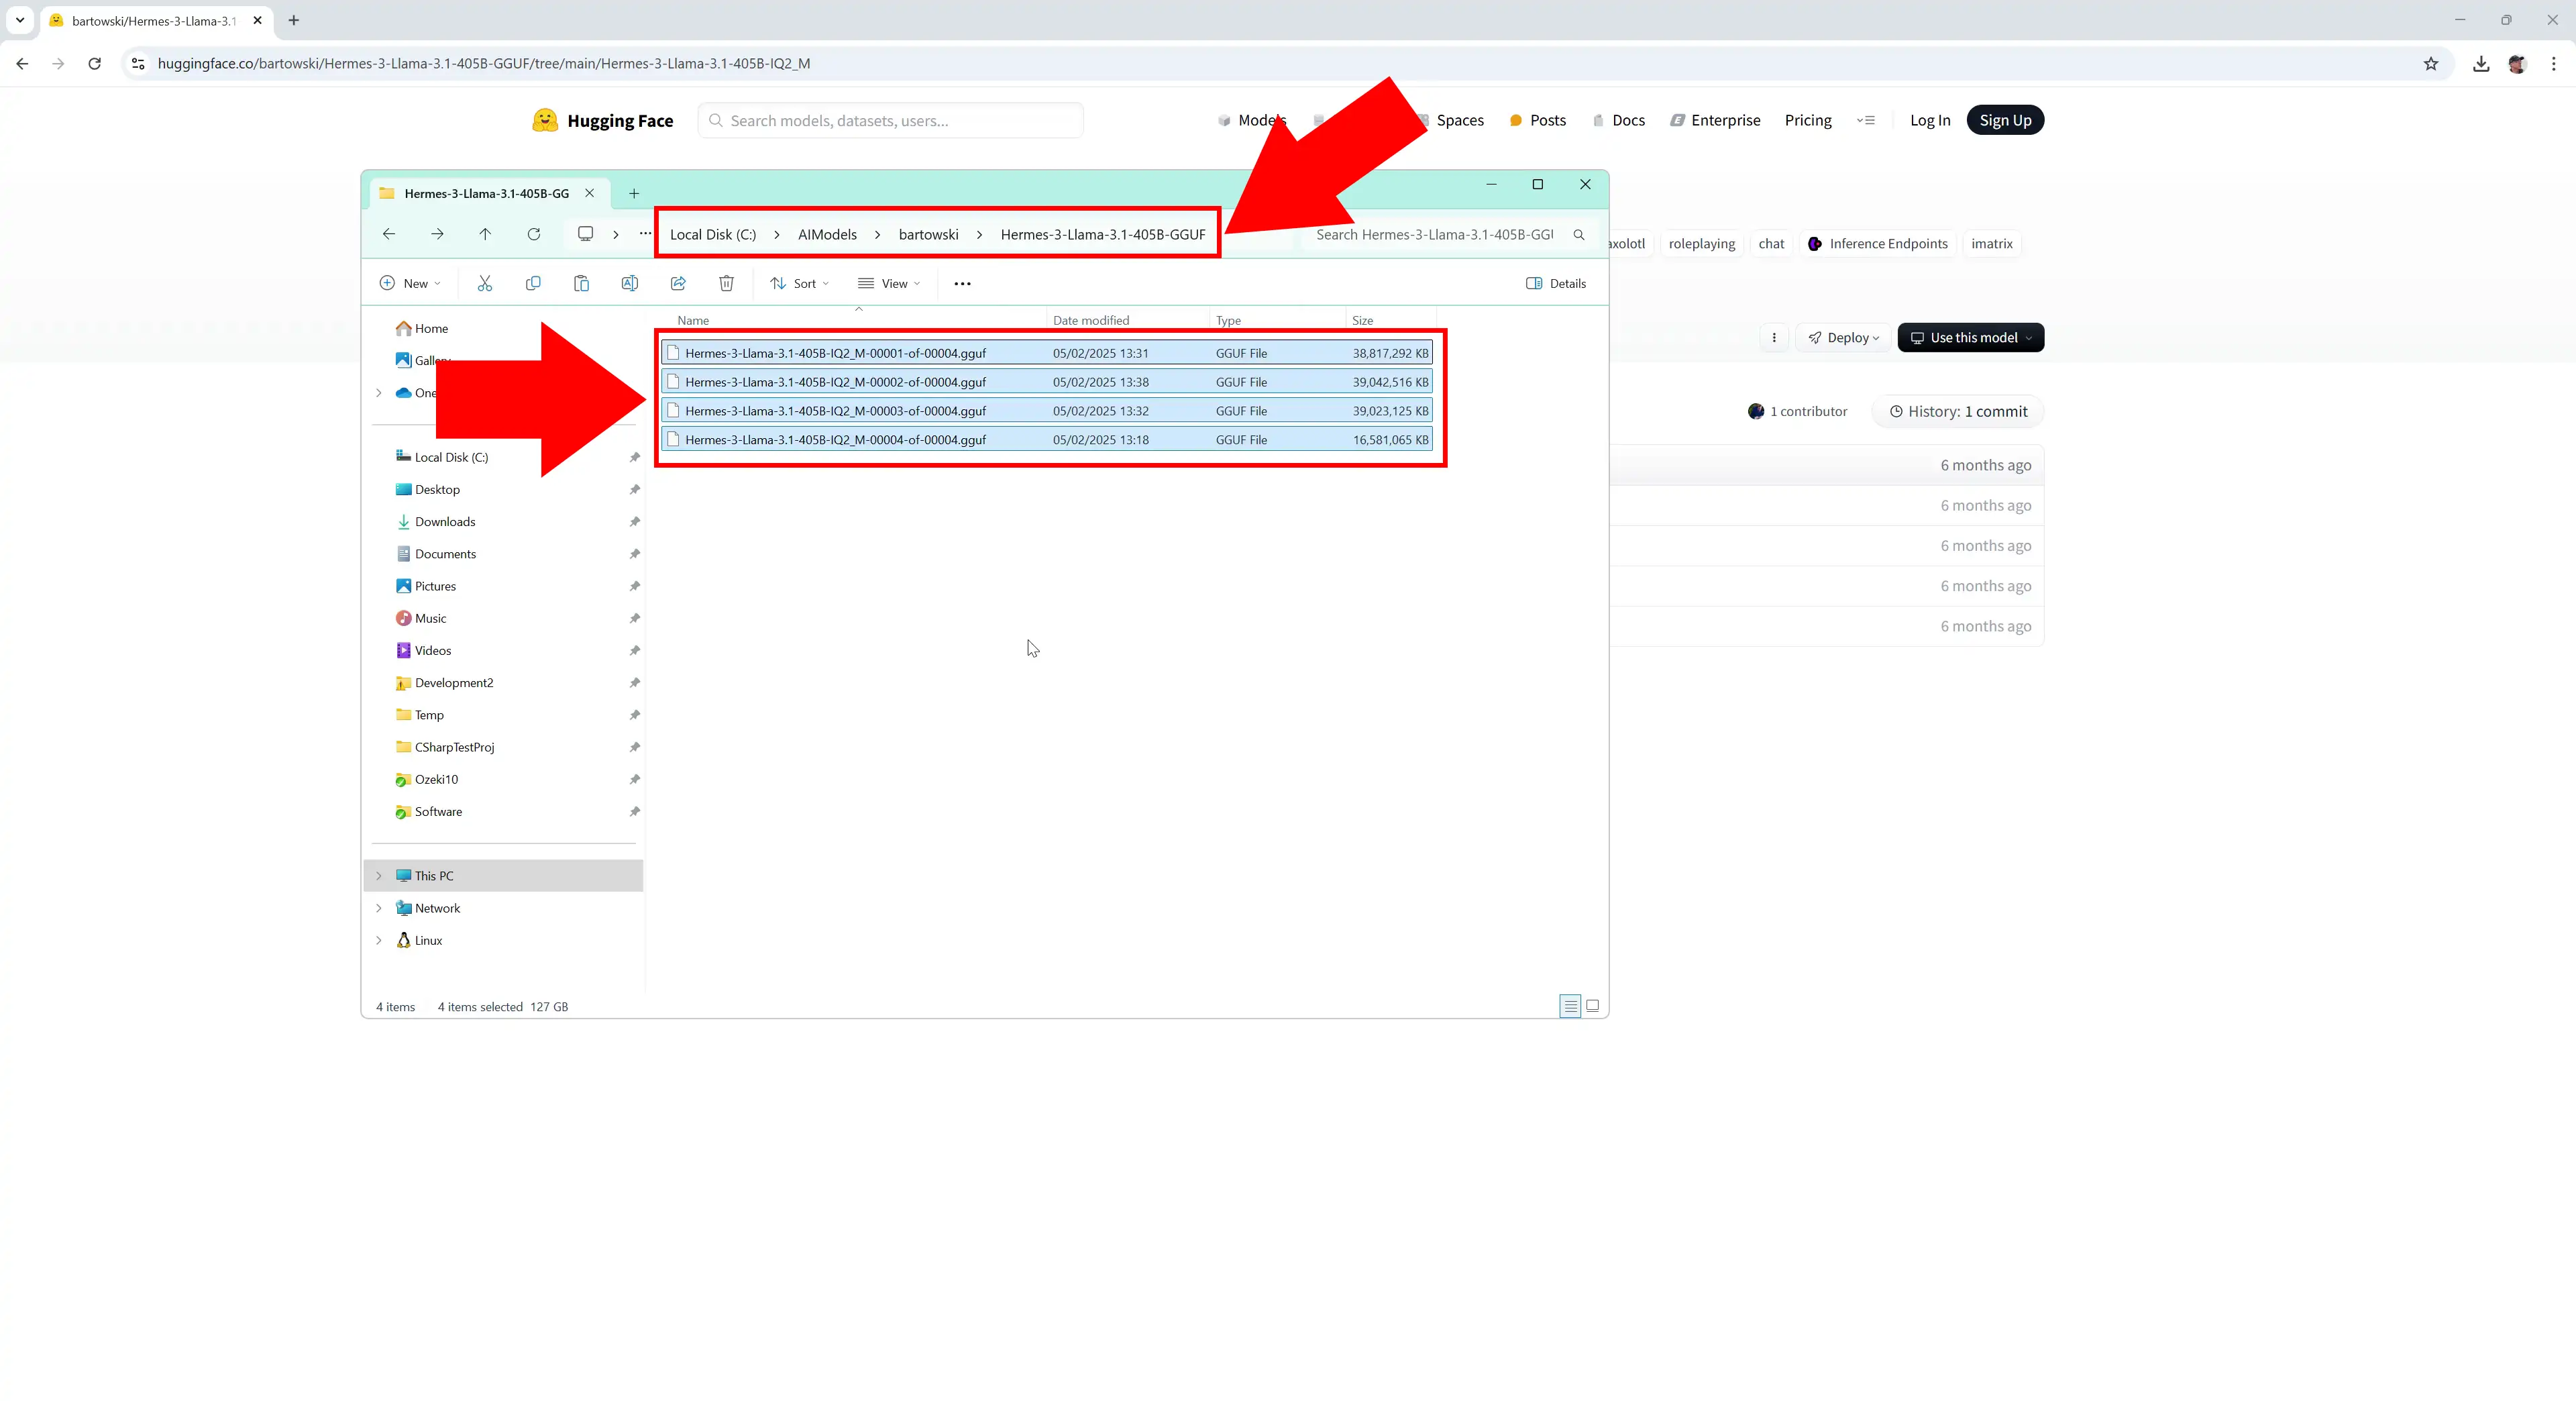
Click on the "Files and versions" tab, select the "Hermes-3-Llama-3.1-405B-IQ2_M" version, four files will appear, download them one by one, you can download them with the down arrow (Figure 3).
Step 4 - Paste model files to C:\AIModels folder
You have downloaded four files with the extension .gguf. Place them in the C:\AIModels path (Figure 4).
Create Ozeki AI Server model and Chatbot
In this video, we will show you in detail how to build and configure the Ozeki AI Server model and how to set up a chatbot that can communicate with users in natural language. You will learn about the installation process and the necessary settings.
Step 5 - PC system specification
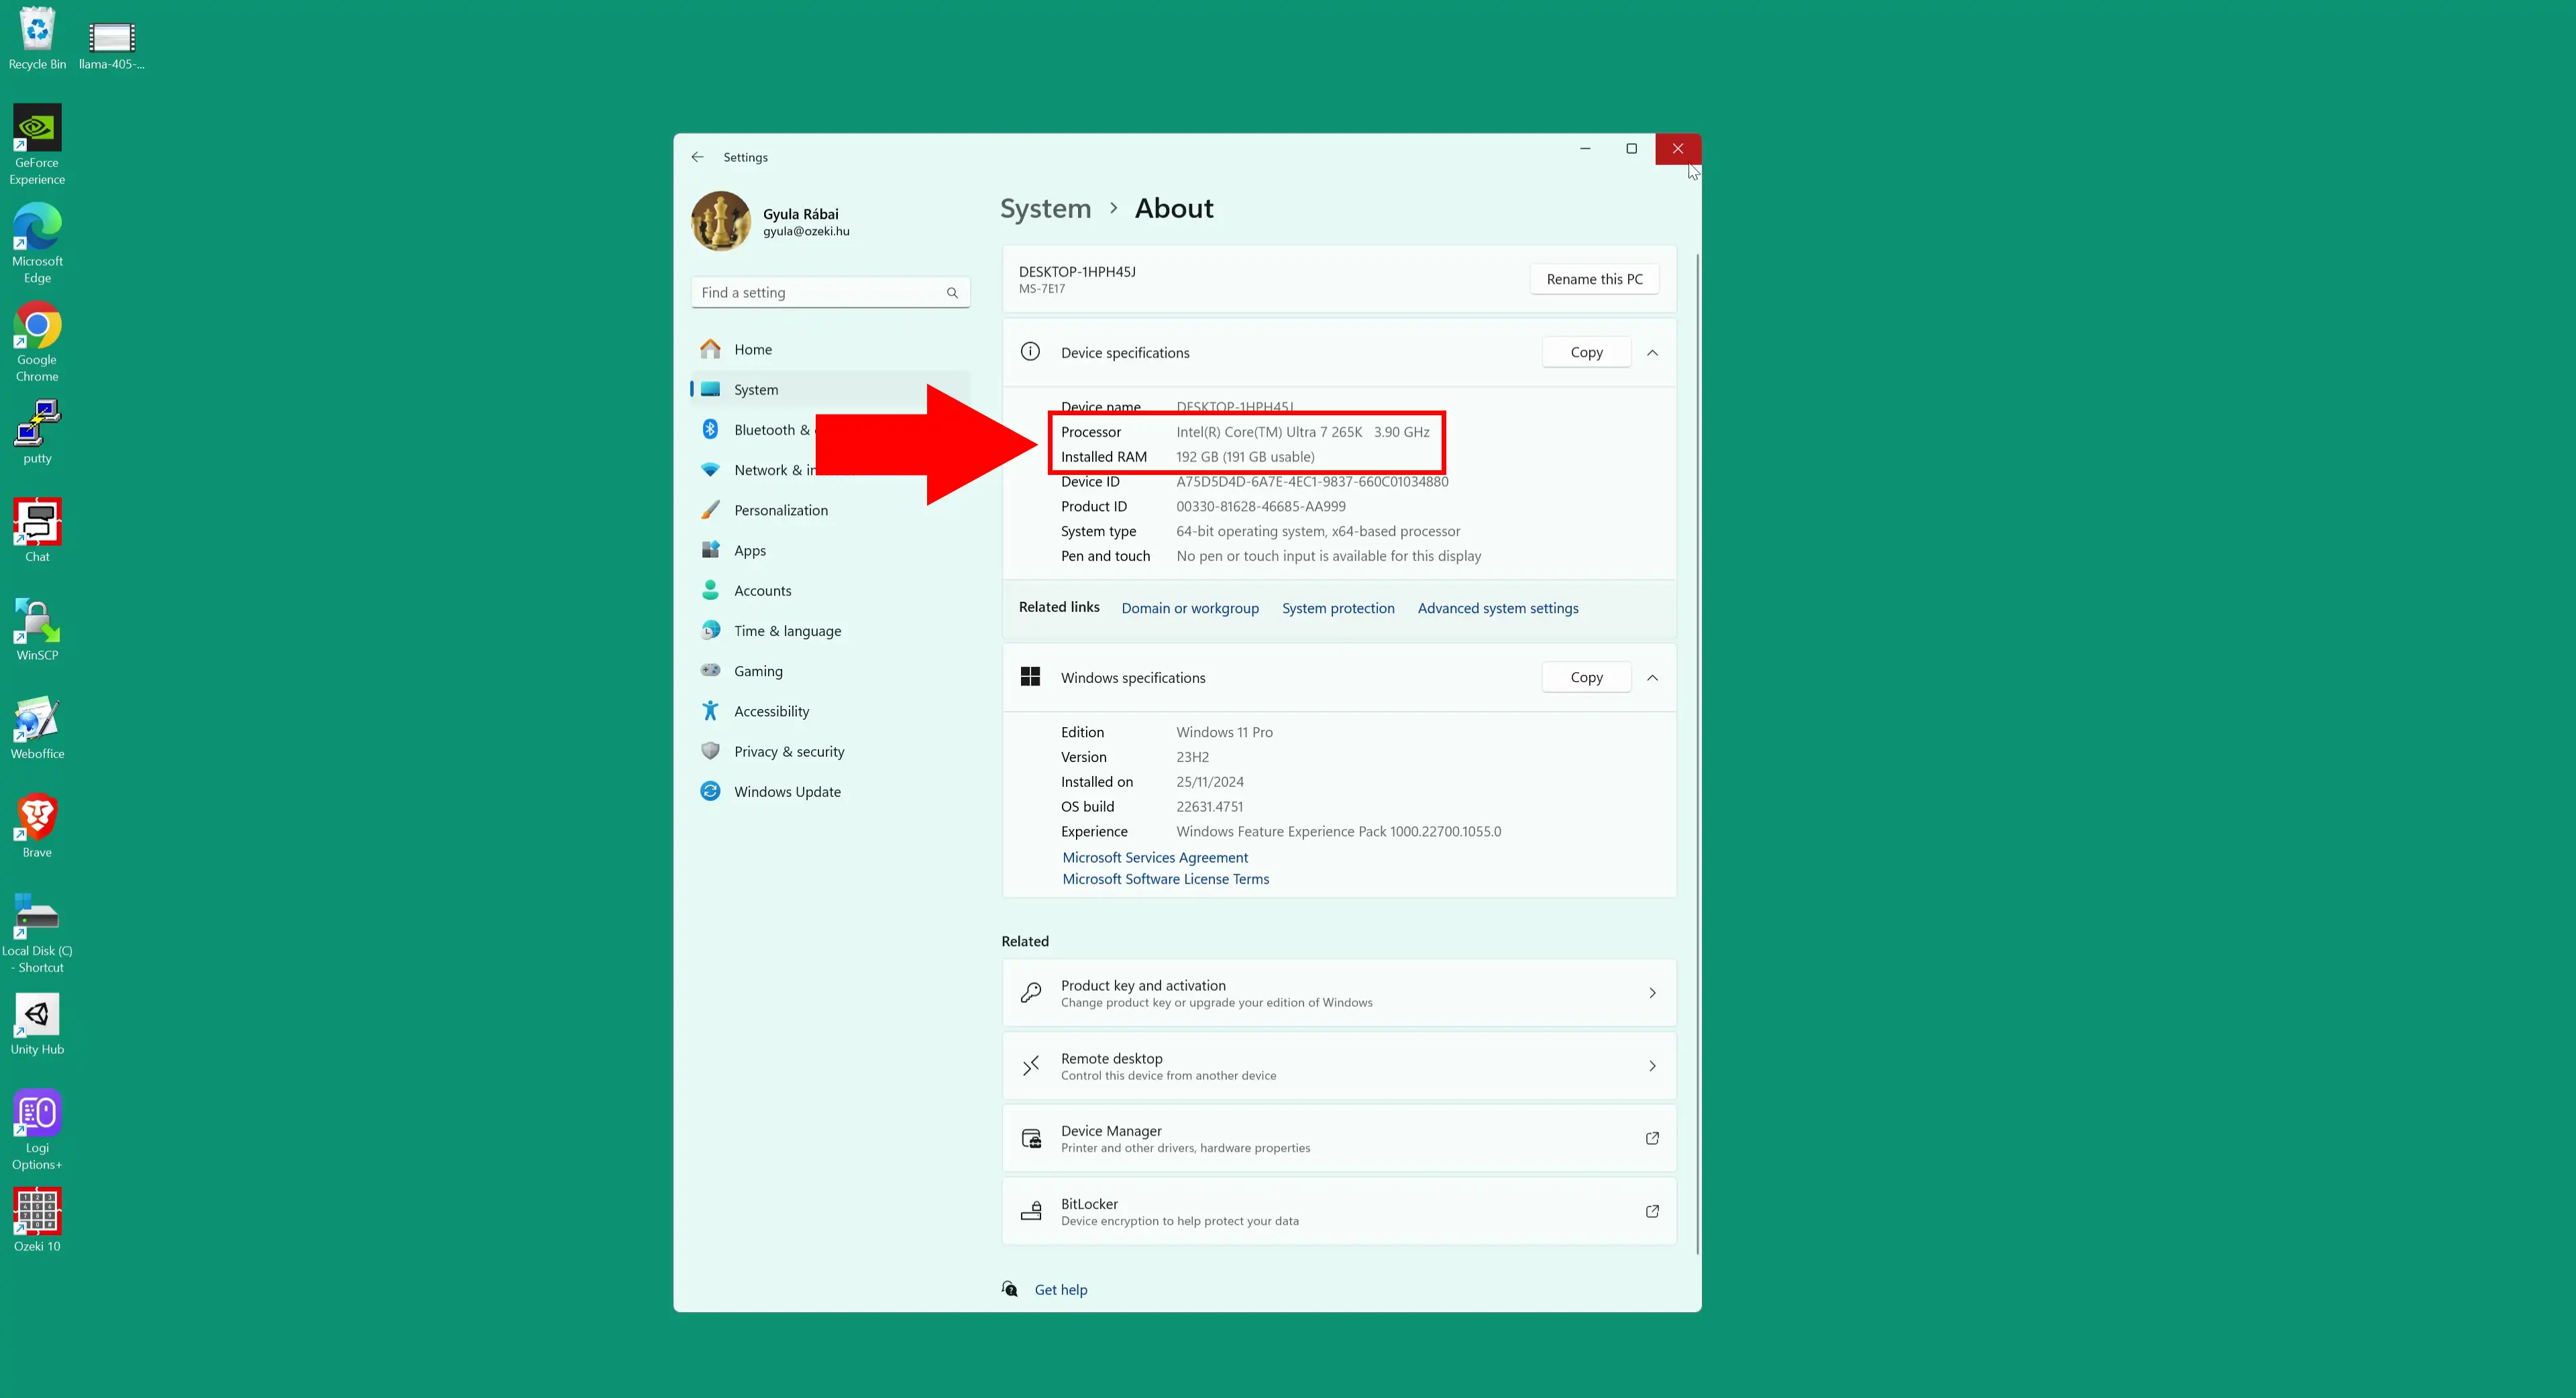
First, check the performance of your computer, because you need to have a powerful system (Figure 5).
Step 6 - Multi GPU system
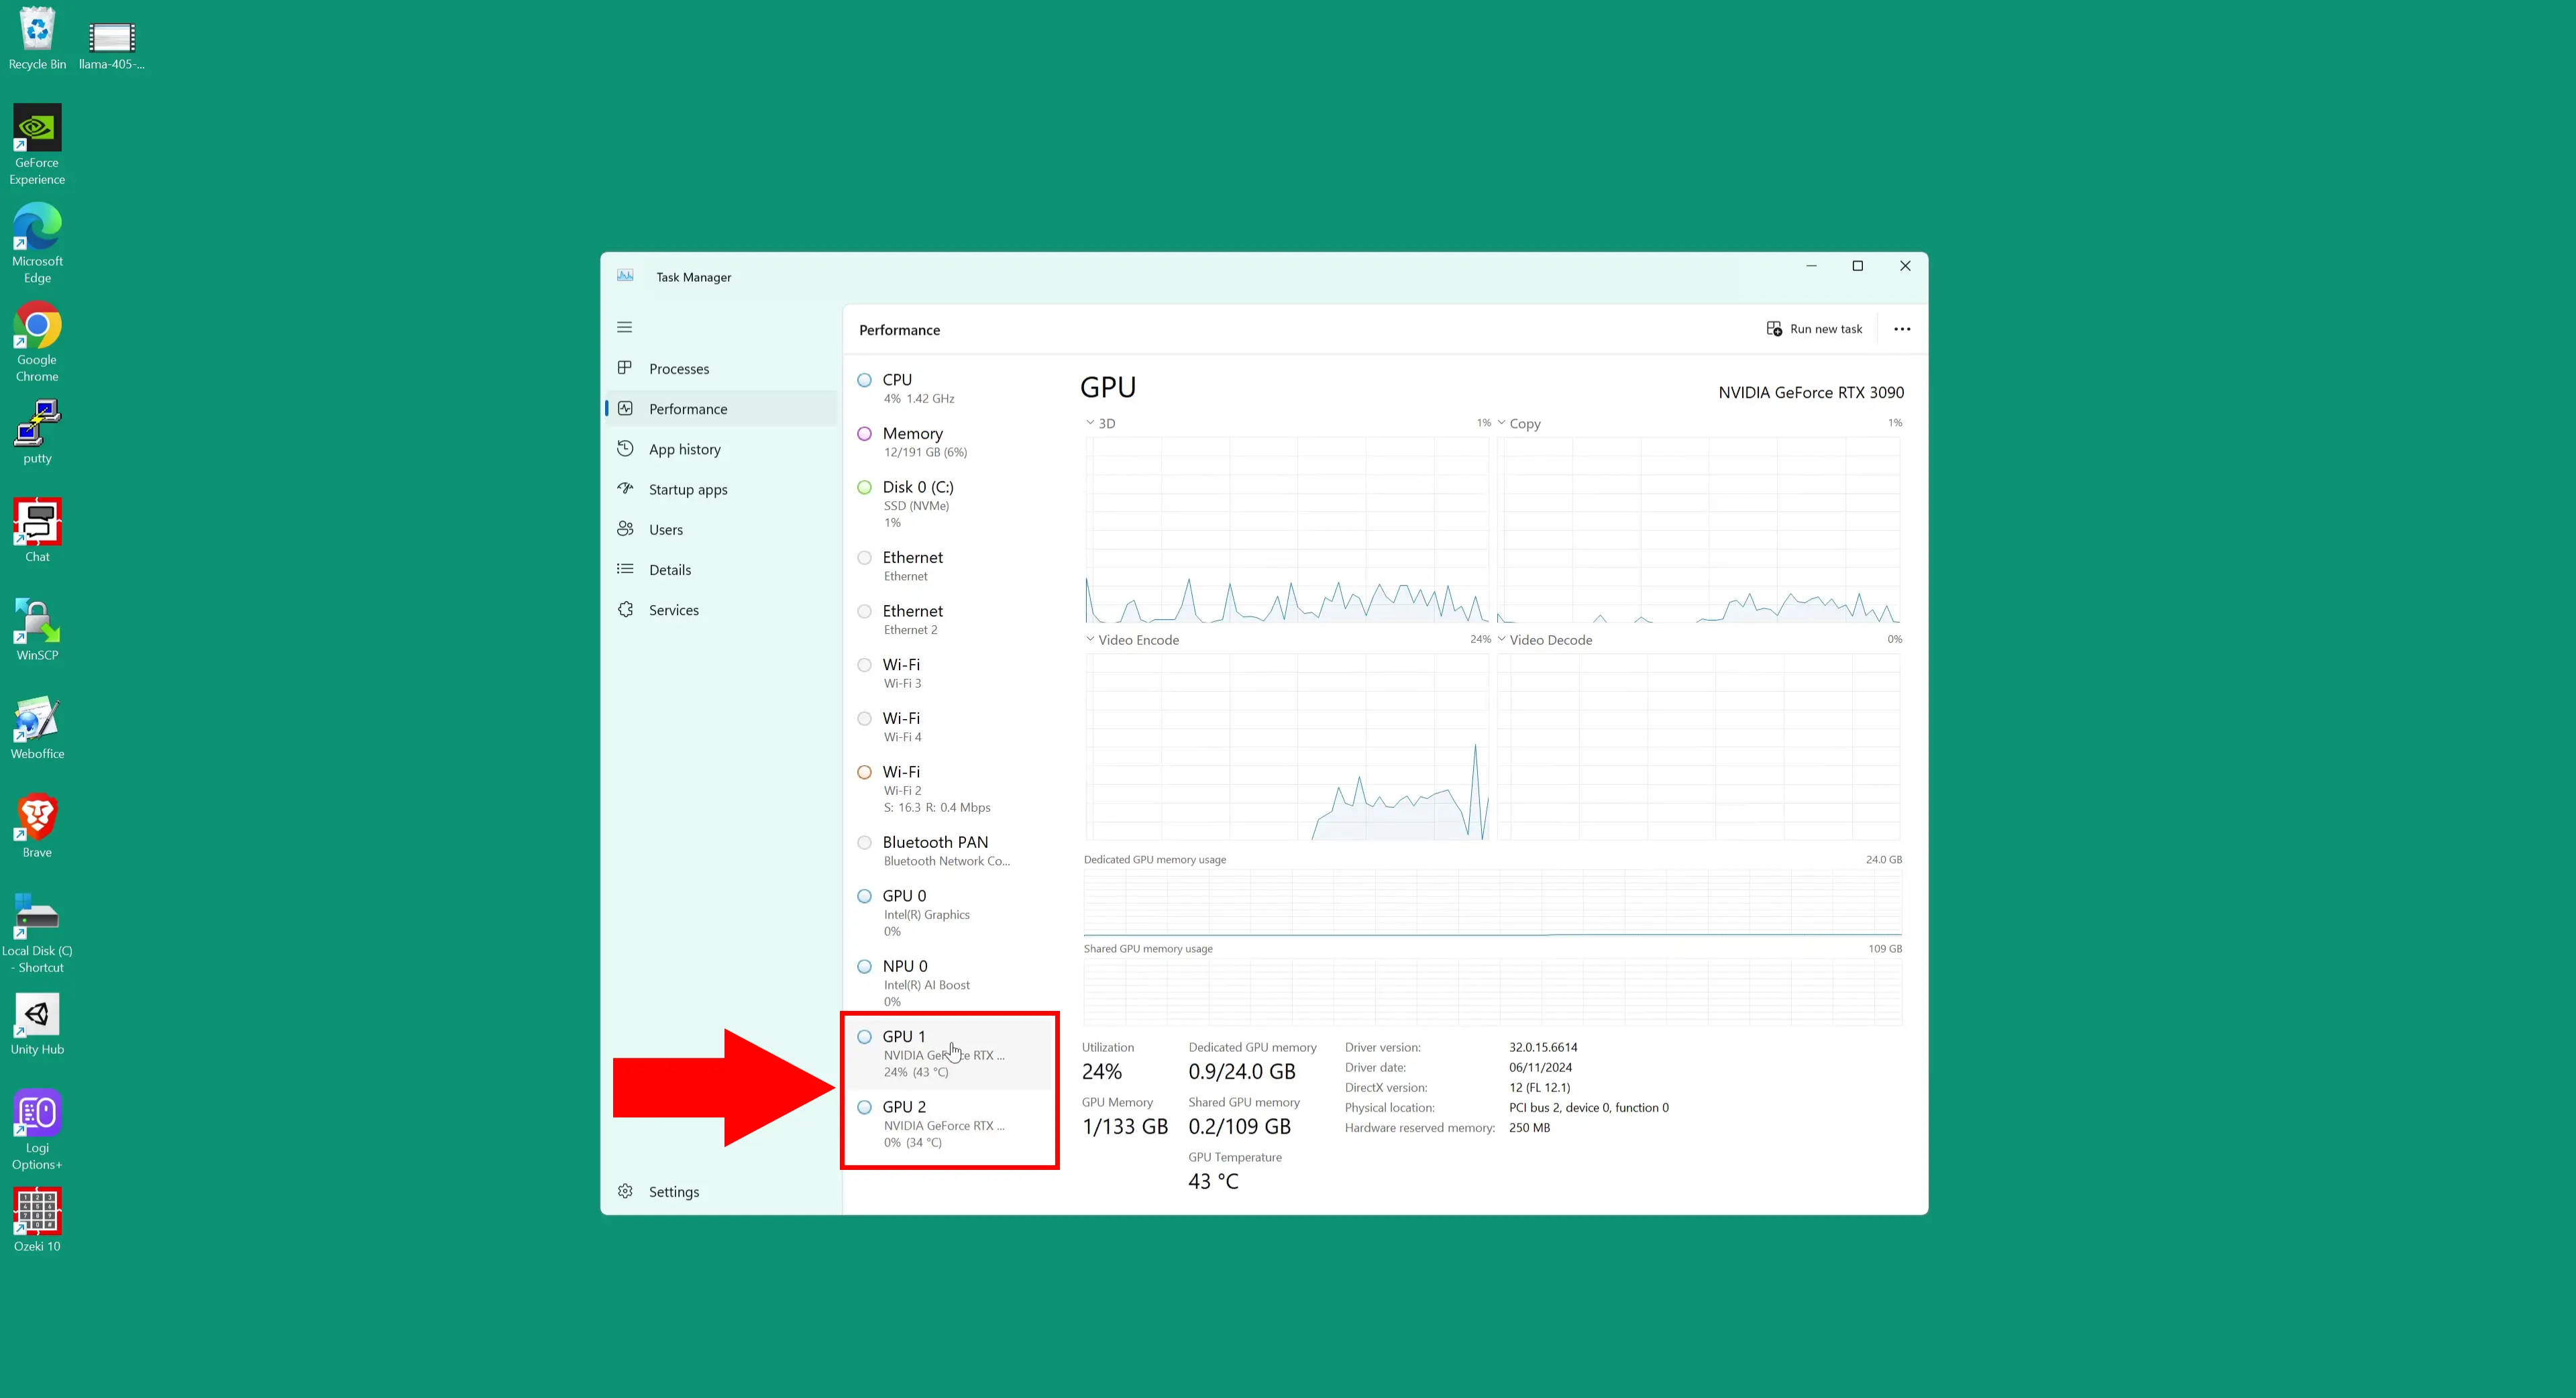
The use of multi-GPU systems is essential for running large language models, as these models require extremely high computing power and memory capacity. A single GPU is often not sufficient to efficiently run models of this size, as VRAM capacity is quickly exhausted and processing time can increase significantly. Systems with multiple GPUs allow load sharing so that individual cards can work in parallel, increasing speed, reducing response time and ensuring smooth operation of models (Figure 6).
Step 7 - Open Ozeki 10
Launch the Ozeki 10 app. If you don't already have it, you can download it here (Figure 7).

Step 8 - Open AI Server
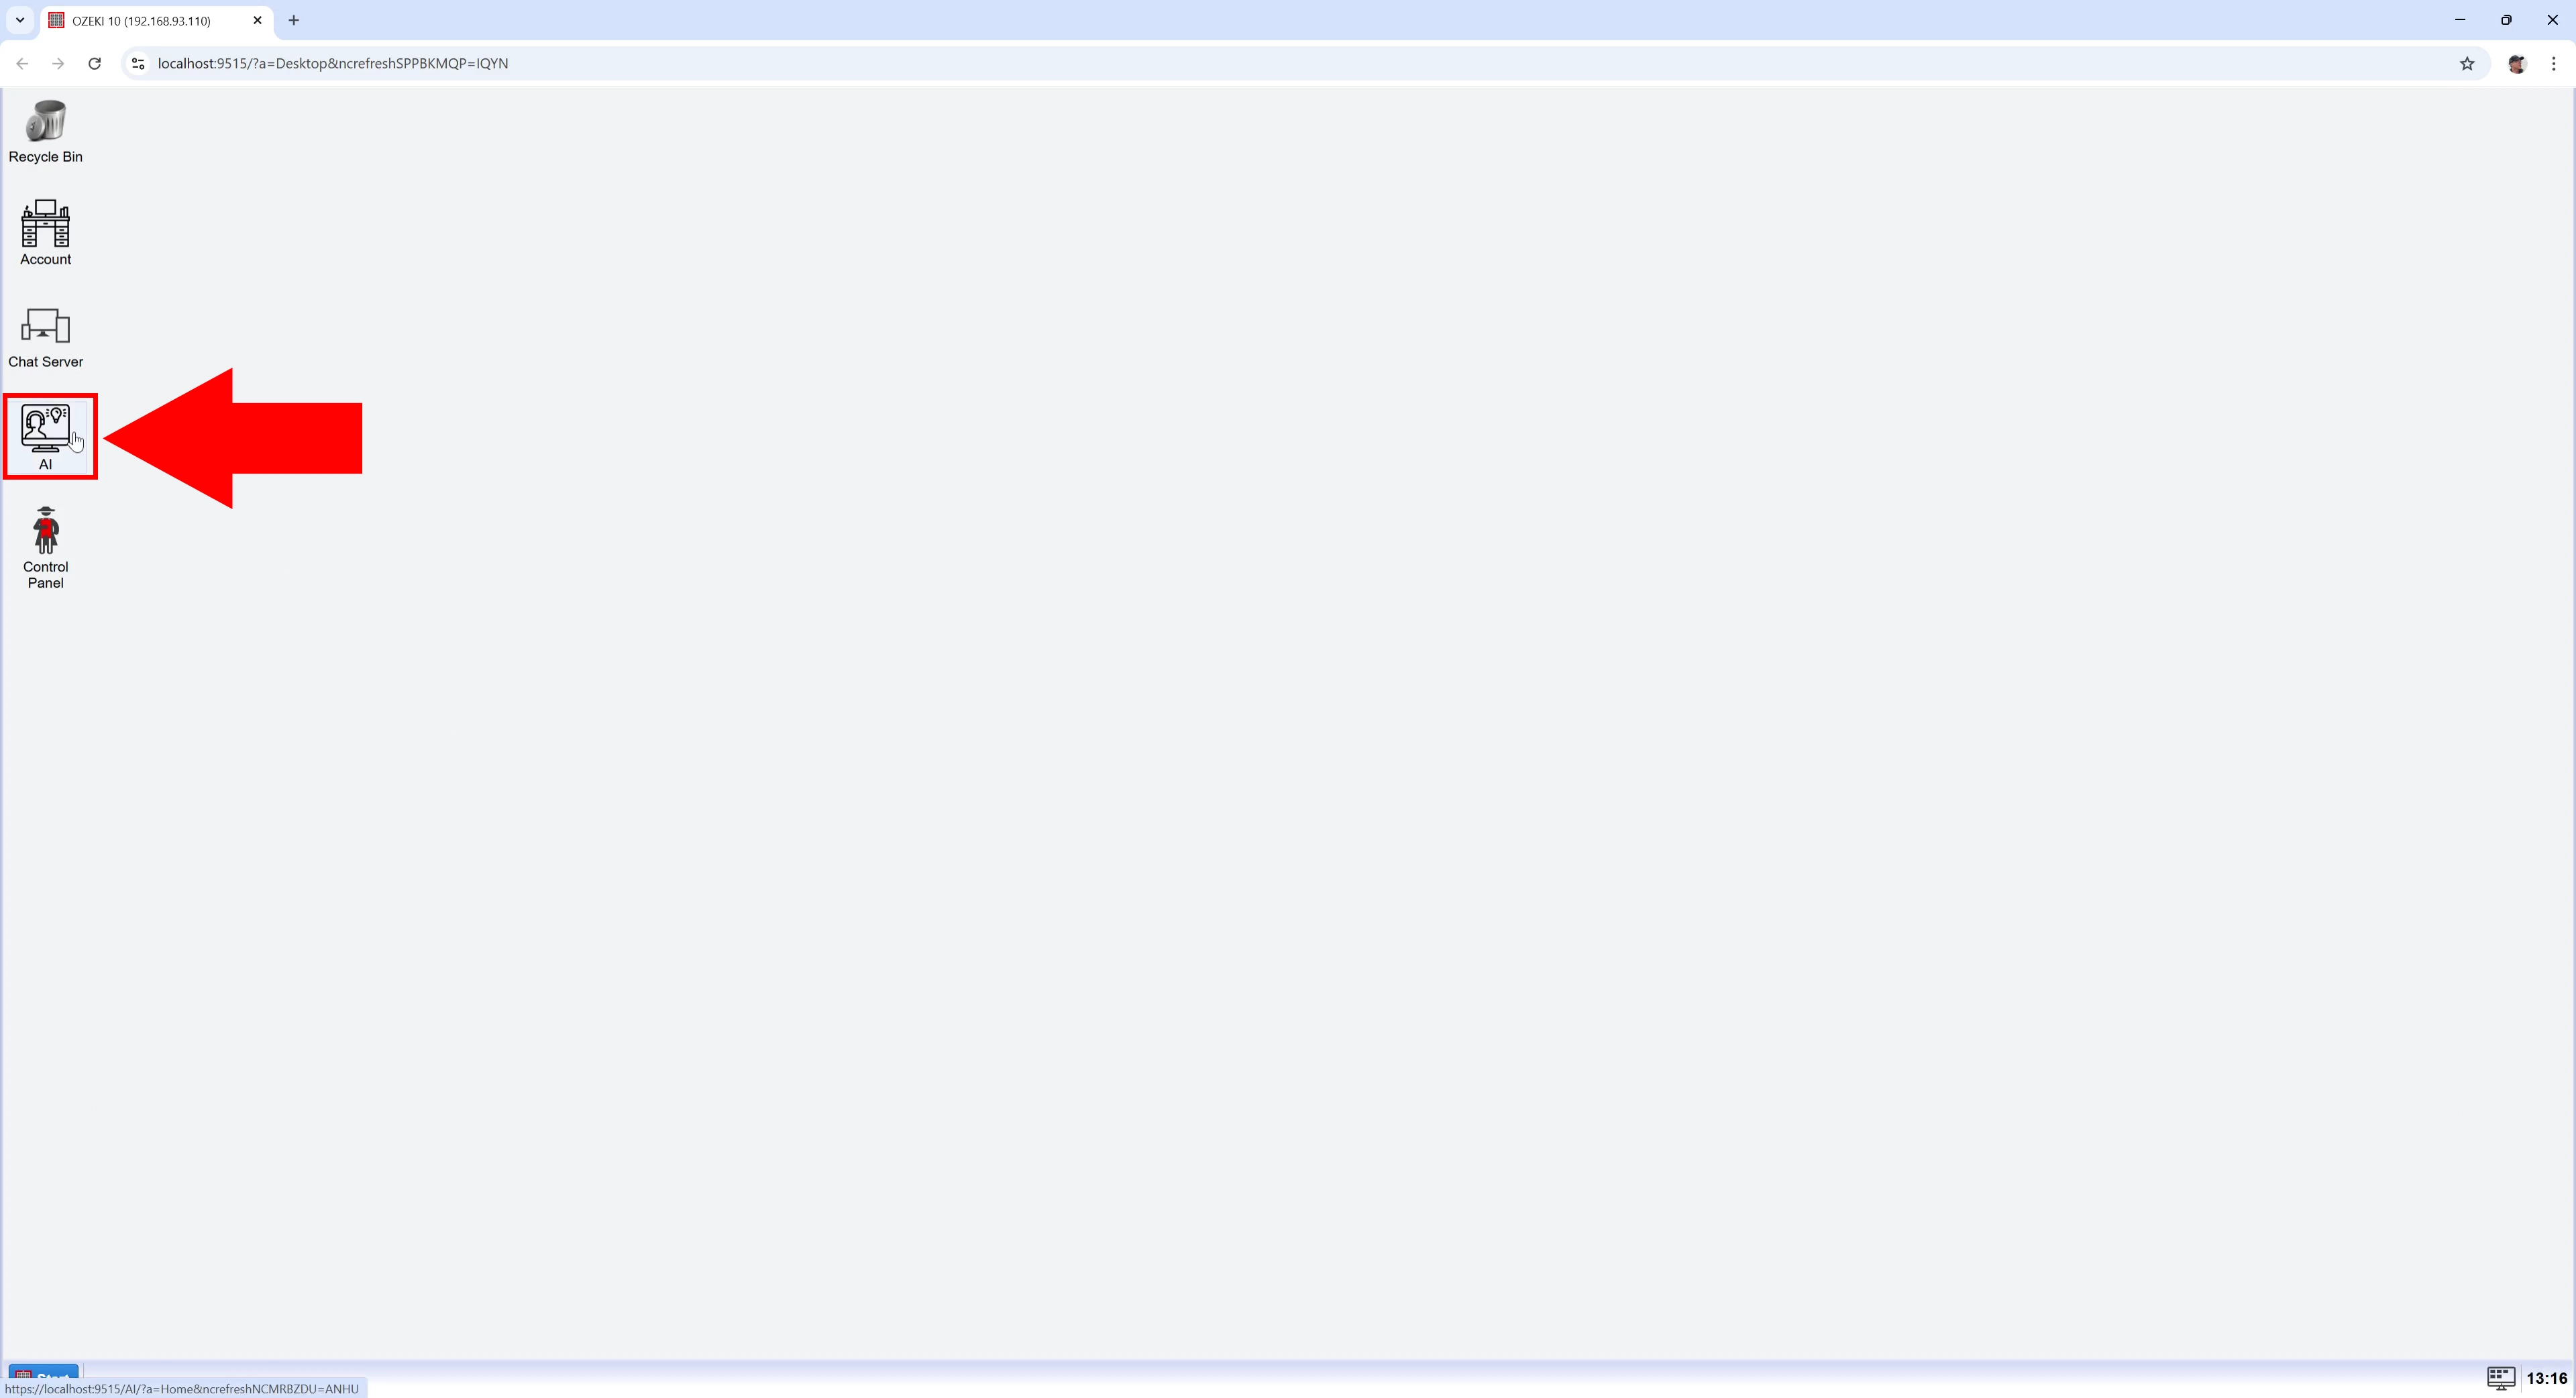
Once opened, open AI Server (Figure 8).
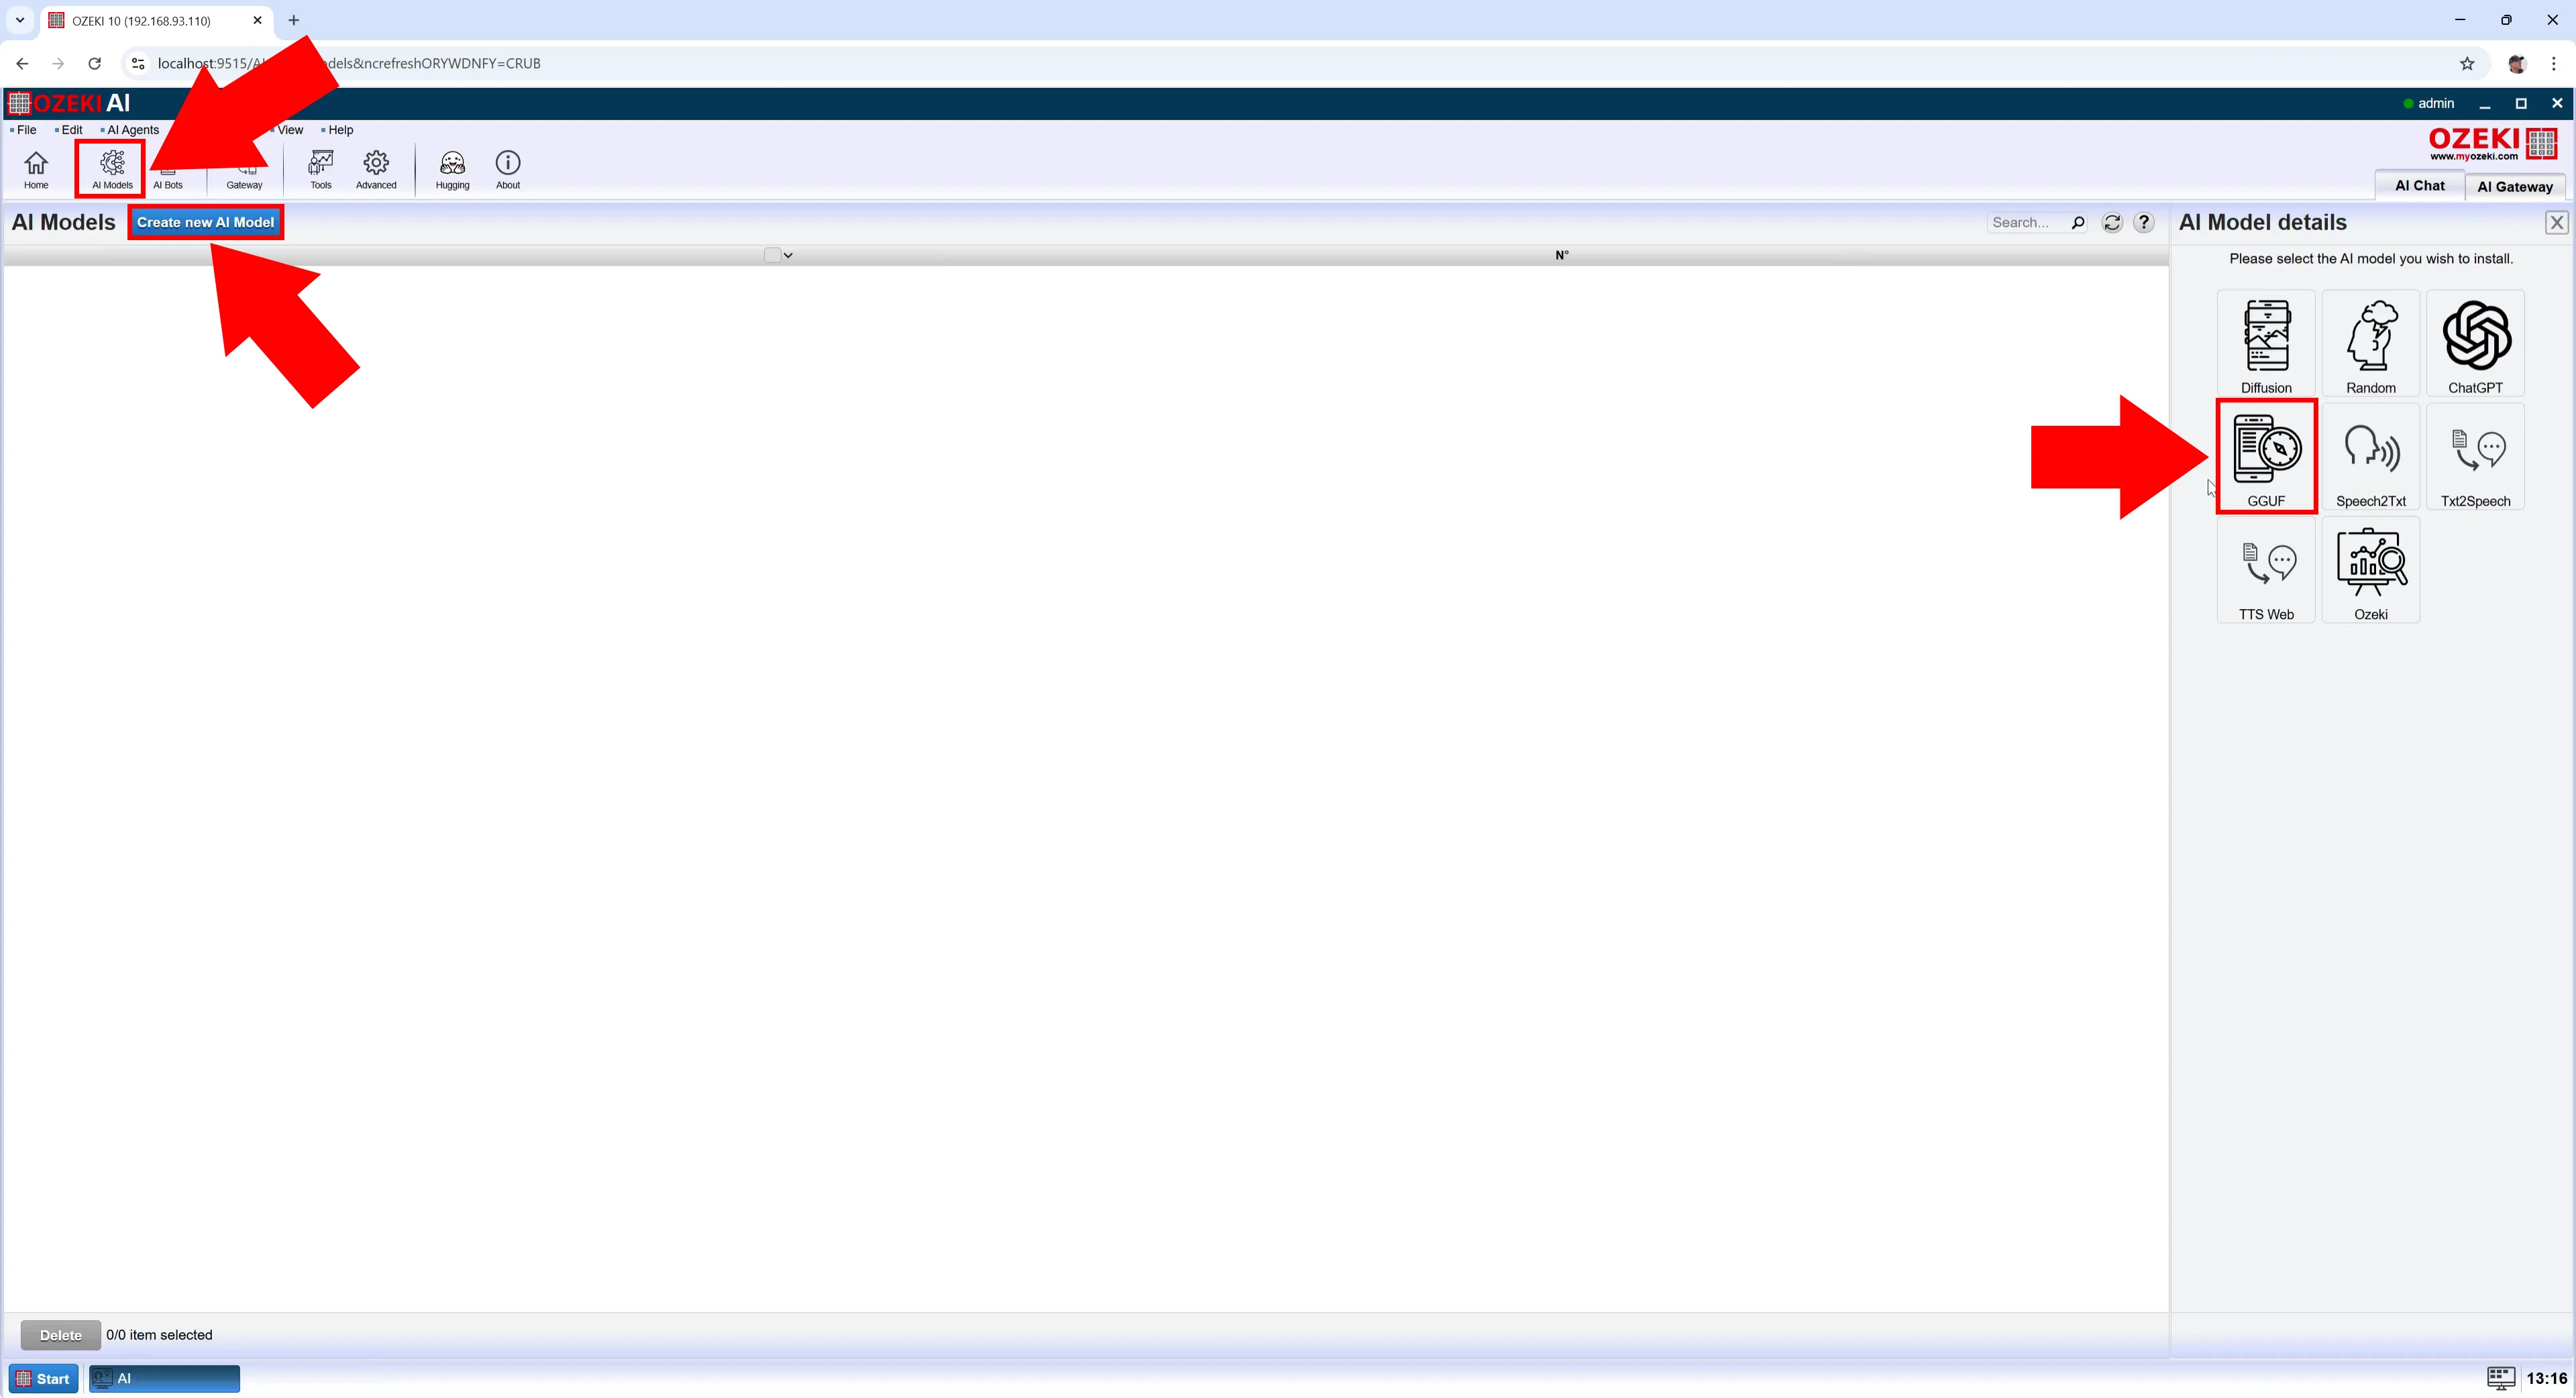
Step 9 - Create new GGUF model
Ozeki AI Server appeared on the screen. Let's create a new GGUF model.
Click on "AI Models" at the top of the screen. Click on the blue
"Create a new AI Model" button. On the right side you will see different
options, select the "GGUF" menu
(Figure 9).
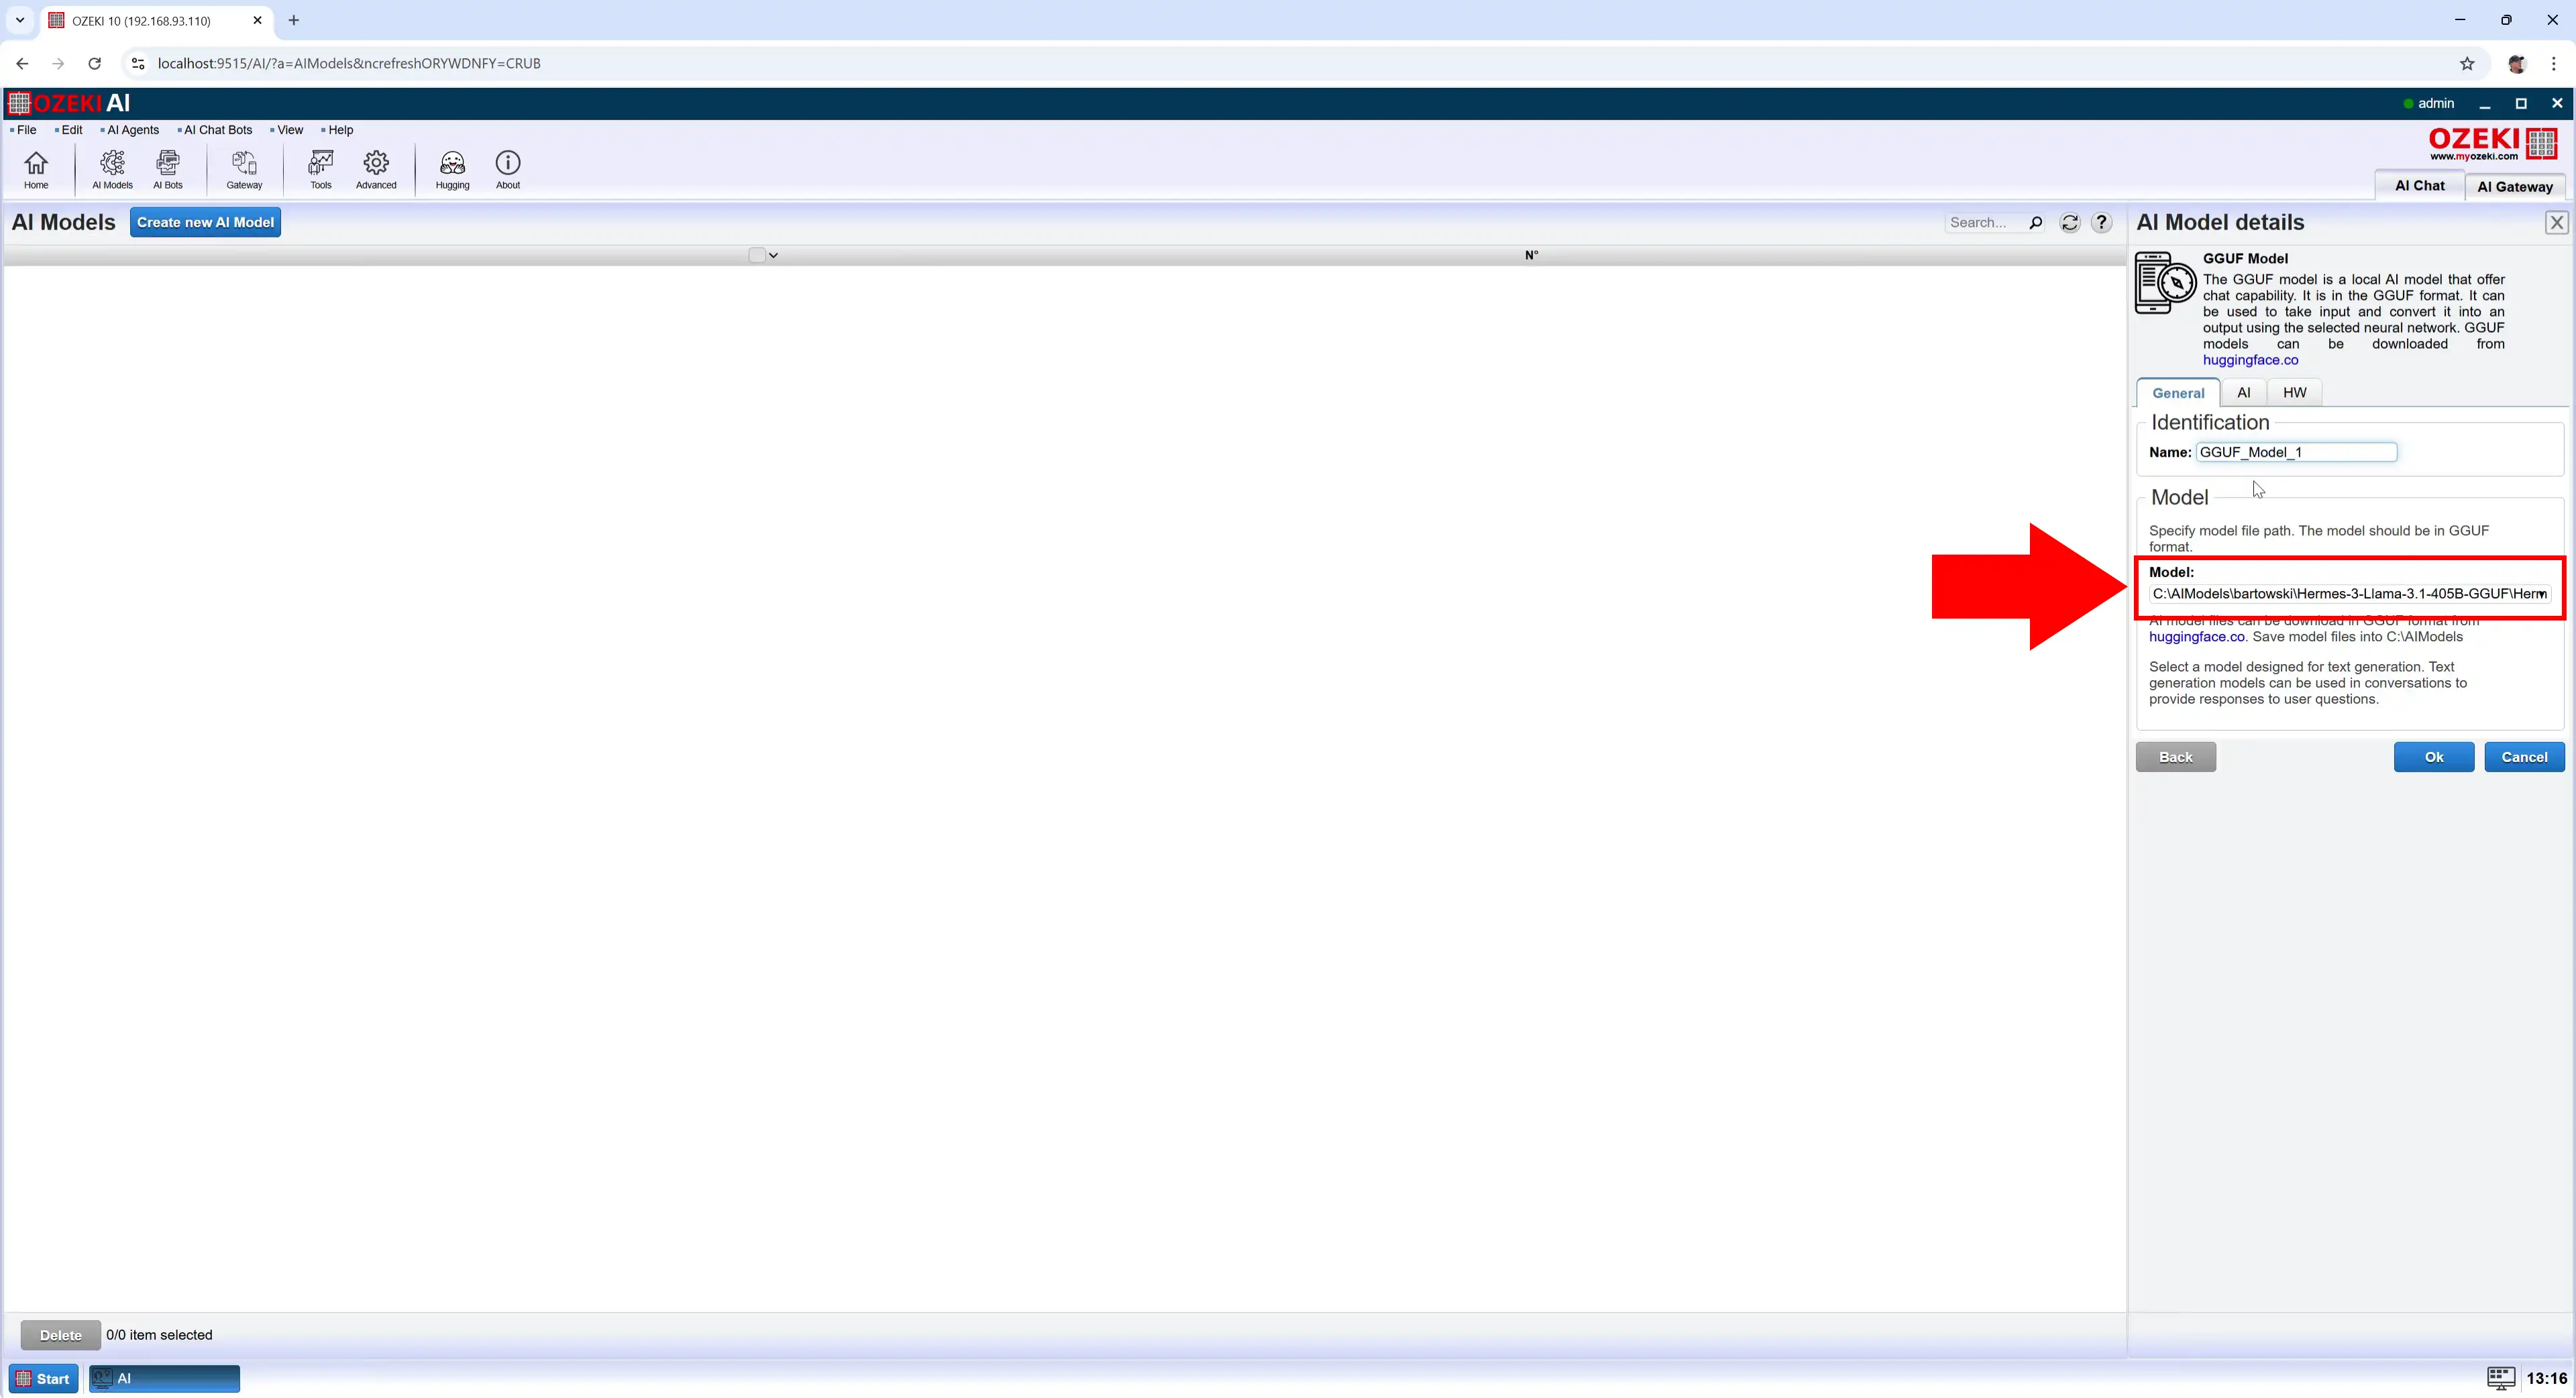
Step 10 - Select model file
After selecting the "GGUF" menu, under the "General" tab, select the "Model" file and click "Ok" (Figure 10).
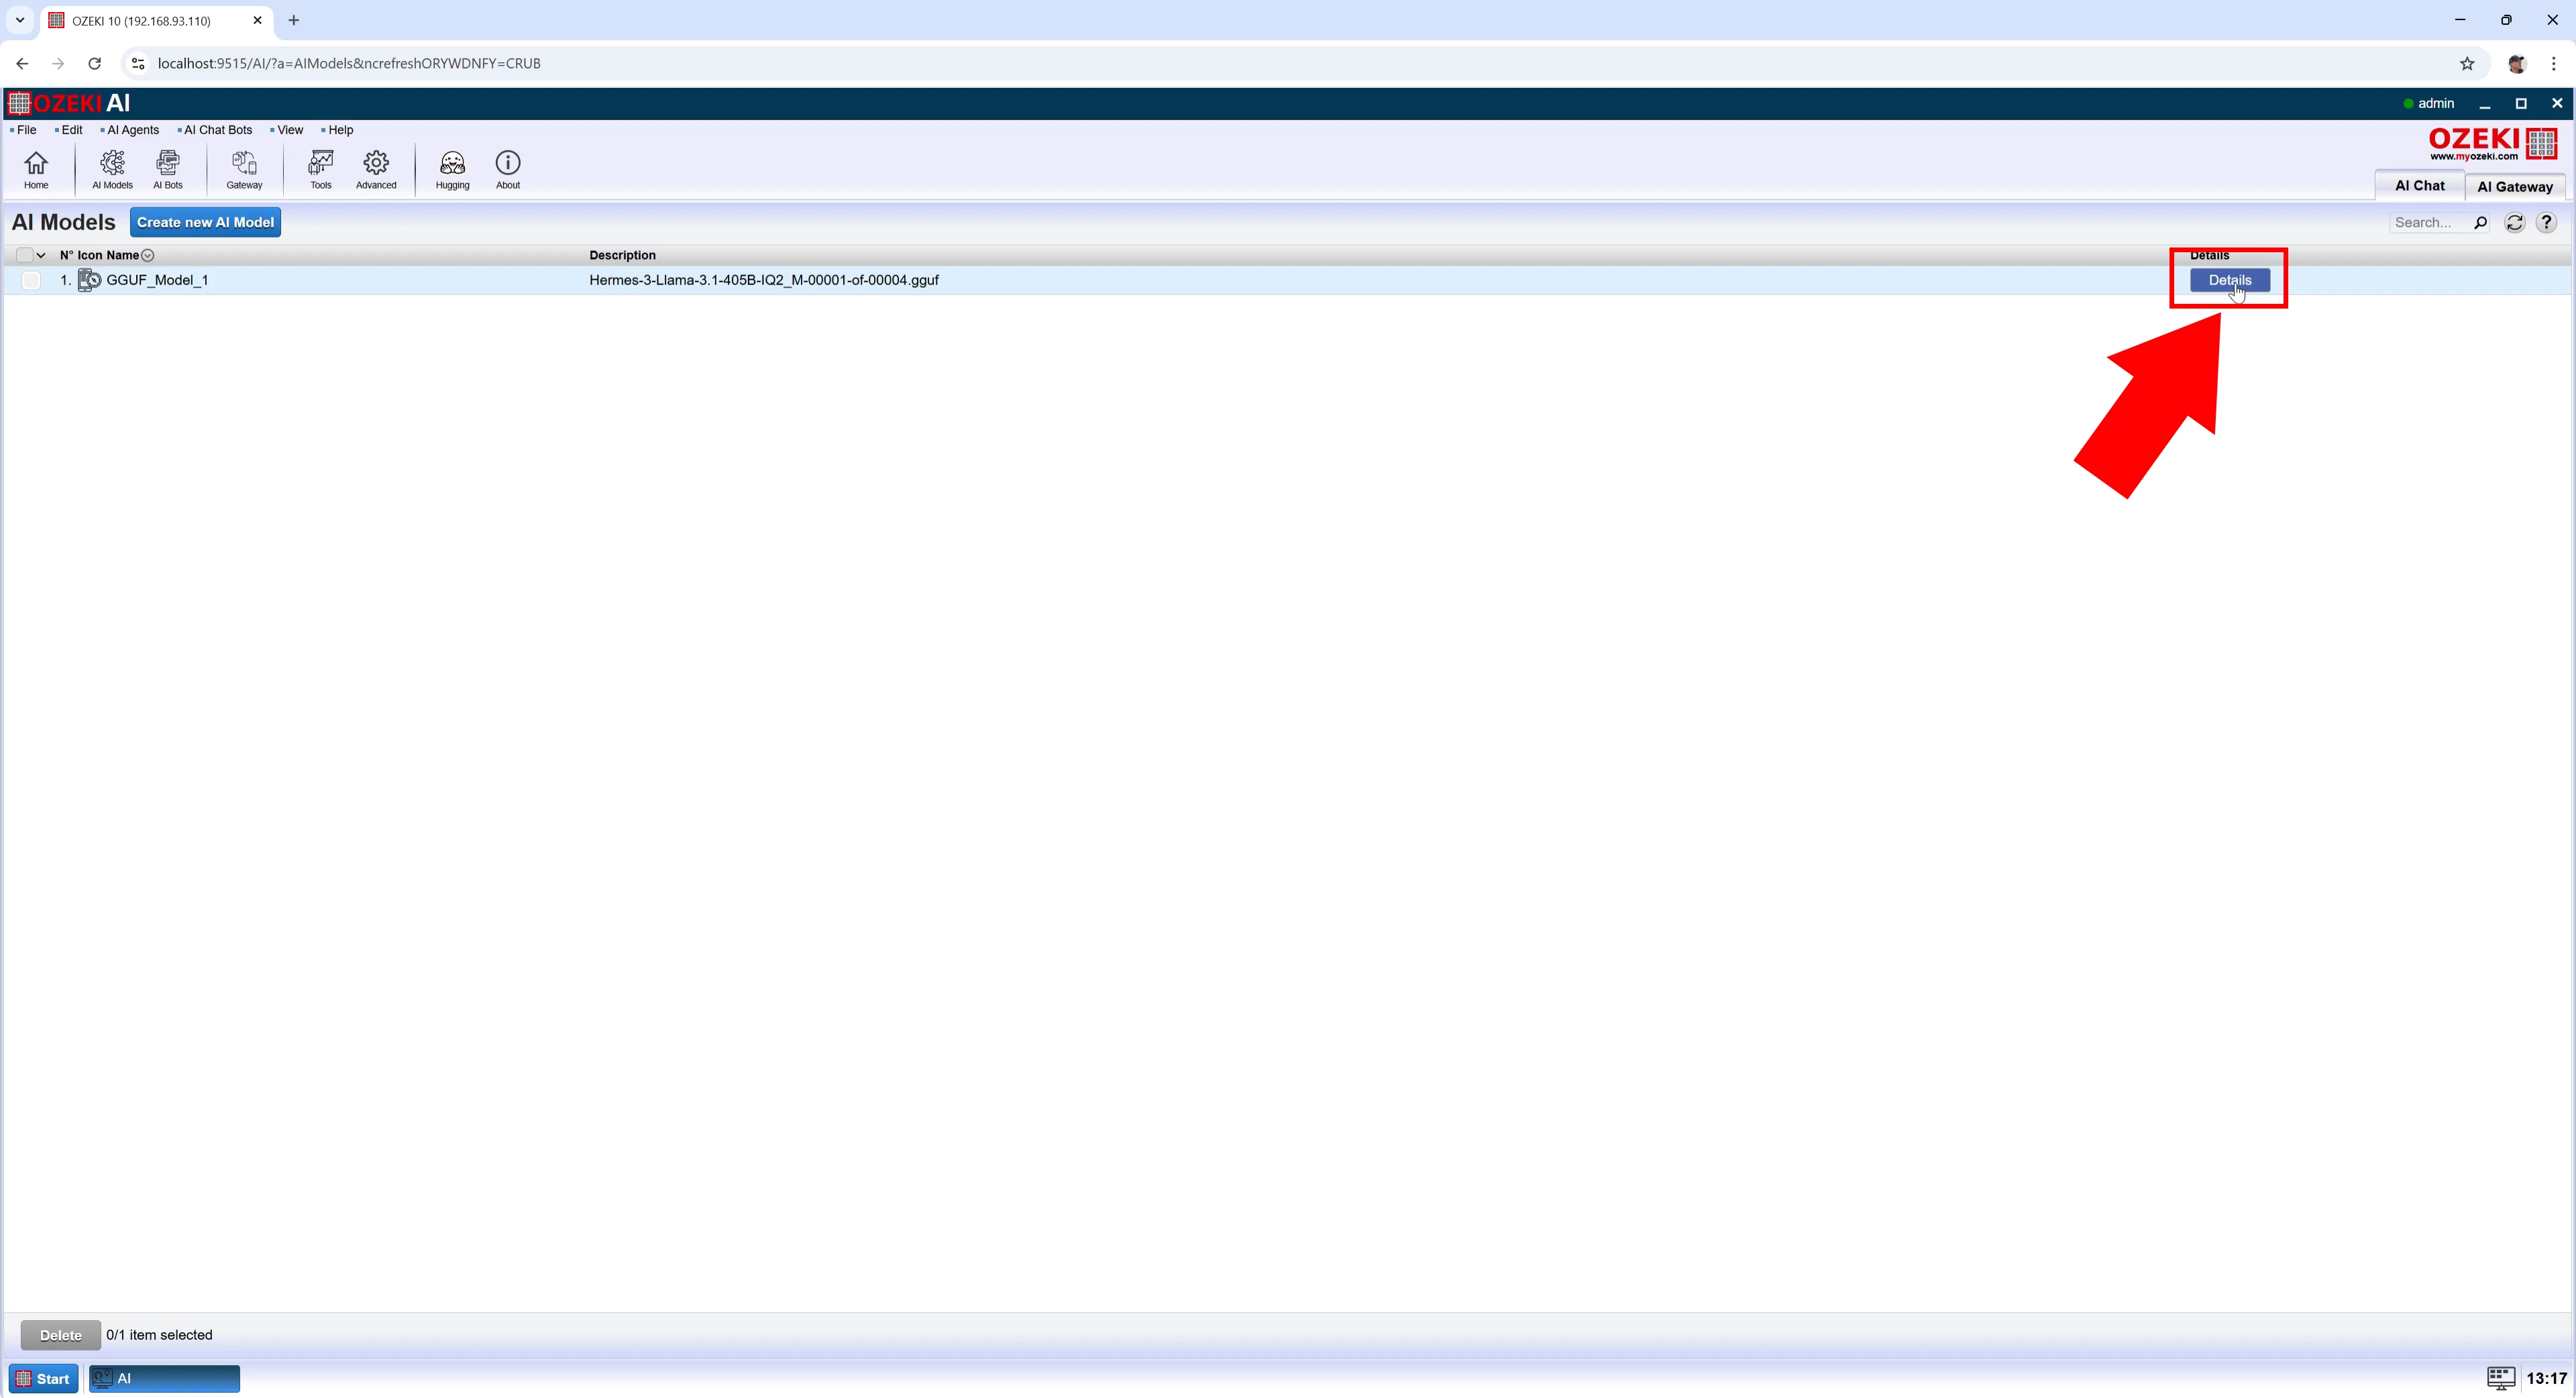
Step 11 - Open model details
We created the new model. Press the blue "Details" button to configure it (Figure 11).
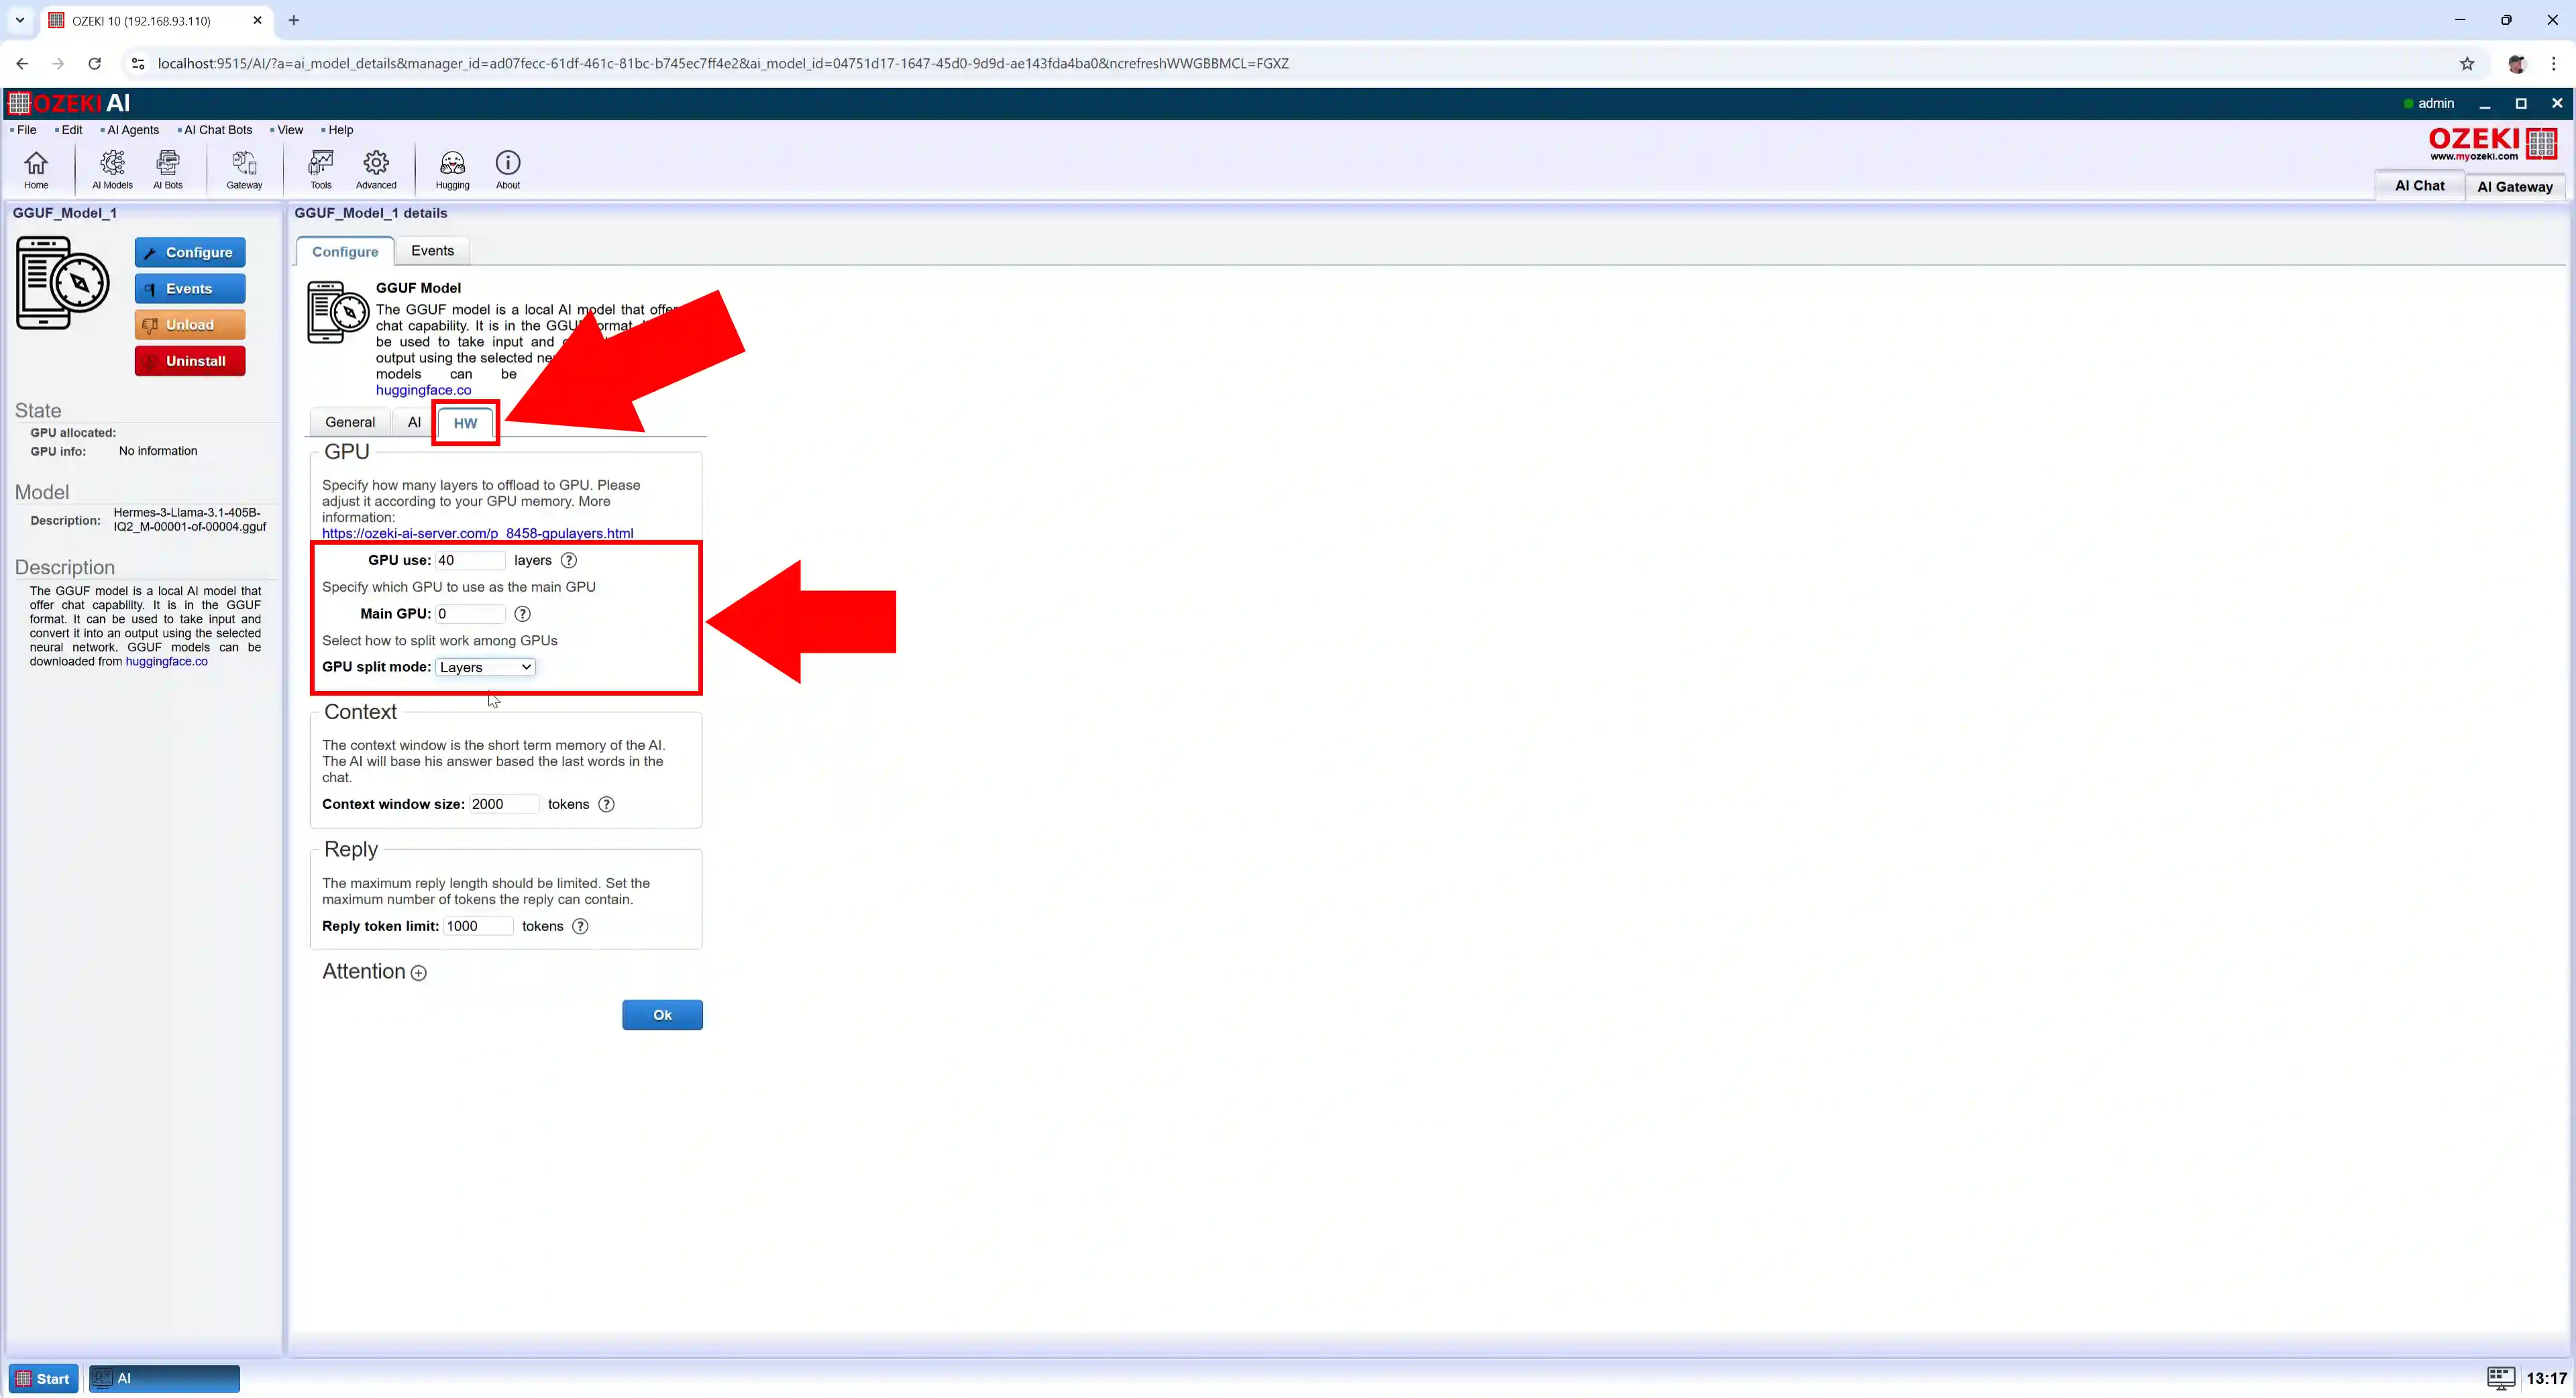
Step 12 - Set GPU layer options
We have opened the details of GGUF_Model_1, select the HW tab. Set "GPU use" to "40". Set "GPU split mode" to "Layers" and click on the blue "Ok" button. A message popup will appear with the following text "Configuration successfully updated!" (Figure 12).
Step 13 - Create new AI chatbot
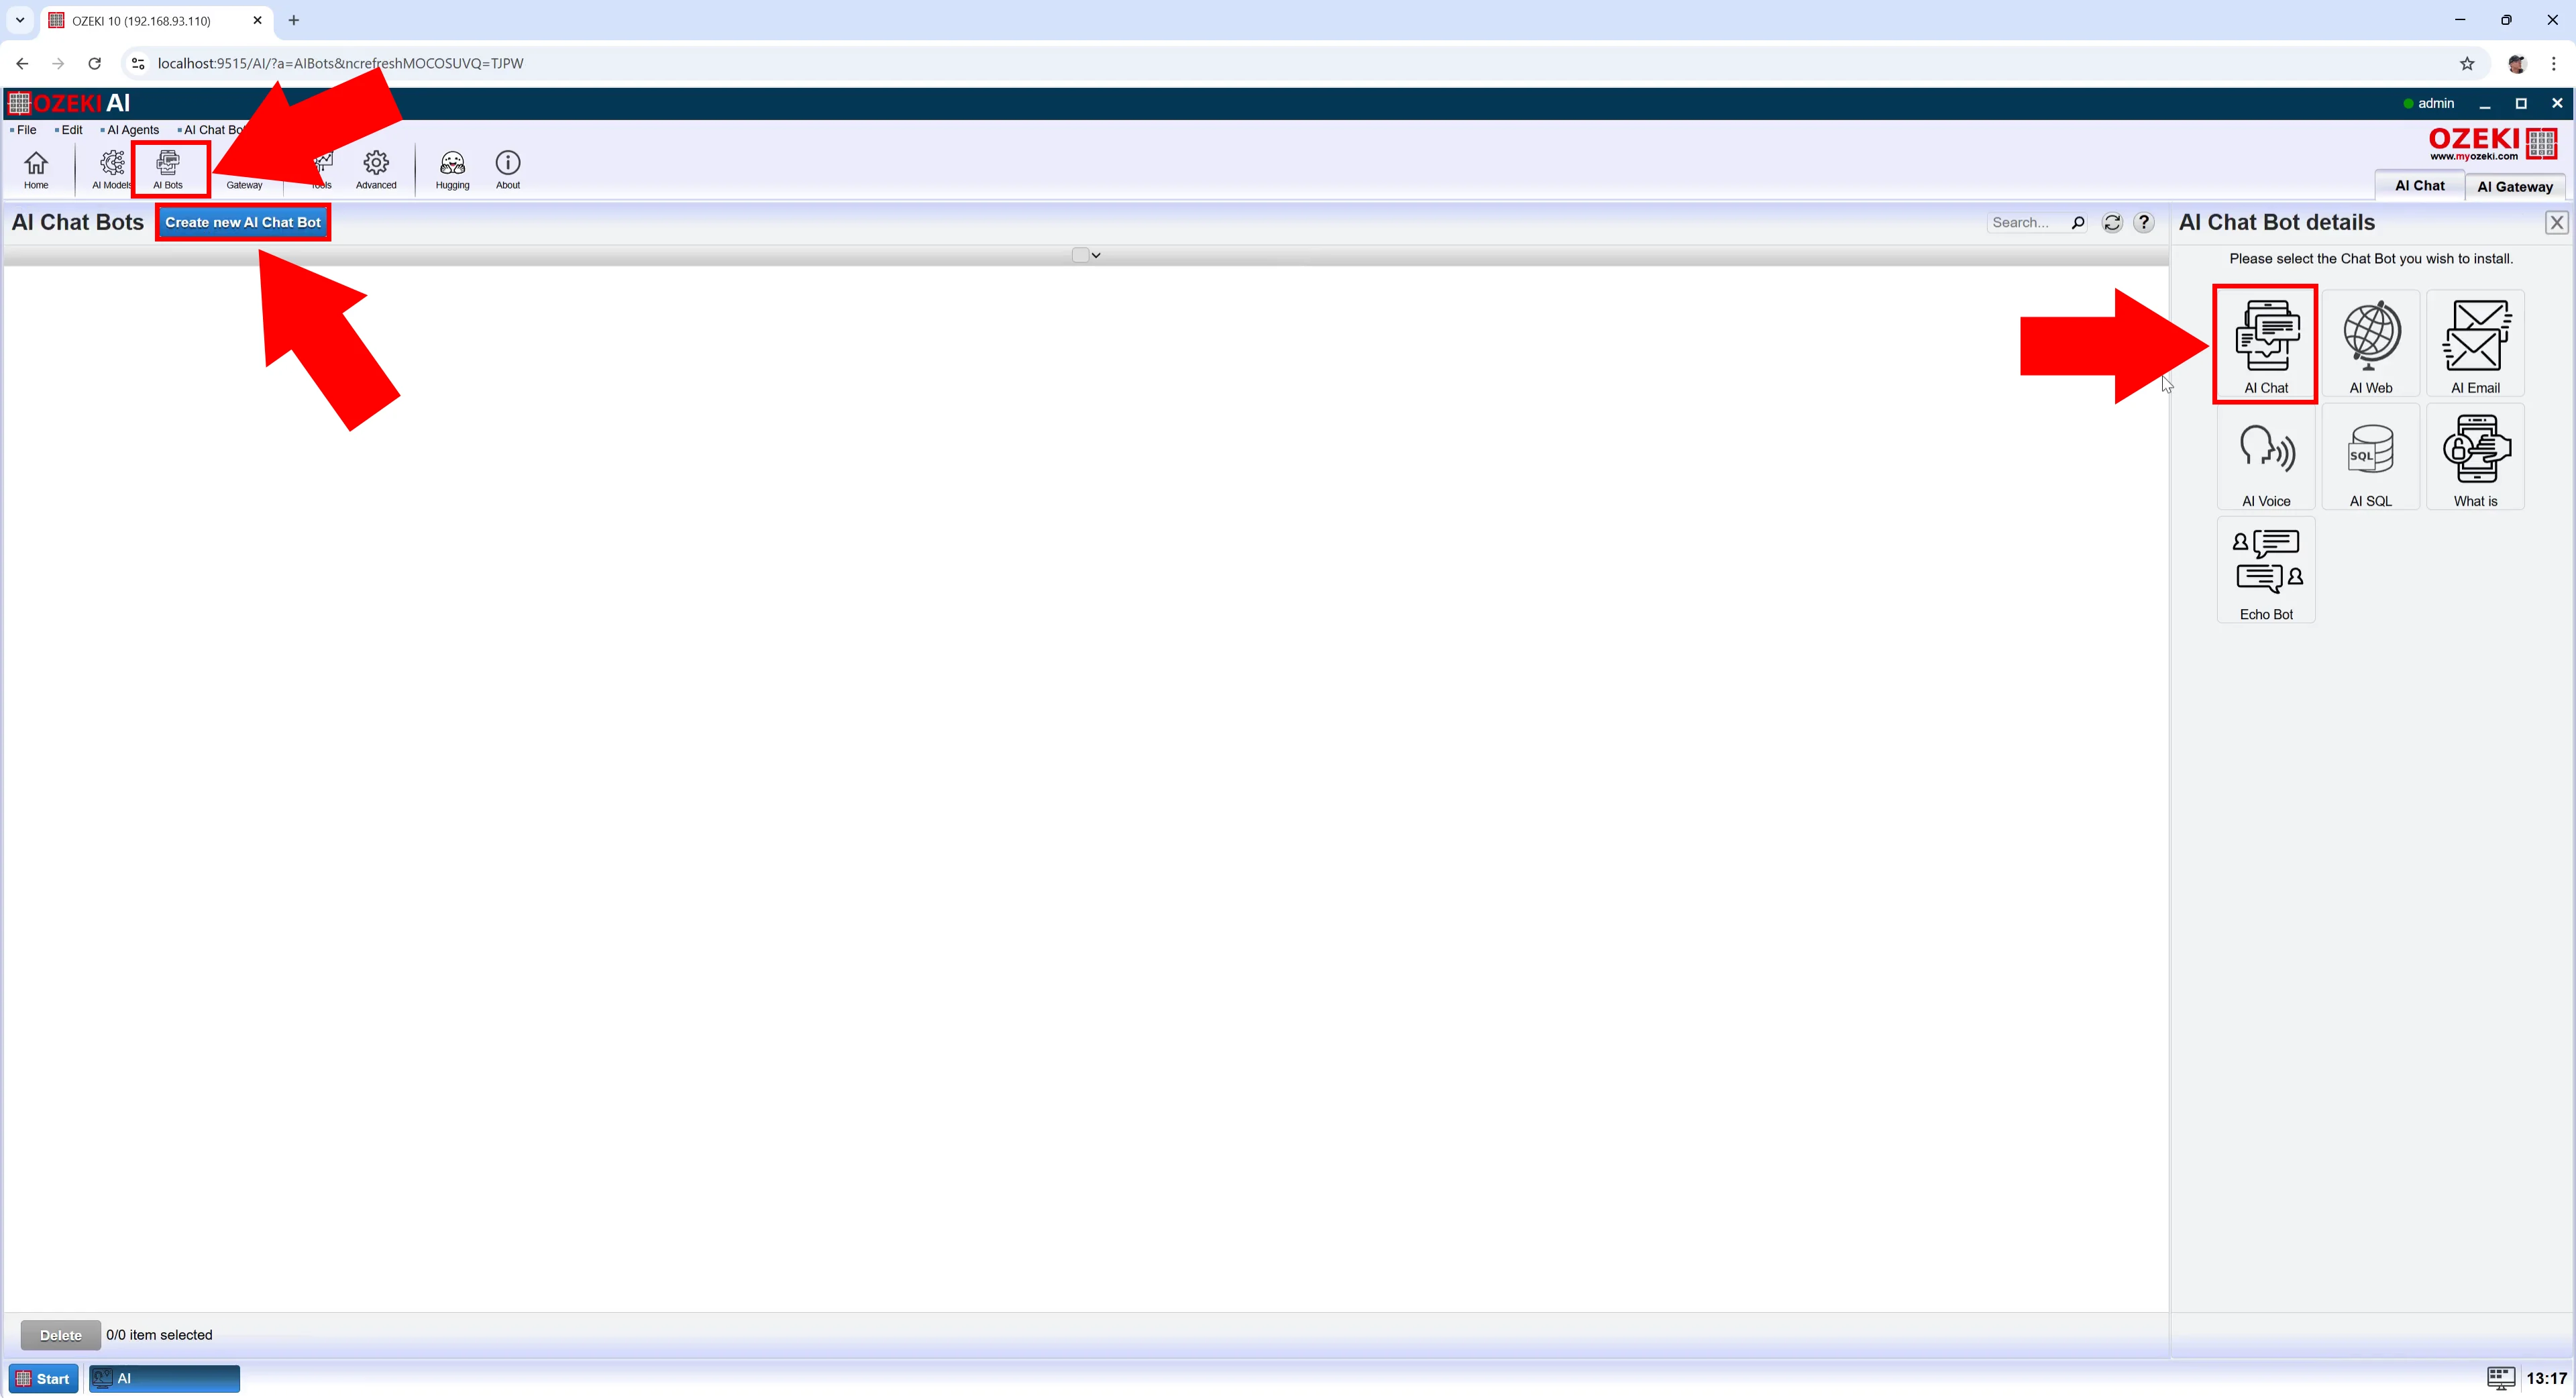
At the top of the screen, select "AI bots". Press the blue "Create new AI Chat Bot" button, then select "AI Chat" on the right (Figure 13).
Step 14 - Select model
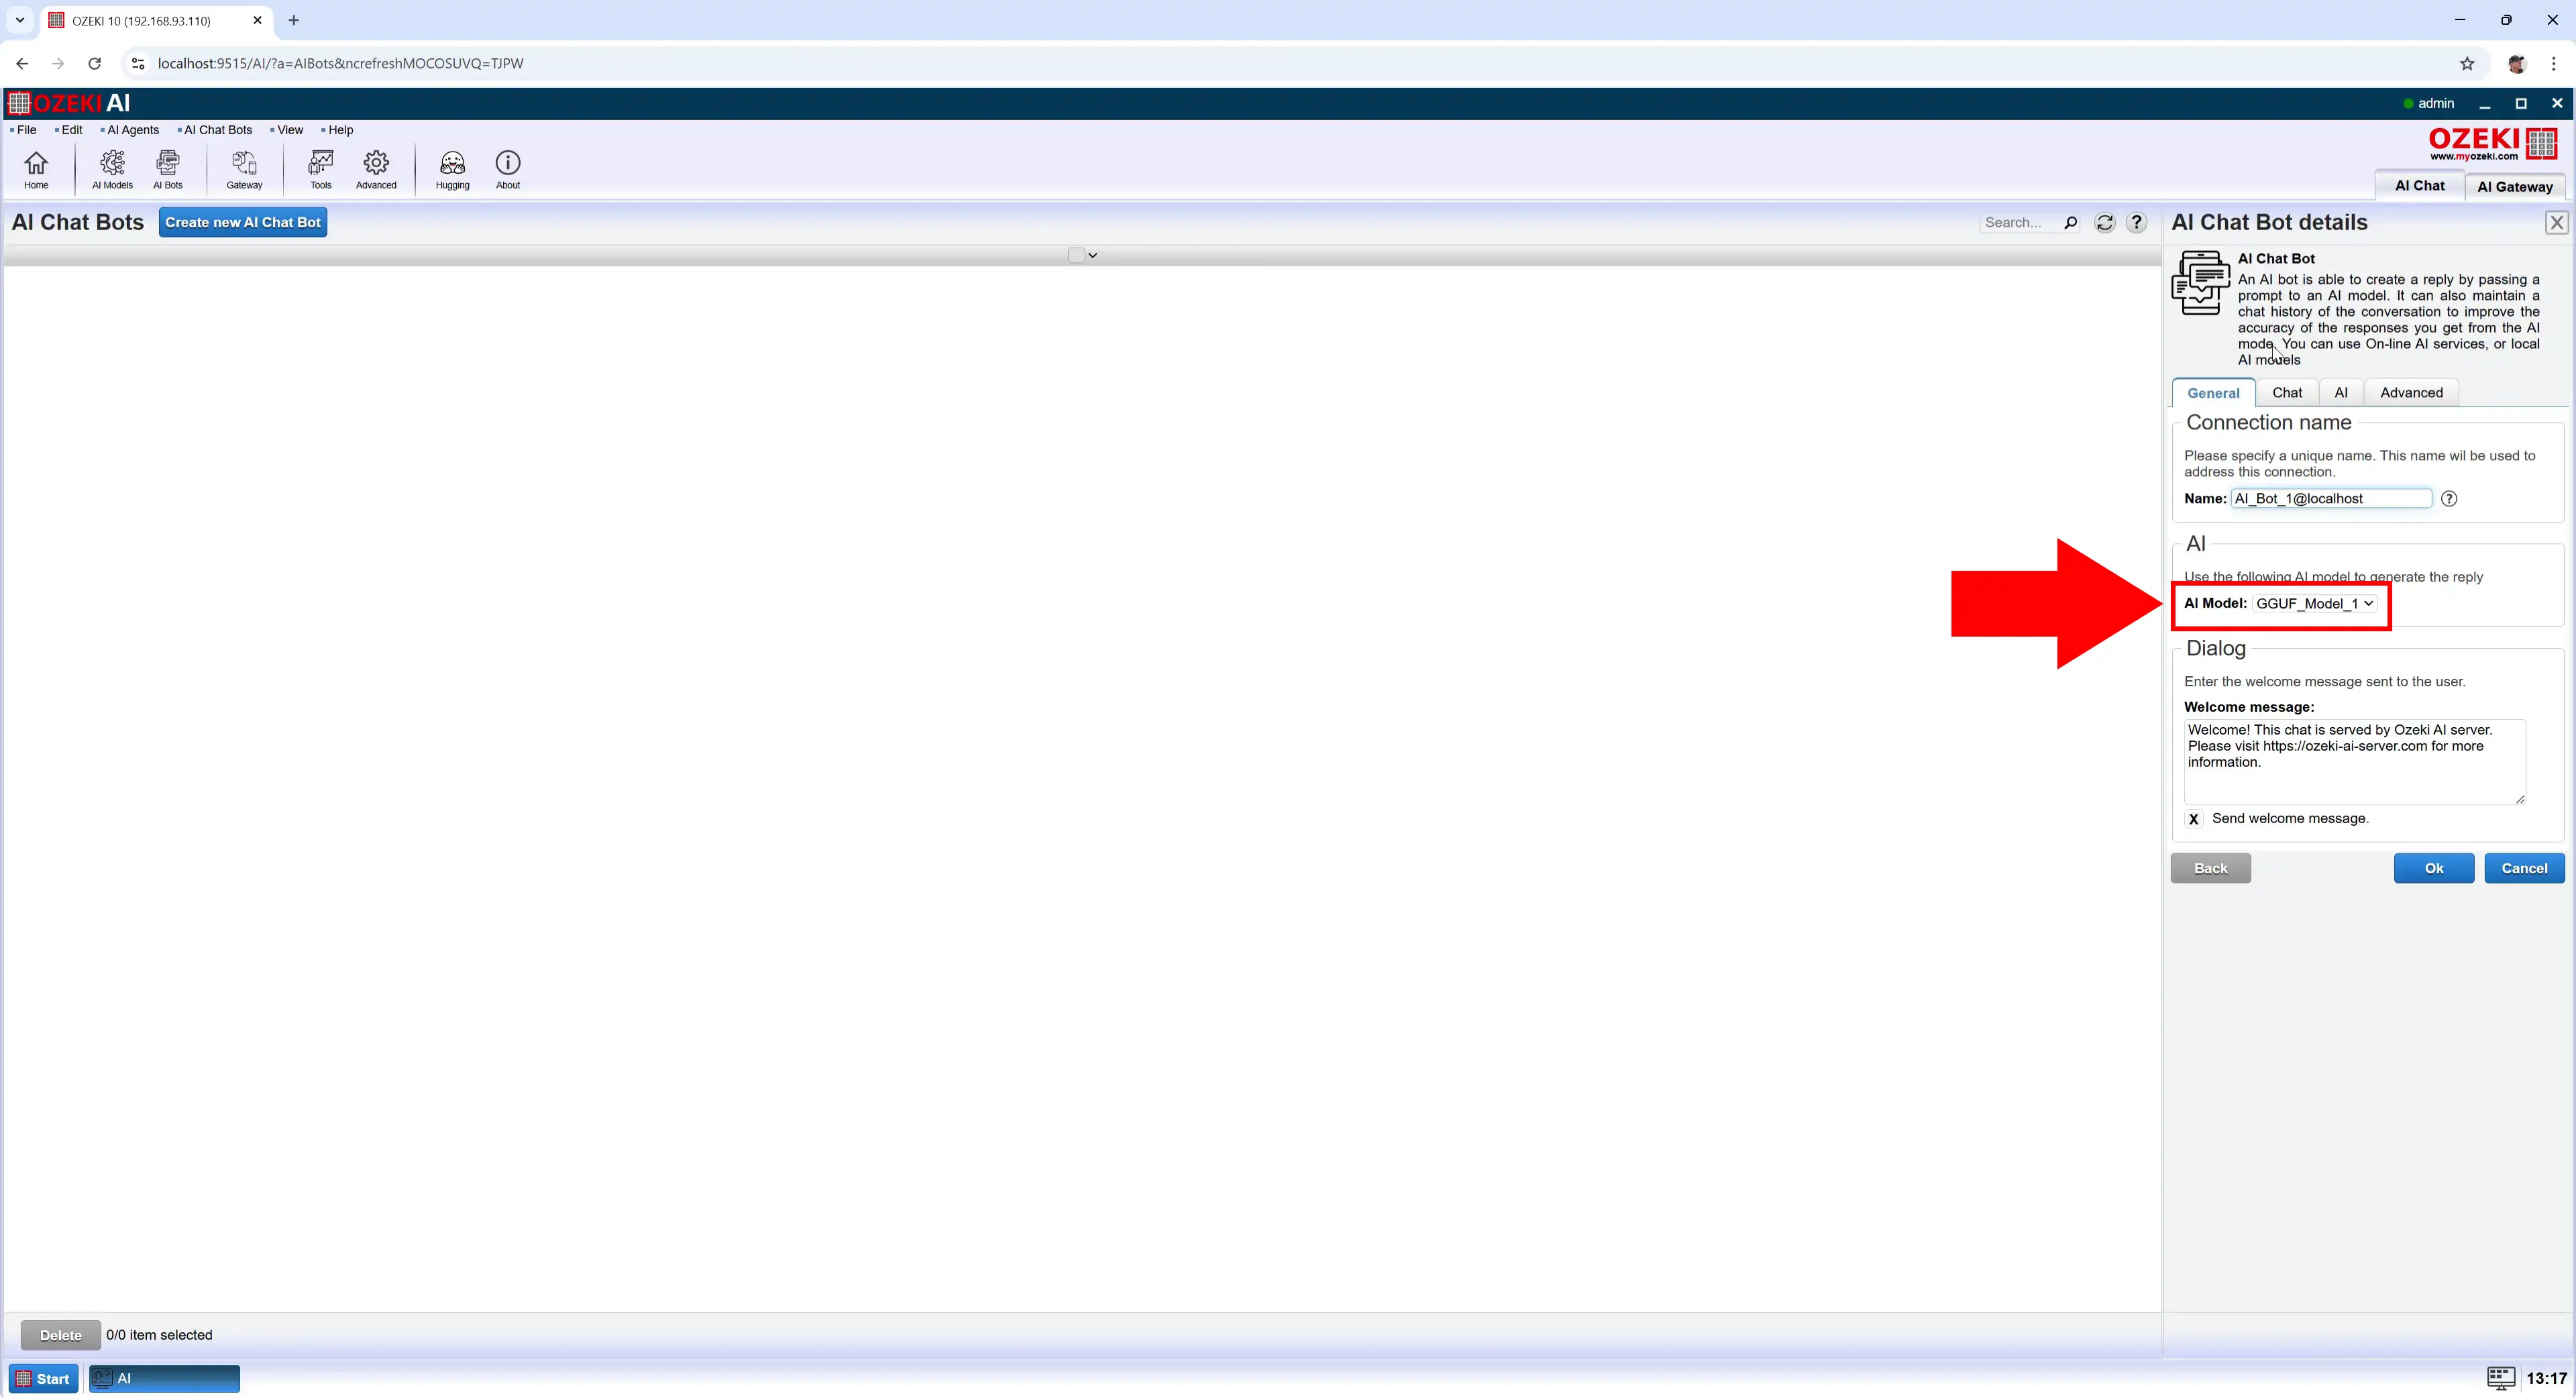
Then at "AI Model" select the already created "GGUF_Model_1" and press "Ok" (Figure 14).
Step 15 - Enable chatbot
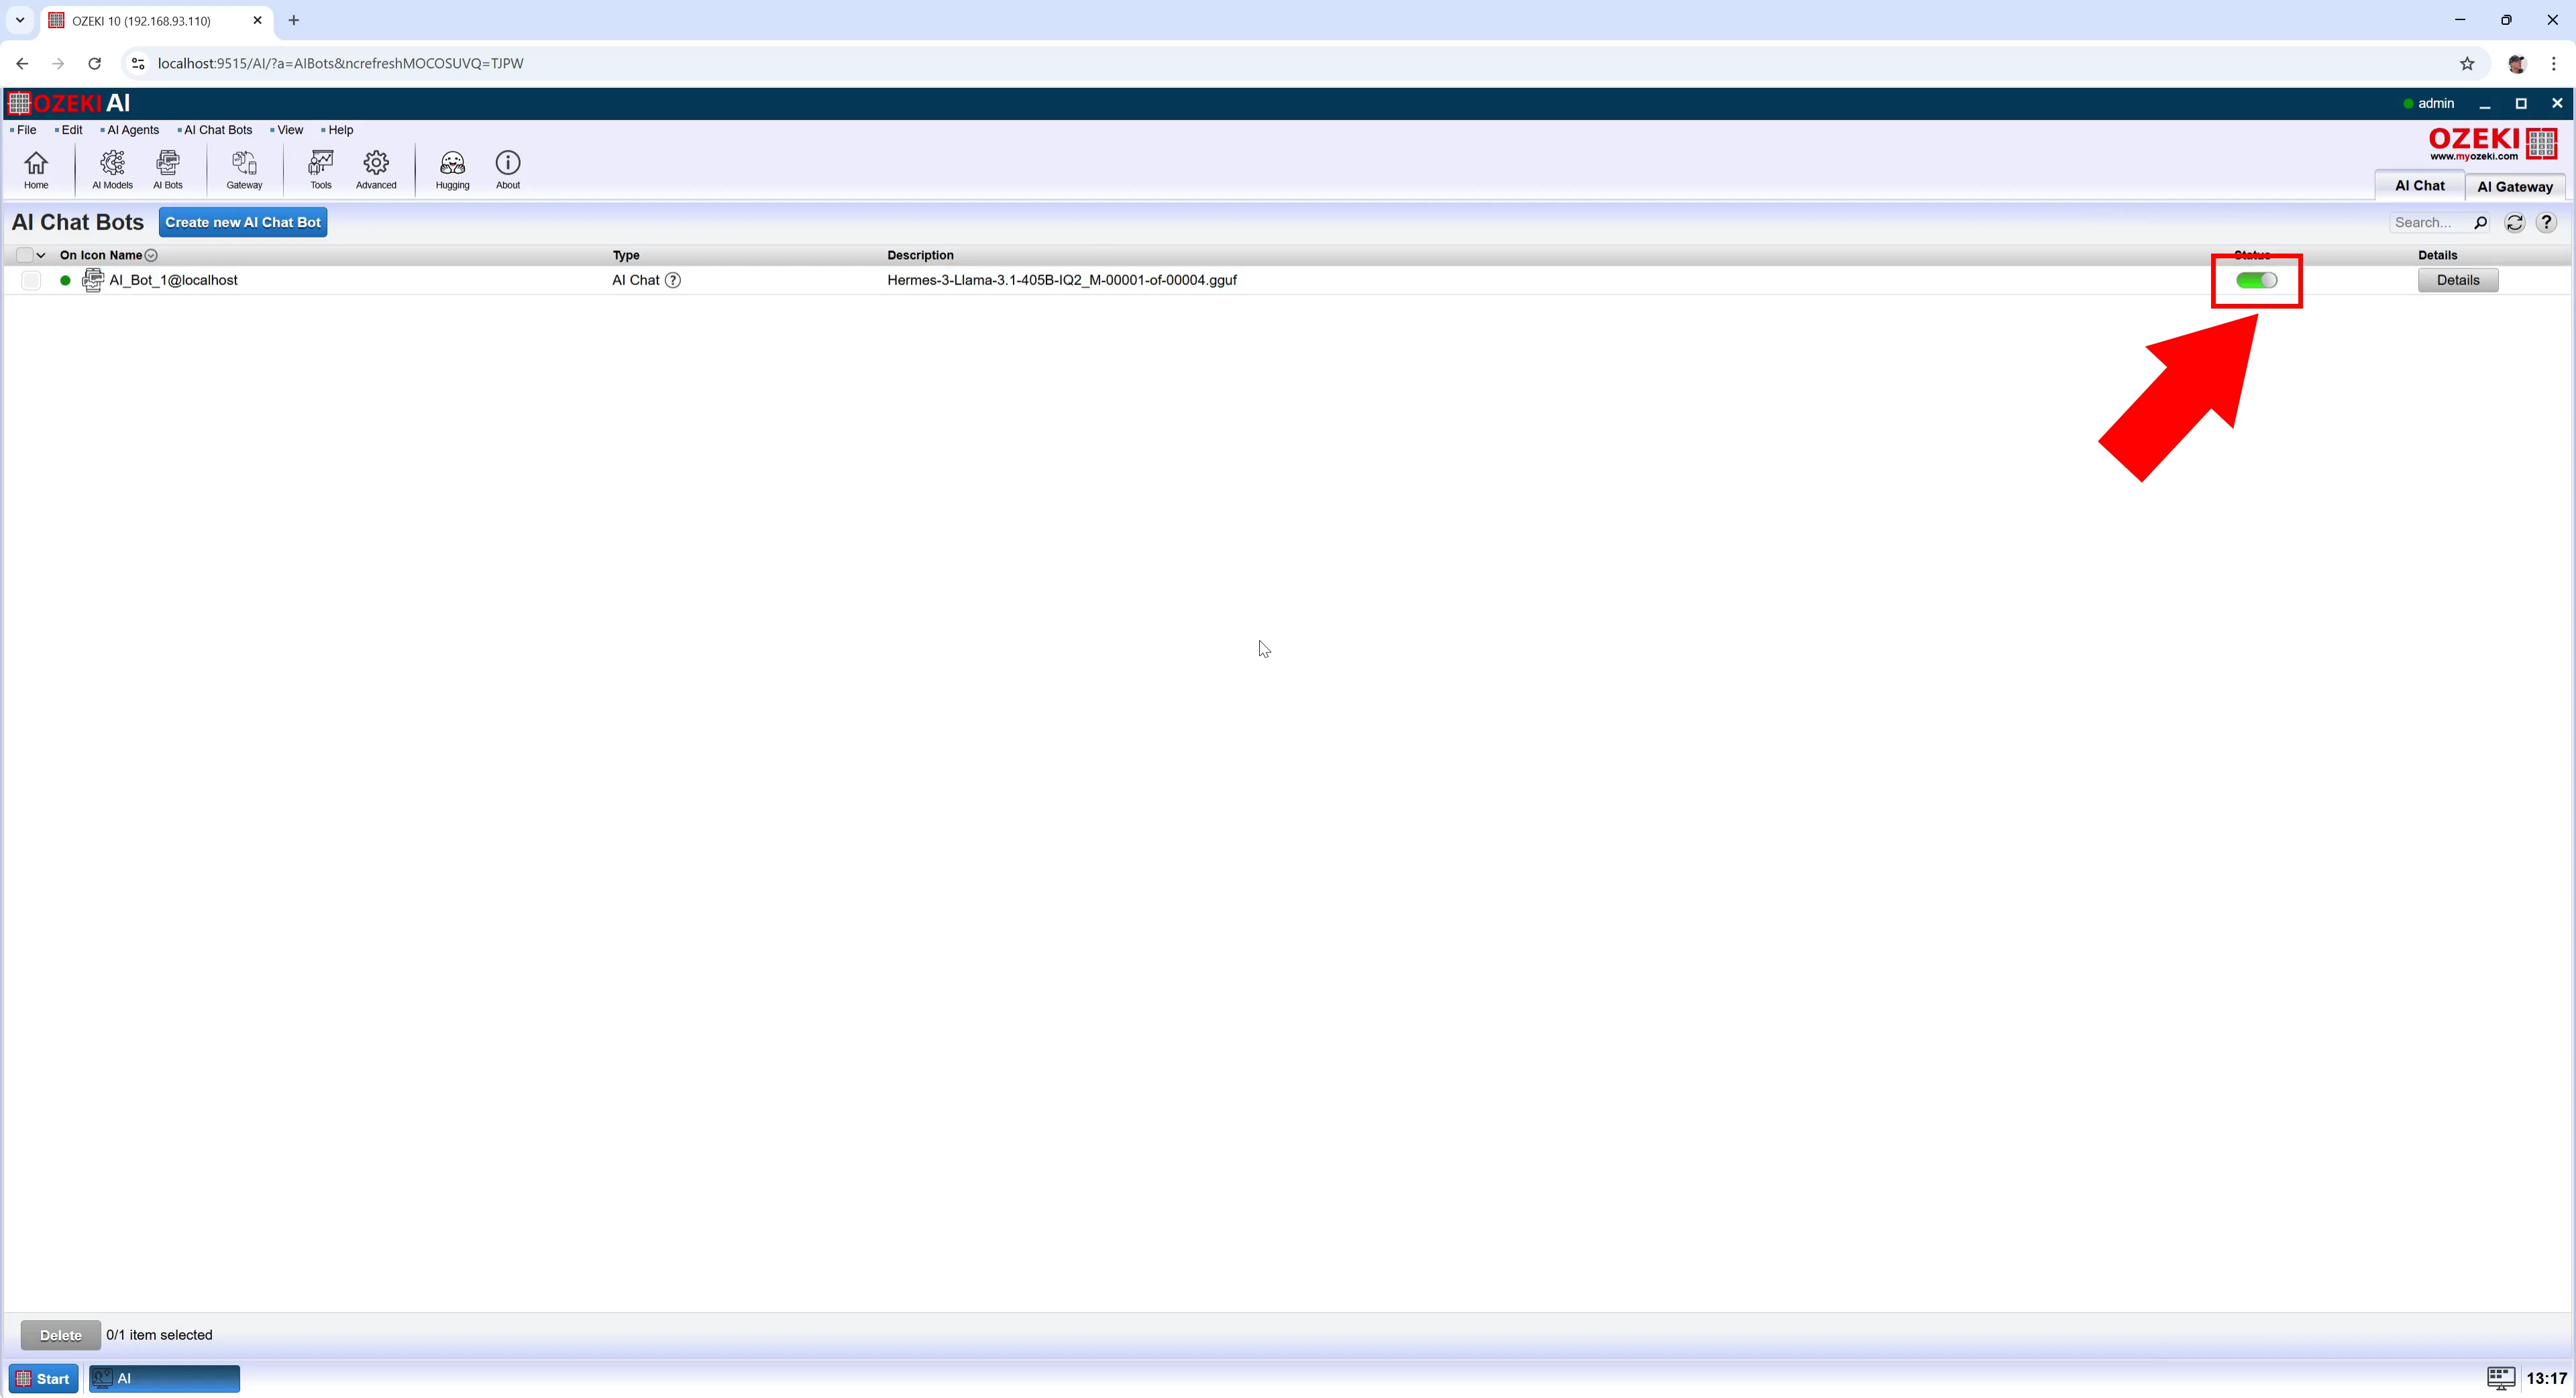
To enable the chatbot, turn on the switch at "Status" and click on AI_Bot_1 (Figure 15).
Step 16 - Conversation with the model
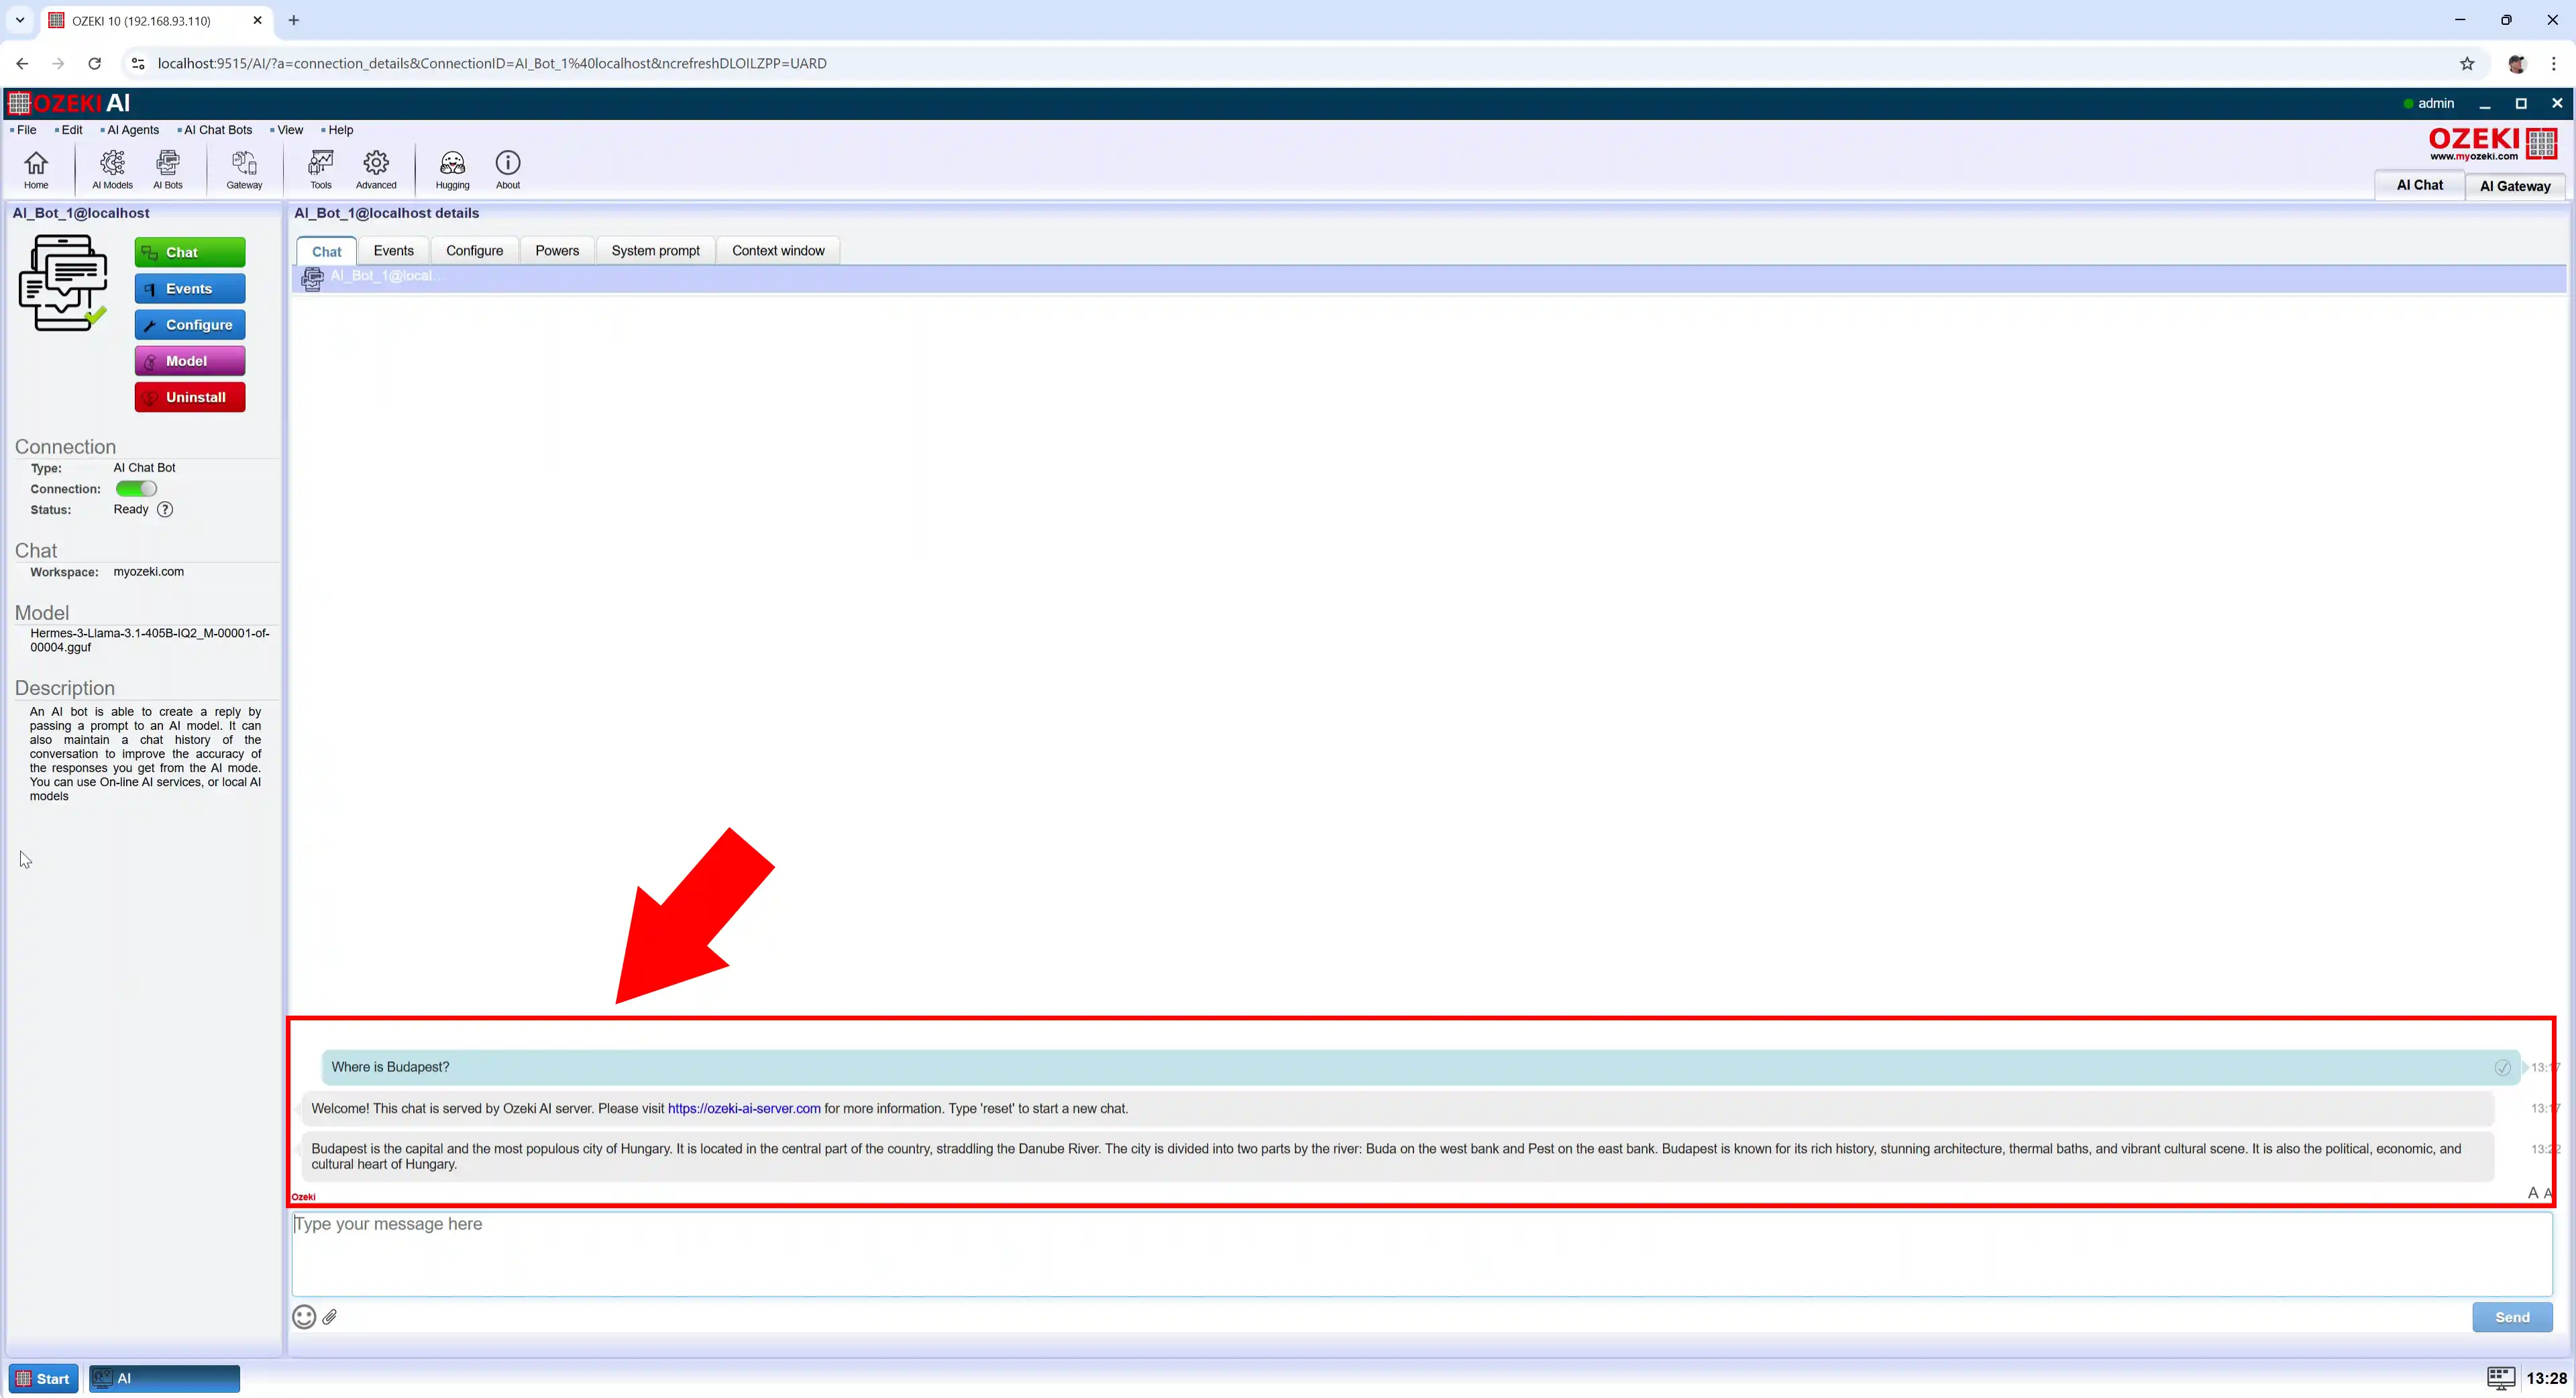
By opening AI_Bot_1 under the "Chat" tab you have the possibility to chat with the chatbot (Figure 16).
Step 17 - Conversation Log
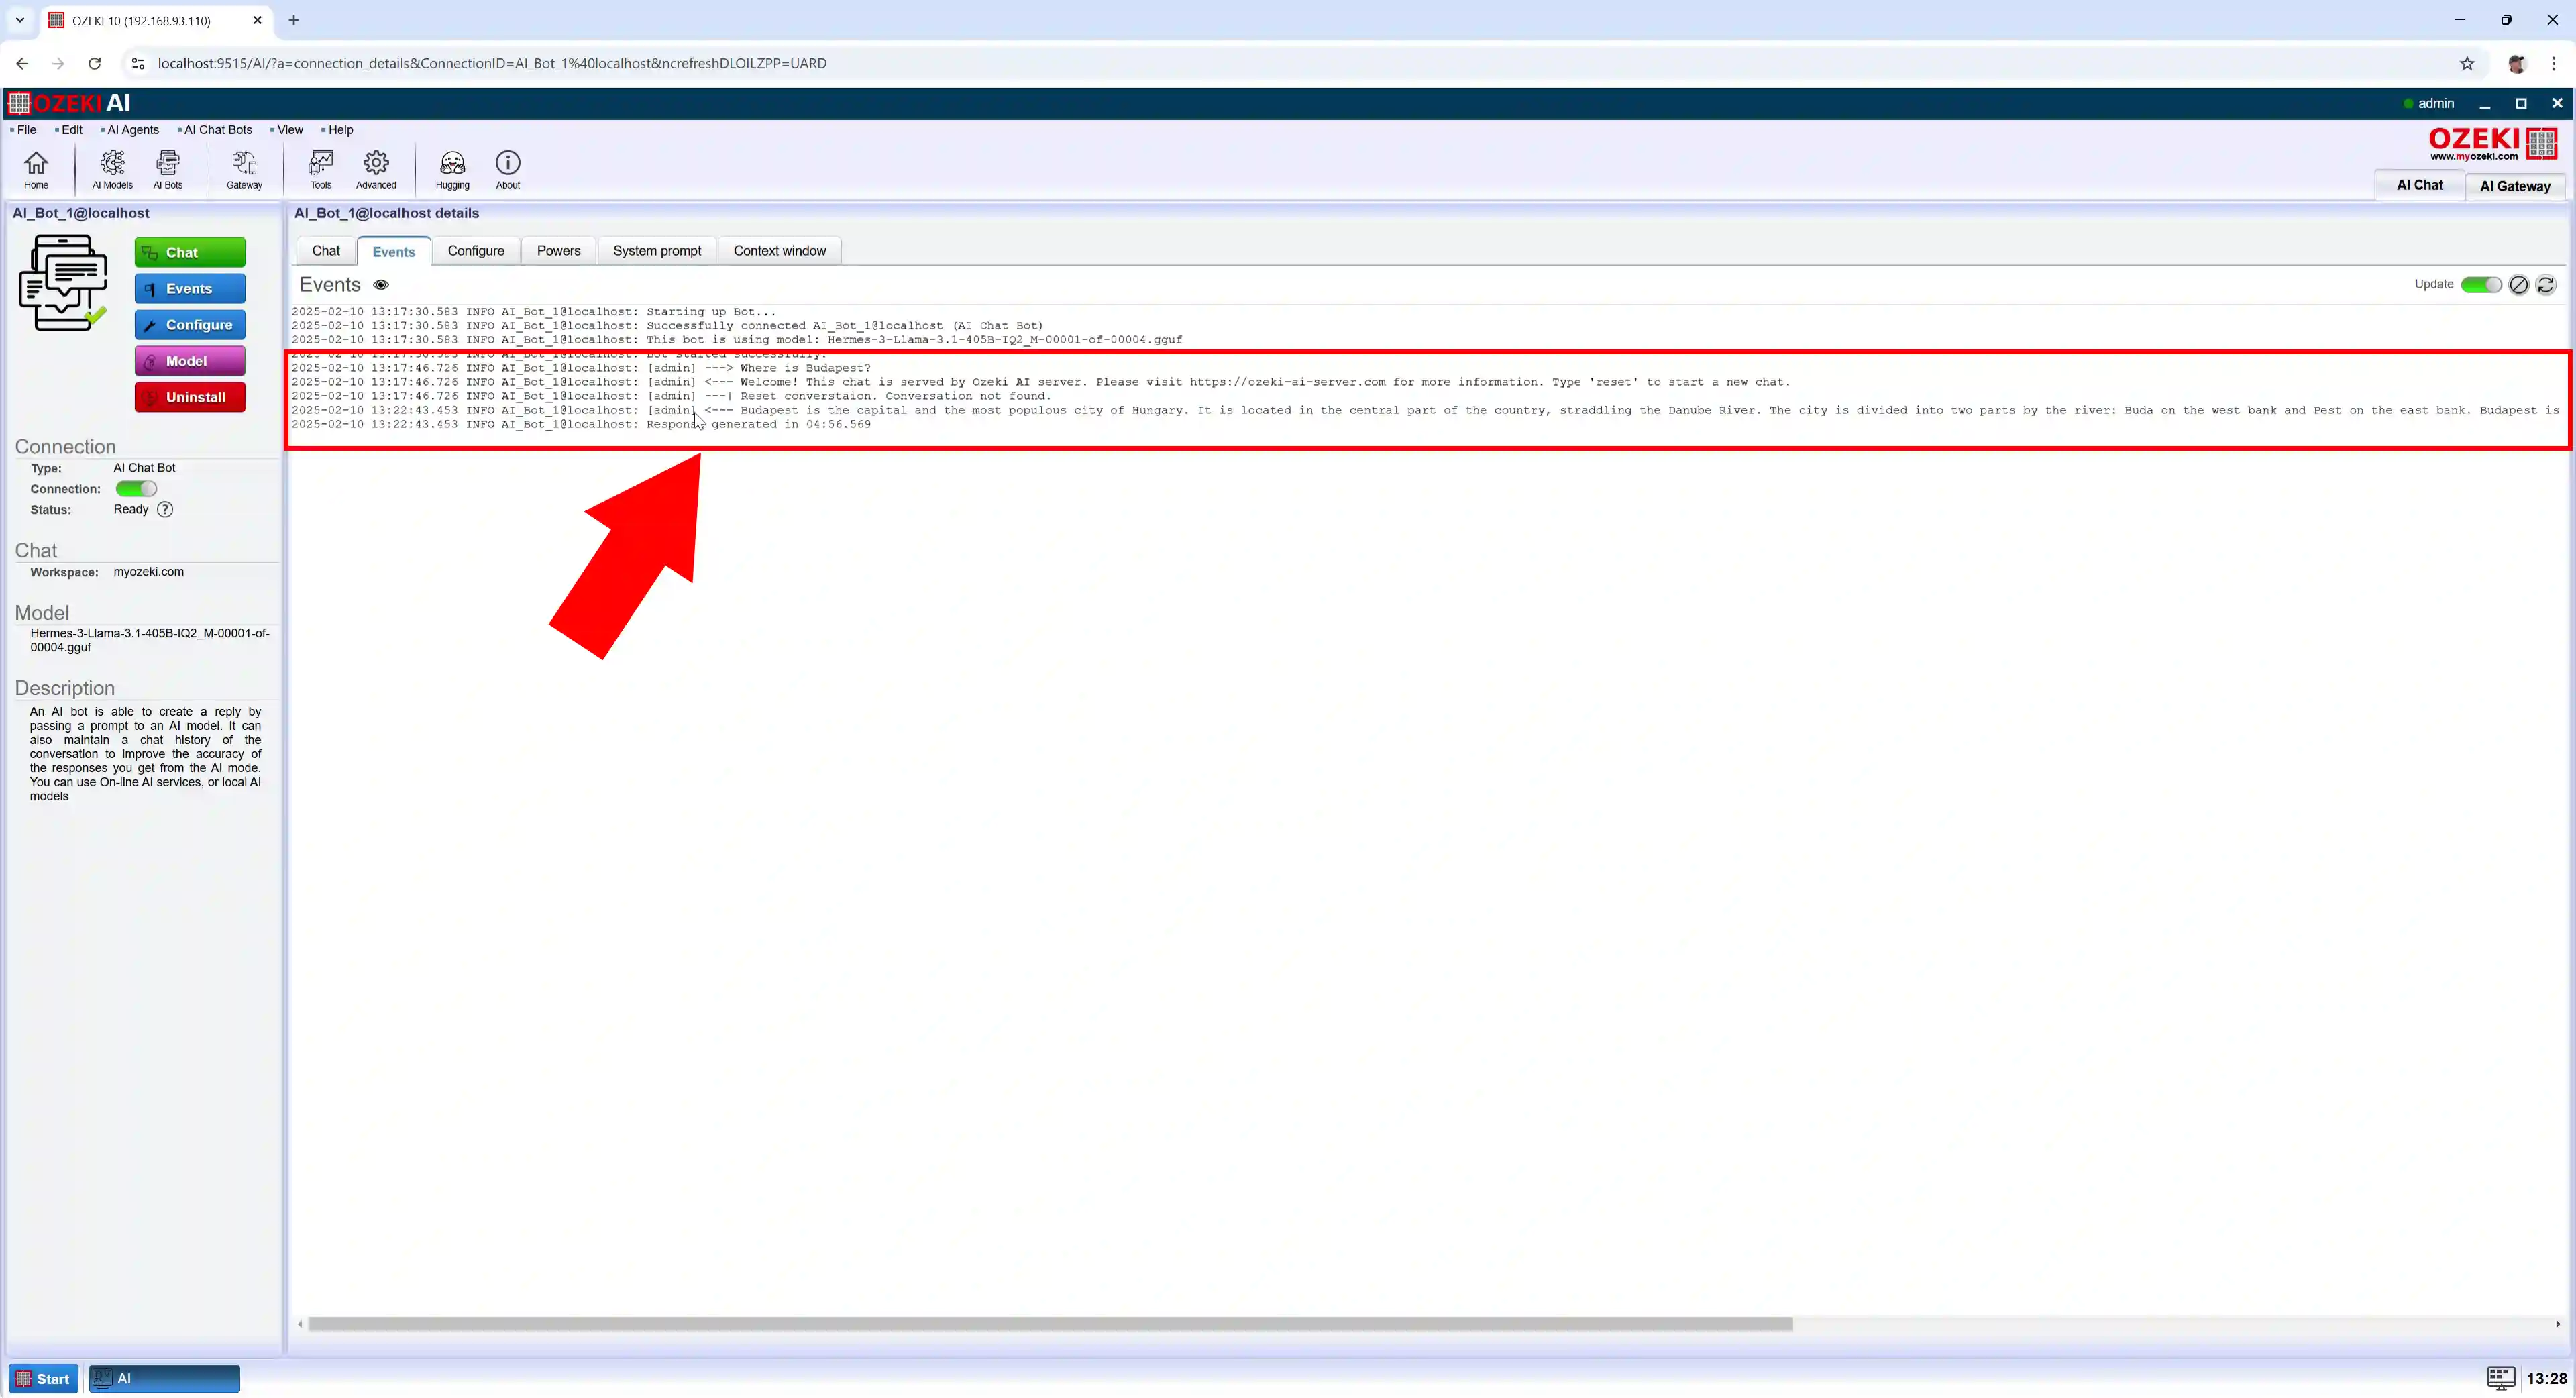
Open the "Events" tab to see the logging (Figure 17).
