How to use a Distilled DeepSeek R1 Model
In this chapter, we will explore how to download and configure the Distilled DeepSeek R1 model for use with Ozeki AI Server. This optimized version of DeepSeek R1 maintains strong AI capabilities while requiring fewer computing resources, making it ideal for efficient deployment. We will walk through the installation process, model integration, and how to use it for AI-driven tasks. By the end, you will have a working Distilled DeepSeek R1 setup within Ozeki AI Server, ready for seamless AI-powered interactions.
What is Distilled DeepSeek R1?
Distilled DeepSeek R1 is a smaller, optimized version of the DeepSeek R1 model, created through model distillation to reduce computational requirements while maintaining strong AI capabilities. These models are based on architectures like Llama and Qwen, offering efficient reasoning for resource-limited applications.
What is Ozeki AI Server?
Ozeki AI Server is a software platform that integrates artificial intelligence (AI) with communication systems, offering tools to create and deploy AI-powered applications for businesses. It enables the automation of processes such as text messaging, voice calls, chatbots, and machine learning, streamlining communication workflows. By bridging AI with communication networks, Ozeki AI Server enhances customer service, optimizes business operations, and improves user engagement across various industries.
How to download DeepSeek R1 model model (Quick Steps)
- Go to the huggingface.co website
- Search for "DeepSeek R1 Distill Llama 8B GGUF"
- Click on "Files and versions"
- Click on "DeepSeek-R1-Distill-Llama-8B-Q4_K_M.gguf"
- Download this .gguf file with the arrow pointing down
How to create Ozeki AI Server model and Chatbot (Quick Steps)
- Open Ozeki 10
- Launch the Ozeki AI Server
- Create new GGUF model, configure it
- Create new AI chatbot, configure it
- Have a good conversation with the chatbot
How to download Distilled DeepSeek R1 model (Video tutorial)
This tutorial video will guide you through the process of downloading the Distilled DeepSeek R1 model from Huggingface.co and saving it to the C:\AIModels directory on your computer. By following the step-by-step instructions, you will be able to install and set up the model easily, ensuring it is ready for use without any hassle.
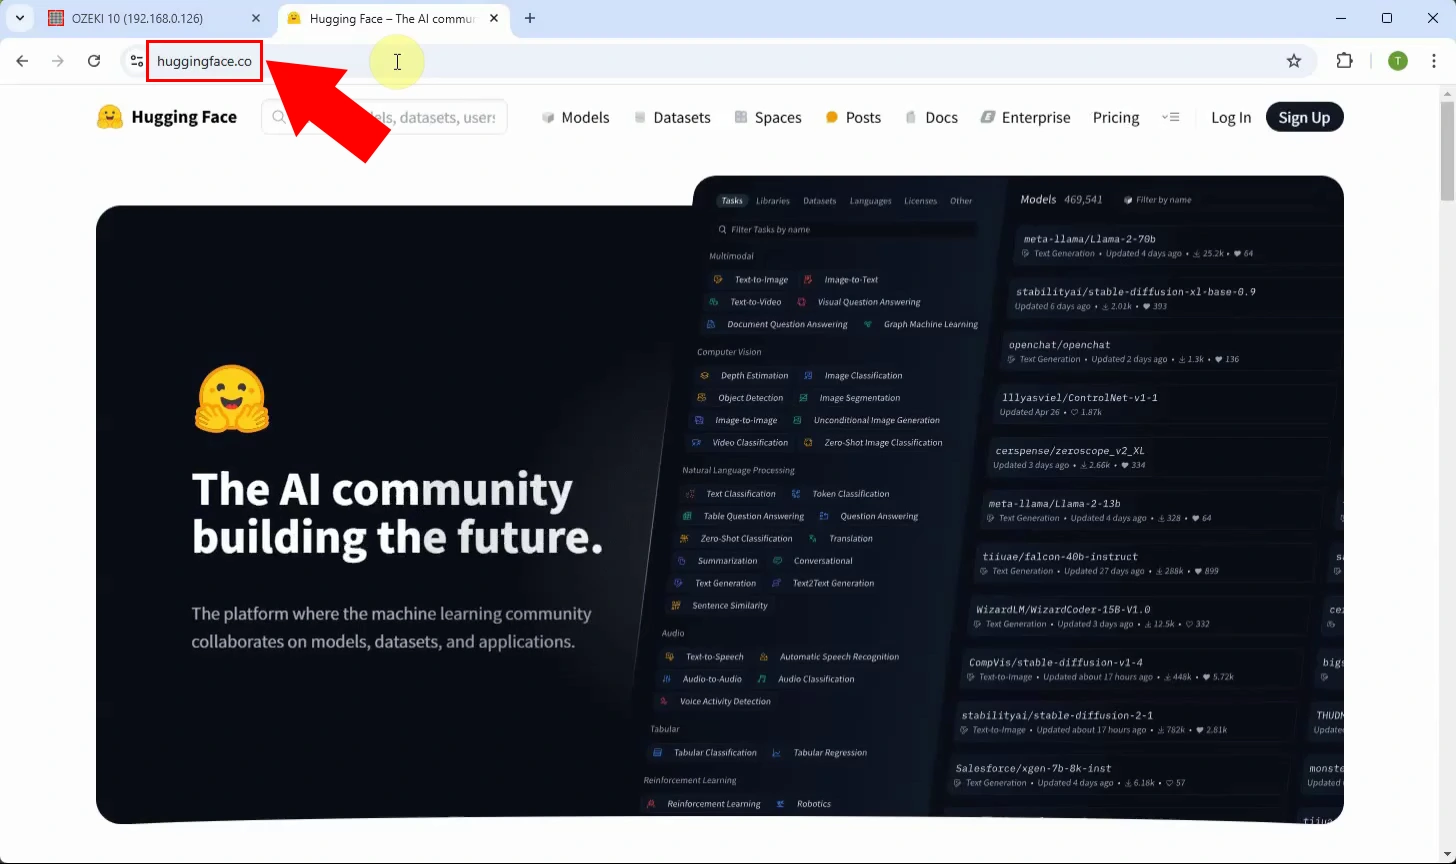
Step 1 - Open Huggingface.co
First, go to the Huggingface (Figure 1).
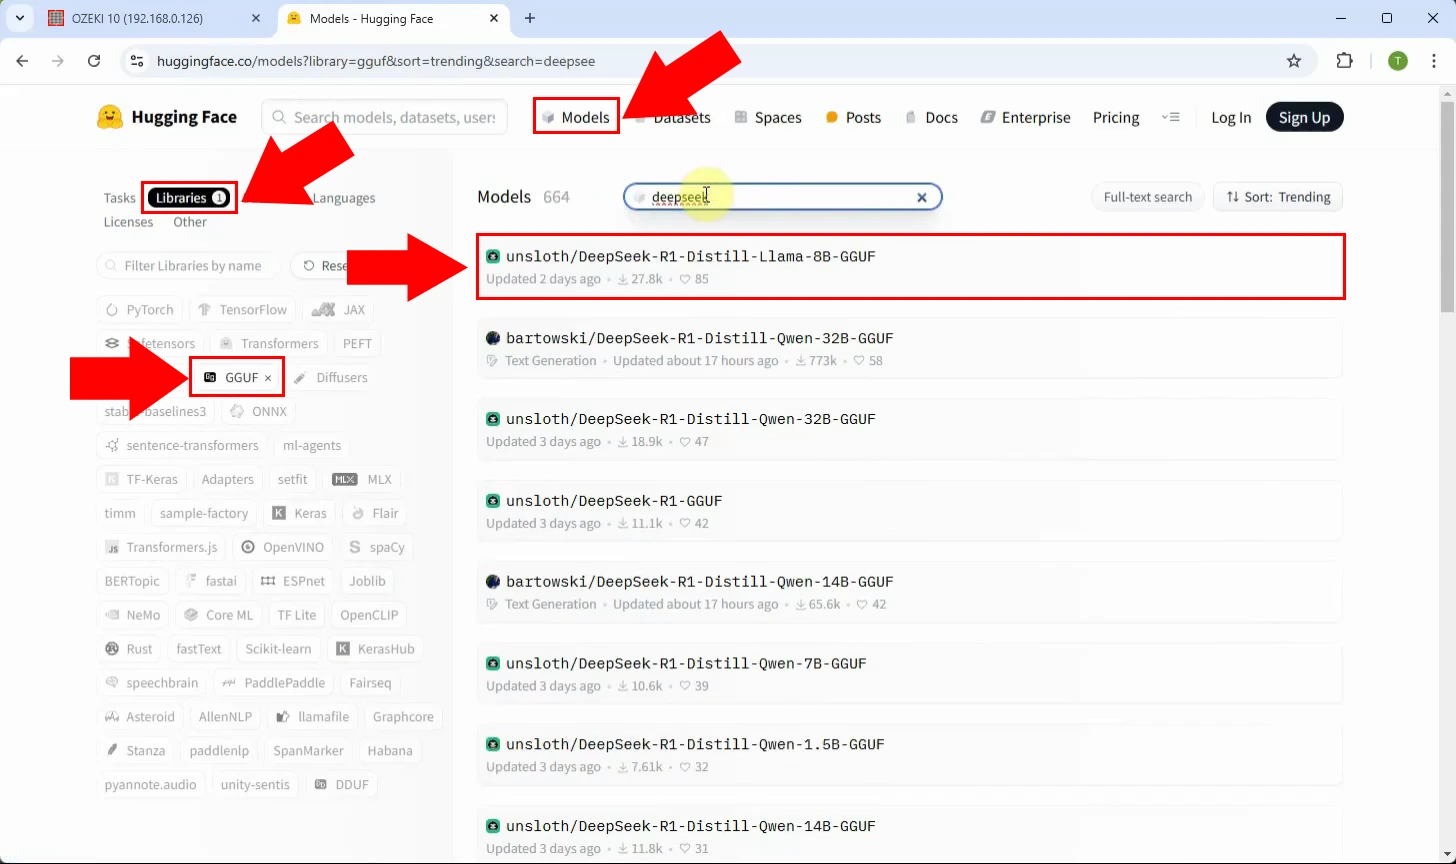
Step 2 - Select GGUF DeepSeek library
Select the Models menu, then Libraries as a filter, then GGUF and search for "deepseek" and select "DeepSeek-R1-Distill-Llama-8B-GGUF" (Figure 2).
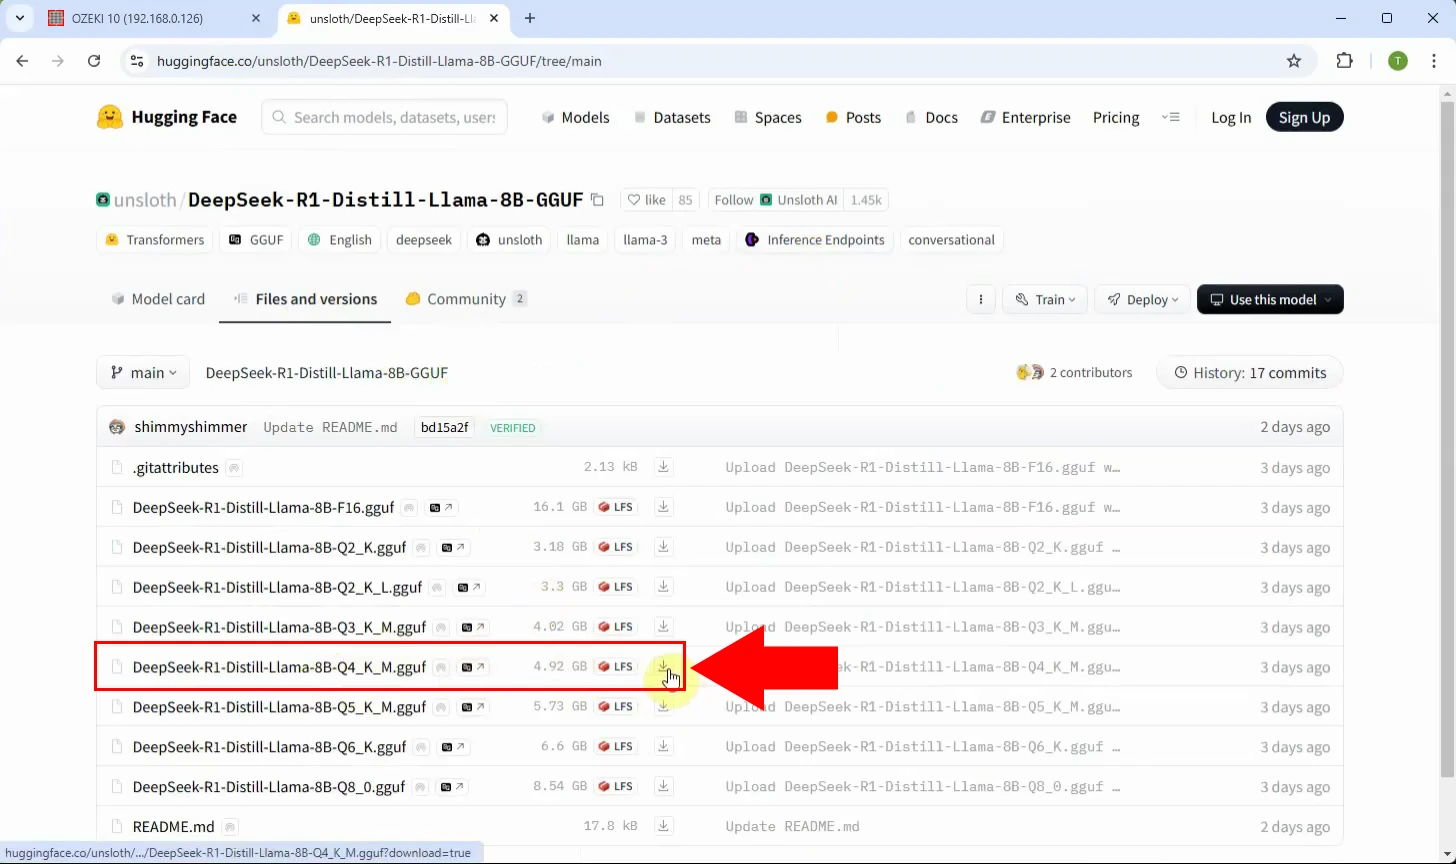
Step 3 - Download model file
Click on the "Files and versions" tab, select the "DeepSeek-R1-Distill-Llama-8B-Q4_K_M.gguf" version and download it, you can download with the down arrow (Figure 3).
Step 4 - Paste model file to C:\AIModels folder
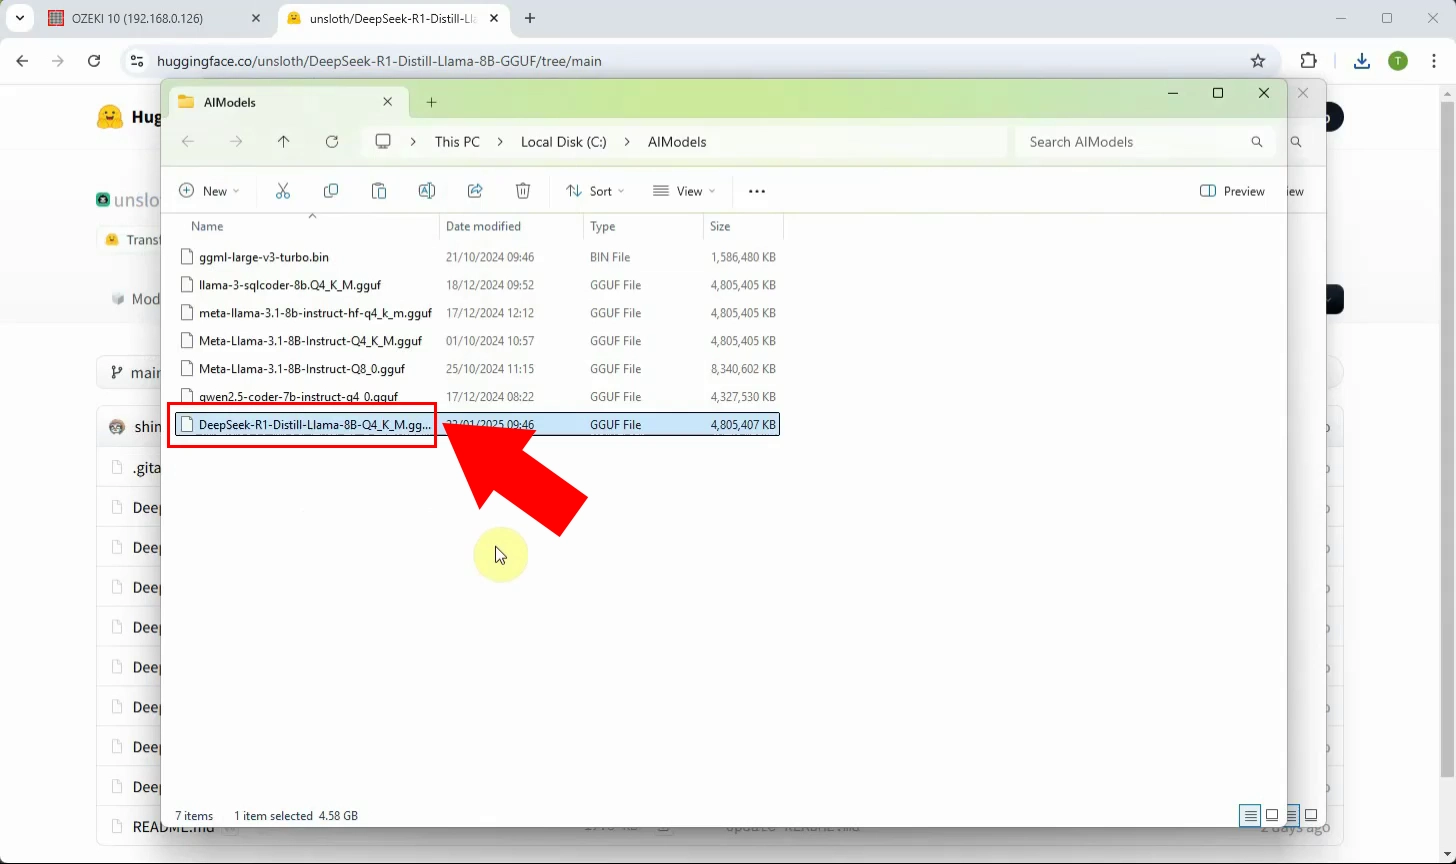
You have already downloaded the DeepSeek-R1-Distill-Llama-8B-Q4_K_M.gguf file. Now, move it to the C:\AIModels folder (Figure 4).
Open Ozeki AI Server and setup the model (Video tutorial)
This video shows how to create a new "AI Model" from the downloaded model within the Ozeki AI Server.
Step 5 - Open Ozeki AI Server
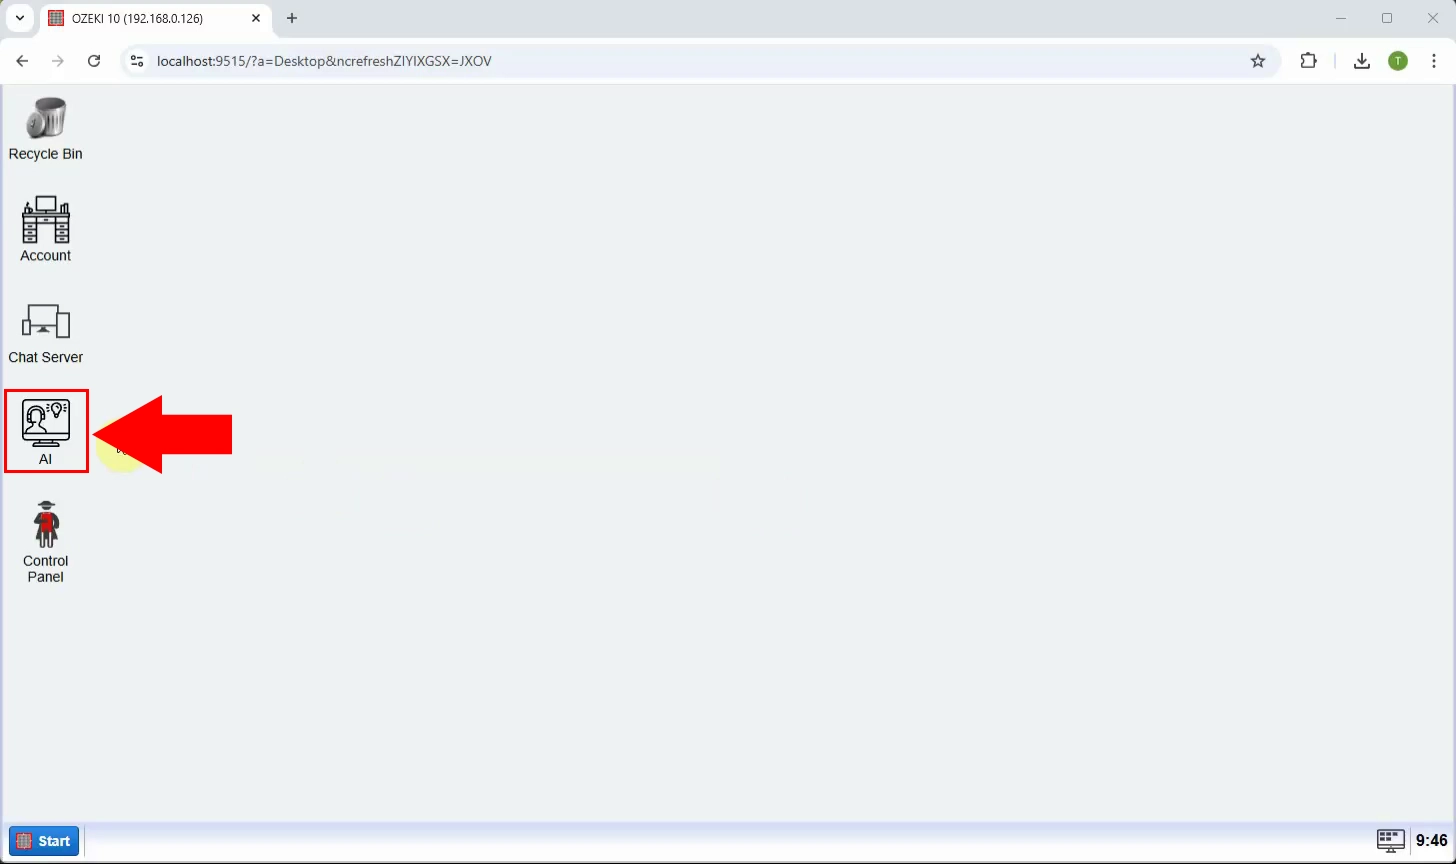
Open the Ozeki 10 application. If you haven't installed it yet, you can download it from the provided link. After launching the app, navigate to and open the Ozeki AI Server (Figure 5).
Step 6 - Create new GGUF model
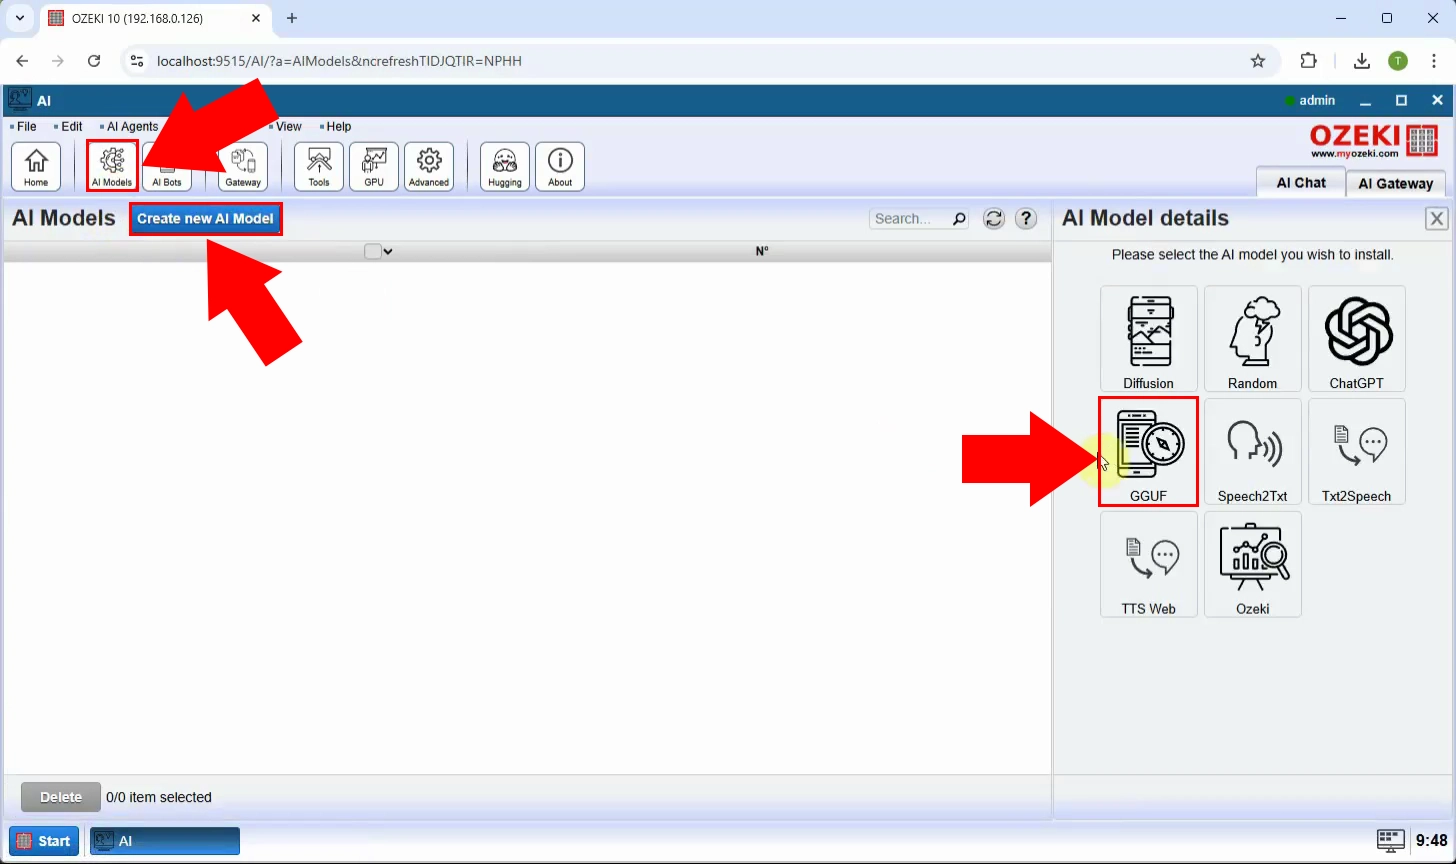
The Ozeki AI Server interface is now displayed on the screen. To create a new GGUF model, click on "AI Models" at the top of the screen. Then, press the blue "Create a new AI Model" button. On the right side, a list of options will appear, select the "GGUF" menu (Figure 6).
Step 7 - Select Deepseek model file
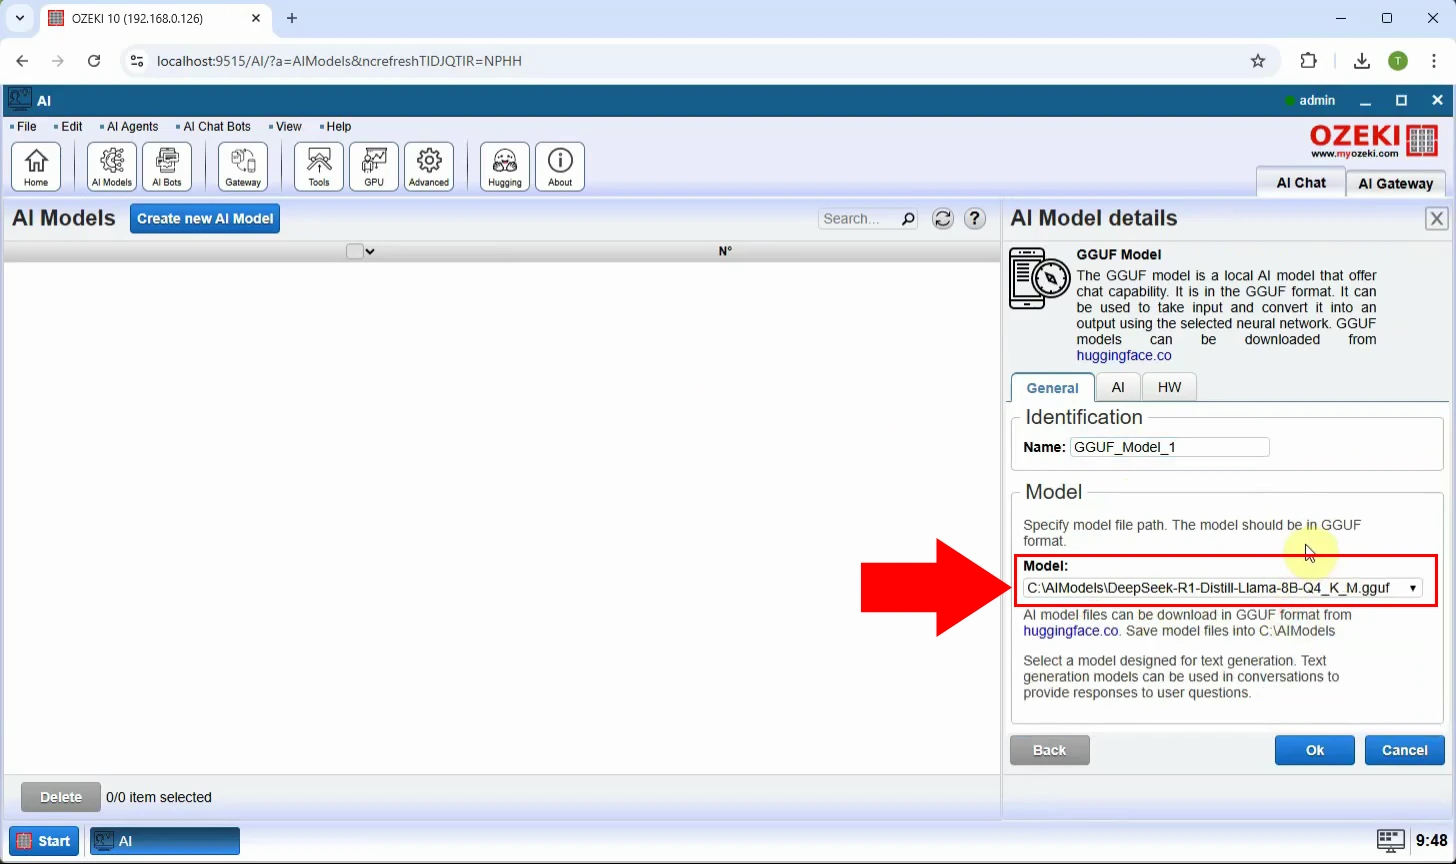
After choosing the "GGUF" menu, go to the "General" tab.
Under Identification, rename the model to "GGUF_Model_1". Next,
select the model file located at "C:\AIModels\DeepSeek-R1-Distill-Llama-8B-Q4_K_M.gguf",
then click "OK"
(Figure 7).
Step 8 - Model created
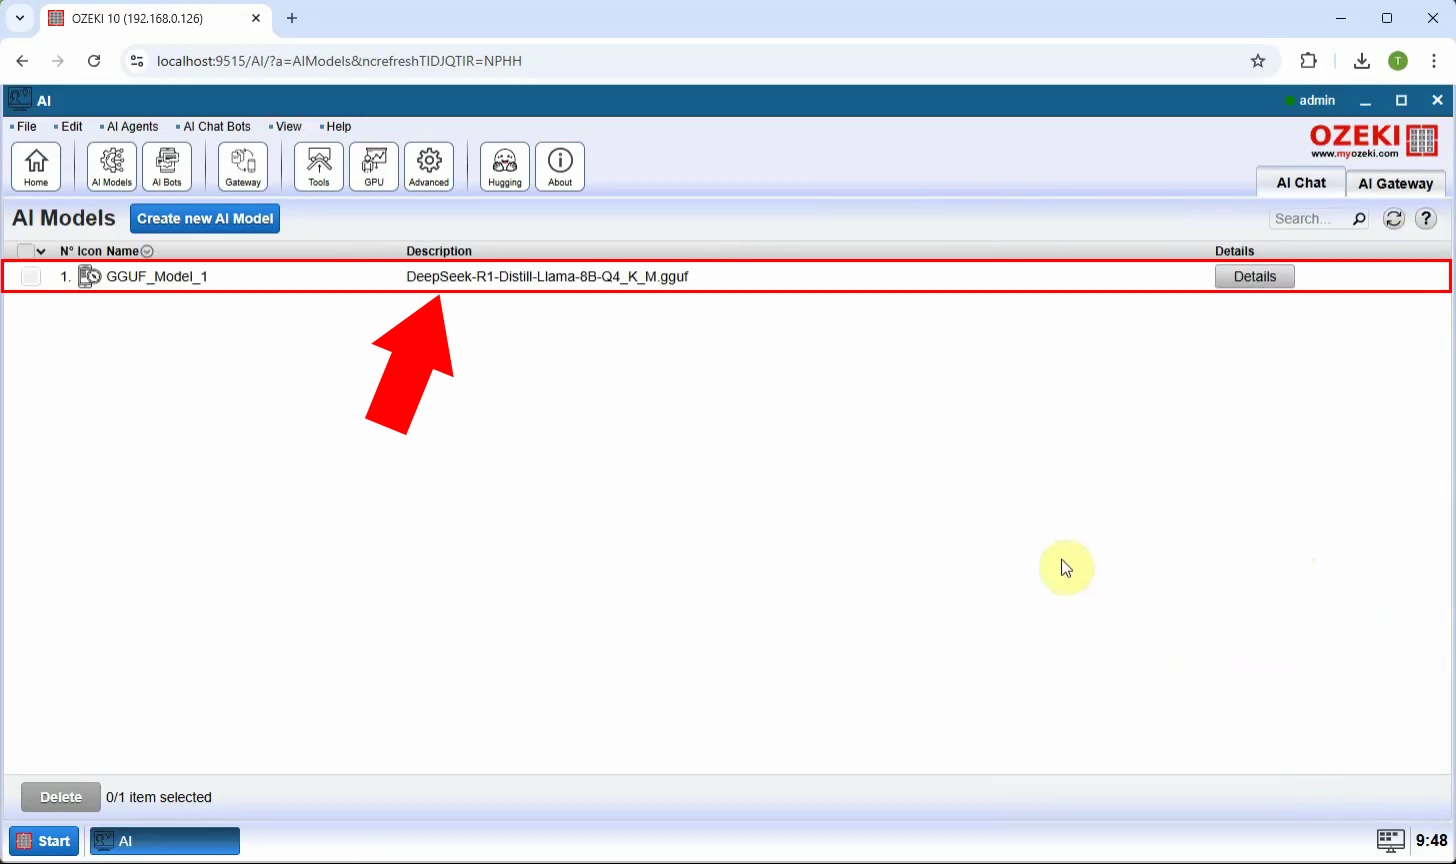
After creating the new AI Model, you can see the completed model (Figure 8).
Create Deepseek AI Chat bot (Video tutorial)
After the creation of the AI Model, the next step is the creation of the AI Chat Bot, which is demonstrated in this video.
Step 9 - Create new AI chatbot
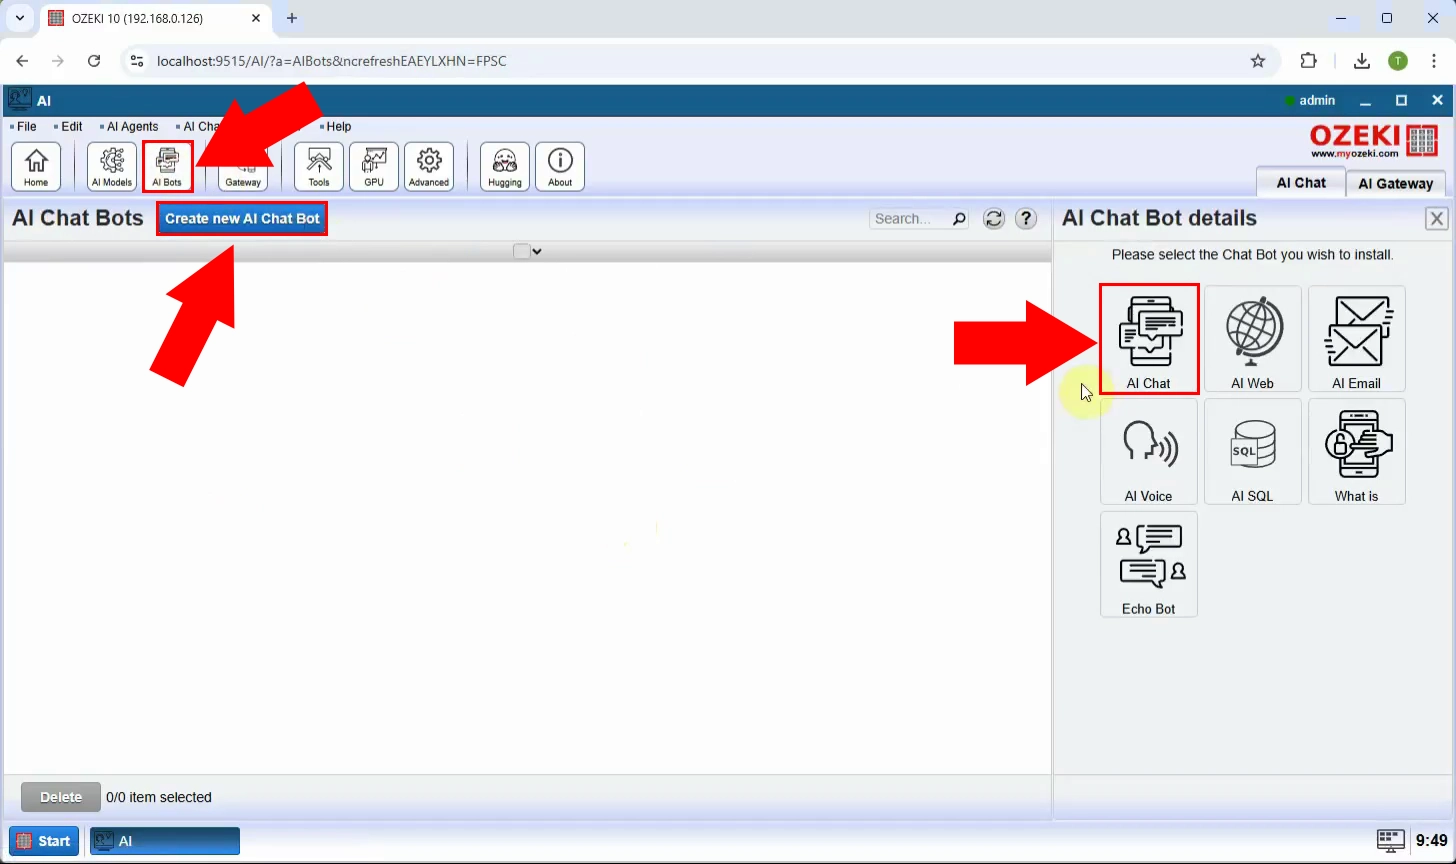
At the top of the screen, click on "AI Bots". Then, press the blue "Create New AI Chat Bot" button and choose "AI Chat" from the options on the right (Figure 9).
Step 10 - Select AI model
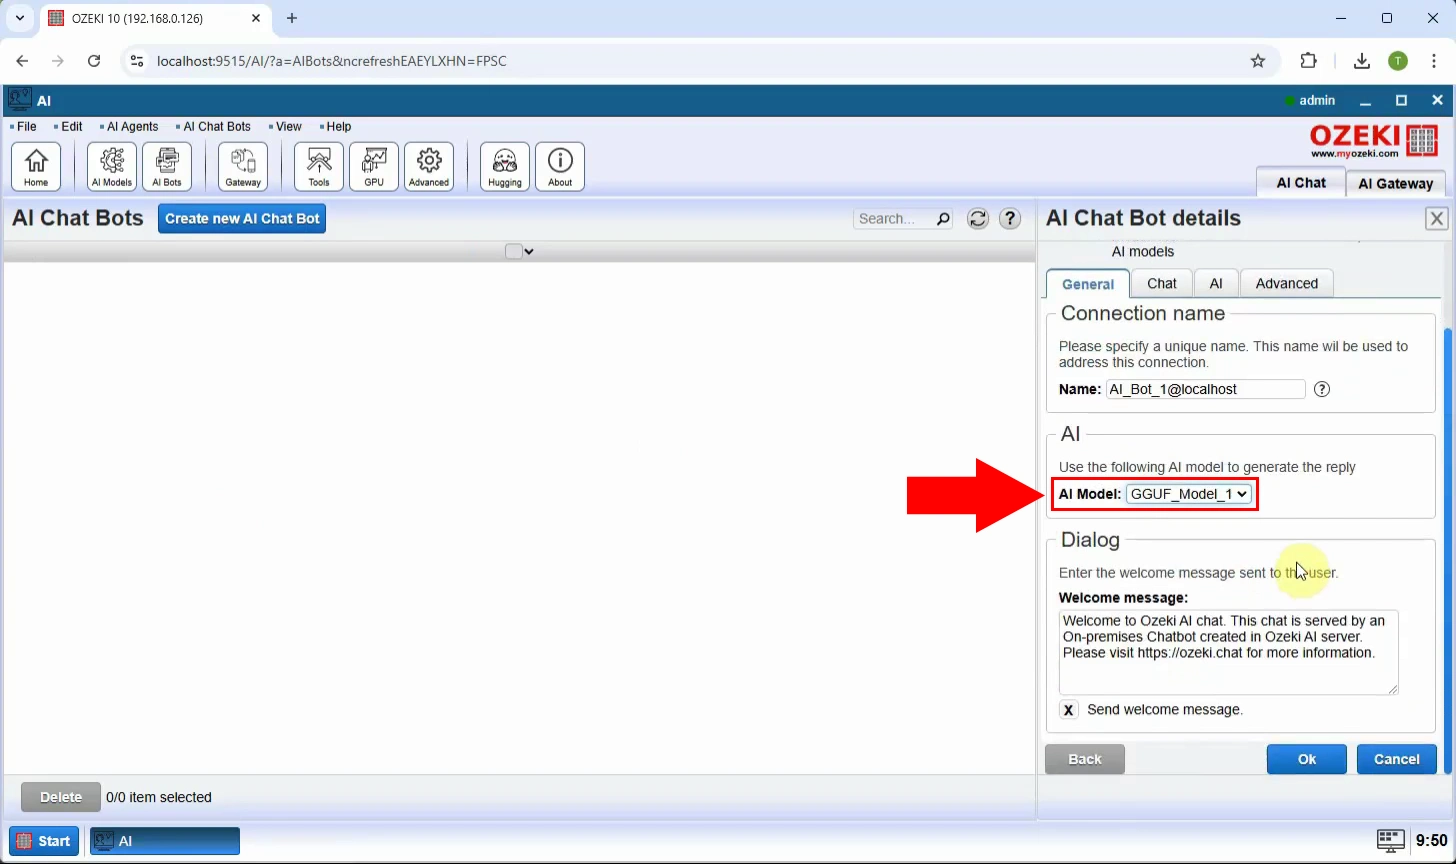
Next, go to the "AI Model" section, select the previously created "GGUF_Model_1", and click "OK" (Figure 10).
Step 11 - Enable chatbot
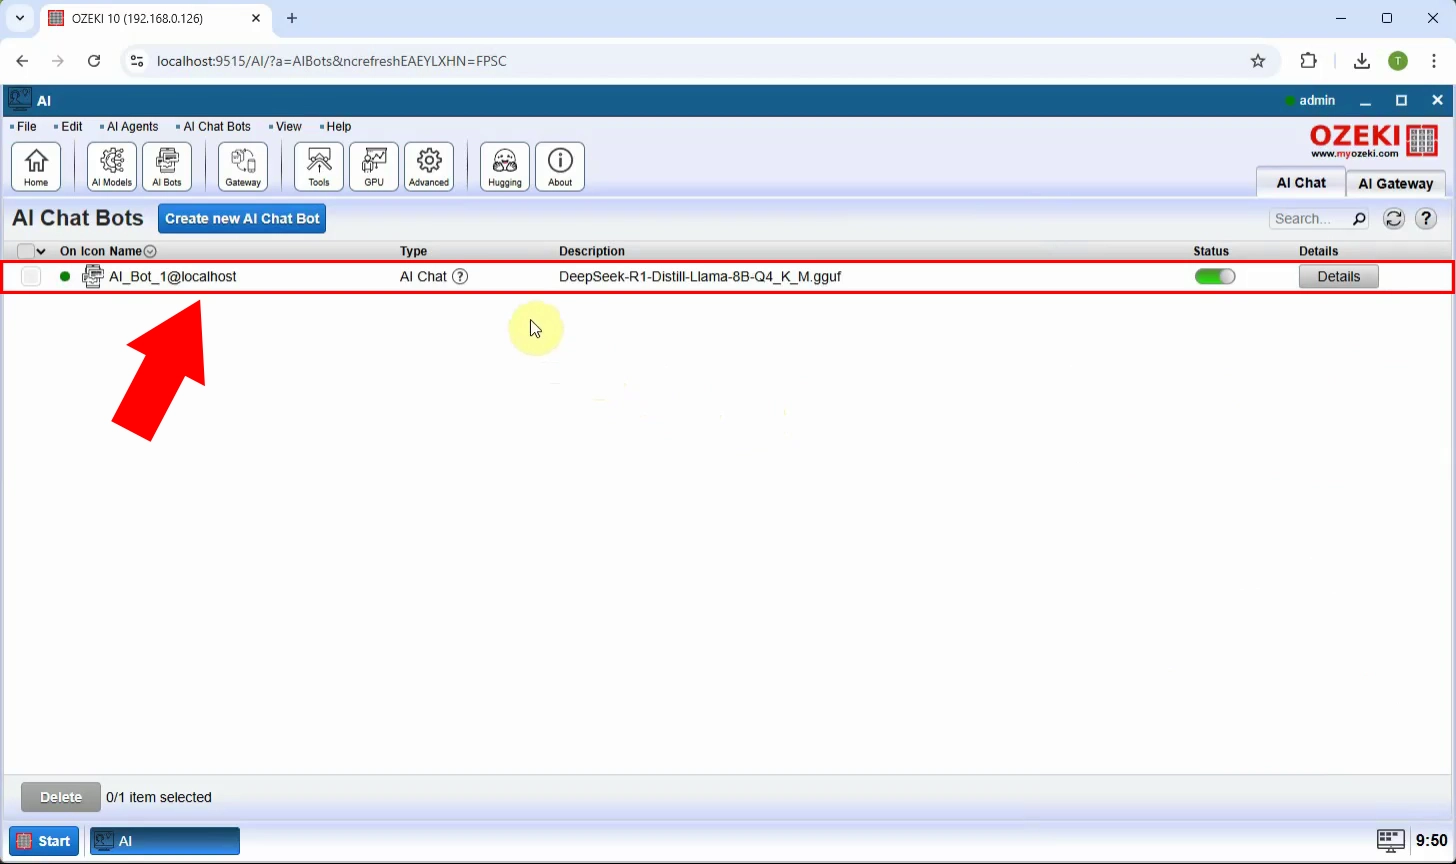
To activate the chatbot, toggle the switch under "Status" and select AI_Bot_1 (Figure 11).
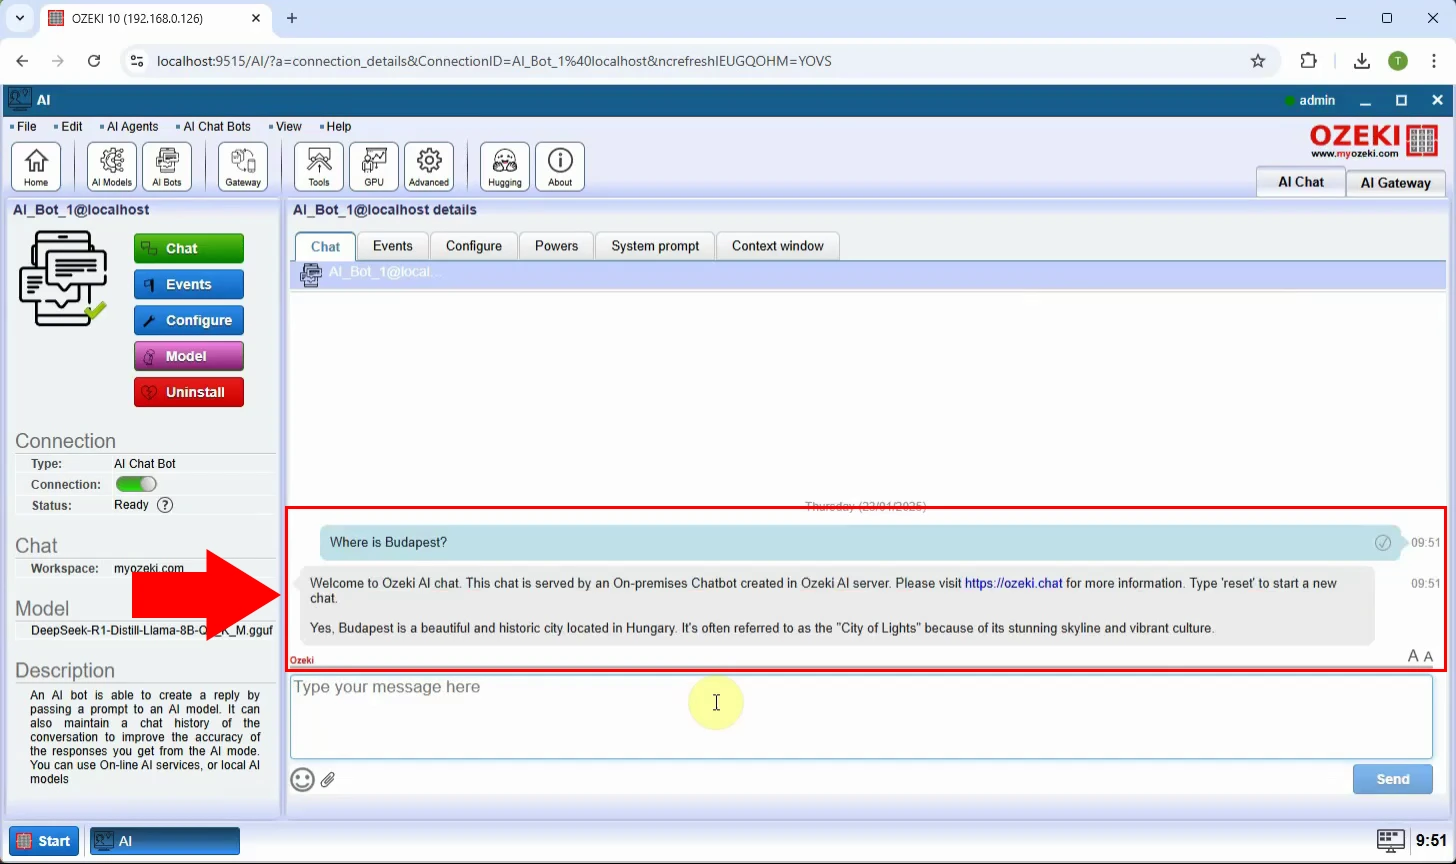
Step 12 - Conversation with DeepSeek model
Go to the "Chat" tab and select AI_Bot_1 to begin a conversation with the chatbot (Figure 12).
