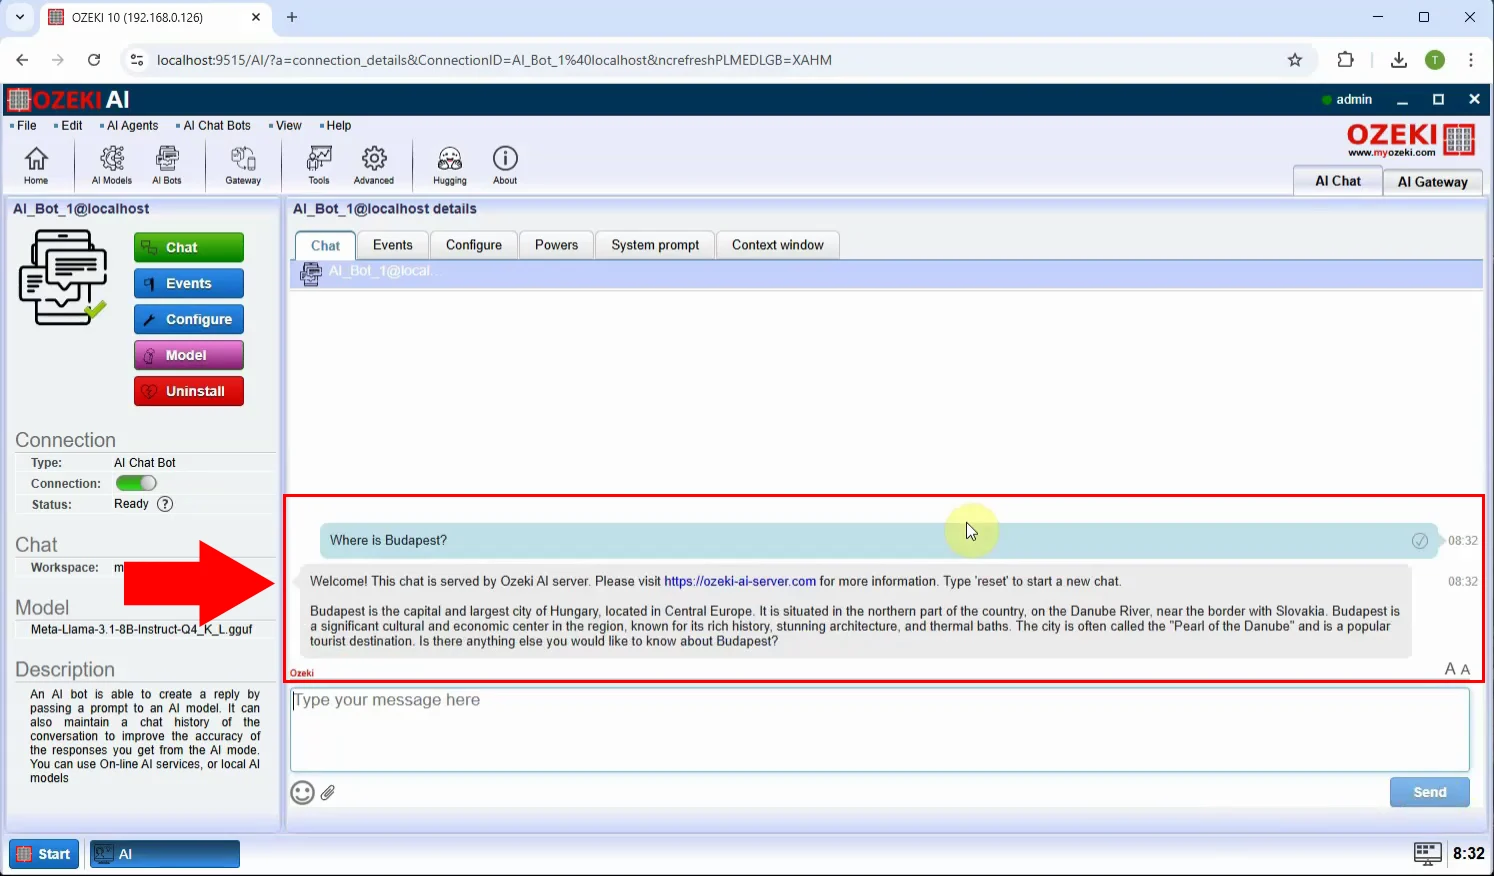
How to use a Llama 3.1 Model
In this chapter, we will cover the installation and execution of the Llama 3.1 model on a personal computer (PC). Due to its advanced AI capabilities, Llama 3.1 requires substantial computing power, but with the help of modern optimization techniques and hardware acceleration, it can run efficiently on high-performance PCs. We will also explore how to integrate Llama 3.1 with the Ozeki AI Server, enabling smooth AI-powered interactions and enhanced functionality.
What is Llama 3.1?
Llama 3.1 is Meta's latest large language model (LLM), designed for text generation, coding, and other AI-driven tasks. It supports over 30 languages and has been trained on extensive datasets to enhance its accuracy and performance. With improved efficiency and advanced safety features, it delivers high-quality responses across various applications. As one of Meta’s most advanced AI models, Llama 3.1 sets new benchmarks in AI capabilities.
What is Ozeki AI Server?
Ozeki AI Server is a software platform designed to integrate artificial intelligence (AI) with communication systems, providing tools to build and deploy AI-powered applications for businesses. It enables the automation of tasks like text messaging, voice calls, and other communication processes, machine learning, and chatbots. By connecting AI capabilities with communication networks, Ozeki AI Server helps improve customer support, automate workflows, and enhance user interactions in various industries.
How to download Llama 3.1 model (Quick Steps)
- Go to the huggingface.co website
- Search for "Meta-Llama-3.1-8B-Instruct-GGUF"
- Click on "Files and versions"
- Click on "Meta-Llama-3.1-8B-Instruct-Q4_K_L.gguf"
- Download this .gguf file with the arrow pointing down
How to create Ozeki AI Server model and Chatbot (Quick Steps)
- Open Ozeki 10
- Launch the Ozeki AI Server
- Create new GGUF model, configure it
- Create new AI chatbot, configure it
- Have a good conversation with the chatbot
How to download Llama 3.1 model (Video tutorial)
In this video tutorial, you will learn how to download the Llama 3.1 model from Huggingface and save it to the C:\AIModels directory on your computer. The step-by-step guide will walk you through accessing Huggingface, locating the Llama 3.1 model, and downloading the necessary files.
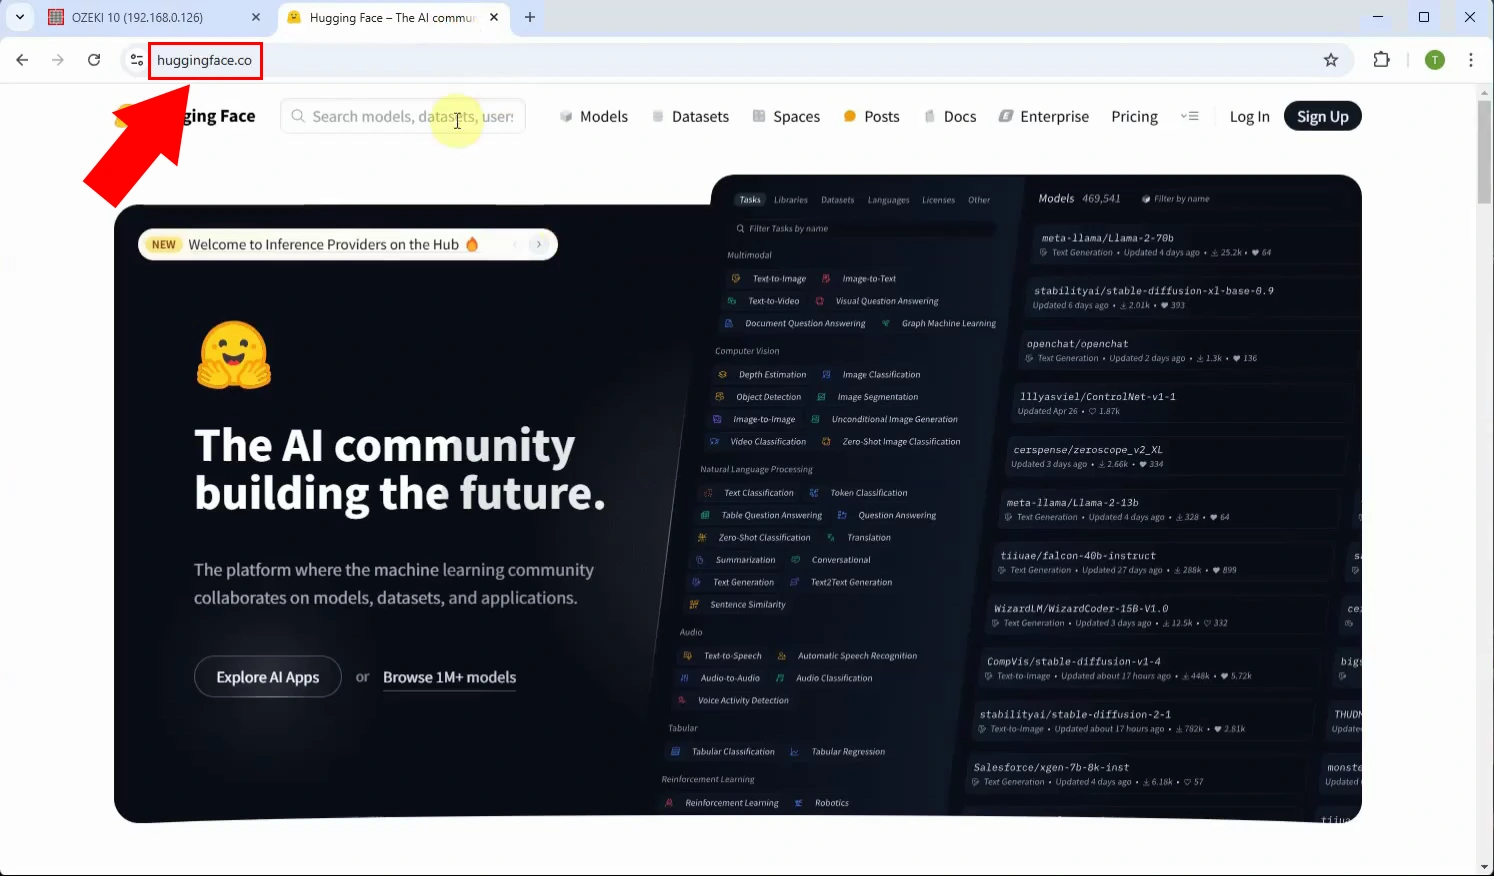
Step 1 - Open Huggingface.co
Start by visiting the Huggingface website. Once there, click on the search bar and enter "Meta-Llama-3.1-8B-Instruct-GGUF" to find the model (Figure 1).
Step 2 - Open model page
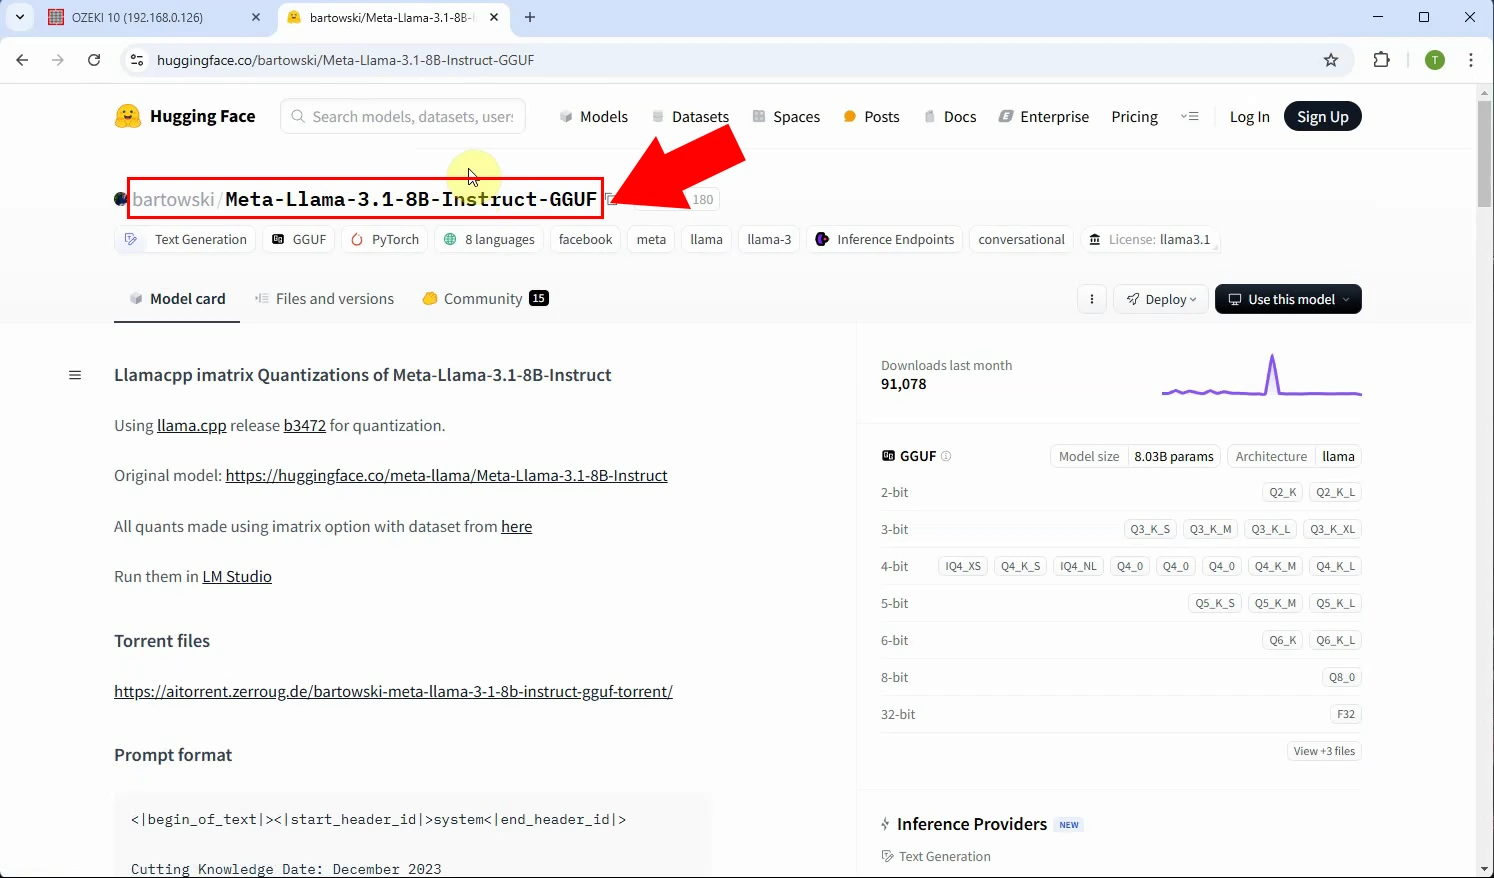
Select the option "Meta-Llama-3.1-8B-Instruct-GGUF" and open it (Figure 2).
Step 3 - Download model file
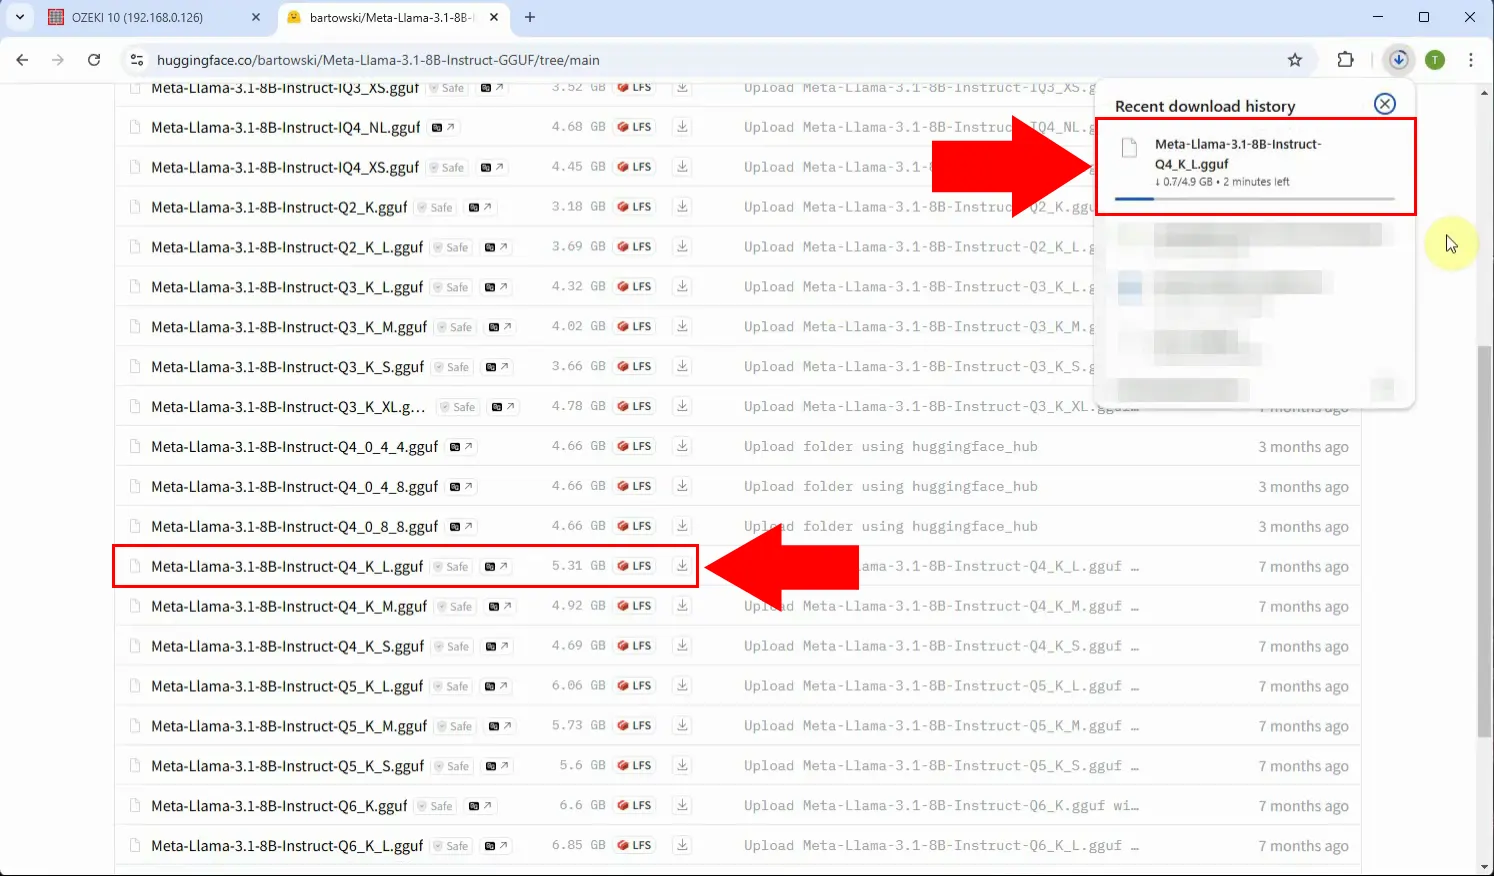
Click on the "Files and versions" tab, select the "Meta-Llama-3.1-8B-Instruct-Q4_K_L" version and download this file, you can download it with the down arrow (Figure 3).
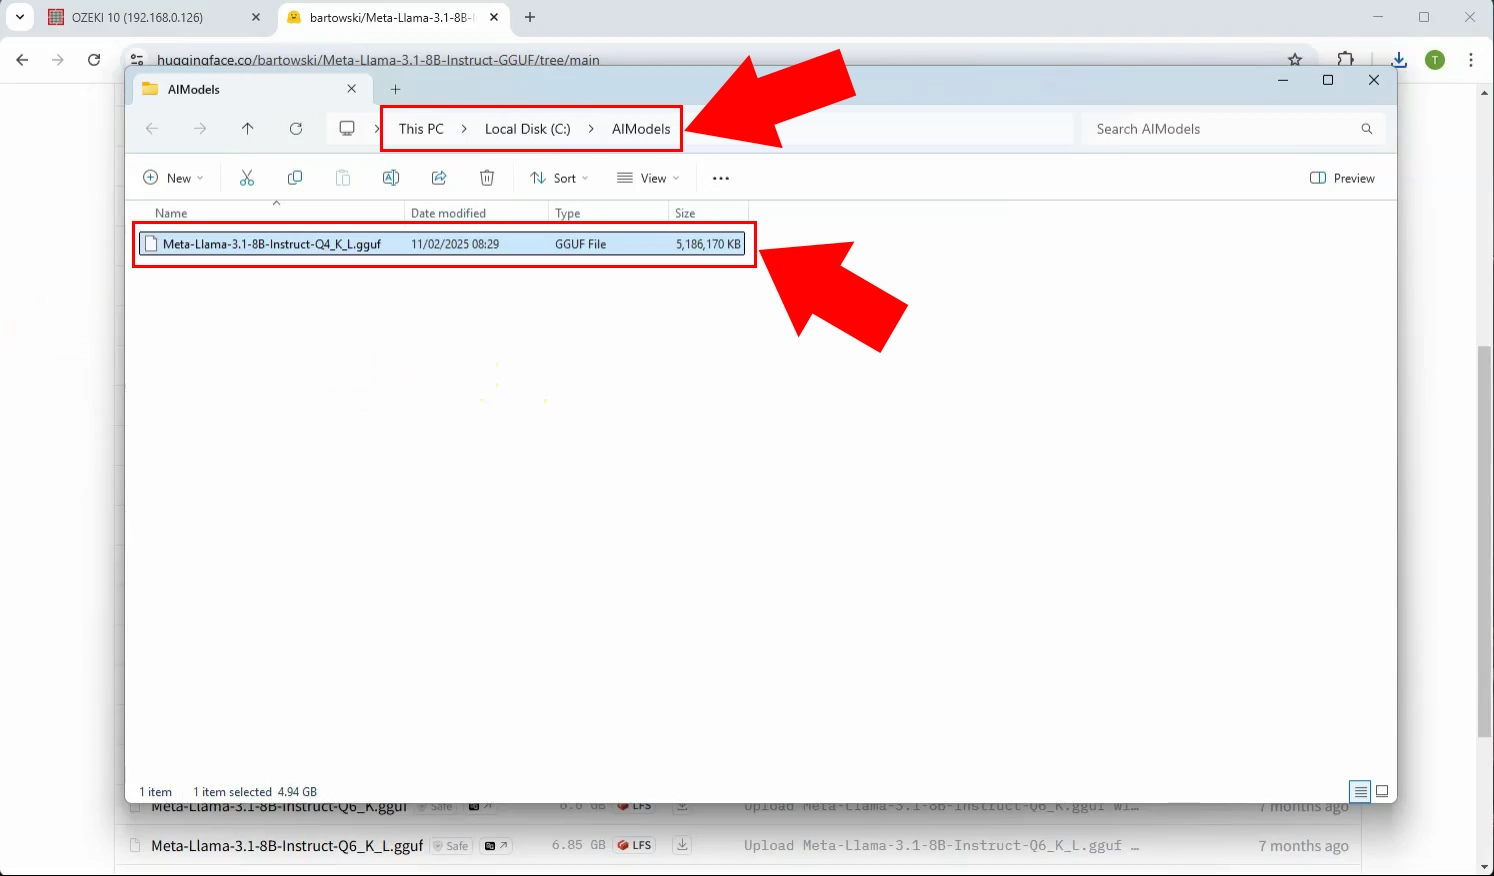
Step 4 - Paste model file into C:\AIModels folder
You have downloaded the .gguf file, place it in the C:\AIModels folder (Figure 4).
Setup model and create AI Chat bot (Video tutorial)
In this video, we will guide you through the process of building and configuring the Ozeki AI Server model, as well as setting up a chatbot that can engage with users in natural language. You will learn about the installation steps, key configurations, and essential settings needed to ensure smooth operation. This tutorial will provide a comprehensive overview, helping you successfully set up and optimize your AI-powered chatbot.
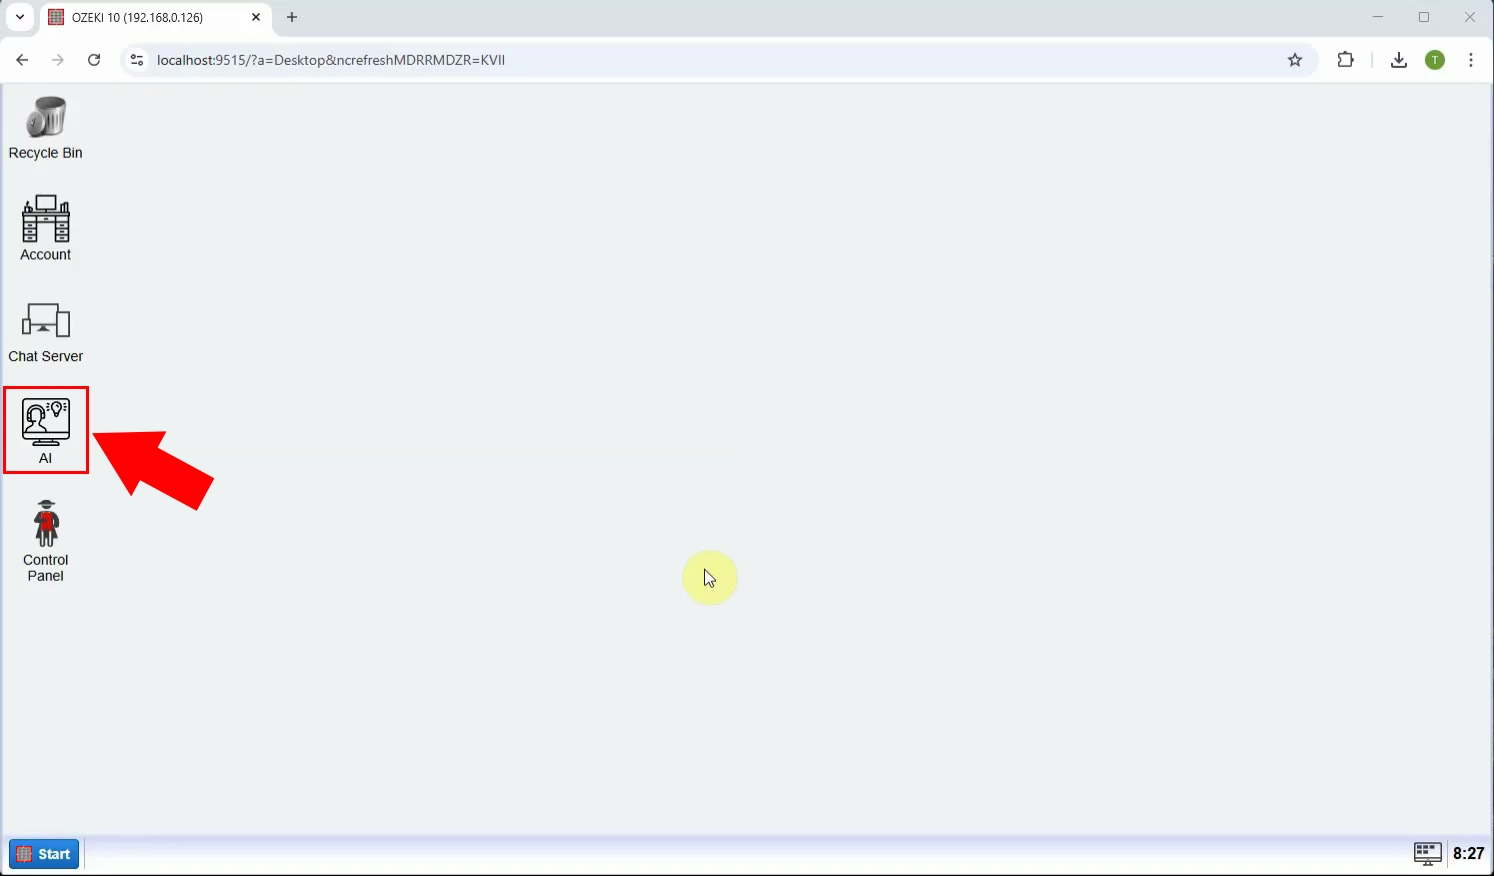
Step 5 - Open Ozeki AI Server
Launch the Ozeki 10 app. If you don't already have it, you can download it here. Once opened, open the Ozeki AI Server (Figure 5).
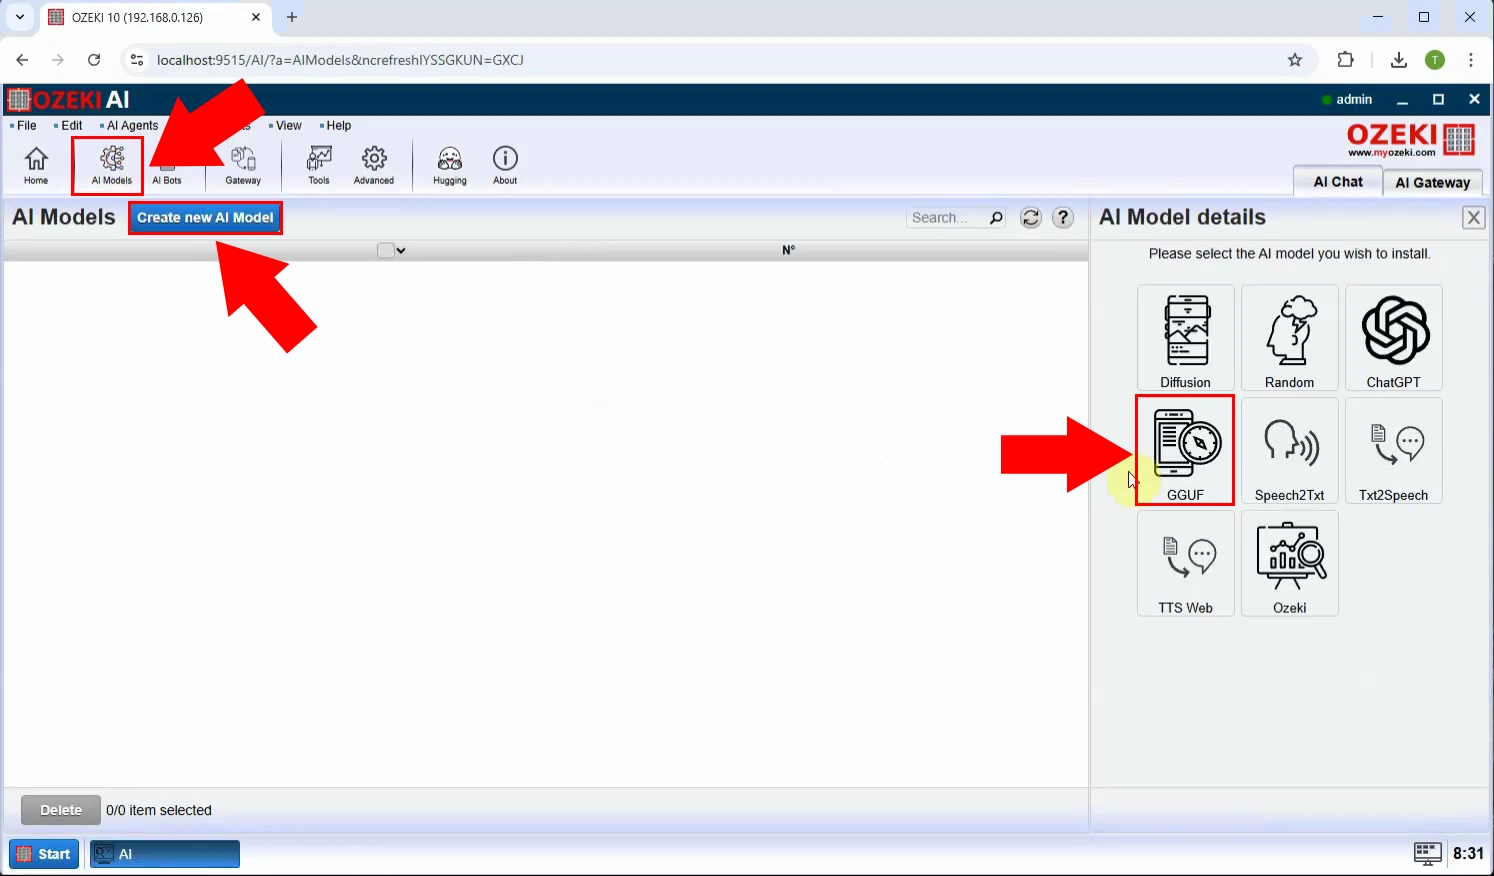
Step 6 - Create new GGUF model
The Ozeki AI Server interface is now displayed on the screen. To create a new GGUF model, start by clicking on "AI Models" at the top of the screen. Then, click the blue "Create a new AI Model" button. On the right side, a list of options will appear, select the "GGUF" menu (Figure 6).
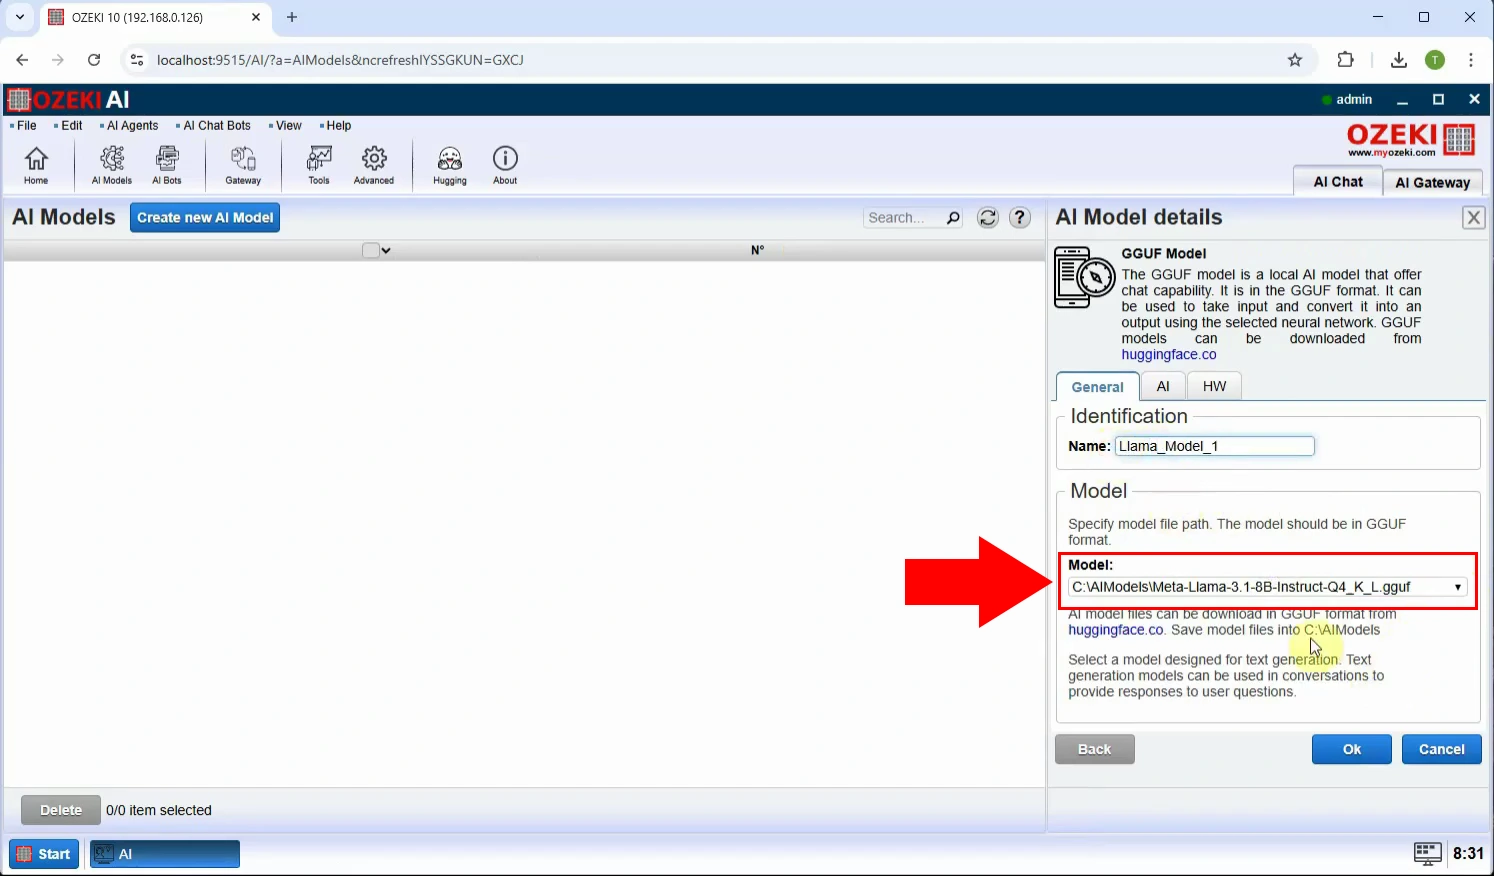
Step 7 - Select model file
After selecting the "GGUF" menu, select the "General" tab, under Indentification rename it to "Llama_Model_1" select the "C:\AIModels\Meta-Llama-3.1-8B-Instruct-Q4_K_L.gguf" Model file then click "Ok" (Figure 7).
Step 8 - Create new AI chatbot
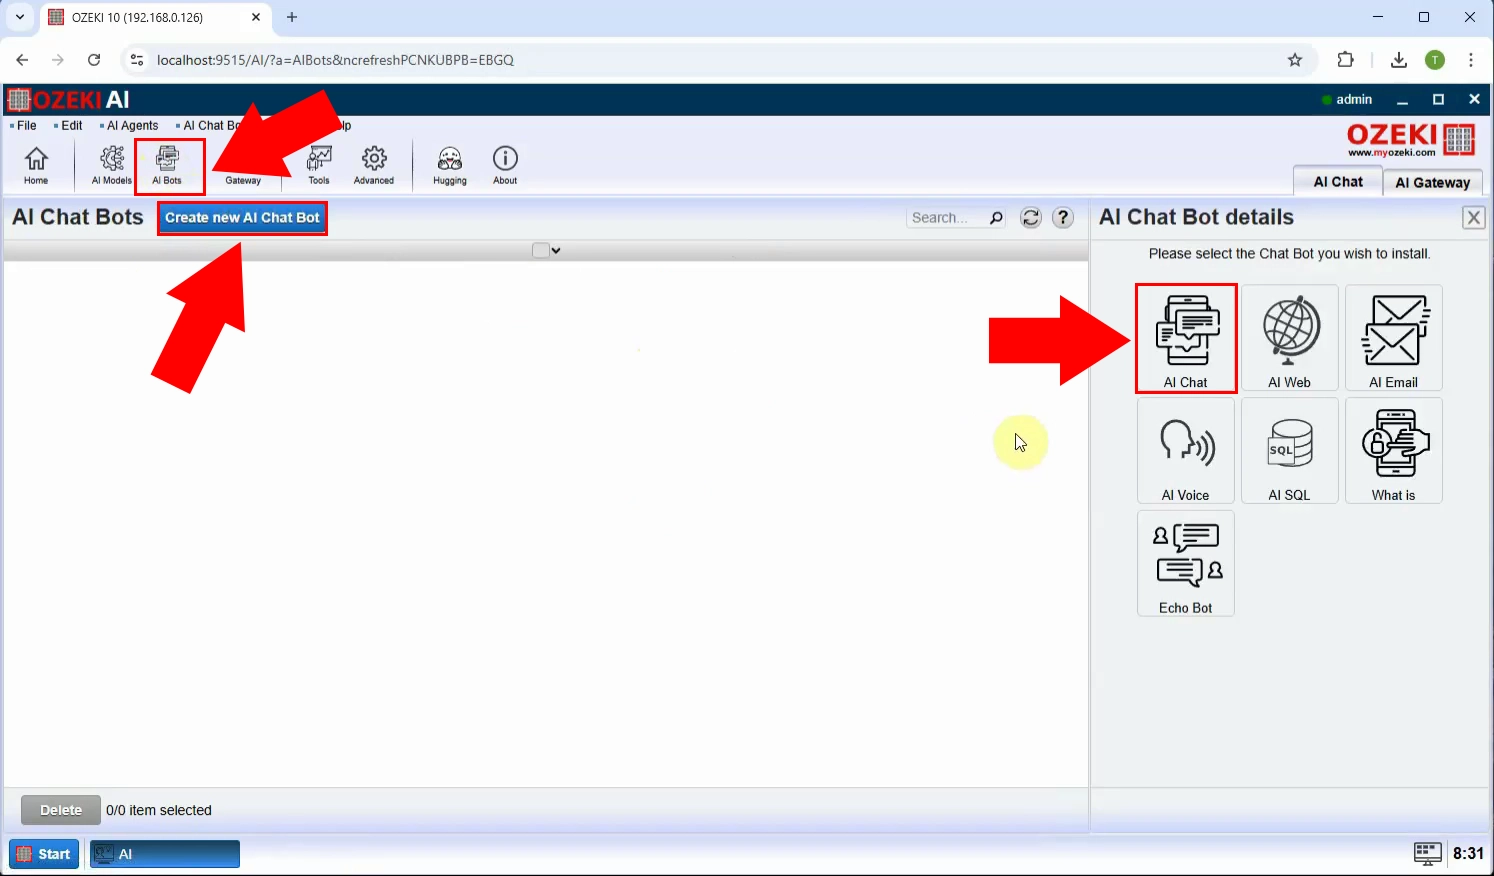
At the top of the screen, select "AI bots". Press the blue "Create new AI Chat Bot" button, then select "AI Chat" on the right (Figure 8).
Step 9 - Select model
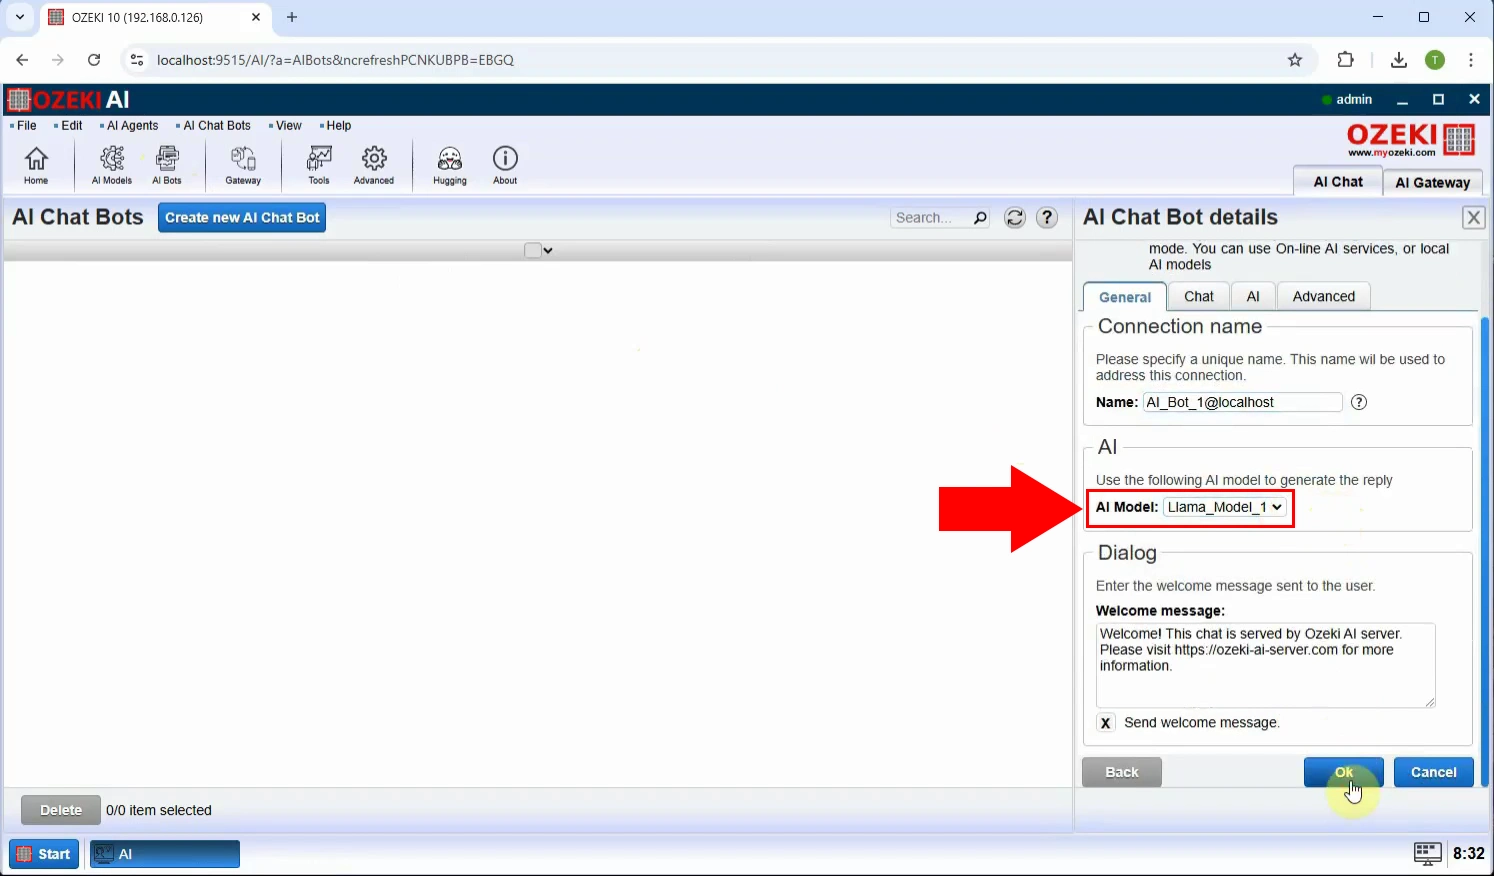
Then at "AI Model" select the already created "Llama_Model_1" and press "Ok" (Figure 9).
Step 10 - Enable chatbot
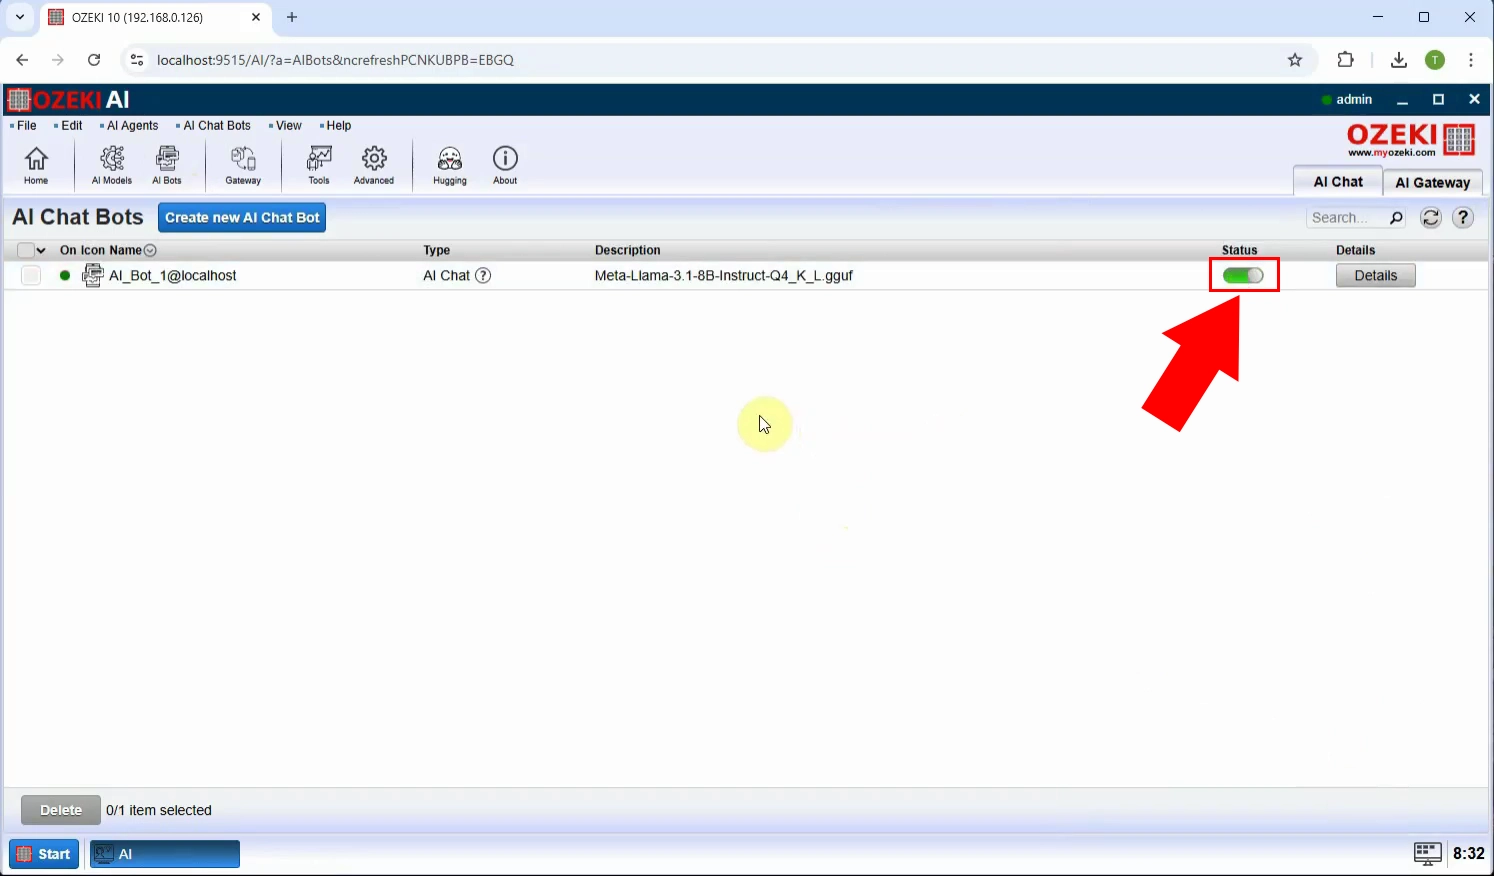
To enable the chatbot, turn on the switch at "Status" and click on AI_Bot_1 (Figure 10).
Step 11 - Conversation with model
By opening AI_Bot_1 under the "Chat" tab you have the possibility to chat with the chatbot (Figure 11).
