How to use a Microsoft Phi-4 Model
In this chapter, we will explore how to download and set up the Microsoft Phi-4 model for use with Ozeki AI Server. You will learn how to obtain the model from Hugging Face, configure it properly, and integrate it into the Ozeki AI Server for seamless operation. With its advanced reasoning capabilities and efficient performance, Phi-4 can enhance AI-driven applications while running on optimized hardware. By following this guide, you will be able to deploy and interact with the Phi-4 model through Ozeki AI Server effectively.
What is Microsoft Phi-4?
Microsoft Phi-4 is a small language model (SLM) with 14 billion parameters, designed for complex reasoning, mathematics, and logic-based tasks. It provides high efficiency while maintaining strong performance, making it a powerful alternative to larger AI models. Optimized for real-world applications, Phi-4 excels in problem-solving and natural language understanding. It is available on platforms like Azure AI, Hugging Face, and Ollama, allowing easy integration into various AI-powered systems.
What is Ozeki AI Server?
Ozeki AI Server is a software platform that combines artificial intelligence (AI) with communication systems, offering tools to develop and deploy AI-driven applications for businesses. It enables the automation of processes such as text messaging, voice calls, machine learning, and chatbots, streamlining communication workflows. By integrating AI with communication networks, Ozeki AI Server enhances customer support, optimizes operations, and improves user engagement across multiple industries.
How to download Microsoft Phi-4 model (Quick Steps)
- Go to the huggingface.co website
- Search for "phi 4 gguf"
- Click on "Files and versions"
- Click on "phi-4-q4.gguf"
- Download this .gguf file with the arrow pointing down
How to create Ozeki AI Server model and Chatbot (Quick Steps)
- Open Ozeki 10
- Launch the Ozeki AI Server
- Create new GGUF model, configure it
- Create new AI chatbot, configure it
- Have a good conversation with the chatbot
How to download Microsoft Phi-4 model (Video tutorial)
This video tutorial will show you how to download the Microsoft Phi-4 model from Huggingface.co and save it to the C:\AIModels directory on your computer. By following the step-by-step guide, you’ll be able to set up the model effortlessly and have it ready to use in no time.
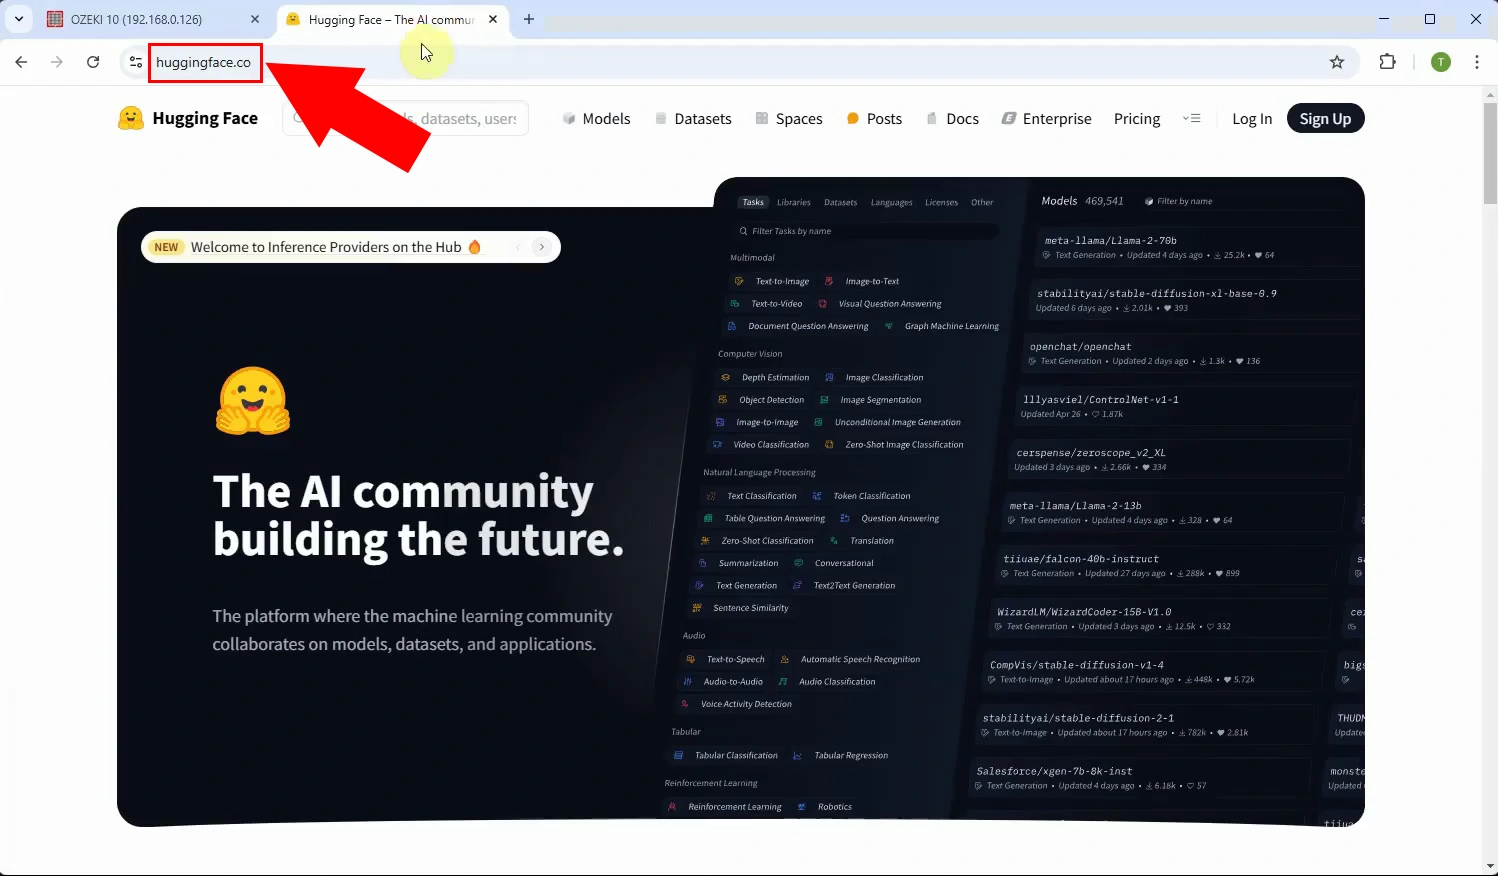
Step 1 - Open Huggingface.co
First, go to the Huggingface website, then click on the search bar and search for "phi 4 gguf" (Figure 1).
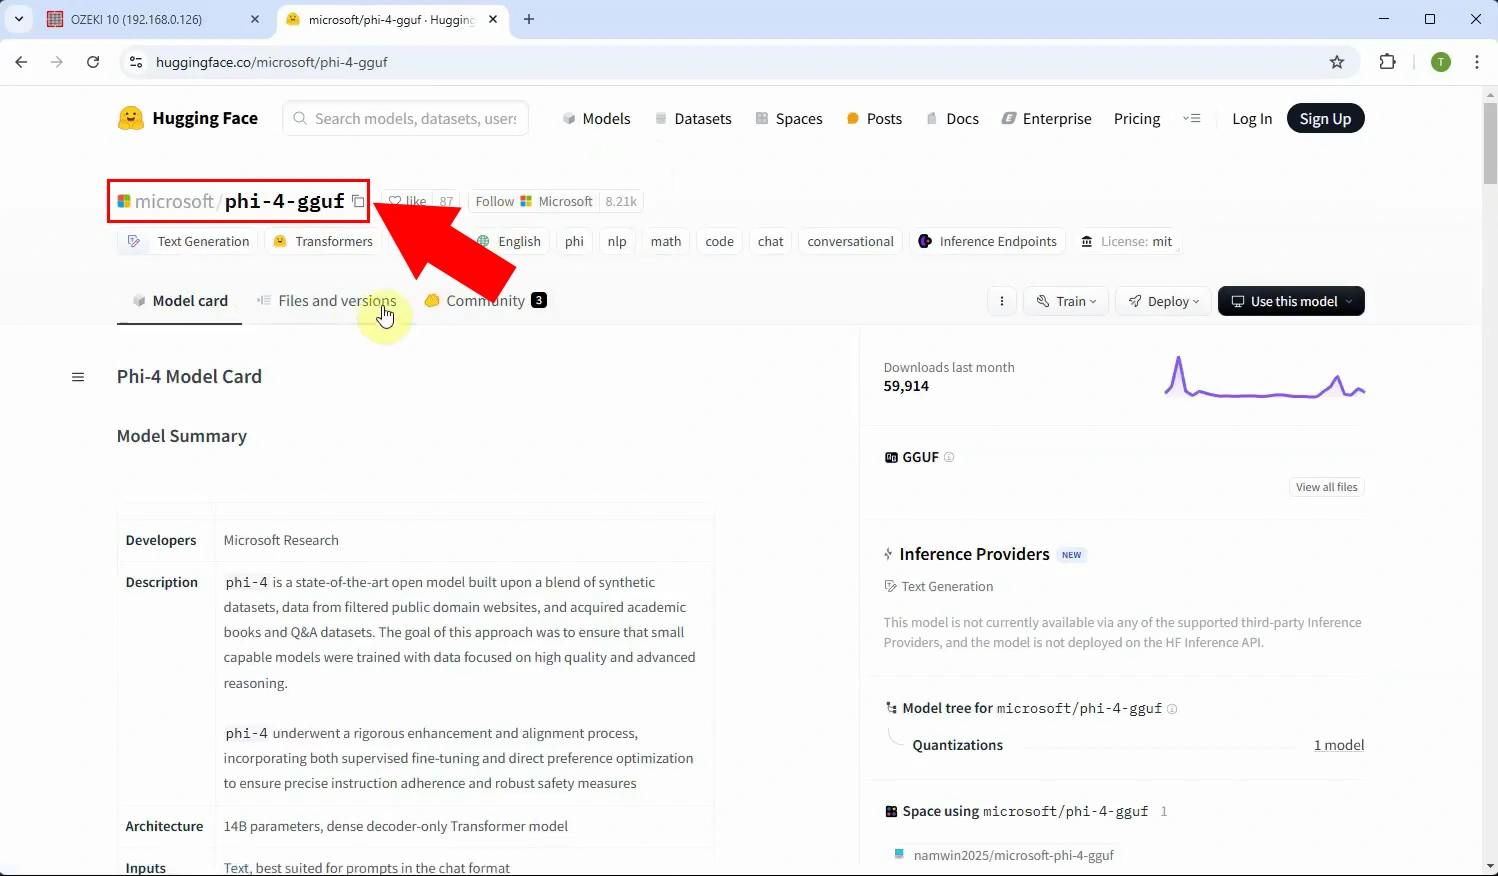
Step 2 - Select Microsoft Phi-4 model
Select the option "phi-4-gguf" and open it (Figure 2).
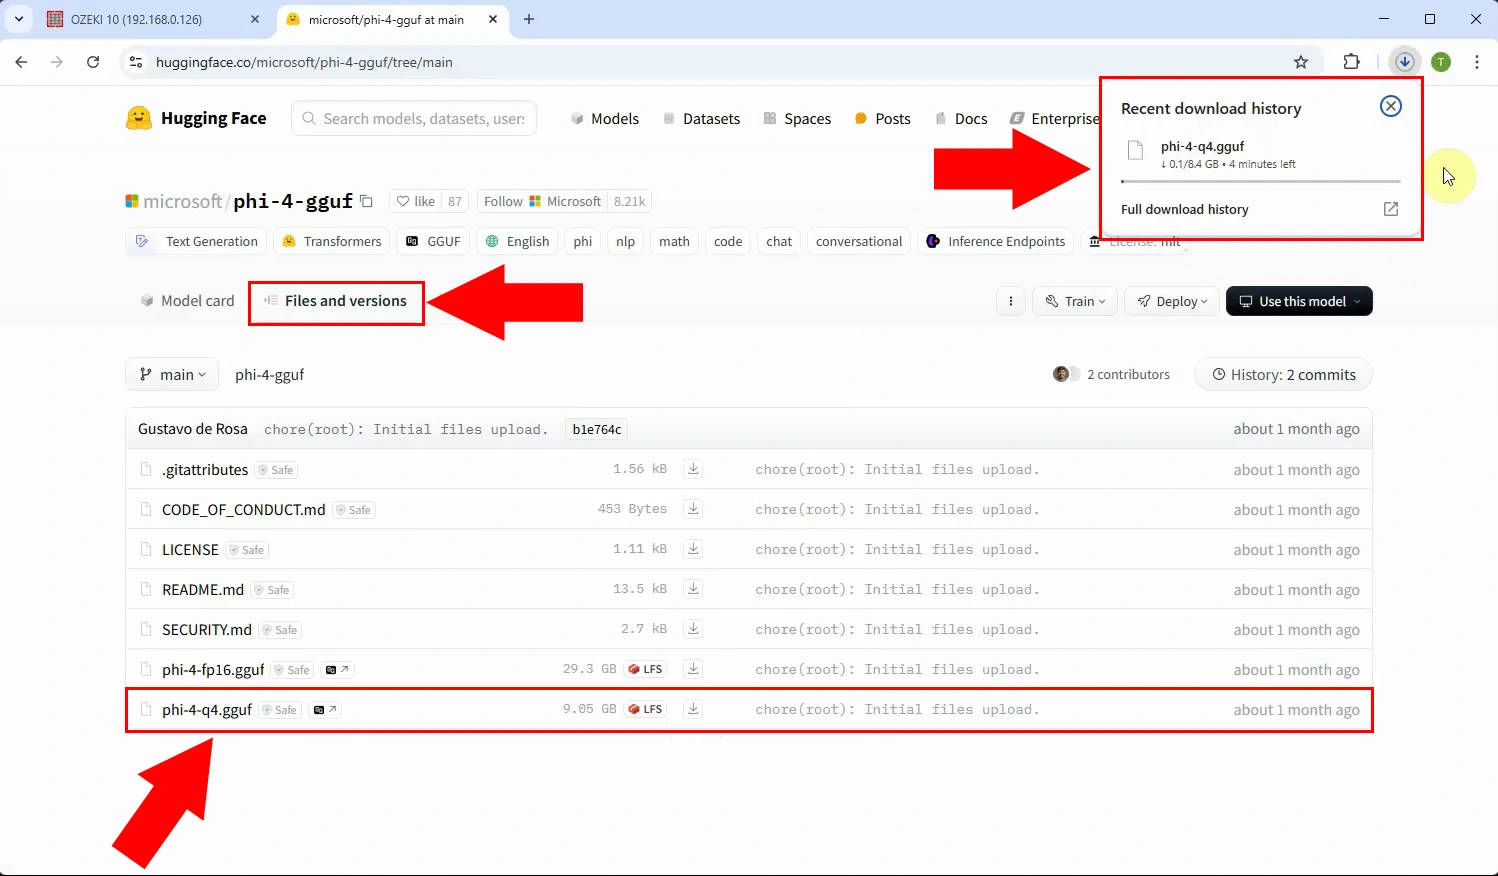
Step 3 - Download model file
Click on the "Files and versions" tab, select the "phi-4-q4.gguf" version and download it, you can download with the down arrow (Figure 3).
Step 4 - Copy model file to C:\AIModels folder
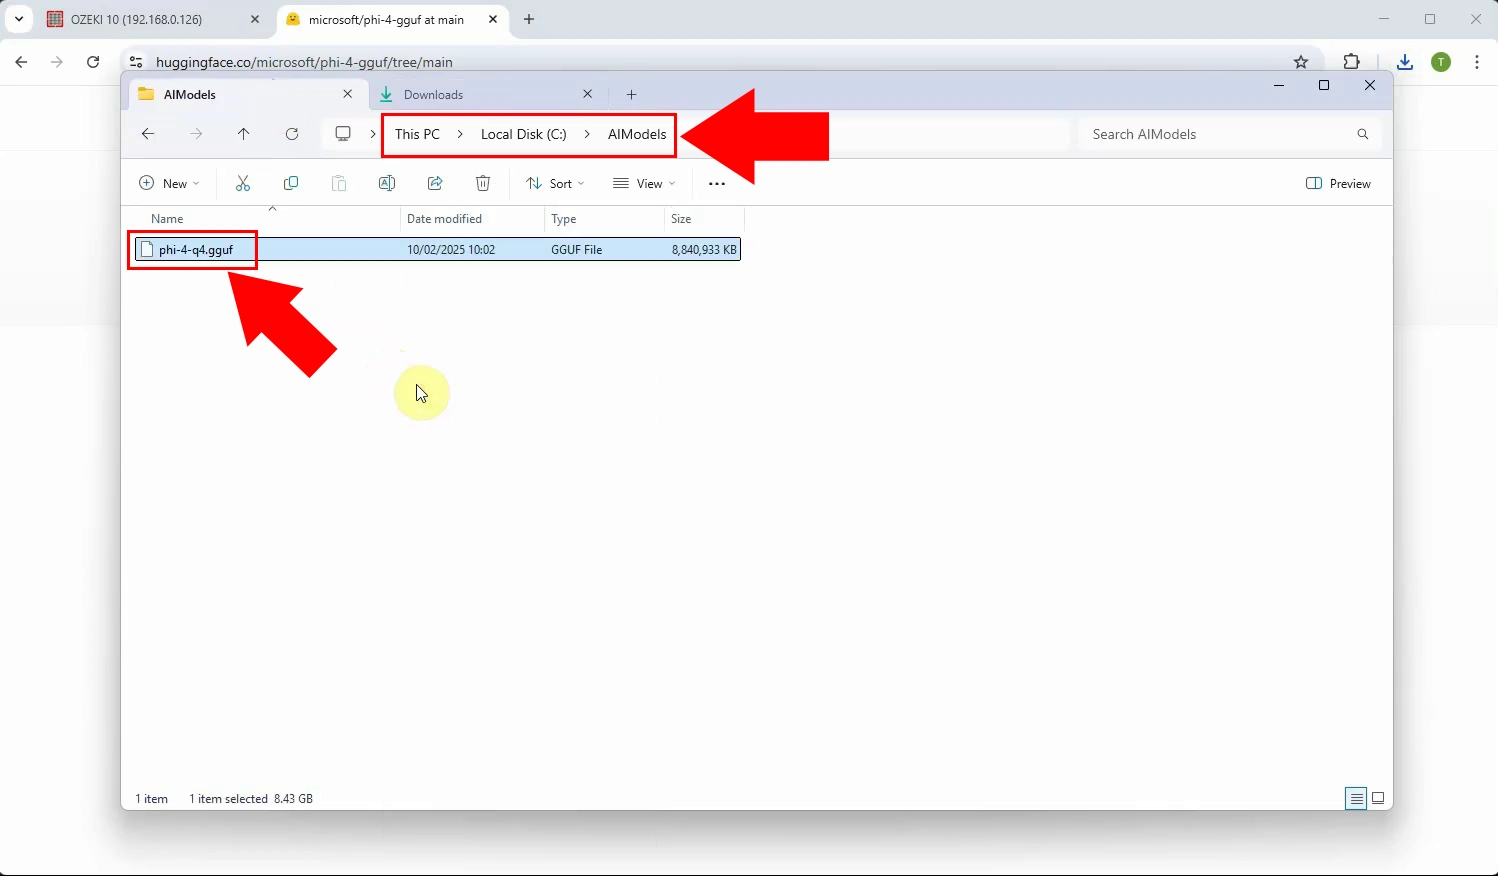
You have already downloaded the phi-4-q4.gguf file, then place it in the C:\AIModels folder (Figure 4).
Setup model and create AI Chat bot (Video tutorial)
In this video, we will guide you through the process of building and configuring the Ozeki AI Server model, along with setting up a chatbot that can communicate with users in natural language. You will learn about the installation steps, key configurations, and essential settings needed to ensure smooth operation. This tutorial will provide a step-by-step walkthrough, helping you successfully set up and optimize your AI-powered chatbot.
Step 5 - Open Ozeki AI Server
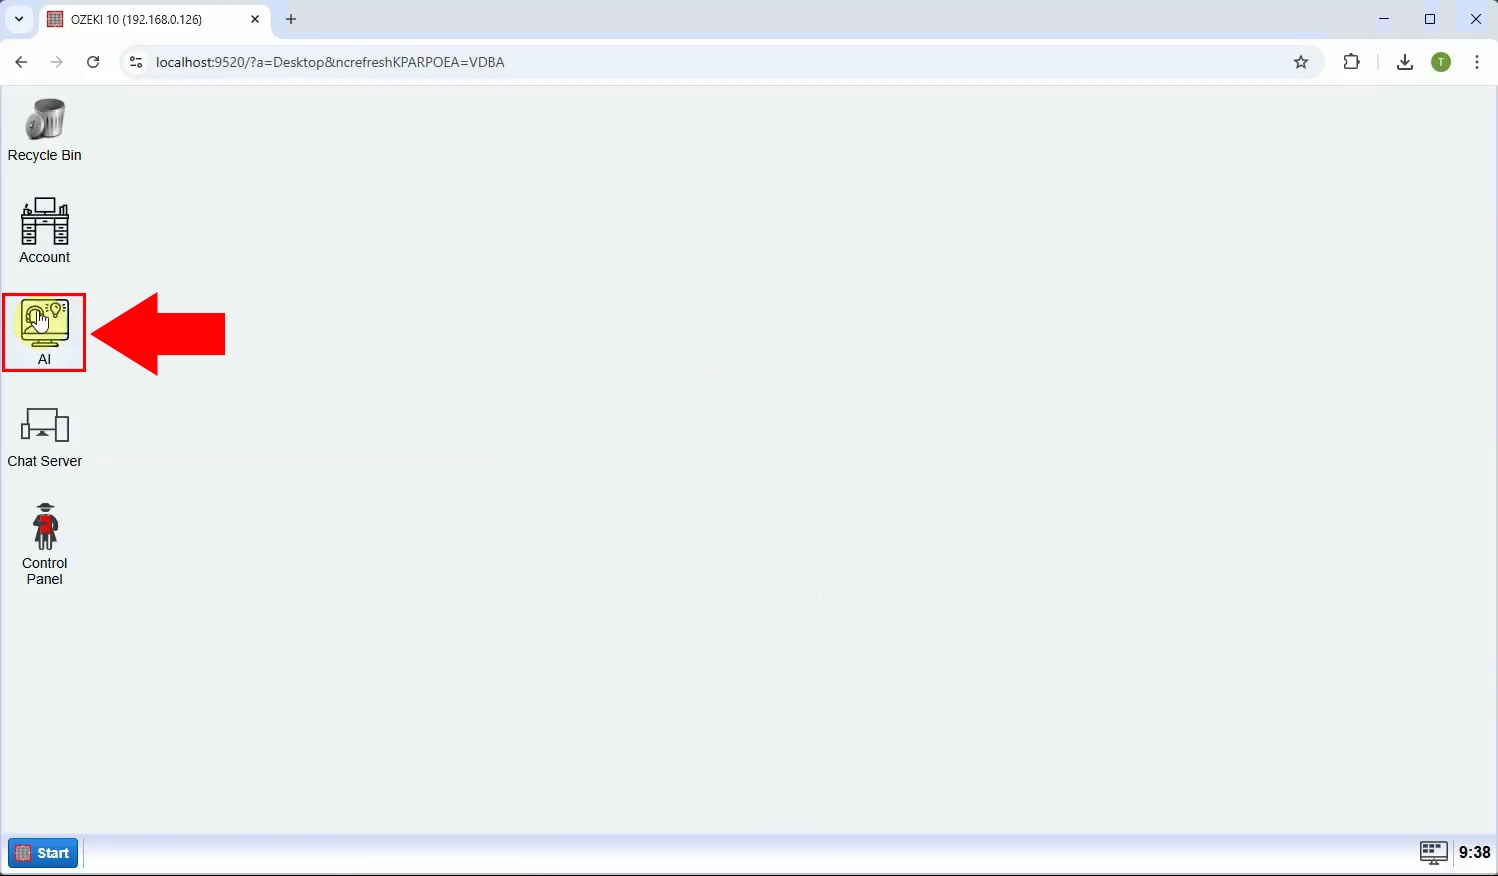
Launch the Ozeki 10 app. If you don't already have it, you can download it here. Once opened, open the Ozeki AI Server (Figure 5).
Step 6 - Create new GGUF model
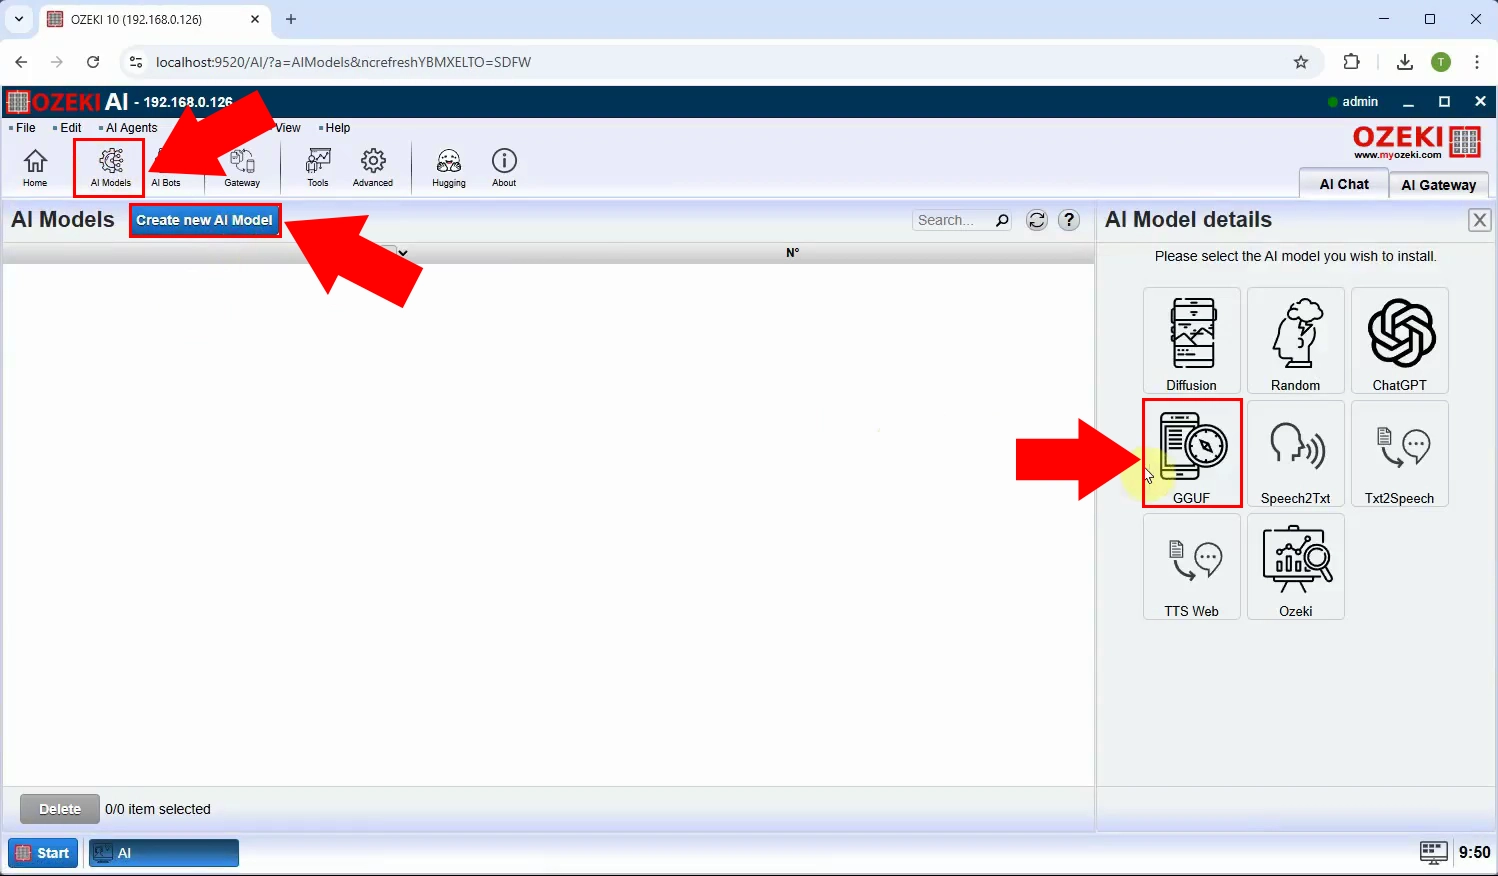
Ozeki AI Server appeared on the screen. Let's create a new GGUF model.
Click on "AI Models" at the top of the screen. Click on the blue
"Create a new AI Model" button. On the right side you will see different
options, select the "GGUF" menu
(Figure 6).
Step 7 - Select model file
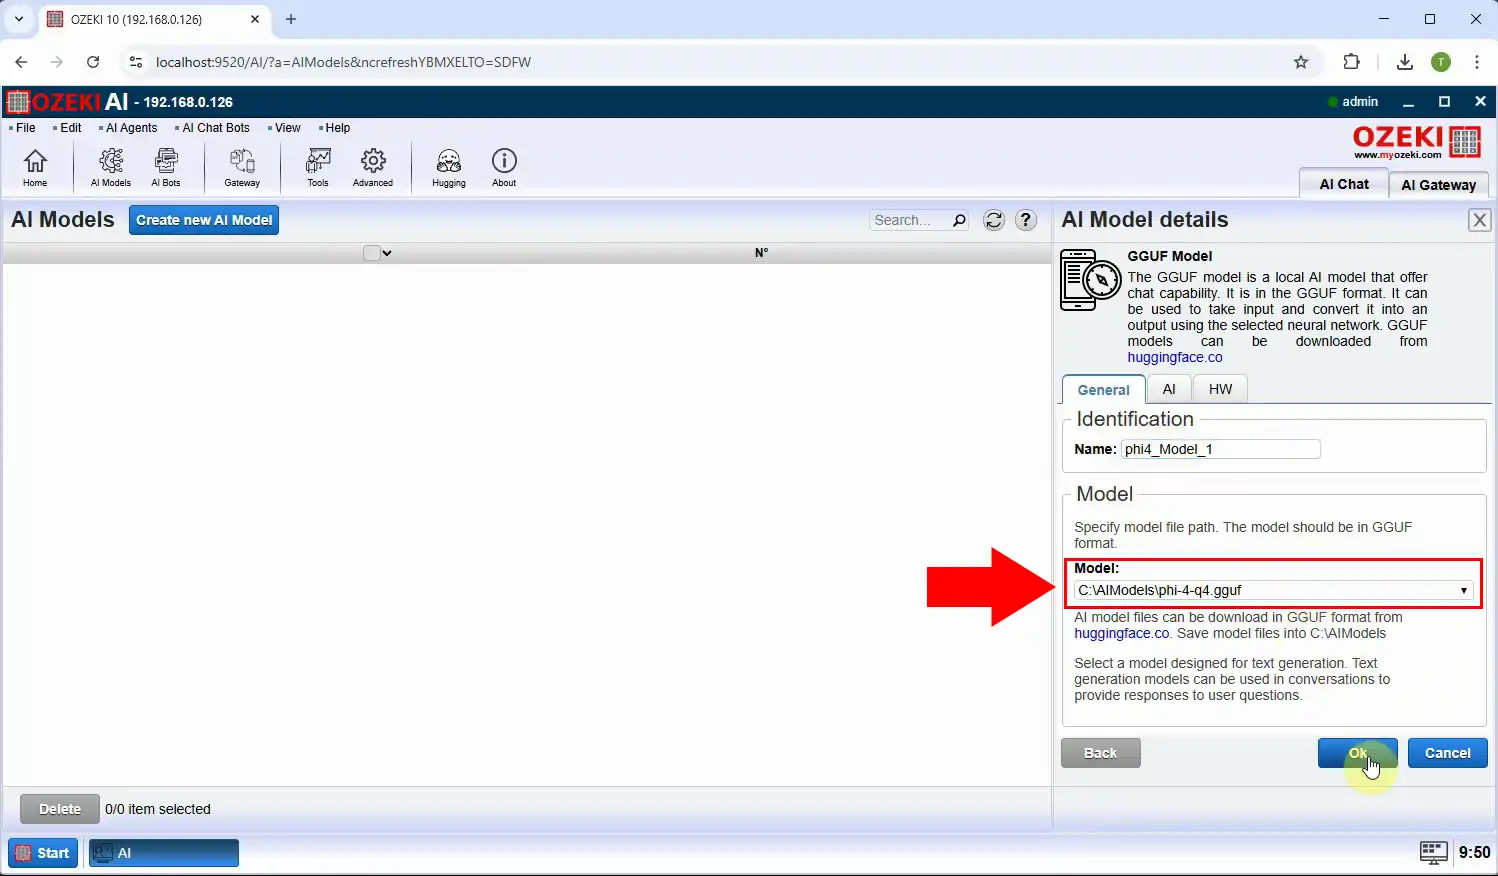
After selecting the "GGUF" menu, select the "General" tab, under Indentification rename it to "phi4_Model_1" select the "C:\AIModels\phi-4-q4.gguf" Model file then click "Ok" (Figure 7).
Step 8 - Create new AI Chatbot
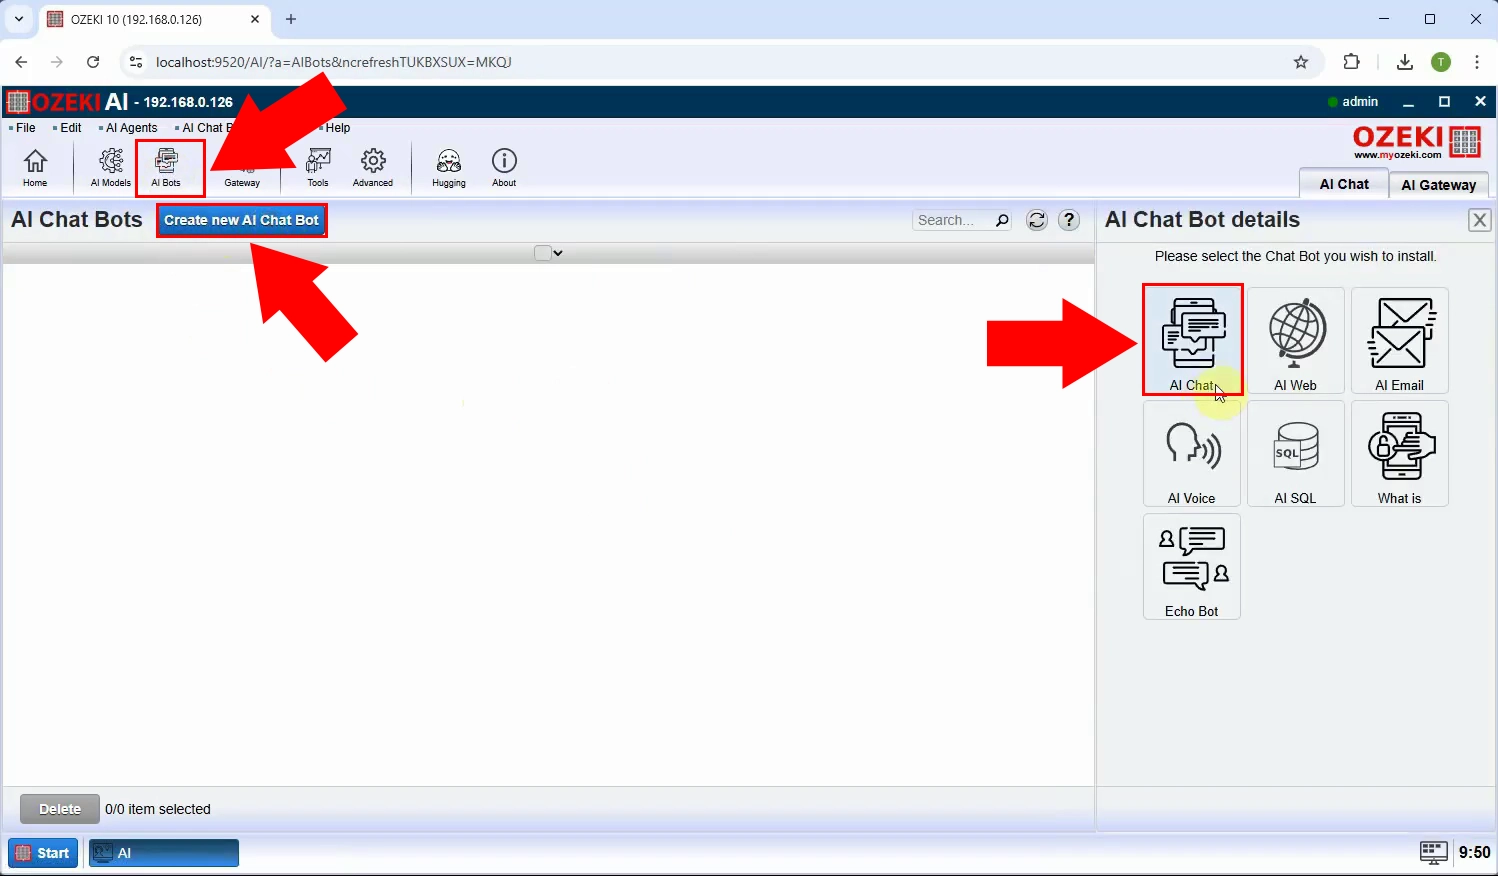
At the top of the screen, select "AI bots". Press the blue "Create new AI Chat Bot" button, then select "AI Chat" on the right (Figure 8).
Step 9 - Select model and create chatbot
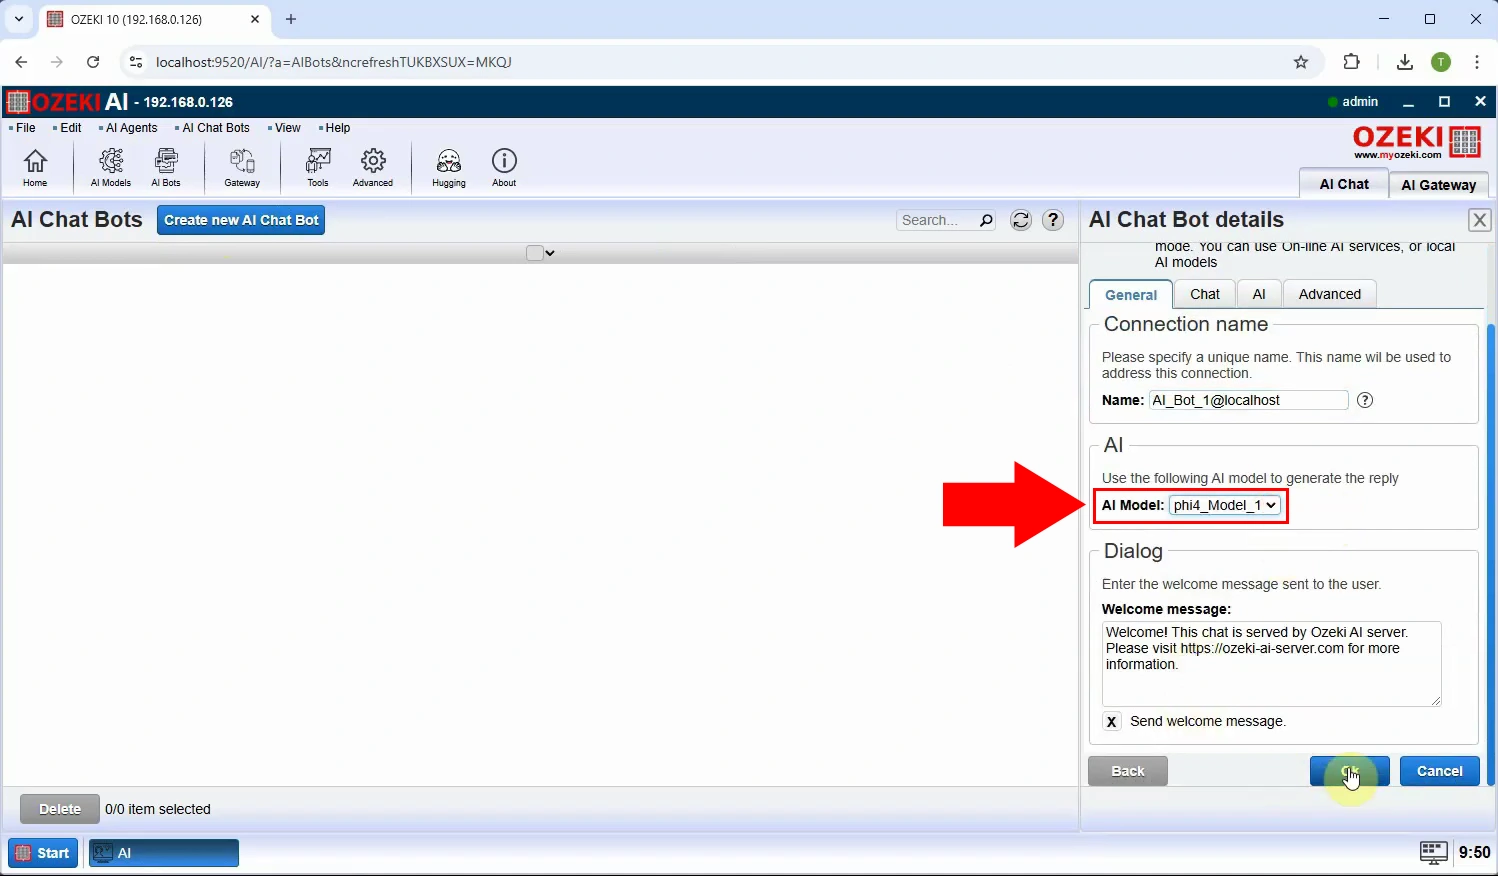
Next, in the "AI Model" section, select the previously created "phi4_Model_1" and click "OK" (Figure 9).
Step 10 - Enable Chatbot
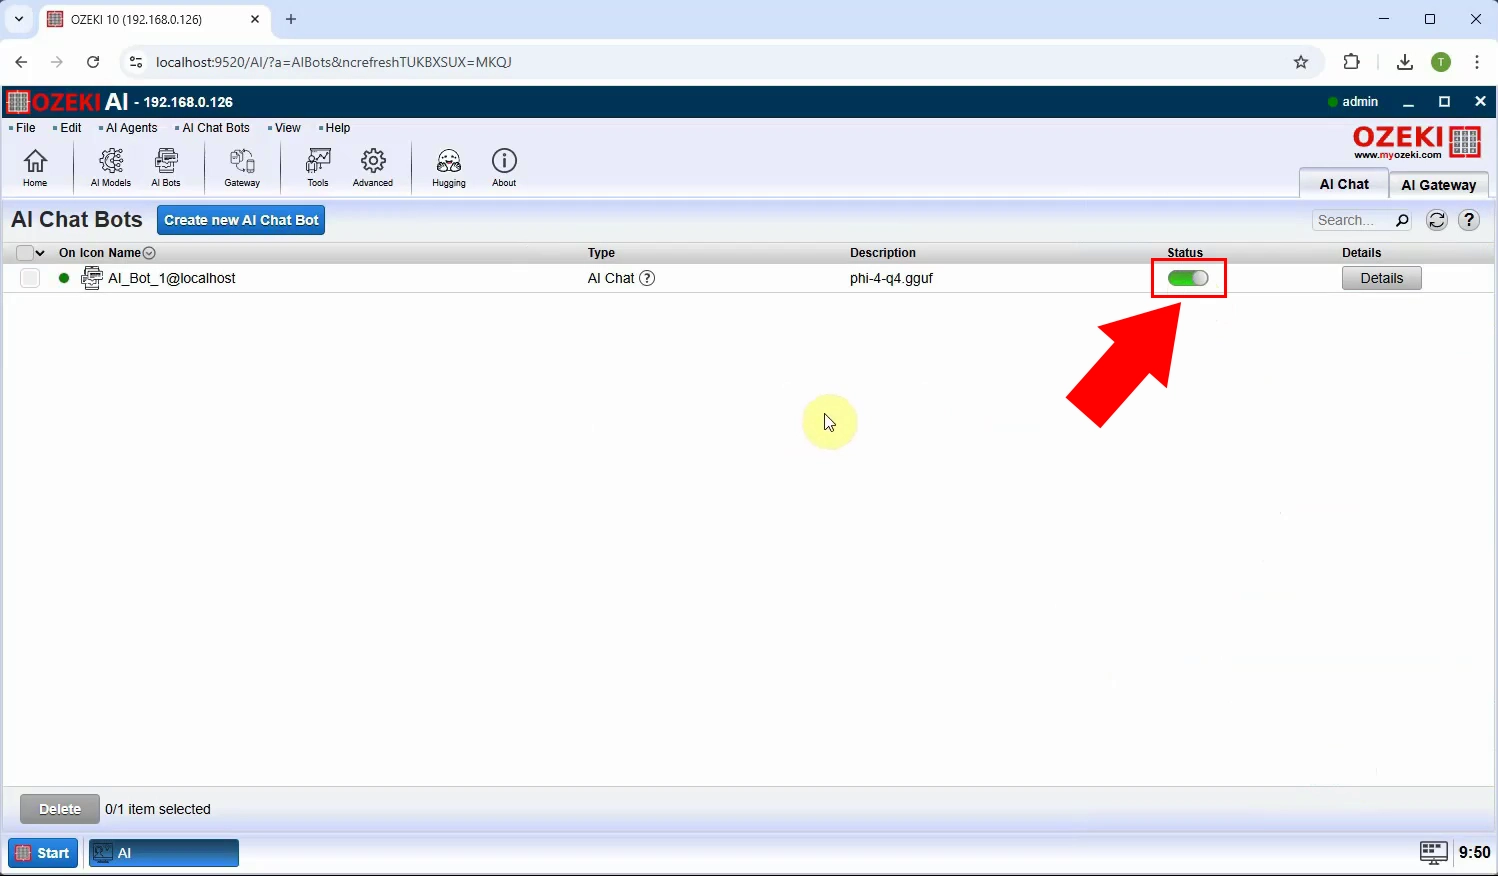
To enable the chatbot, turn on the switch at "Status" and click on AI_Bot_1 (Figure 10).
Step 11 - Conversation with AI model
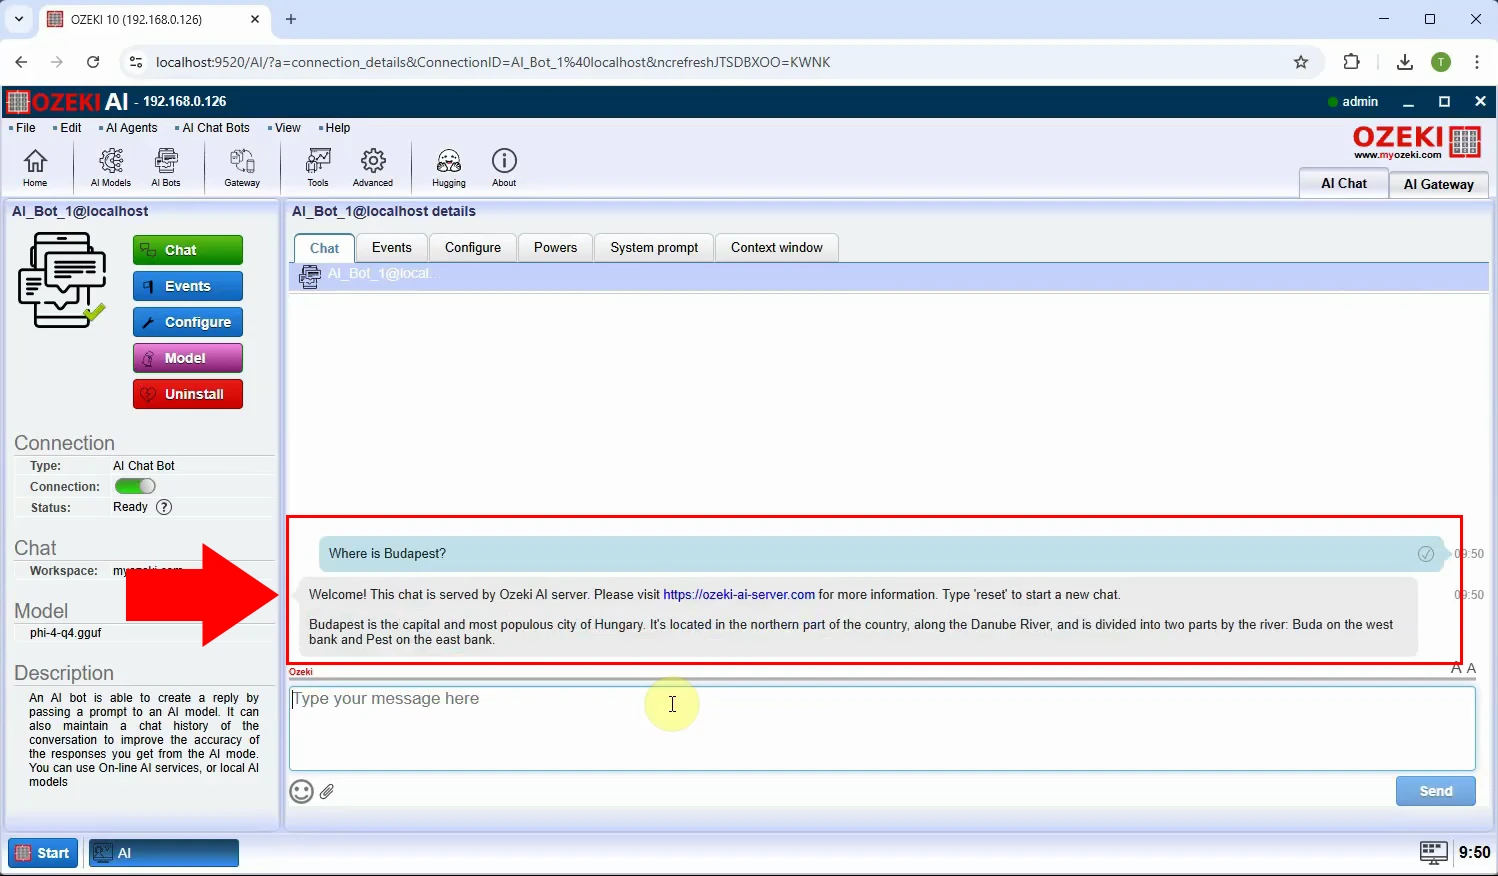
By selecting AI_Bot_1 under the "Chat" tab, you can start a conversation with the chatbot (Figure 11).
