How to run Deepseek R1 671B model on a desktop PC
In this chapter, we will explore how to install and run the Deepseek R1 671B model on a personal computer (PC). Since large-scale models like Deepseek R1 671B require significant computing power, modern optimization techniques and hardware acceleration now make it possible to run them efficiently on high-end PCs. Additionally, you will learn how to integrate the Deepseek R1 671B model with the Ozeki AI Server, enabling you to utilize its AI capabilities and engage in seamless interactions.
What is Deepseek R1 671B?
The Deepseek R1 671B is a large language model (LLM) with 671 billion parameters, designed to handle complex natural language processing (NLP) tasks such as text generation, question answering, and contextual understanding. Built on an advanced transformer architecture, it leverages cutting-edge AI techniques to deliver highly accurate and human-like responses. Due to its massive size and computational requirements, Deepseek R1 671B is primarily used in high-performance AI applications, requiring powerful hardware or distributed computing environments to function effectively.
What is Ozeki AI Server?
Ozeki AI Server is a software platform designed to integrate artificial intelligence (AI) with communication systems, providing tools to build and deploy AI-powered applications for businesses. It enables the automation of tasks like text messaging, voice calls, and other communication processes, machine learning, and chatbots. By connecting AI capabilities with communication networks, Ozeki AI Server helps improve customer support, automate workflows, and enhance user interactions in various industries.
How to download Deepseek R1 671B model (Quick Steps)
- Go to the huggingface.co website
- Search for DeepSeek R1 GGUF
- Click on "Files and versions"
- Click on "DeepSeek-R1-UD-IQ1_S"
- Download all three .gguf files one by one, with the arrow pointing down
How to create Ozeki AI Server model and Chatbot (Quick Steps)
- Check your PC system specification
- Open Ozeki 10
- Create new GGUF model, configure it
- Create new AI chatbot, configure it
- Have a good conversation with the chatbot
How to download Deepseek R1 671B model (Video tutorial)
This video tutorial will show you how to download the Deepseek R1 671B model from Huggingface.co and save it to the C:\AIModels directory on your computer. By following the step-by-step guide, you’ll be able to set up the model effortlessly and have it ready to use in no time.
Step 1 - Open Huggingface.co
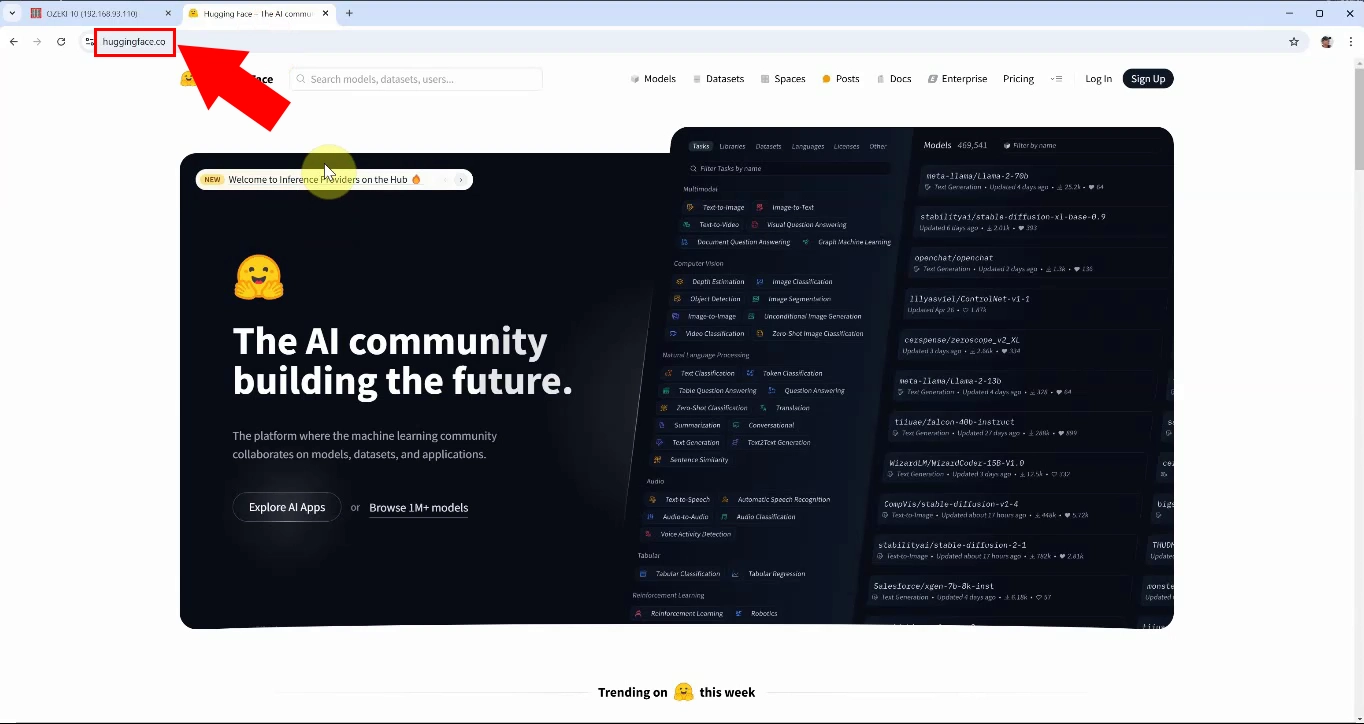
First, go to the Huggingface website, then click on the search bar and search for "DeepSeek R1 GGUF" (Figure 1).
Step 2 - Open DeepSeek R1 model page
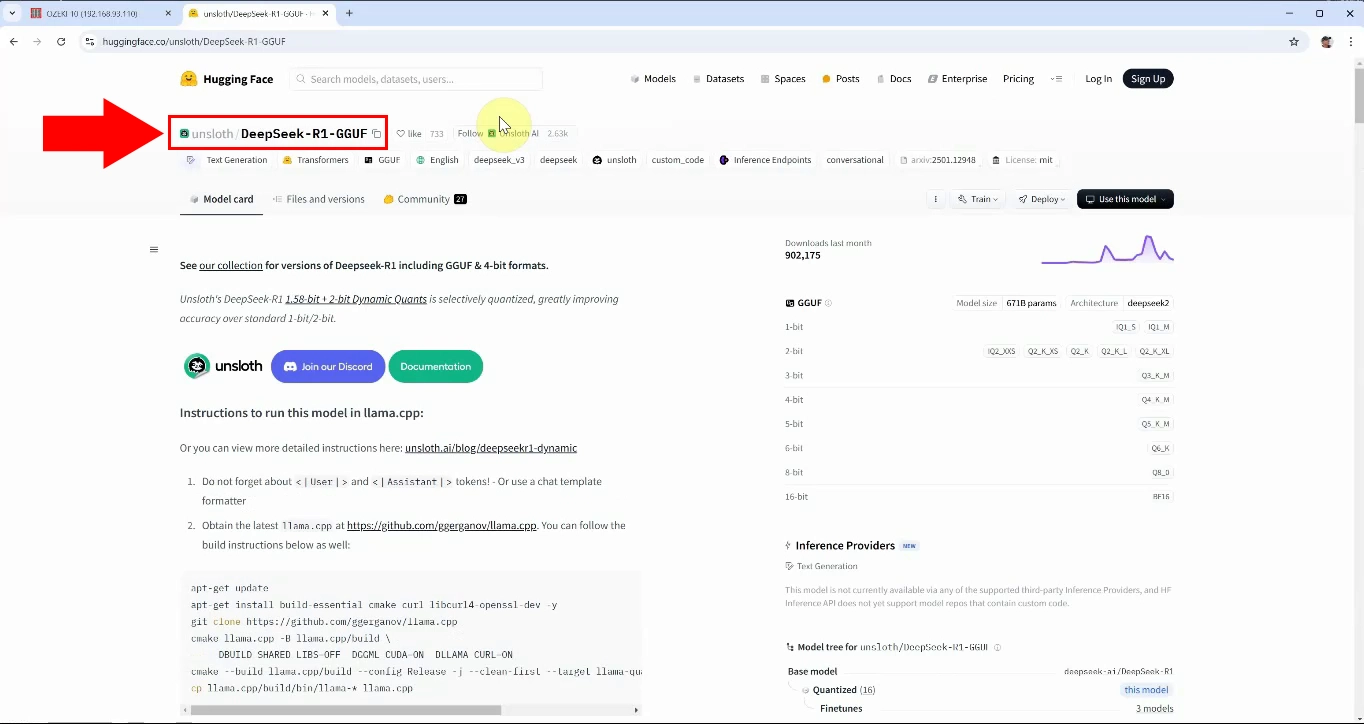
Select the option "DeepSeek-R1-GGUF" and open it (Figure 2).
Step 3 - Download model files
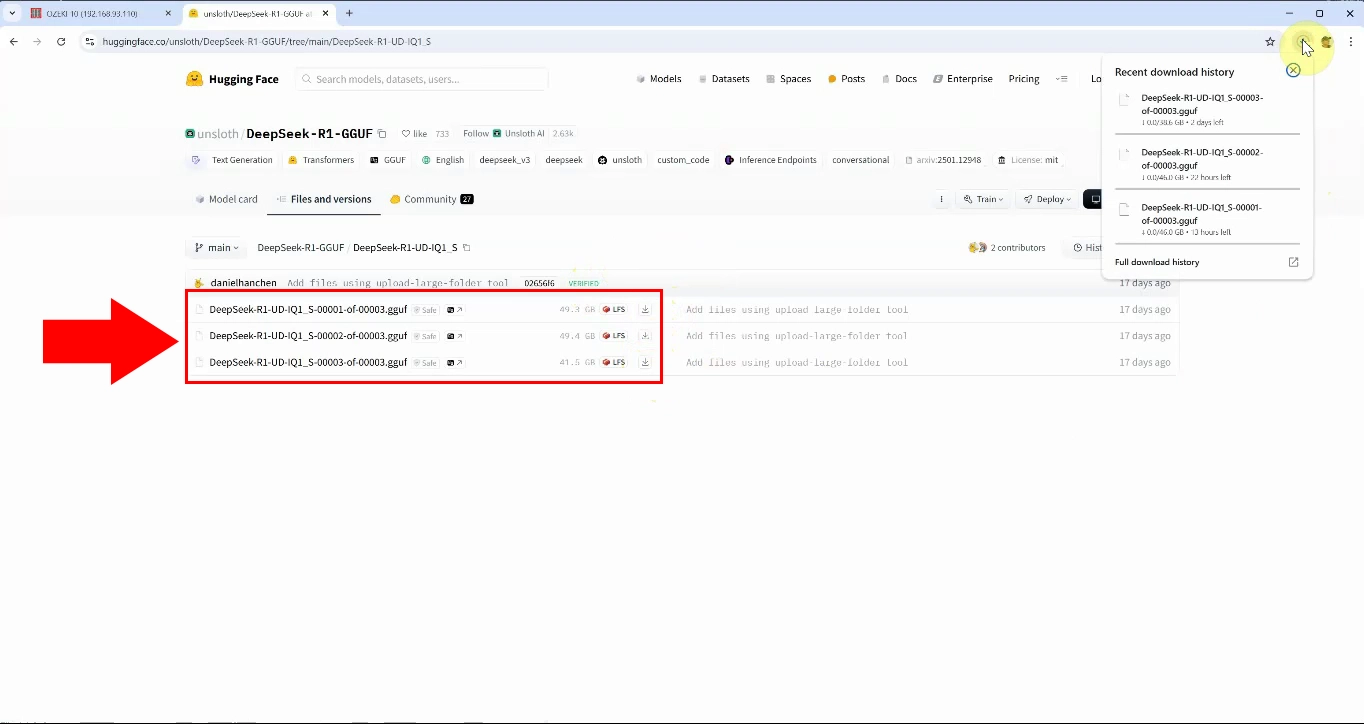
Click on the "Files and versions" tab, select the "DeepSeek-R1-UD-IQ1_S" version, three files will appear, download them one by one, you can download them with the down arrow (Figure 3).
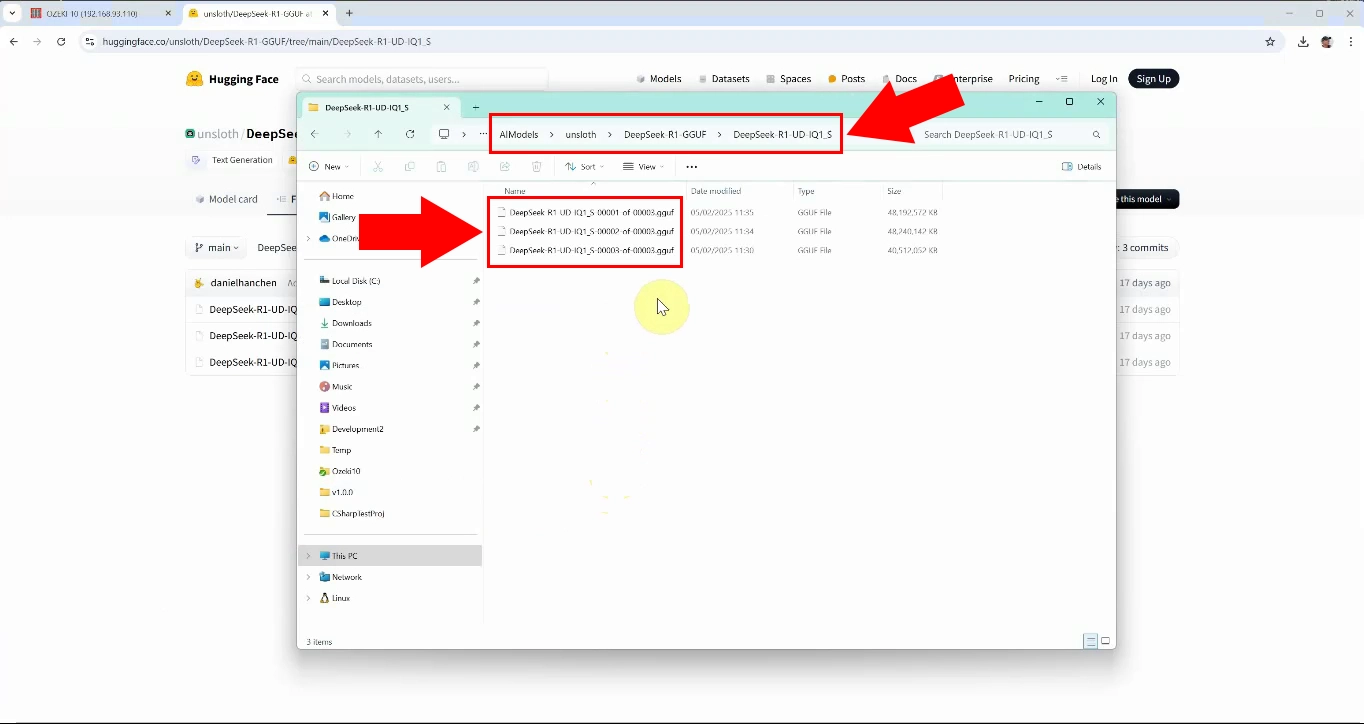
Step 4 - Paste model file into C:\AIModels folder
You have downloaded three files with the extension .gguf. Place them in the C:\AIModels path (Figure 4).
Create Ozeki AI server model and Chatbot (Video tutorial)
In this video, we will provide a detailed walkthrough on how to build and configure the Ozeki AI Server model, as well as how to set up a chatbot capable of communicating with users in natural language. You will gain insights into the installation process and the essential settings required for proper functionality.
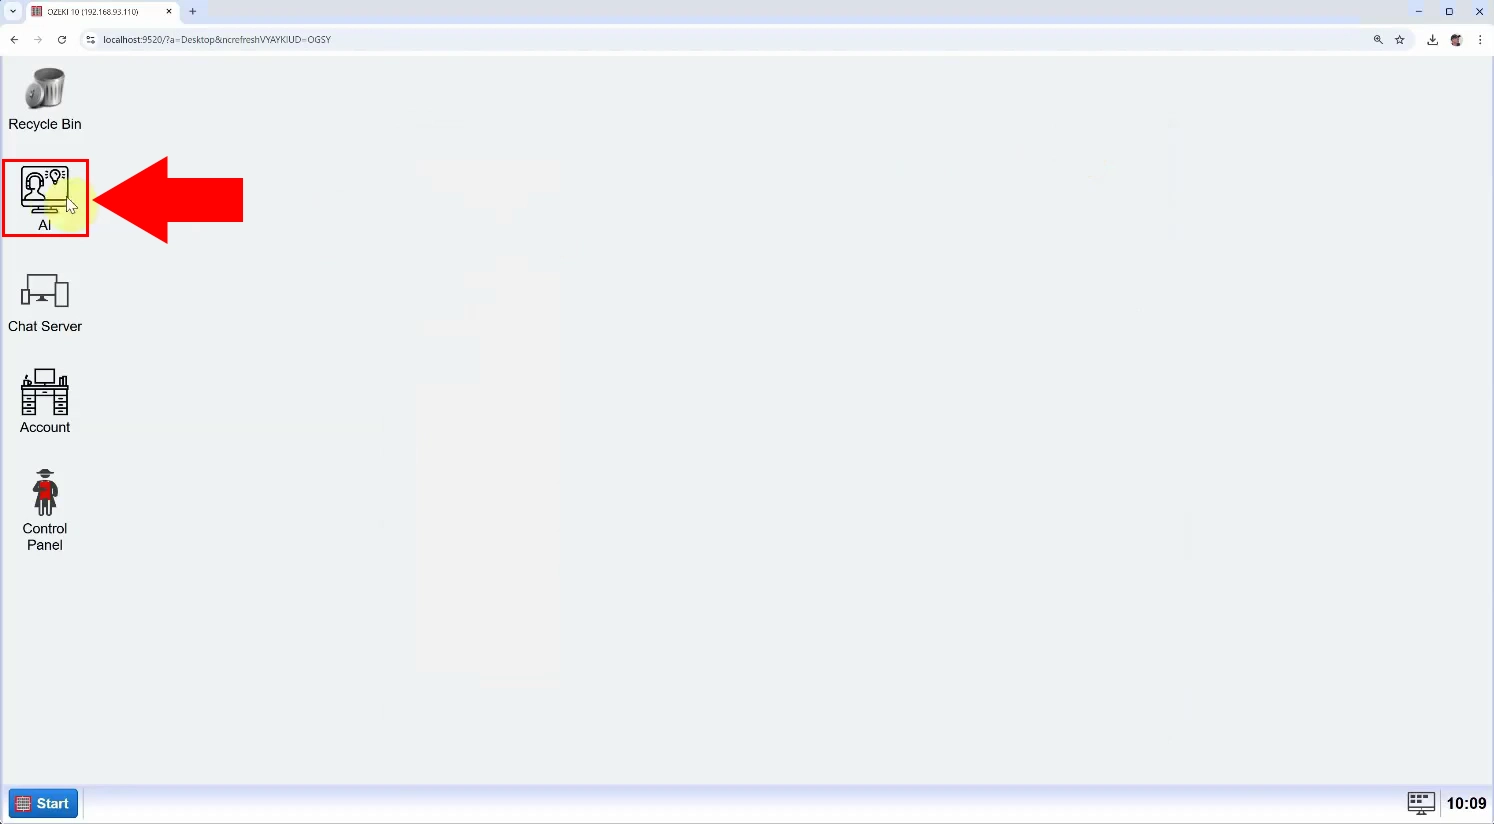
Step 5 - Open Ozeki AI Server
Launch the Ozeki 10 app. If you don't already have it, you can download it here. Once opened, open the Ozeki AI Server (Figure 5).
Step 6 - Create new GGUF model
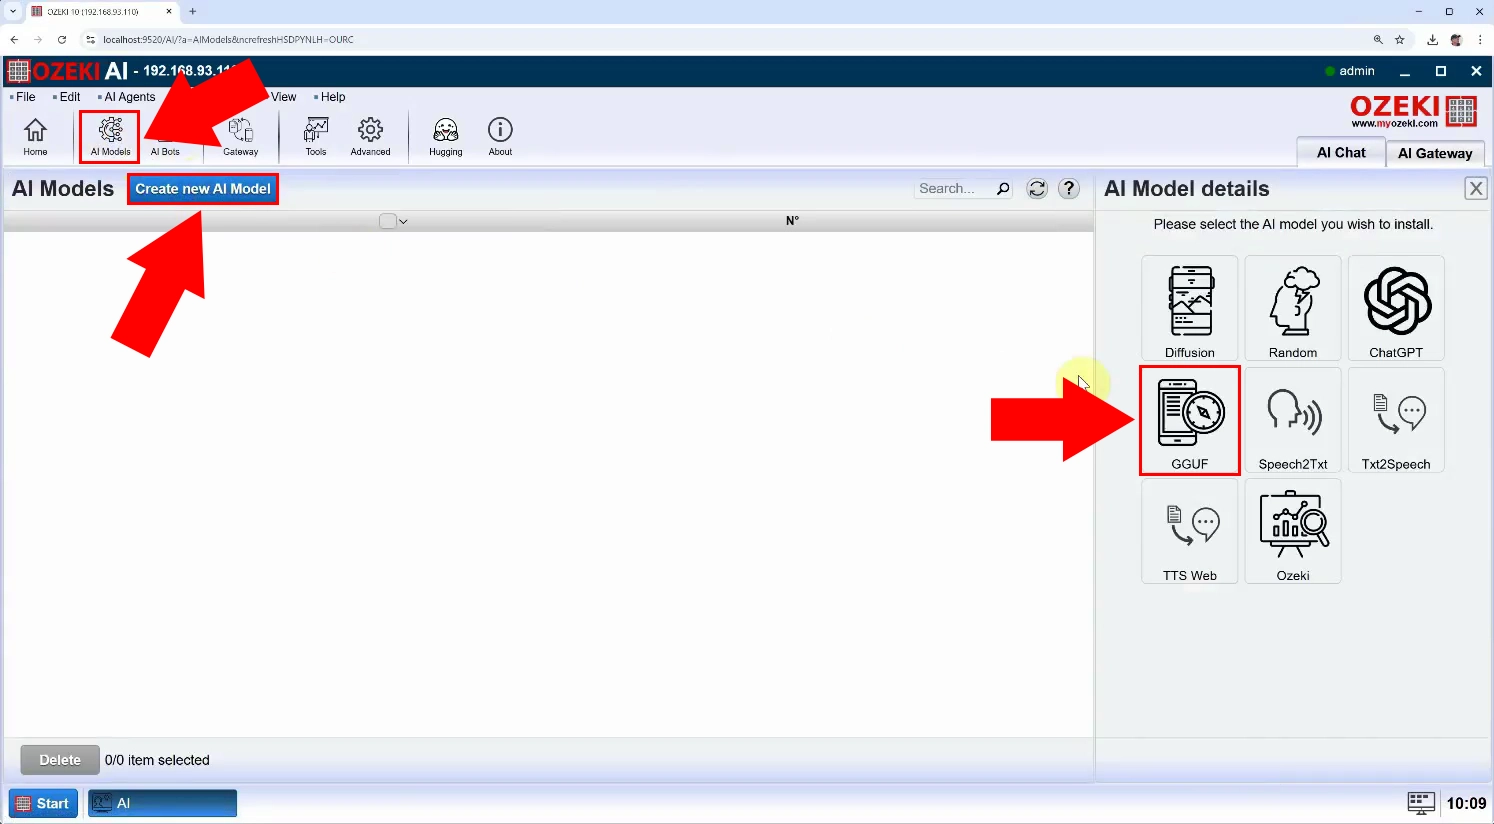
Ozeki AI Server appeared on the screen. Let's create a new GGUF model.
Click on "AI Models" at the top of the screen. Click on the blue
"Create a new AI Model" button. On the right side you will see different
options, select the "GGUF" menu
(Figure 6).
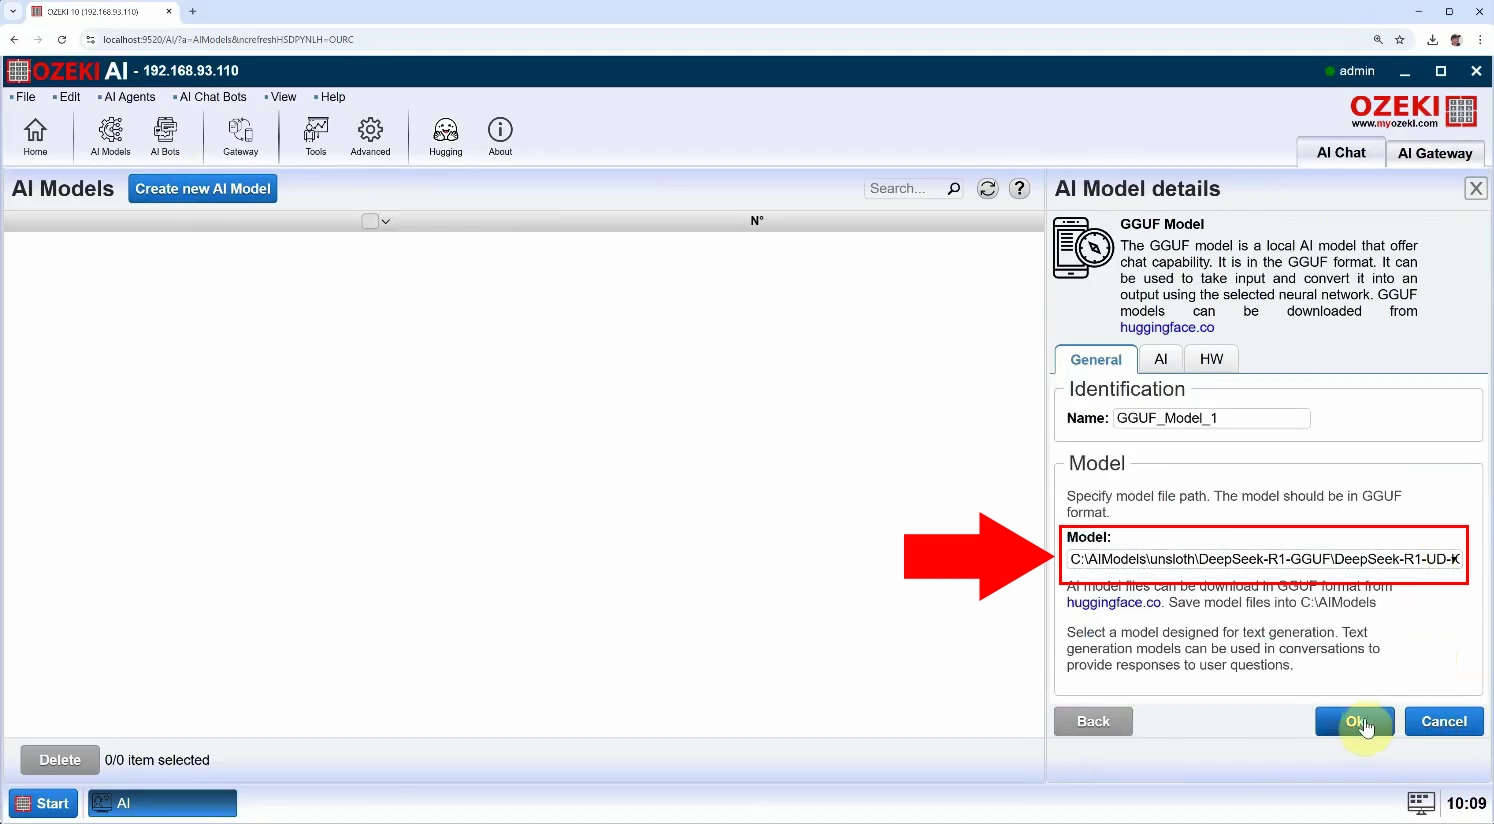
Step 7 - Select model file
After selecting the "GGUF" menu, under the "General" tab, select the "Model" file and click "Ok" (Figure 7).
Step 8 - Open model details
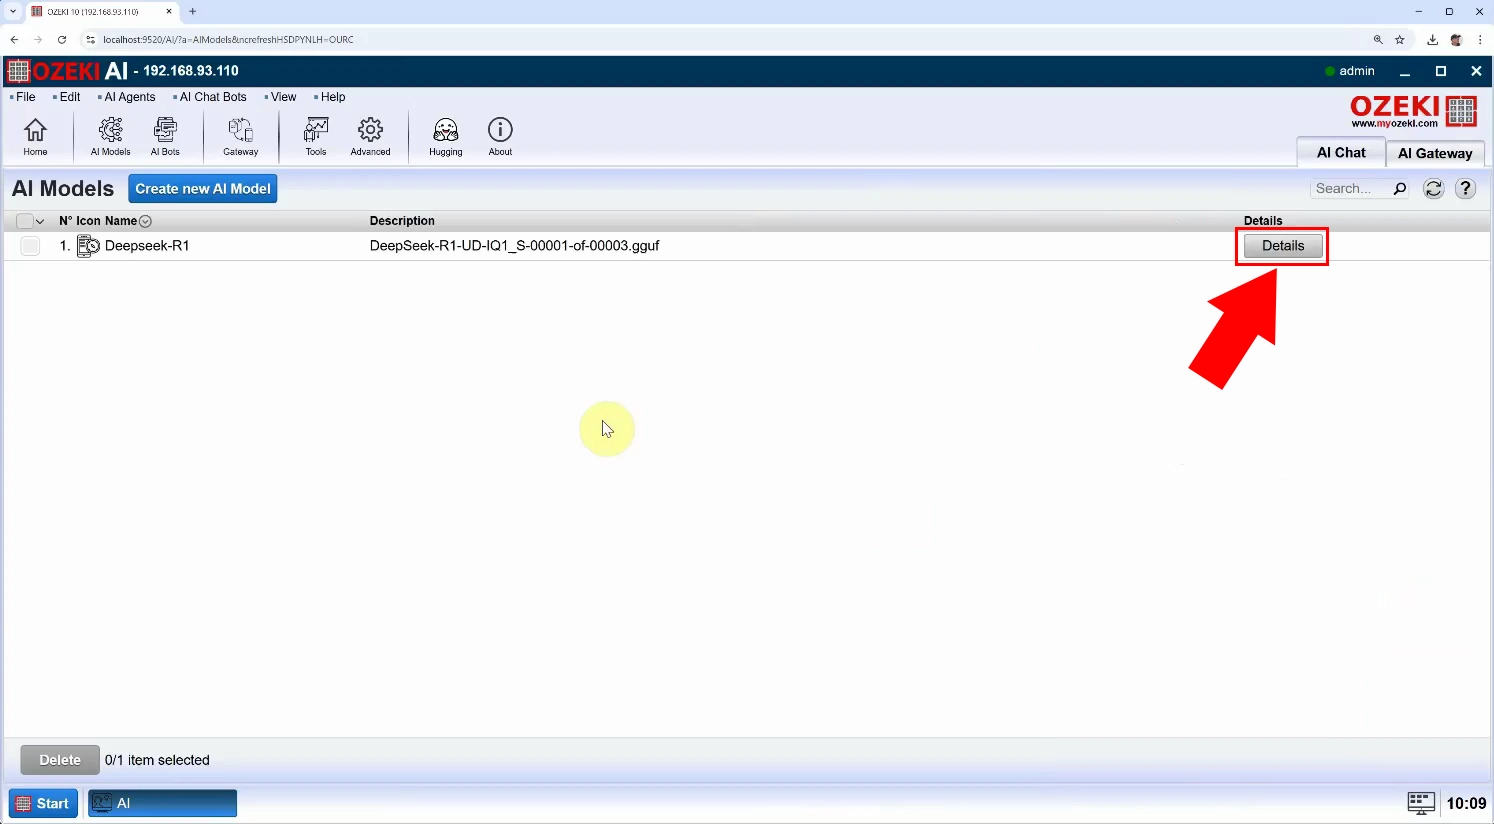
We created the new model. Press the blue "Details" button to configure it (Figure 8).
Step 9 - Set GPU layer options
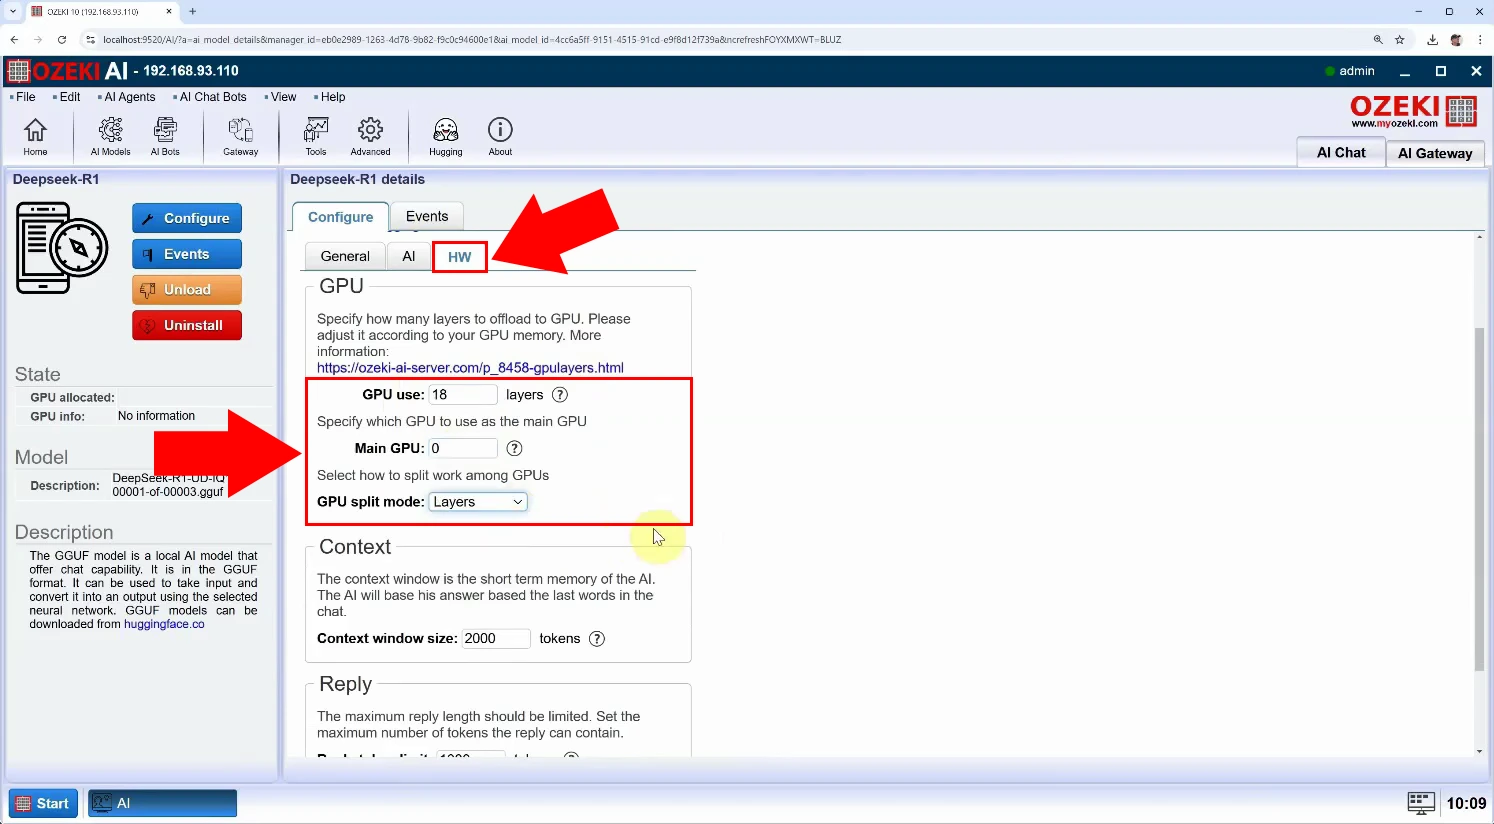
We have opened the details of Deepseek-R1, select the HW tab. Set "GPU use" to "18". Set "GPU split mode" to "Layers" and click on the blue "Ok" button. A message popup will appear with the following text "Configuration successfully updated!" (Figure 9).
Step 10 - Create new AI chatbot
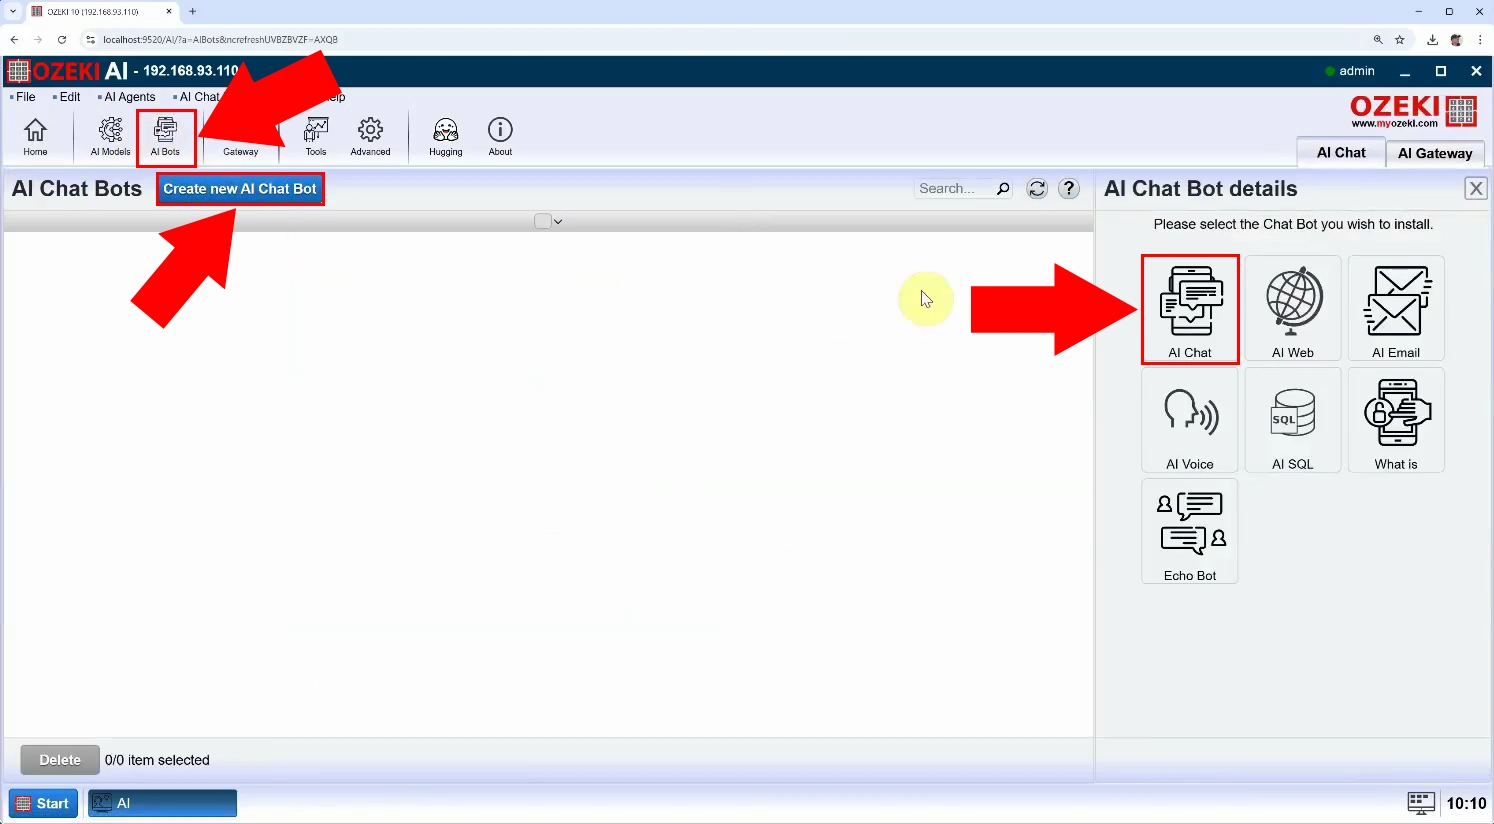
At the top of the screen, select "AI bots". Press the blue "Create new AI Chat Bot" button, then select "AI Chat" on the right (Figure 10).
Step 11 - Select model
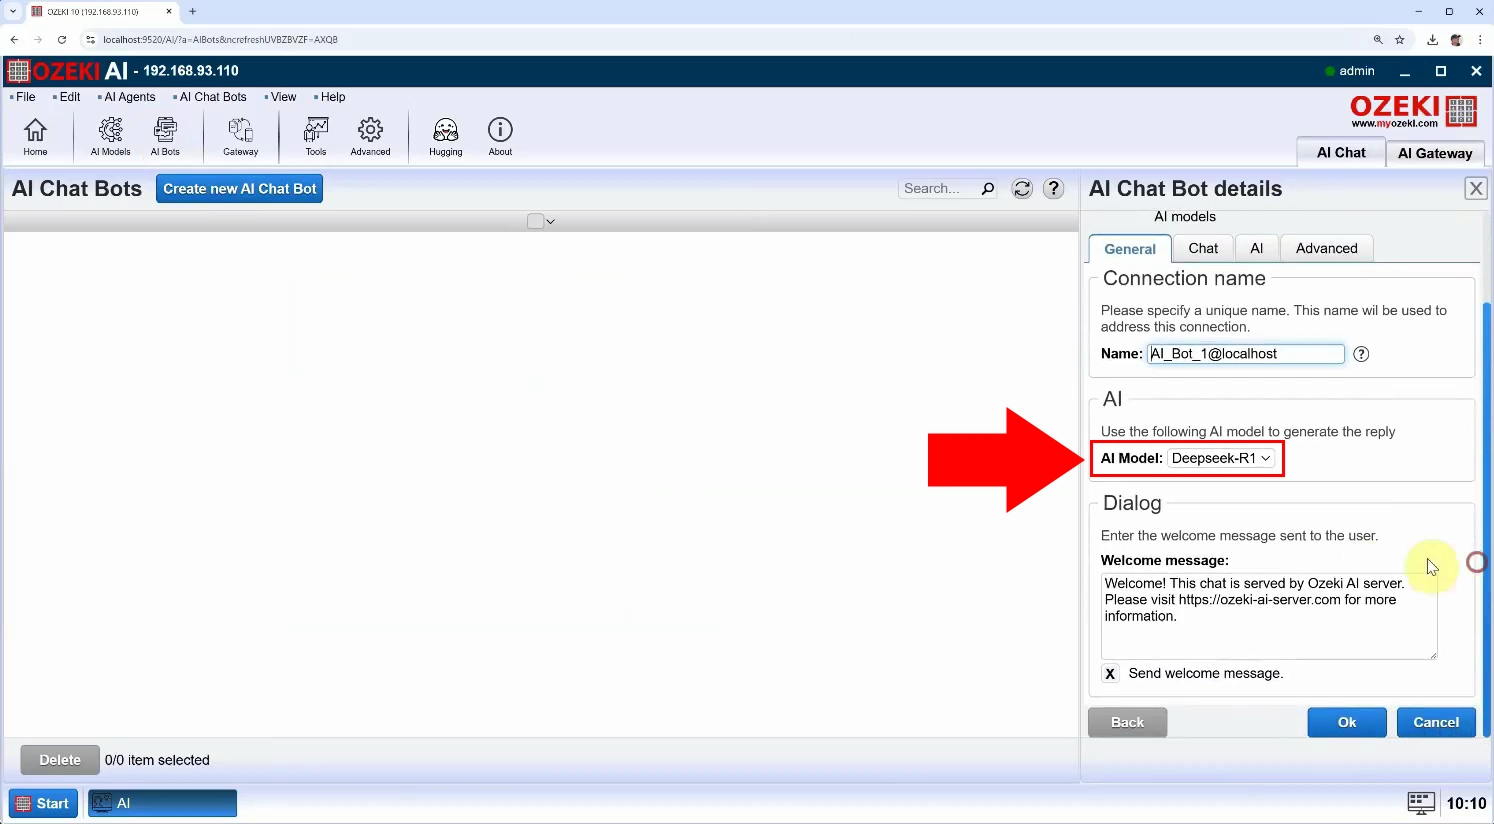
Then at "AI Model" select the already created "Deepseek-R1" and press "Ok" (Figure 11).
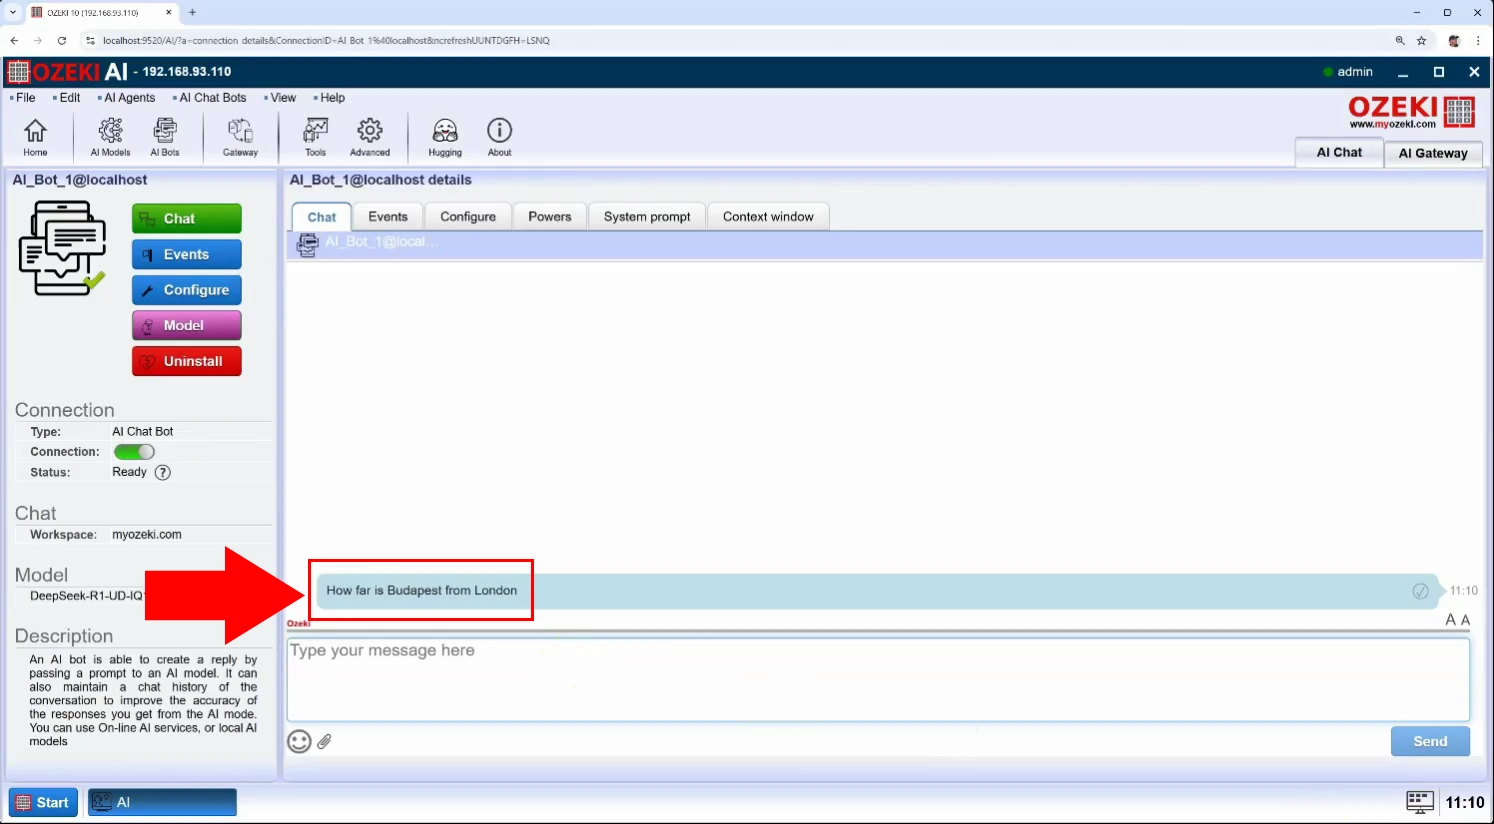
Step 12 - Ask a question from the model
To enable the chatbot, turn on the switch at "Status" and click on AI_Bot_1. By opening AI_Bot_1 under the "Chat" tab you have the possibility to chat with the chatbot (Figure 12).
Step 13 - Model response
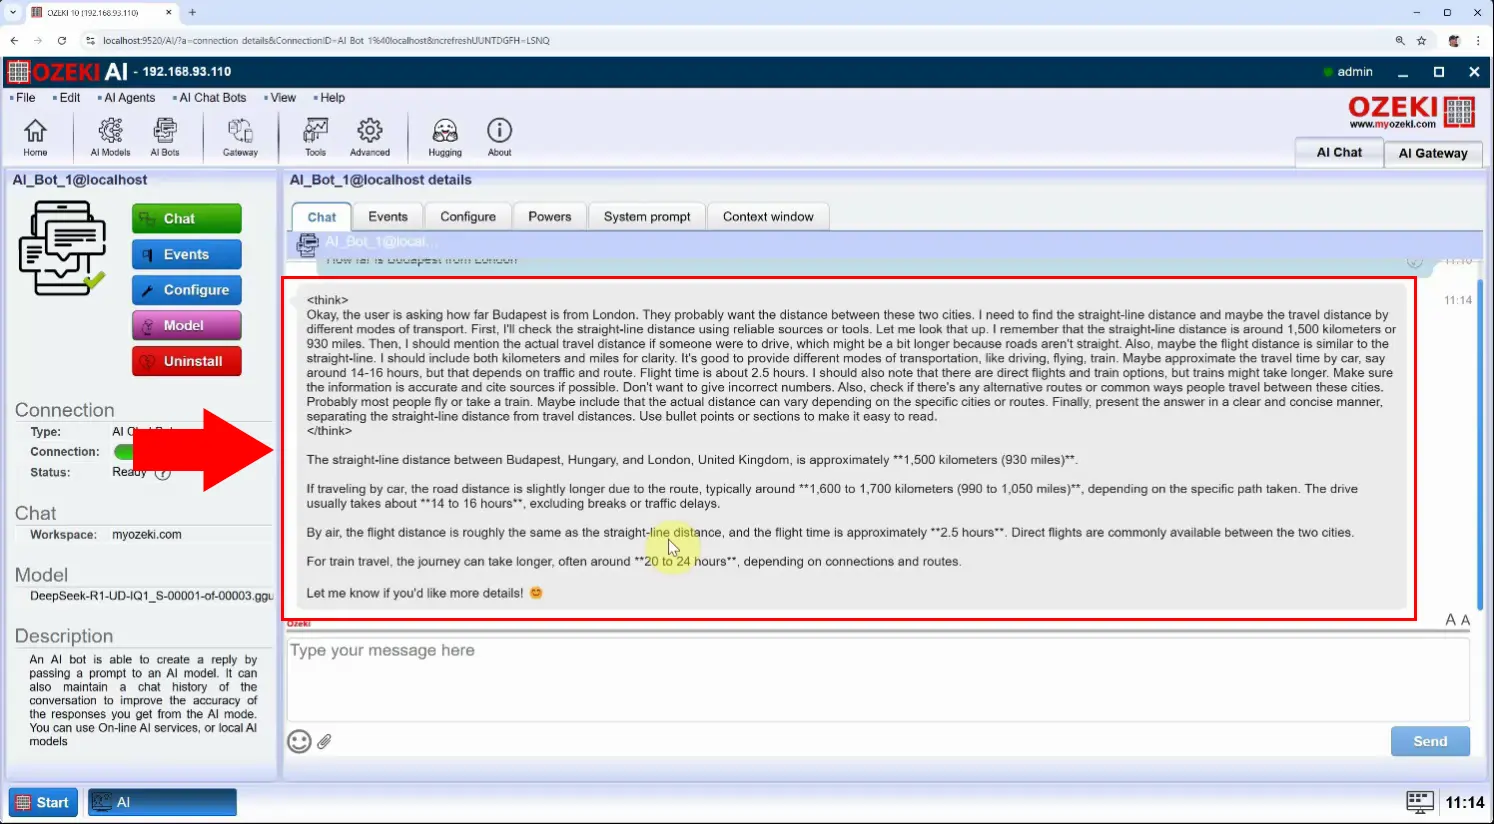
If you write a message or even ask a question, you can see the response (Figure 13).
Step 14 - Chat communication log
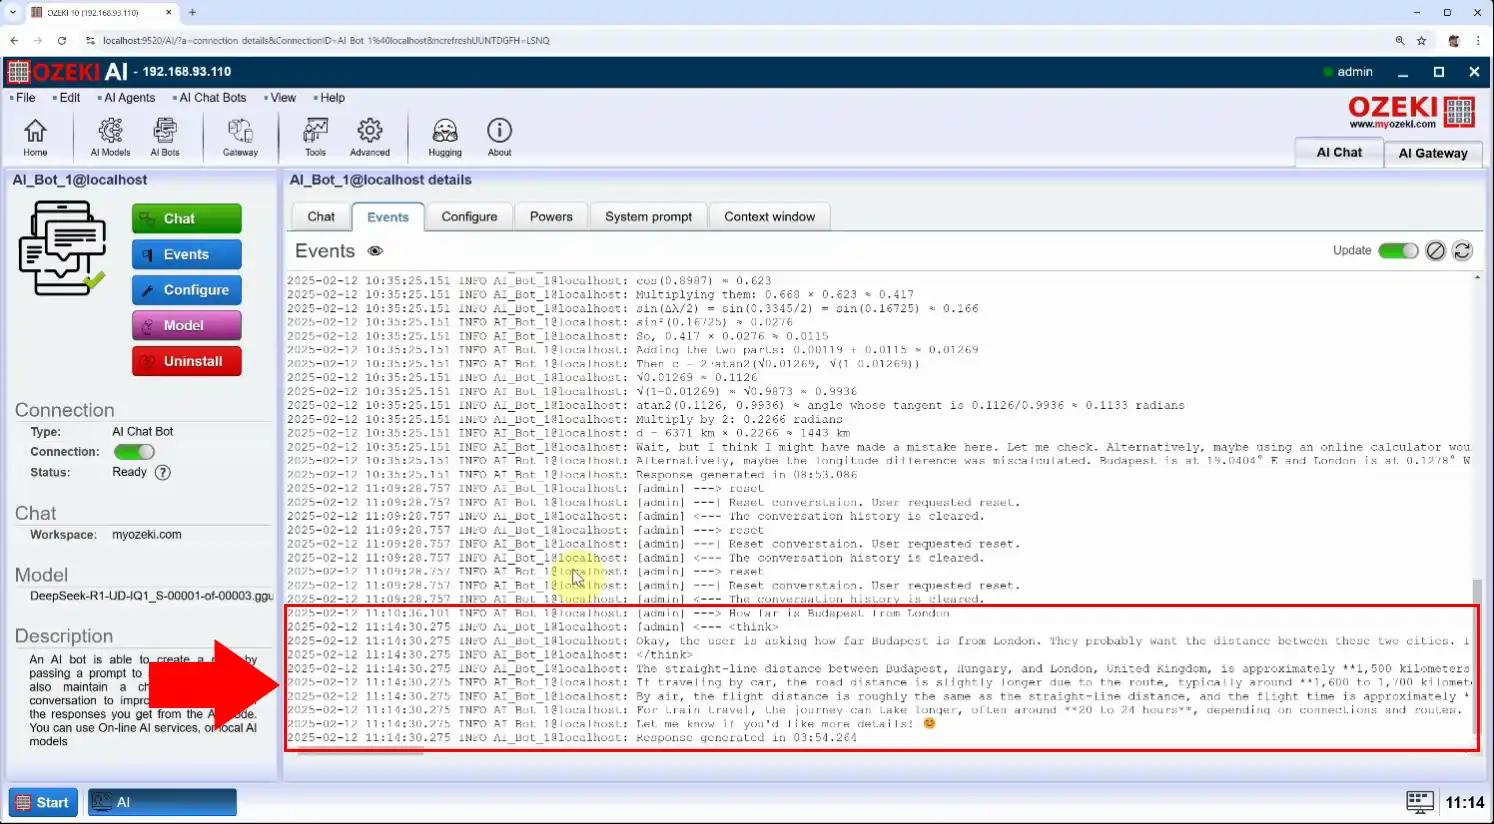
Open the "Events" tab to view the log of the conversation (Figure 14).
